
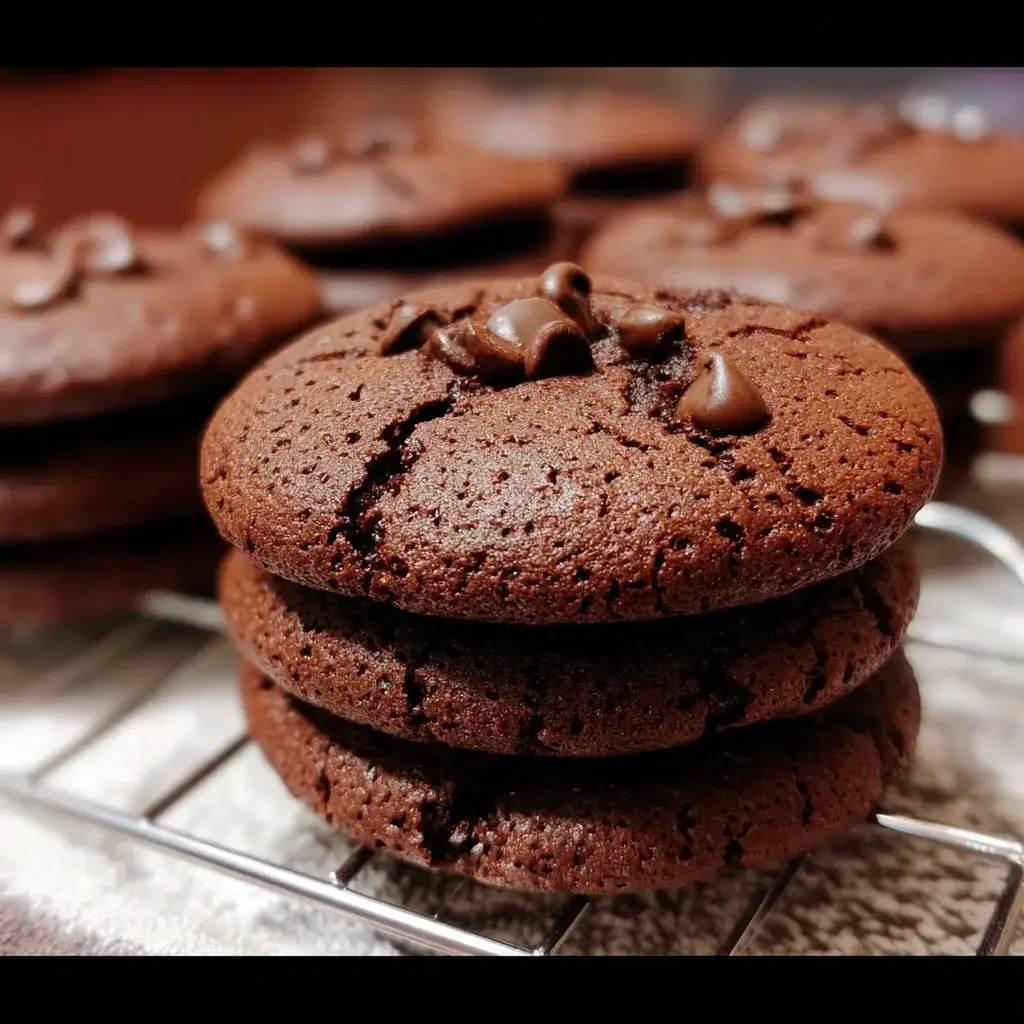

For a long time, the words “fudgy,” “decadent,” and “gluten-free” felt like they belonged to three different families that should never, ever be introduced. My journey into gluten-free baking was paved with good intentions and a shocking number of gritty, crumbly, and frankly, sad-tasting cookies. I was on a quest for the holy grail: a gluten-free chocolate cookie that wasn’t just a pale imitation of the real thing, but a genuinely crave-worthy dessert in its own right. I wanted a cookie with those coveted chewy edges, a soft, brownie-like center that sinks under your teeth, and molten puddles of chocolate in every single bite. After countless bags of flour and dozens of test batches, this recipe was born. The first time I pulled these from the oven and took a bite, I actually gasped. This was it. This was the one. When I shared them with my friends and family, the reaction was universal: disbelief that they were gluten-free. They are rich, they are intensely chocolatey, and they have a texture so fudgy and satisfying that they have ruined all other gluten-free cookies for me. This isn’t just a recipe; it’s the triumphant end to a very long quest.
The Secret to Irresistibly Fudgy Gluten-Free Cookies
Before we dive into the ingredients, it’s important to understand why this recipe works so well and consistently produces a brownie-like cookie, not a dry, cakey one. The magic is in the method and a few key ingredient choices that are specifically designed to build richness and a chewy, fudgy texture in the absence of gluten.
- The Foundation: Melted Butter and Chocolate. Unlike many cookie recipes that start by creaming softened butter and sugar together (a process that incorporates air for a lighter, cakier result), this recipe starts with melted butter and melted chocolate. This technique minimizes air, creating a denser, chewier, more brownie-like foundation from the very beginning.
- The Flavor Powerhouses: Cocoa and Chocolate. This is a “double chocolate” cookie for a reason. We use high-quality Dutch-processed cocoa powder for a deep, dark, complex chocolate flavor base. Then, we add melted bittersweet chocolate directly into the batter, which contributes not only to the intense flavor but also to the fudgy texture, thanks to its high cocoa butter content.
- The Texture Secret: An Extra Egg Yolk. While whole eggs provide structure and leavening, the yolk is a powerhouse of fat and emulsifiers. Adding one extra egg yolk to the batter makes the cookie richer, chewier, and significantly more fudgy. It’s a small change that makes a huge difference in the final texture.
- The Essential Flour: Success in gluten-free baking hinges on using the right flour. This recipe calls for a high-quality “1-to-1” or “Measure for Measure” gluten-free all-purpose flour blend. These blends are carefully formulated with a mix of grains and starches, and most importantly, they contain xanthan gum—a crucial binder that mimics the role of gluten, providing structure and preventing the cookies from crumbling.
- The Non-Negotiable Chill: Chilling the dough is perhaps the most critical step in this entire recipe. It allows the gluten-free flours to fully hydrate, preventing a gritty texture. It solidifies the fats, which drastically reduces spreading in the oven and results in a thicker, gooier cookie. And finally, it allows the flavors to meld and deepen, resulting in a richer, more complex chocolate taste.
Complete Ingredient List
For the most accurate and consistent results, especially in gluten-free baking, using a kitchen scale to measure your ingredients is highly recommended.
- 1 ¼ cups (175g) high-quality gluten-free 1-to-1 baking flour (with xanthan gum)
- ½ cup (45g) high-quality Dutch-processed cocoa powder
- 1 teaspoon baking soda
- ½ teaspoon fine sea salt
- 4 ounces (113g) bittersweet chocolate (60-70% cacao), chopped, plus more for topping if desired
- ½ cup (113g or 1 stick) unsalted butter, cut into pieces
- 1 cup (220g) packed light brown sugar
- ½ cup (100g) granulated sugar
- 1 large egg, plus 1 large egg yolk, at room temperature
- 1 tablespoon pure vanilla extract
- 1 ½ cups (255g) semi-sweet or dark chocolate chips or chunks
- Flaky sea salt (like Maldon), for sprinkling
Step-by-Step Instructions
Follow these instructions carefully, paying special attention to the chilling time, for perfect cookies every time.
- Combine Dry Ingredients: In a medium bowl, whisk together the gluten-free 1-to-1 flour, Dutch-processed cocoa powder, baking soda, and fine sea salt. Whisking thoroughly ensures the leavening and salt are evenly distributed and helps to aerate the flour and cocoa. Set aside.
- Melt Chocolate and Butter: Create a double boiler by placing a heatproof bowl over a saucepan of simmering water (make sure the bottom of the bowl does not touch the water). Add the 4 ounces of chopped bittersweet chocolate and the ½ cup of butter to the bowl. Stir occasionally until both are completely melted and the mixture is smooth and glossy. Remove the bowl from the heat and set aside to cool slightly for about 5 minutes.
- Whisk in Sugars and Eggs: Pour the slightly cooled chocolate-butter mixture into a large mixing bowl. Add the light brown sugar and granulated sugar and whisk vigorously for about a minute until the mixture is well combined and no lumps of sugar remain.
- Add Eggs and Vanilla: Add the room temperature egg and the extra egg yolk, along with the vanilla extract. Whisk vigorously for another full minute. The mixture should become thick, glossy, and smooth. This step helps to emulsify the fats and sugars, creating that signature shiny, crackly top on the cookies.
- Combine Wet and Dry: Pour the dry ingredient mixture into the wet ingredients. Use a rubber spatula to fold everything together until just combined. The dough will be soft and seem a bit oily. Be careful not to overmix; stop as soon as you no longer see streaks of flour.
- Fold in Chocolate Chips: Gently fold in the 1 ½ cups of chocolate chips or chunks until they are evenly distributed throughout the dough.
- The Critical Chill: Cover the bowl tightly with plastic wrap and refrigerate the dough for at least 3 hours, or preferably overnight (up to 48 hours). Do not skip this step. This is essential for managing spread, developing flavor, and ensuring a non-gritty texture.
- Preheat and Prepare for Baking: When you’re ready to bake, preheat your oven to 350°F (175°C). Line two large baking sheets with parchment paper.
- Scoop and Bake: Using a medium-sized (1.5 to 2-tablespoon) cookie scoop, portion the cold dough into balls and place them on the prepared baking sheets, leaving at least 2-3 inches of space between each cookie to allow for some spreading.
- Add Toppings (Optional but Recommended): For that bakery-style look, gently press a few extra chocolate chips or chunks onto the tops of the dough balls.
- Bake: Bake for 11-13 minutes. The edges of the cookies should be set, but the centers will look soft, puffy, and slightly underdone. This is the key to a fudgy center.
- The Final Touches: Remove the baking sheets from the oven. Immediately sprinkle the tops of the hot cookies with a little flaky sea salt. Let the cookies cool on the baking sheet for 10 minutes. During this time, they will continue to cook from the residual heat and will set up. After 10 minutes, carefully transfer the cookies to a wire rack to cool completely.
Nutrition Facts
- Servings: Makes approximately 24-30 cookies
- Calories per serving: Approximately 160-200 calories (This is an estimate and will vary based on the specific brands of flour, chocolate, and the final size of your cookies).
Preparation Time
- Active Preparation Time: 20 minutes
- Chilling Time: Minimum 3 hours (preferably overnight)
- Bake Time: 11-13 minutes per batch
- Total Time: Approximately 3.5 hours (mostly inactive chilling time)
How to Serve
These cookies are a decadent treat perfect for any occasion. While they are phenomenal on their own, here are a few ways to serve them for an elevated experience.
- The Classic Way:
- Serve slightly warm with a tall, cold glass of milk for the ultimate comfort food pairing.
- Enjoy with a hot cup of coffee or an espresso; the bitterness of the coffee beautifully balances the rich chocolate.
- For an Indulgent Dessert:
- Create a simple cookie skillet by placing a slightly warm cookie in a small bowl.
- Top with a generous scoop of high-quality vanilla bean or coffee ice cream.
- Drizzle with a touch of salted caramel or hot fudge sauce for an over-the-top treat.
- As a Crowd-Pleasing Party Favor:
- Sandwich two cookies together with a layer of vanilla buttercream, peanut butter frosting, or even marshmallow fluff to create decadent cookie sandwiches.
- Package them in clear cellophane bags tied with a ribbon for a beautiful and delicious homemade gift.
Additional Tips for a Flawless Batch
- Choose the Right Gluten-Free Flour: This is the most crucial tip for success. You must use a gluten-free flour blend that is specifically labeled “1-to-1” or “Measure for Measure” and contains xanthan gum. Brands like Bob’s Red Mill 1-to-1 Baking Flour (in the light blue bag) or King Arthur’s Measure for Measure are excellent and reliable choices. Using a single flour like almond or coconut flour will not work.
- Embrace the Chill: I cannot overstate the importance of chilling the dough. It might seem like an annoying, time-consuming step, but it is the secret to thick, chewy, flavorful cookies that don’t spread into thin, sad pancakes on the baking sheet. A 3-hour chill is the minimum, but an overnight chill is even better for flavor development.
- Don’t Overbake! The key to a fudgy, gooey center is to pull the cookies from the oven when they still look a little soft and underdone in the middle. They will continue to bake and set up on the hot cookie sheet as they cool. Overbaking is the number one enemy of a fudgy cookie.
- The Flaky Salt Finish: Don’t dismiss the final sprinkle of flaky sea salt as just a fancy garnish. A good quality flaky salt like Maldon provides a tiny, crunchy explosion of saltiness that cuts through the richness of the chocolate and actually enhances its flavor, making the cookies taste even more complex and delicious.
- Room Temperature Eggs Matter: Using room temperature eggs allows them to emulsify more easily and completely into the batter. This creates a smoother, more stable dough and contributes to that beautiful, glossy texture and crackly top. To quickly bring eggs to room temperature, place them in a bowl of warm (not hot) water for 5-10 minutes.
Frequently Asked Questions (FAQ)
Q1: My cookies spread too much and were thin. What went wrong?
A: This is almost always due to not chilling the dough long enough or at all. The cold, firm dough melts more slowly in the oven, preventing excessive spread. Another potential cause could be an oven that is not hot enough. Use an oven thermometer to ensure your oven is calibrated to the correct temperature.
Q2: Can I make this cookie dough ahead of time?
A: Yes! This dough is perfect for making ahead. You can store the prepared dough, tightly covered, in the refrigerator for up to 72 hours. The flavor actually gets deeper and more complex the longer it chills. You can also scoop the dough into balls, freeze them solid on a baking sheet, and then transfer them to a freezer bag. You can bake the cookies directly from frozen; just add 2-3 minutes to the baking time.
Q3: Can I make these cookies dairy-free?
A: Yes, with a few careful substitutions. Use a high-quality dairy-free butter substitute that comes in a firm stick form (not a soft tub margarine). For the chocolate, use dairy-free bittersweet and semi-sweet chocolate chips, which are widely available from brands like Enjoy Life or Guittard.
Q4: Why do you use Dutch-processed cocoa powder? Can I use natural cocoa powder?
A: Dutch-processed cocoa powder has been treated with an alkali to neutralize its acidity. This results in a darker color and a smoother, less bitter, more intensely chocolatey flavor that is perfect for these fudgy cookies. You can use natural cocoa powder in a pinch, but the cookies will be a bit lighter in color and have a slightly sharper, more acidic chocolate flavor.
Q5: My cookies have a gritty texture. How can I fix this?
A: A gritty texture in gluten-free baking is almost always a result of the flours not having enough time to fully hydrate. This is another reason why the long chilling time is so essential. By letting the dough rest in the refrigerator for at least 3 hours, you give the flours ample time to absorb the liquid from the butter and eggs, which softens them and eliminates any grittiness.

Fudgy Gluten Free Double Chocolate Chip Cookies recipe
Ingredients
-
1 ¼ cups (175g) high-quality gluten-free 1-to-1 baking flour (with xanthan gum)
-
½ cup (45g) high-quality Dutch-processed cocoa powder
-
1 teaspoon baking soda
-
½ teaspoon fine sea salt
-
4 ounces (113g) bittersweet chocolate (60-70% cacao), chopped, plus more for topping if desired
-
½ cup (113g or 1 stick) unsalted butter, cut into pieces
-
1 cup (220g) packed light brown sugar
-
½ cup (100g) granulated sugar
-
1 large egg, plus 1 large egg yolk, at room temperature
-
1 tablespoon pure vanilla extract
-
1 ½ cups (255g) semi-sweet or dark chocolate chips or chunks
-
Flaky sea salt (like Maldon), for sprinkling
Instructions
-
Combine Dry Ingredients: In a medium bowl, whisk together the gluten-free 1-to-1 flour, Dutch-processed cocoa powder, baking soda, and fine sea salt. Whisking thoroughly ensures the leavening and salt are evenly distributed and helps to aerate the flour and cocoa. Set aside.
-
Melt Chocolate and Butter: Create a double boiler by placing a heatproof bowl over a saucepan of simmering water (make sure the bottom of the bowl does not touch the water). Add the 4 ounces of chopped bittersweet chocolate and the ½ cup of butter to the bowl. Stir occasionally until both are completely melted and the mixture is smooth and glossy. Remove the bowl from the heat and set aside to cool slightly for about 5 minutes.
-
Whisk in Sugars and Eggs: Pour the slightly cooled chocolate-butter mixture into a large mixing bowl. Add the light brown sugar and granulated sugar and whisk vigorously for about a minute until the mixture is well combined and no lumps of sugar remain.
-
Add Eggs and Vanilla: Add the room temperature egg and the extra egg yolk, along with the vanilla extract. Whisk vigorously for another full minute. The mixture should become thick, glossy, and smooth. This step helps to emulsify the fats and sugars, creating that signature shiny, crackly top on the cookies.
-
Combine Wet and Dry: Pour the dry ingredient mixture into the wet ingredients. Use a rubber spatula to fold everything together until just combined. The dough will be soft and seem a bit oily. Be careful not to overmix; stop as soon as you no longer see streaks of flour.
-
Fold in Chocolate Chips: Gently fold in the 1 ½ cups of chocolate chips or chunks until they are evenly distributed throughout the dough.
-
The Critical Chill: Cover the bowl tightly with plastic wrap and refrigerate the dough for at least 3 hours, or preferably overnight (up to 48 hours). Do not skip this step. This is essential for managing spread, developing flavor, and ensuring a non-gritty texture.
-
Preheat and Prepare for Baking: When you’re ready to bake, preheat your oven to 350°F (175°C). Line two large baking sheets with parchment paper.
-
Scoop and Bake: Using a medium-sized (1.5 to 2-tablespoon) cookie scoop, portion the cold dough into balls and place them on the prepared baking sheets, leaving at least 2-3 inches of space between each cookie to allow for some spreading.
-
Add Toppings (Optional but Recommended): For that bakery-style look, gently press a few extra chocolate chips or chunks onto the tops of the dough balls.
-
Bake: Bake for 11-13 minutes. The edges of the cookies should be set, but the centers will look soft, puffy, and slightly underdone. This is the key to a fudgy center.
-
The Final Touches: Remove the baking sheets from the oven. Immediately sprinkle the tops of the hot cookies with a little flaky sea salt. Let the cookies cool on the baking sheet for 10 minutes. During this time, they will continue to cook from the residual heat and will set up. After 10 minutes, carefully transfer the cookies to a wire rack to cool completely.
Nutrition
- Serving Size: one normal portion
- Calories: 160-200


