
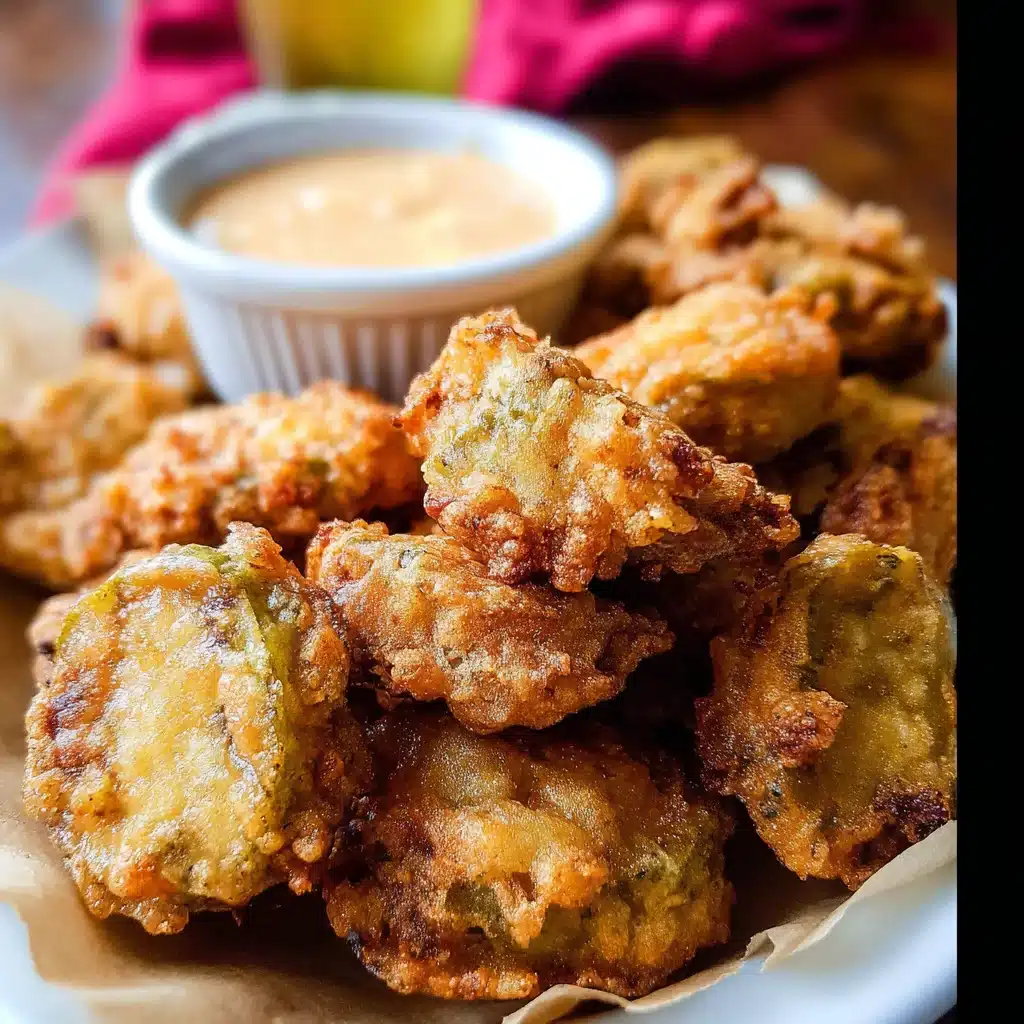

Of all the bar snacks and carnival foods in the American culinary canon, there’s one that I used to eye with deep suspicion: the fried pickle. It sounded like an absurdity, a culinary dare that had gone too far. Pickles belonged next to a sandwich, cold and crisp from the jar, not sizzling in a vat of hot oil. That was my firm stance until a sweltering summer evening at a local food truck festival. The air was thick with the smells of grilled meats and sugary funnel cakes, but my friend insisted we get the fried pickles from a wildly popular truck. I reluctantly agreed, expecting a greasy, soggy disappointment. What I received was a revelation. The basket held not limp spears, but golden-brown, craggy-coated pickle chips. I picked one up, dipped it into the accompanying creamy, spicy sauce, and took a bite. The audible crunch gave way to a shocking burst of hot, tangy dill brine, immediately soothed by the cool dipping sauce. It was salty, sour, crispy, and creamy all at once. It wasn’t just good; it was spectacular. I was an instant convert. Since that day, I’ve been on a mission to perfect the homemade fried pickle, and this recipe is the culmination of that quest. It’s the recipe that turns skeptics into believers and has become the undisputed champion of appetizers in my home.
The Anatomy of a Perfect Fried Pickle
Before we dive into the recipe, let’s break down what separates a legendary fried pickle from a mediocre, greasy one. Achieving that perfect, crave-worthy result isn’t about luck; it’s about understanding the three key components: the pickle itself, the breading, and the fry. Mastering each element is the secret to unlocking fried pickle nirvana.
First, the pickle. The choice of pickle is paramount. While you can technically fry any pickle, the ideal candidate is a classic, crunchy dill pickle. Sweet pickles or bread-and-butter varieties can become cloyingly sweet when fried, clashing with the savory breading. The real debate lies in the cut: spears versus chips. Spears offer a higher pickle-to-breading ratio and a substantial, juicy bite. However, they are more prone to becoming water-logged and making the breading fall off. Chips, on the other hand, are the superior choice for guaranteed crispiness. They offer more surface area for the delicious crunchy coating, cook faster and more evenly, and are perfectly sized for dipping. For this recipe, we champion the dill pickle chip.
Second, the breading. This is where the magic of the crunch happens. A soggy fried pickle is a tragedy, and the breading is your first line of defense. A simple flour dredge isn’t enough; it will absorb oil and become limp. The secret lies in a three-step dredging process: a light coating of seasoned flour, a dip in an egg wash, and a final, generous coating in a crispy medium like Panko breadcrumbs. The flour helps the egg wash adhere to the pickle, the egg wash acts as the glue for the final coating, and the Panko breadcrumbs create an incredibly light, airy, and ultra-crispy crust that stays crunchy long after frying.
Finally, the fry. The temperature of your oil is non-negotiable. If the oil is too cool, the pickles will sit in it for too long, absorbing grease and becoming heavy and soggy. If the oil is too hot, the breading will burn before the pickle inside has a chance to heat through. The sweet spot is around 350-375°F (175-190°C). This allows the breading to quickly turn golden brown and seal itself, creating a protective barrier that steams the pickle inside while keeping the outside perfectly crisp. Frying in small batches is just as important, as overcrowding the pan will cause the oil temperature to drop dramatically, leading straight back to soggy pickles.
The Essential Companion: Zesty Ranch Dipping Sauce
A fried pickle is only half the experience without the perfect dipping sauce. The ideal sauce should be cool, creamy, and zesty to cut through the richness of the fried coating and complement the tangy dill pickle. While you can use store-bought ranch dressing in a pinch, this homemade version is infinitely better and comes together in minutes. It’s the perfect yin to the fried pickle’s yang.
Dipping Sauce Ingredients:
- Mayonnaise: ½ cup
- Sour Cream or Buttermilk: ¼ cup (use sour cream for a thicker sauce, buttermilk for a more traditional dressing consistency)
- Fresh Chives: 1 tablespoon, finely chopped
- Fresh Dill: 1 tablespoon, finely chopped (or 1 teaspoon dried dill)
- Garlic Powder: ½ teaspoon
- Onion Powder: ½ teaspoon
- Cayenne Pepper: ¼ teaspoon (or more, to taste)
- Worcestershire Sauce: ½ teaspoon
- Fresh Lemon Juice: 1 teaspoon
- Salt and Freshly Ground Black Pepper: To taste
Dipping Sauce Instructions:
In a small bowl, combine the mayonnaise, sour cream (or buttermilk), chopped chives, dill, garlic powder, onion powder, cayenne pepper, Worcestershire sauce, and lemon juice. Whisk until smooth and fully combined. Season with salt and pepper to taste. For the best flavor, cover and refrigerate for at least 30 minutes to allow the flavors to meld together.
Complete Ingredients for Crispy Fried Pickles
This recipe is designed for maximum crunch and flavor. Using Panko breadcrumbs is highly recommended for the best texture.
- Whole Dill Pickles: 1 (24-ounce) jar, preferably with a crinkle-cut chip
- All-Purpose Flour: 1 cup
- Panko Breadcrumbs: 2 cups
- Seasonings for Flour Mixture:
- Smoked Paprika: 1 teaspoon
- Garlic Powder: 1 teaspoon
- Cayenne Pepper: ½ teaspoon (adjust to your heat preference)
- Fine Sea Salt: ½ teaspoon
- Freshly Ground Black Pepper: ½ teaspoon
- Large Eggs: 2
- Milk or Water: 1 tablespoon
- Neutral Frying Oil: 4-6 cups, such as canola, vegetable, or peanut oil
Step-by-Step Instructions
Follow these steps carefully for perfectly crispy, non-soggy fried pickles every time. The setup is key to a smooth process.
Step 1: The All-Important Pickle Prep
This is the most critical step for avoiding soggy results. Open the jar of pickles and drain them thoroughly in a colander. Transfer the pickle chips to a thick layer of paper towels. Lay another layer of paper towels on top and press down firmly to absorb as much brine and moisture as possible. Let them sit and dry for at least 15-20 minutes. For extra insurance, pat each individual pickle chip dry again right before breading. A dry surface is essential for the breading to stick.
Step 2: Set Up Your Dredging Station
Efficiency is your friend when frying. Set up a standard three-step breading station. You will need three shallow dishes or pie plates.
- Dish 1 (Flour): In the first dish, whisk together the all-purpose flour, smoked paprika, garlic powder, cayenne pepper, salt, and black pepper until evenly combined.
- Dish 2 (Egg Wash): In the second dish, whisk the two large eggs with the tablespoon of milk or water until smooth and slightly frothy.
- Dish 3 (Panko): In the third dish, add the Panko breadcrumbs.
Arrange the dishes in a line: pickles, flour mixture, egg wash, Panko, and finally, a clean baking sheet or large plate to hold the breaded pickles.
Step 3: Bread the Pickles
Working in small batches, take a very dry pickle chip and dredge it in the seasoned flour mixture, shaking off any excess. Next, dip it completely into the egg wash, allowing any excess to drip off. Finally, press the pickle firmly into the Panko breadcrumbs, ensuring it is generously and evenly coated on all sides. Place the breaded pickle on your clean baking sheet in a single layer. Repeat until all pickles are breaded.
Step 4: Heat the Oil and Fry
In a large, heavy-bottomed pot or Dutch oven, pour in about 2-3 inches of your neutral frying oil. Heat the oil over medium-high heat until it reaches 350°F to 375°F (175-190°C). Use a deep-fry or candy thermometer for accuracy. If you don’t have a thermometer, you can test the oil by dropping in a small cube of bread; it should turn golden brown in about 30-45 seconds.
Carefully place a single layer of breaded pickles into the hot oil, being careful not to overcrowd the pot. Frying in batches is essential to maintain the oil temperature. Fry for 2-3 minutes, turning once, until they are deep golden brown and crispy on both sides.
Step 5: Drain and Season
Using a slotted spoon or spider strainer, remove the fried pickles from the oil and transfer them to a wire rack set over a baking sheet. Do not drain them on paper towels, as this can trap steam and make them soggy. Immediately sprinkle them with a tiny pinch of extra salt while they are still hot. Repeat the frying process with the remaining pickles, allowing the oil to come back up to temperature between batches.
The Air Fryer Fried Pickle Method
For a lighter version with less oil, the air fryer is an excellent alternative. You still get a fantastic crunch without the deep frying.
Air Fryer Instructions:
- Prepare and bread the pickles exactly as described in Steps 1-3.
- Preheat your air fryer to 400°F (200°C).
- Arrange the breaded pickles in a single layer in the air fryer basket. Do not let them overlap, as this will prevent them from crisping. You will need to work in batches.
- Generously spray the tops of the pickles with a neutral cooking oil spray. This is crucial for achieving a golden-brown, fried texture.
- Air fry for 6-8 minutes, flipping the pickles halfway through and spraying the other side with oil. Cook until they are golden brown and crispy.
- Serve immediately with the dipping sauce.
Nutrition Facts
Please note that these values are an approximation. The final numbers will vary based on the size of the pickles, the amount of oil absorbed during frying, and the specific ingredients used.
- Servings: 6-8 appetizer servings
- Serving Size: Approximately 6-8 fried pickle chips
- Calories Per Serving (Deep Fried): Approximately 280-320 calories
- Calories Per Serving (Air Fried): Approximately 150-180 calories
Preparation Time
- Active Preparation Time: 25 minutes (includes drying pickles and breading)
- Cooking Time: 15-20 minutes (frying in batches)
- Total Time: Approximately 40-45 minutes
How to Serve Your Fried Pickles
These crispy delights are more versatile than you might think. Serve them hot and fresh for the best experience.
- The Classic Appetizer:
- Serve them hot from the fryer in a basket lined with parchment paper.
- Always include a ramekin of the Zesty Ranch Dipping Sauce (or another favorite sauce) alongside them.
- They are a perfect starter for a game day party, barbecue, or casual get-together.
- As a Surprising Side Dish:
- Swap out french fries and serve a pile of fried pickles next to a juicy burger or a grilled chicken sandwich.
- They provide a wonderful textural and flavor contrast to rich, savory mains like pulled pork or brisket.
- The Ultimate Topping:
- Use a few fried pickle chips as a crunchy, tangy topping inside your burger or sandwich.
- Coarsely chop them and sprinkle them over a bowl of chili or a loaded baked potato for an unexpected and delicious crunch.
- Add them to a salad, like a “fried chicken salad,” for a burst of flavor and texture.
5 Additional Tips for Fried Pickle Perfection
- Embrace the Double Dredge: For an extra-thick, shatteringly crispy crust, you can perform a double dredge. After the first coating of Panko, dip the pickle back into the egg wash and then back into the Panko again. This creates a substantial crust that is virtually guaranteed not to fall off.
- Keep Them Warm Correctly: If you’re making a large batch for a party, you can keep the finished fried pickles warm and crispy. Preheat your oven to its lowest setting (around 200°F or 95°C). Place the wire rack with the fried pickles on it directly into the warm oven while you fry the remaining batches.
- Don’t Skip the Seasoning: The seasoned flour is your first opportunity to build flavor. Don’t be shy with the paprika, garlic, and cayenne. Furthermore, the final sprinkle of salt right after they come out of the oil is crucial. Hot fried foods absorb salt perfectly, enhancing all the other flavors.
- Use a Spider Strainer: For deep frying, a spider strainer (a wide, shallow, wire-mesh scoop) is the best tool for both adding and removing food from hot oil. It allows you to handle more pickles at once than a slotted spoon and drains oil much more effectively.
- Chill Your Breaded Pickles: If you have time, placing the tray of breaded pickles in the refrigerator for 15-20 minutes before frying can help the coating adhere even better. The cold, firm coating will set up beautifully when it hits the hot oil.
Frequently Asked Questions (FAQ)
1. Why did my breading fall off the pickles?
This is the most common issue and it usually comes down to one thing: moisture. If the pickles are not patted completely dry, the steam created during frying will push the breading right off. It can also happen if the oil isn’t hot enough, or if the pickles aren’t fully coated in each step of the dredging process (flour, then egg, then breadcrumbs).
2. Can I bake these instead of frying them?
Yes, you can bake them for a healthier option, though they won’t be quite as crispy as the fried or air-fried versions. Preheat your oven to 425°F (220°C). Place the breaded pickles on a wire rack set on a baking sheet and spray them generously with cooking oil. Bake for 10-15 minutes, flipping halfway through, until golden brown.
3. What other dipping sauces work well?
The possibilities are endless! Besides the Zesty Ranch, fried pickles are fantastic with a classic Southern Comeback Sauce (a mayo-based sauce with chili sauce, ketchup, and spices), a spicy aioli (mayonnaise with garlic and sriracha or chipotle), or a simple honey mustard dip.
4. Can I make fried pickles ahead of time?
Unfortunately, fried pickles are best served fresh. They lose their signature crunch upon refrigeration. You can, however, do all the prep work ahead of time. You can bread all the pickles, lay them on a baking sheet, cover them, and refrigerate for a few hours before you plan to fry them. This makes a great party prep shortcut.
5. How do I reheat leftover fried pickles?
Reheating in the microwave is a definite no-go; it will make them irrevocably soggy. The best way to bring back some of the crunch is to use an oven or air fryer. Preheat your air fryer or oven to 375°F (190°C) and heat the pickles for 3-5 minutes, until warmed through and re-crisped. They won’t be as perfect as when they were fresh, but it’s the next best thing.
Fried Pickles recipe
Ingredients
-
Whole Dill Pickles: 1 (24-ounce) jar, preferably with a crinkle-cut chip
-
All-Purpose Flour: 1 cup
-
Panko Breadcrumbs: 2 cups
-
Seasonings for Flour Mixture:
-
Smoked Paprika: 1 teaspoon
-
Garlic Powder: 1 teaspoon
-
Cayenne Pepper: ½ teaspoon (adjust to your heat preference)
-
Fine Sea Salt: ½ teaspoon
-
Freshly Ground Black Pepper: ½ teaspoon
-
-
Large Eggs: 2
-
Milk or Water: 1 tablespoon
-
Neutral Frying Oil: 4-6 cups, such as canola, vegetable, or peanut oil
Instructions
Step 1: The All-Important Pickle Prep
This is the most critical step for avoiding soggy results. Open the jar of pickles and drain them thoroughly in a colander. Transfer the pickle chips to a thick layer of paper towels. Lay another layer of paper towels on top and press down firmly to absorb as much brine and moisture as possible. Let them sit and dry for at least 15-20 minutes. For extra insurance, pat each individual pickle chip dry again right before breading. A dry surface is essential for the breading to stick.
Step 2: Set Up Your Dredging Station
Efficiency is your friend when frying. Set up a standard three-step breading station. You will need three shallow dishes or pie plates.
-
Dish 1 (Flour): In the first dish, whisk together the all-purpose flour, smoked paprika, garlic powder, cayenne pepper, salt, and black pepper until evenly combined.
-
Dish 2 (Egg Wash): In the second dish, whisk the two large eggs with the tablespoon of milk or water until smooth and slightly frothy.
-
Dish 3 (Panko): In the third dish, add the Panko breadcrumbs.
Arrange the dishes in a line: pickles, flour mixture, egg wash, Panko, and finally, a clean baking sheet or large plate to hold the breaded pickles.
Step 3: Bread the Pickles
Working in small batches, take a very dry pickle chip and dredge it in the seasoned flour mixture, shaking off any excess. Next, dip it completely into the egg wash, allowing any excess to drip off. Finally, press the pickle firmly into the Panko breadcrumbs, ensuring it is generously and evenly coated on all sides. Place the breaded pickle on your clean baking sheet in a single layer. Repeat until all pickles are breaded.
Step 4: Heat the Oil and Fry
In a large, heavy-bottomed pot or Dutch oven, pour in about 2-3 inches of your neutral frying oil. Heat the oil over medium-high heat until it reaches 350°F to 375°F (175-190°C). Use a deep-fry or candy thermometer for accuracy. If you don’t have a thermometer, you can test the oil by dropping in a small cube of bread; it should turn golden brown in about 30-45 seconds.
Carefully place a single layer of breaded pickles into the hot oil, being careful not to overcrowd the pot. Frying in batches is essential to maintain the oil temperature. Fry for 2-3 minutes, turning once, until they are deep golden brown and crispy on both sides.
Step 5: Drain and Season
Using a slotted spoon or spider strainer, remove the fried pickles from the oil and transfer them to a wire rack set over a baking sheet. Do not drain them on paper towels, as this can trap steam and make them soggy. Immediately sprinkle them with a tiny pinch of extra salt while they are still hot. Repeat the frying process with the remaining pickles, allowing the oil to come back up to temperature between batches.
The Air Fryer Fried Pickle Method
For a lighter version with less oil, the air fryer is an excellent alternative. You still get a fantastic crunch without the deep frying.
Air Fryer Instructions:
-
Prepare and bread the pickles exactly as described in Steps 1-3.
-
Preheat your air fryer to 400°F (200°C).
-
Arrange the breaded pickles in a single layer in the air fryer basket. Do not let them overlap, as this will prevent them from crisping. You will need to work in batches.
-
Generously spray the tops of the pickles with a neutral cooking oil spray. This is crucial for achieving a golden-brown, fried texture.
-
Air fry for 6-8 minutes, flipping the pickles halfway through and spraying the other side with oil. Cook until they are golden brown and crispy.
-
Serve immediately with the dipping sauce.
Nutrition
- Serving Size: one normal portion
- Calories: 150-180


