

There are few desserts that capture the essence of elegance and delicate precision quite like a Japanese Strawberry and Cream Cake Roll. I’ll never forget the first time I saw one in the pristine, brightly lit display case of a small Japanese bakery. It was a perfect, ethereal swirl of pale-yellow sponge cake, impossibly white cream, and a single, jewel-like strawberry nestled in the center. It looked less like food and more like a work of art. For years, I was too intimidated to even attempt making one myself. The horror stories of cracked sponges, weeping cream, and disastrously messy rolls were enough to keep me at bay. But one weekend, armed with a newfound determination, I decided to tackle my baking nemesis. The result of that day, after much research and careful practice, is the recipe you see here. When I finally took that first bite, it was a moment of pure bliss. The cake was a revelation—impossibly soft, light as a cloud, with a moist, fine crumb that practically dissolved on the tongue. It was subtly sweet, allowing the tartness of the fresh strawberries and the rich, milky flavor of the cream to shine. It was a resounding success with my family, who declared it the “best cake ever,” and it has since become my go-to dessert for special occasions, a symbol of how patience and proper technique can lead to the most beautifully rewarding results.
The Ultimate Japanese Strawberry & Cream Cake Roll (Ichigo Roll Cake)
This guide is more than just a recipe; it’s a comprehensive masterclass in creating the perfect Japanese-style cake roll. We’ll explore the specific techniques behind the cloud-like chiffon sponge, the secret to a perfectly stable whipped cream filling that won’t weep, and the method for achieving a flawless, crack-free roll every single time. This style of dessert, known as Yōgashi in Japan, represents the beautiful fusion of Western baking techniques with the Japanese palate’s preference for lighter, less sweet, and more texturally refined sweets.
Complete Ingredients List
Precision is the cornerstone of Japanese baking. For the most accurate and consistent results, using a kitchen scale to measure your ingredients, especially the flour and sugar, is highly recommended. This recipe is designed for a standard 10×15 inch (25×38 cm) jelly roll pan.
For the Soufflé Chiffon Cake:
- Cake Flour: ¾ cup + 2 tablespoons (100g). Cake flour has a lower protein content than all-purpose flour, which is essential for creating the signature tender, light-as-air crumb. Do not substitute with all-purpose flour if you want the authentic texture.
- Large Eggs: 4, separated into yolks and whites. This is the most crucial step. Ensure your eggs are at room temperature for the best volume.
- Granulated Sugar: ½ cup (100g), divided into two ¼ cup (50g) portions. One portion is for the yolk batter, the other for the meringue.
- Whole Milk: ¼ cup (60ml), at room temperature. The fat in whole milk adds to the cake’s richness and moisture.
- Neutral-flavored Oil: 3 tablespoons (45ml). Use canola, grapeseed, or vegetable oil. Oil creates a moister and softer cake than butter, and it stays soft even when refrigerated.
- Pure Vanilla Extract: 1 teaspoon. For a hint of aromatic flavor.
- Salt: ¼ teaspoon. To balance the sweetness and enhance flavors.
For the Stabilized Strawberry Cream Filling:
- Cold Heavy Whipping Cream: 1 ½ cups (360ml), with at least 36% milk fat. The high-fat content is critical for a stable cream. Keep it very cold until the moment you use it.
- Powdered Sugar (Confectioners’ Sugar): ⅓ cup (40g), sifted. It dissolves easily and the cornstarch in it provides some initial stability.
- Unflavored Gelatin: 1 teaspoon. This is the secret weapon for a cream that holds its shape perfectly for days without becoming watery.
- Cold Water: 2 tablespoons. For blooming the gelatin.
- Vanilla Extract: ½ teaspoon.
- Fresh Strawberries: About 1 cup, hulled and diced into small pieces, plus 4-5 whole small strawberries for the center line. Ensure your strawberries are firm, ripe, and patted completely dry.
Step-by-Step Instructions
Follow these phases carefully. The success of your cake roll lies in the details of each step, from creating the meringue to the gentle rolling technique.
Phase 1: Preparation and Setup
- Preheat and Prepare Pan: Preheat your oven to 350°F (175°C). Grease a 10×15 inch jelly roll pan. Line it with parchment paper, leaving a 2-inch overhang on the two long sides. This “sling” will make it easy to lift the cake out of the pan later. Do not grease the parchment paper itself.
- Ingredient Prep: Separate your eggs carefully, placing yolks in one large bowl and whites in the completely clean, grease-free bowl of your stand mixer (or another large bowl if using a hand mixer). Ensure no trace of yolk gets into the whites, or they will not whip up into a proper meringue. Set out all your other ingredients.
Phase 2: Making the Chiffon Cake Batter
- Create the Yolk Batter: In the large bowl with the egg yolks, add one portion (¼ cup / 50g) of the granulated sugar. Whisk by hand until the mixture is pale and slightly thickened. Whisk in the milk, oil, vanilla extract, and salt until fully combined.
- Add Flour: Sift the cake flour directly into the yolk mixture. Use a whisk to gently combine the ingredients until just incorporated. Do not overmix. A few small lumps are okay. Set this yolk batter aside.
- Make the Meringue: Using your stand mixer with the whisk attachment (or a hand mixer), beat the egg whites on medium-low speed until they become foamy and bubbly. With the mixer running on medium speed, gradually add the second portion (¼ cup / 50g) of granulated sugar, one tablespoon at a time. Once all the sugar is added, increase the speed to medium-high and beat until the meringue reaches stiff, glossy peaks. This is key: the meringue should hold its shape firmly, but the very tip might curl over slightly when you lift the beater. It should look like smooth, shiny shaving cream, not dry or chunky.
- Fold the Batter: Gently fold the meringue into the yolk batter in three additions. Use a large rubber spatula to add the first third of the meringue to the yolk batter, folding gently to lighten the mixture. Add the remaining meringue in two more batches, using a “cut and fold” motion—cut down the center of the bowl, scrape along the bottom, and fold the batter over on itself. Rotate the bowl as you go. Be very gentle to avoid deflating the air you worked so hard to incorporate. Stop folding as soon as no large streaks of white remain.
Phase 3: Baking and Cooling the Cake
- Bake the Cake: Pour the finished batter into your prepared pan. Use an offset spatula to gently spread it into an even layer, making sure it reaches all the corners. Tap the pan firmly on the counter a few times to release any large air bubbles.
- Baking Time: Bake for 12-15 minutes, or until the cake is light golden brown, and the center springs back when you gently press it with your finger. Do not overbake. An overbaked cake will be dry and is the primary cause of cracking.
- Cooling and Preparing to Roll: As soon as the cake comes out of the oven, drop the pan from a height of about 6 inches onto your heatproof counter. This shock helps prevent the cake from shrinking excessively as it cools. Lay a new, clean sheet of parchment paper on your counter and dust it lightly with powdered sugar. Immediately flip the hot cake pan over onto the sugared parchment. Carefully lift the pan off, and then gently peel away the parchment paper that the cake was baked on.
- Initial Roll: While the cake is still hot and pliable, use the clean parchment underneath to help you gently roll the cake up, starting from a short end. Roll the parchment paper up with the cake. Let it cool completely in this rolled-up shape on a wire rack. This “trains” the cake into a spiral, which dramatically reduces the risk of cracking later.
Phase 4: Making the Stabilized Whipped Cream
- Bloom the Gelatin: In a small, microwave-safe bowl, sprinkle the unflavored gelatin over the 2 tablespoons of cold water. Let it sit for 5-10 minutes to “bloom” and absorb the water. It will look like a thick, rubbery gel.
- Whip the Cream: While the gelatin blooms, pour the very cold heavy cream, sifted powdered sugar, and vanilla into your chilled mixer bowl. Whip on medium-high speed until the cream thickens and forms soft peaks (the peak slumps over when you lift the beater).
- Incorporate the Gelatin: Microwave the bloomed gelatin for 5-10 seconds, just until it melts into a liquid. Do not let it boil. To prevent the gelatin from seizing, “temper” it: add a large dollop of the soft-whipped cream to the melted gelatin and whisk quickly to combine.
- Finish Whipping: With the mixer on medium speed, pour the tempered gelatin mixture into the rest of the whipped cream. Increase the speed to medium-high and whip until the cream reaches stiff peaks. It will be thick, luscious, and hold its shape perfectly. Be careful not to over-whip it into butter. Stir in the small diced strawberries.
Phase 5: Assembling and Chilling the Cake Roll
- Unroll and Fill: Once the cake has cooled completely, gently unroll it. It will have a natural curve. Trim about ¼ inch off all four edges of the cake for a clean, neat look.
- Apply Cream: Spread the strawberry cream filling evenly over the surface of the cake, leaving a 1-inch border on the far short edge.
- Add Strawberries: About 1 inch from the short edge where you will begin rolling, arrange the whole small strawberries in a single, tight line.
- Roll and Chill: Using the parchment paper to help you lift, start rolling the cake from the end with the line of strawberries. Make the first turn as tight as possible around the berries. Continue rolling, using the parchment to guide you and keep the roll snug.
- Final Chill: Wrap the finished cake roll tightly in the parchment paper, and then wrap it again in plastic wrap to secure its shape. Place it in the refrigerator seam-side down for at least 4 hours, or preferably overnight. This chilling period is essential for the cream to set fully and for the cake to firm up, ensuring clean, beautiful slices.
Nutrition Facts
- Servings: 8-10 slices
- Calories Per Serving: Approximately 300-380 kcal
Disclaimer: This is an estimate. The actual nutritional value will vary based on the specific ingredients used, the fat content of your cream, and the size of your slices.
Preparation Time
- Active Preparation Time: 45 minutes
- Baking Time: 15 minutes
- Cooling and Chilling Time: 5 hours (minimum)
- Total Time: Approximately 6 hours
How to Serve Your Japanese Cake Roll
The beauty of this cake is its elegant simplicity. Let it be the star of the show.
- Chill is Key: Always serve this cake well-chilled, straight from the refrigerator. The textures of the soft cake and firm, cool cream are best when cold.
- Slicing Technique: For perfectly clean slices, use a long, sharp serrated knife. Dip the knife in hot water and wipe it clean between each and every cut.
- Simple Garnish: A light dusting of powdered sugar over the top of the roll just before serving adds a touch of professional elegance.
- Plating: Serve a slice on its own on a clean white plate. You can add a single fresh strawberry or a sprig of mint on the side for a pop of color.
- Perfect Pairings: This cake is a perfect accompaniment to a cup of tea.
- Japanese Green Tea: Sencha or Genmaicha.
- Black Tea: A light Earl Grey or Darjeeling.
5 Essential Tips for a Perfect Cake Roll
Master this dessert by keeping these five crucial tips in mind.
1. The Secret to a Crack-Free Roll is a Moist Cake
The number one reason cake rolls crack is because they are overbaked and dry. Watch your cake like a hawk. Bake it just until it springs back to a light touch. The second part of this secret is rolling it while it’s still warm. This creates a “muscle memory” in the cake, so it won’t resist or crack when you unroll it later for filling.
2. Master the Meringue for an Airy Crumb
The ethereal texture of the chiffon cake comes almost entirely from the air beaten into the meringue. Use a spotlessly clean, grease-free bowl and beater. Any fat will prevent the whites from whipping up. Adding the sugar gradually helps stabilize the meringue, and beating to stiff—but not dry—peaks is the goal. If it looks chunky or separated, you’ve gone too far.
3. Stabilized Cream is a Non-Negotiable
Regular whipped cream will begin to weep and lose its structure within hours, especially when paired with moist cake and juicy fruit. Using gelatin to stabilize the cream is a game-changer. It ensures your filling stays thick, luscious, and perfectly sliceable, even a day or two later. It’s the secret of professional bakeries.
4. Don’t Skip the Trimming
Trimming a thin layer off all four sides of the cooled, unrolled cake might seem fussy, but it’s an important step. The edges of the cake are slightly drier and chewier from being in contact with the pan. Removing them ensures that every single bite of your finished roll has the same perfectly soft, tender texture.
5. The Chill is Your Final Ingredient
Patience is a virtue, especially with this cake. The final, long chill in the refrigerator is not just for making it cold. It’s an essential step that allows the cream to fully set, the flavors to meld, and the entire structure to firm up. Attempting to slice the cake roll before it has chilled for at least 4 hours will result in a messy, squished roll and a less-defined swirl.
Frequently Asked Questions (FAQ)
Here are answers to common issues you might encounter on your cake-rolling journey.
1. Why did my cake crack when I rolled it?
Answer: Cracking is almost always due to the cake being too dry. This can happen from overbaking it by even a minute or two, or from having too much flour in your batter (which is why weighing your flour is so important). Another cause is trying to roll the cake after it has cooled completely. It’s crucial to do the initial “training” roll while the cake is still warm and pliable.
2. Can I use all-purpose flour instead of cake flour?
Answer: While you technically can, the result will not be the same. All-purpose flour has a higher protein content, which will develop more gluten and result in a denser, chewier, and less delicate cake. If you are in a pinch, you can make a DIY substitute: for every 1 cup of all-purpose flour, remove 2 tablespoons of the flour and replace it with 2 tablespoons of cornstarch. Sift them together several times. However, for the authentic Japanese bakery texture, investing in cake flour is highly recommended.
3. My whipped cream didn’t get stiff. What went wrong?
Answer: This usually comes down to temperature and fat content. Your heavy whipping cream must have a high fat content (at least 36%) and it, along with your mixing bowl and beater, should be very cold. Any warmth will prevent the fat globules from emulsifying properly. If it still won’t stiffen, you may have accidentally used a lower-fat cream (sometimes just called “whipping cream”) or it wasn’t cold enough.
4. Can I use frozen strawberries in the filling?
Answer: It is not recommended to use frozen strawberries directly in the cream filling. As they thaw, they release a significant amount of water, which will make your cream filling soggy and unstable, even with the gelatin. You must use fresh, firm strawberries that have been patted completely dry. If you only have frozen strawberries, you could cook them down into a thick compote, cool it completely, and then swirl that into the cream instead.
5. How far in advance can I make this cake roll?
Answer: Thanks to the stabilized cream, this cake holds up beautifully. You can make it one day ahead of when you plan to serve it. In fact, an overnight chill in the refrigerator is ideal for the flavors to meld and for the structure to become perfectly firm for slicing. Keep it tightly wrapped in plastic wrap in the fridge. It will stay fresh and delicious for up to 3 days.
Print
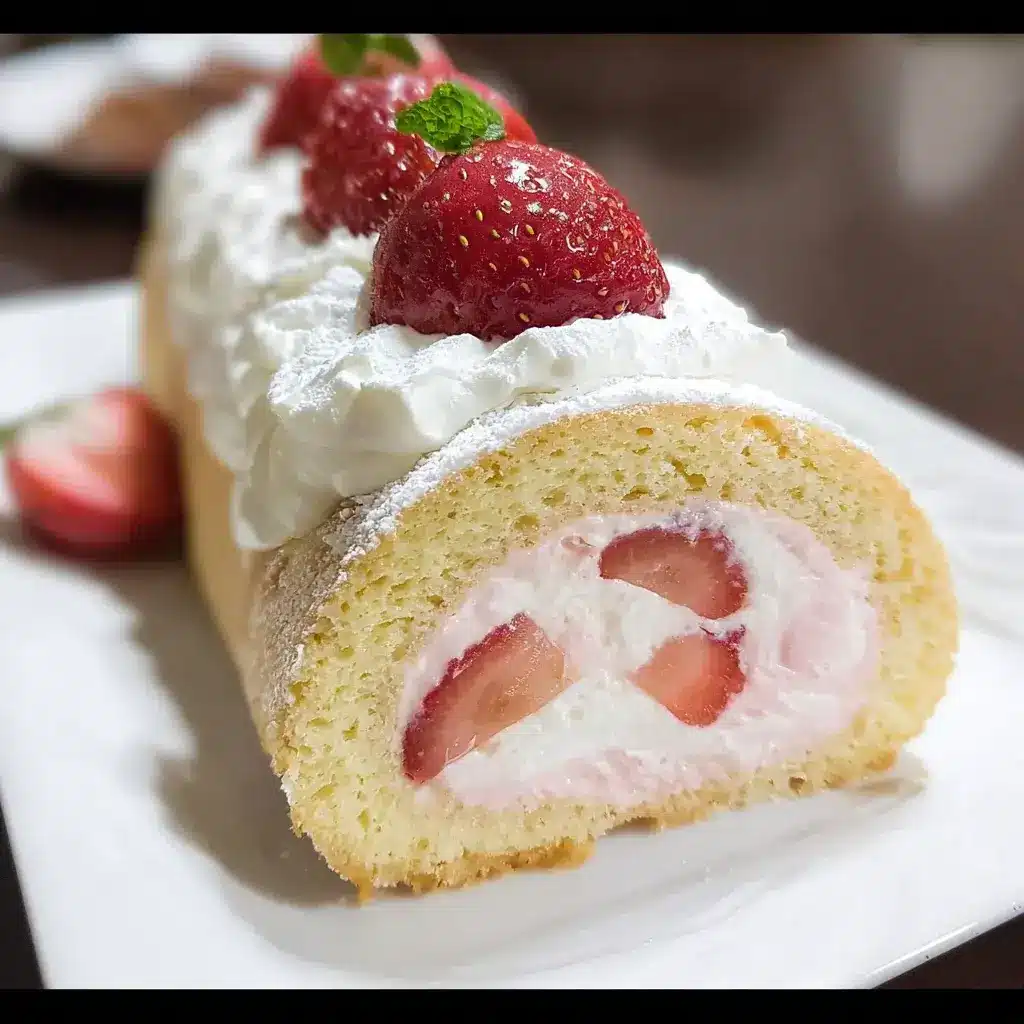
Fresh Strawberry and Cream Japanese Cake Roll recipe
Ingredients
For the Soufflé Chiffon Cake:
-
Cake Flour: ¾ cup + 2 tablespoons (100g). Cake flour has a lower protein content than all-purpose flour, which is essential for creating the signature tender, light-as-air crumb. Do not substitute with all-purpose flour if you want the authentic texture.
-
Large Eggs: 4, separated into yolks and whites. This is the most crucial step. Ensure your eggs are at room temperature for the best volume.
-
Granulated Sugar: ½ cup (100g), divided into two ¼ cup (50g) portions. One portion is for the yolk batter, the other for the meringue.
-
Whole Milk: ¼ cup (60ml), at room temperature. The fat in whole milk adds to the cake’s richness and moisture.
-
Neutral-flavored Oil: 3 tablespoons (45ml). Use canola, grapeseed, or vegetable oil. Oil creates a moister and softer cake than butter, and it stays soft even when refrigerated.
-
Pure Vanilla Extract: 1 teaspoon. For a hint of aromatic flavor.
-
Salt: ¼ teaspoon. To balance the sweetness and enhance flavors.
For the Stabilized Strawberry Cream Filling:
-
Cold Heavy Whipping Cream: 1 ½ cups (360ml), with at least 36% milk fat. The high-fat content is critical for a stable cream. Keep it very cold until the moment you use it.
-
Powdered Sugar (Confectioners’ Sugar): ⅓ cup (40g), sifted. It dissolves easily and the cornstarch in it provides some initial stability.
-
Unflavored Gelatin: 1 teaspoon. This is the secret weapon for a cream that holds its shape perfectly for days without becoming watery.
-
Cold Water: 2 tablespoons. For blooming the gelatin.
-
Vanilla Extract: ½ teaspoon.
-
Fresh Strawberries: About 1 cup, hulled and diced into small pieces, plus 4-5 whole small strawberries for the center line. Ensure your strawberries are firm, ripe, and patted completely dry.
Instructions
Phase 1: Preparation and Setup
-
Preheat and Prepare Pan: Preheat your oven to 350°F (175°C). Grease a 10×15 inch jelly roll pan. Line it with parchment paper, leaving a 2-inch overhang on the two long sides. This “sling” will make it easy to lift the cake out of the pan later. Do not grease the parchment paper itself.
-
Ingredient Prep: Separate your eggs carefully, placing yolks in one large bowl and whites in the completely clean, grease-free bowl of your stand mixer (or another large bowl if using a hand mixer). Ensure no trace of yolk gets into the whites, or they will not whip up into a proper meringue. Set out all your other ingredients.
Phase 2: Making the Chiffon Cake Batter
-
Create the Yolk Batter: In the large bowl with the egg yolks, add one portion (¼ cup / 50g) of the granulated sugar. Whisk by hand until the mixture is pale and slightly thickened. Whisk in the milk, oil, vanilla extract, and salt until fully combined.
-
Add Flour: Sift the cake flour directly into the yolk mixture. Use a whisk to gently combine the ingredients until just incorporated. Do not overmix. A few small lumps are okay. Set this yolk batter aside.
-
Make the Meringue: Using your stand mixer with the whisk attachment (or a hand mixer), beat the egg whites on medium-low speed until they become foamy and bubbly. With the mixer running on medium speed, gradually add the second portion (¼ cup / 50g) of granulated sugar, one tablespoon at a time. Once all the sugar is added, increase the speed to medium-high and beat until the meringue reaches stiff, glossy peaks. This is key: the meringue should hold its shape firmly, but the very tip might curl over slightly when you lift the beater. It should look like smooth, shiny shaving cream, not dry or chunky.
-
Fold the Batter: Gently fold the meringue into the yolk batter in three additions. Use a large rubber spatula to add the first third of the meringue to the yolk batter, folding gently to lighten the mixture. Add the remaining meringue in two more batches, using a “cut and fold” motion—cut down the center of the bowl, scrape along the bottom, and fold the batter over on itself. Rotate the bowl as you go. Be very gentle to avoid deflating the air you worked so hard to incorporate. Stop folding as soon as no large streaks of white remain.
Phase 3: Baking and Cooling the Cake
-
Bake the Cake: Pour the finished batter into your prepared pan. Use an offset spatula to gently spread it into an even layer, making sure it reaches all the corners. Tap the pan firmly on the counter a few times to release any large air bubbles.
-
Baking Time: Bake for 12-15 minutes, or until the cake is light golden brown, and the center springs back when you gently press it with your finger. Do not overbake. An overbaked cake will be dry and is the primary cause of cracking.
-
Cooling and Preparing to Roll: As soon as the cake comes out of the oven, drop the pan from a height of about 6 inches onto your heatproof counter. This shock helps prevent the cake from shrinking excessively as it cools. Lay a new, clean sheet of parchment paper on your counter and dust it lightly with powdered sugar. Immediately flip the hot cake pan over onto the sugared parchment. Carefully lift the pan off, and then gently peel away the parchment paper that the cake was baked on.
-
Initial Roll: While the cake is still hot and pliable, use the clean parchment underneath to help you gently roll the cake up, starting from a short end. Roll the parchment paper up with the cake. Let it cool completely in this rolled-up shape on a wire rack. This “trains” the cake into a spiral, which dramatically reduces the risk of cracking later.
Phase 4: Making the Stabilized Whipped Cream
-
Bloom the Gelatin: In a small, microwave-safe bowl, sprinkle the unflavored gelatin over the 2 tablespoons of cold water. Let it sit for 5-10 minutes to “bloom” and absorb the water. It will look like a thick, rubbery gel.
-
Whip the Cream: While the gelatin blooms, pour the very cold heavy cream, sifted powdered sugar, and vanilla into your chilled mixer bowl. Whip on medium-high speed until the cream thickens and forms soft peaks (the peak slumps over when you lift the beater).
-
Incorporate the Gelatin: Microwave the bloomed gelatin for 5-10 seconds, just until it melts into a liquid. Do not let it boil. To prevent the gelatin from seizing, “temper” it: add a large dollop of the soft-whipped cream to the melted gelatin and whisk quickly to combine.
-
Finish Whipping: With the mixer on medium speed, pour the tempered gelatin mixture into the rest of the whipped cream. Increase the speed to medium-high and whip until the cream reaches stiff peaks. It will be thick, luscious, and hold its shape perfectly. Be careful not to over-whip it into butter. Stir in the small diced strawberries.
Phase 5: Assembling and Chilling the Cake Roll
-
Unroll and Fill: Once the cake has cooled completely, gently unroll it. It will have a natural curve. Trim about ¼ inch off all four edges of the cake for a clean, neat look.
-
Apply Cream: Spread the strawberry cream filling evenly over the surface of the cake, leaving a 1-inch border on the far short edge.
-
Add Strawberries: About 1 inch from the short edge where you will begin rolling, arrange the whole small strawberries in a single, tight line.
-
Roll and Chill: Using the parchment paper to help you lift, start rolling the cake from the end with the line of strawberries. Make the first turn as tight as possible around the berries. Continue rolling, using the parchment to guide you and keep the roll snug.
-
Final Chill: Wrap the finished cake roll tightly in the parchment paper, and then wrap it again in plastic wrap to secure its shape. Place it in the refrigerator seam-side down for at least 4 hours, or preferably overnight. This chilling period is essential for the cream to set fully and for the cake to firm up, ensuring clean, beautiful slices
Nutrition
- Serving Size: one normal portion
- Calories: 300-380


