
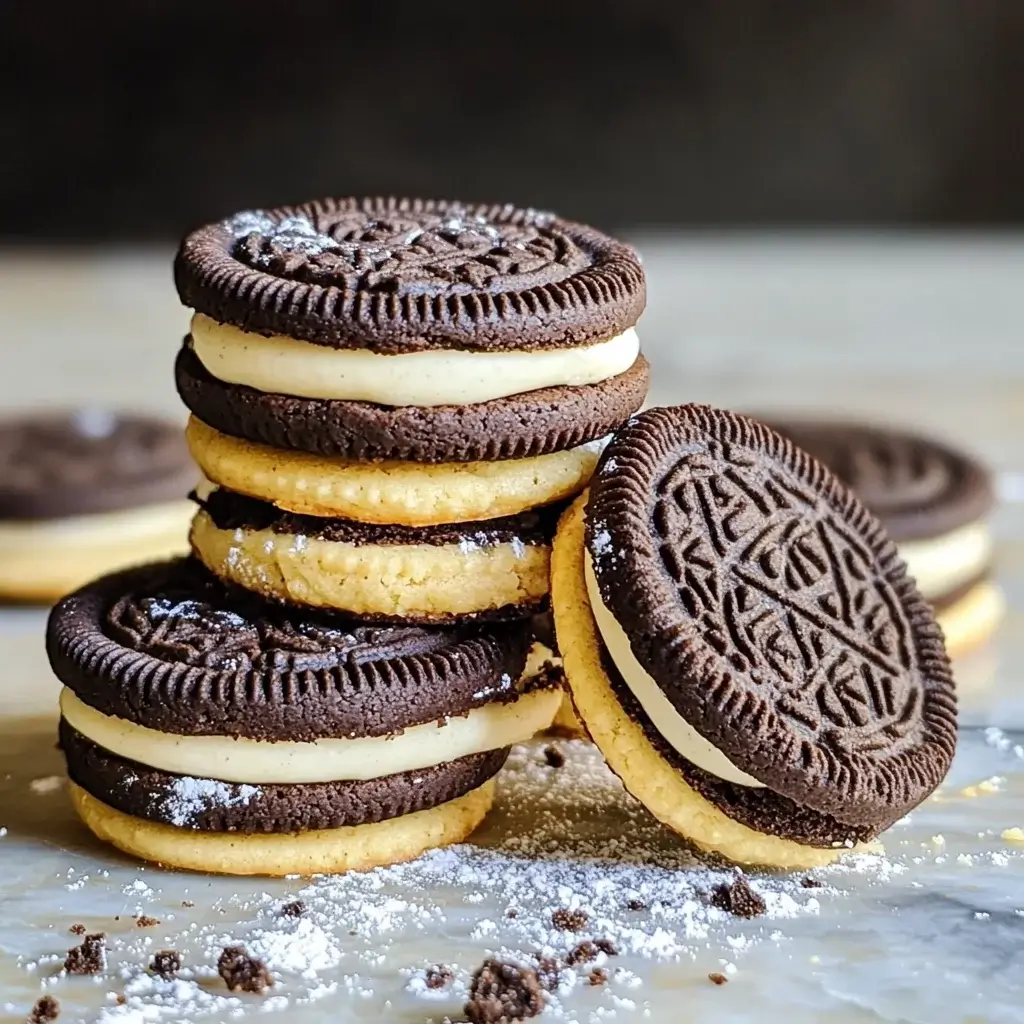

In our house, there’s a certain black and white cookie that holds legendary status. You know the one – perfectly crisp chocolate wafers sandwiching a sweet, creamy filling. Yes, Oreos! But as much as we love the convenience of grabbing a sleeve from the store, I often find myself wanting a homemade version, something I can feel a little bit better about serving (and indulging in!). That’s where “Faux Oreos” came into being in my kitchen. It started as a simple experiment, a way to satisfy those Oreo cravings with a touch of homemade goodness. And let me tell you, they were a hit! My kids, self-proclaimed Oreo connoisseurs, couldn’t get enough. They loved helping to roll out the dough, cut out the circles, and of course, assemble the cookies with that signature creamy center. The best part? These Faux Oreos capture the essence of the original – the satisfying snap of the cookie, the rich chocolate flavor, and the melt-in-your-mouth filling – but with a homemade touch that makes them feel extra special. If you’re looking for a fun baking project that results in a treat everyone will adore, and maybe even mistake for the real deal, then you absolutely have to try these Faux Oreo Cookies. Get ready to experience the magic of homemade cookies that are just as addictive, if not more so, than their famous inspiration!
Ingredients: Building Blocks of Black and White Bliss
Creating perfect Faux Oreo Cookies relies on a carefully chosen selection of ingredients, each playing a crucial role in achieving that signature taste and texture. From the dark, crisp wafers to the sweet, melt-in-your-mouth filling, every component matters. Let’s break down each ingredient and understand its importance in crafting these homemade delights.
- For the Chocolate Wafers:
- All-Purpose Flour (2 cups): The foundation of our cookie structure. All-purpose flour provides the necessary gluten development for a slightly chewy yet crisp cookie. It’s important to measure your flour correctly – spoon it into your measuring cup and level it off with a straight edge, rather than scooping directly from the bag, which can lead to using too much flour and drier cookies. For a slightly more tender cookie, you can substitute a tablespoon or two of all-purpose flour with cornstarch.
- Unsweetened Cocoa Powder (¾ cup, Dutch-processed preferred): The heart of the intense chocolate flavor and the signature dark color of Oreo wafers. Dutch-processed cocoa powder is alkalized, resulting in a darker color, smoother flavor, and less acidity compared to natural cocoa powder. While natural cocoa powder will also work, Dutch-processed will give you a more authentic Oreo color and flavor. Ensure your cocoa powder is fresh for the best flavor.
- Granulated Sugar (1 ½ cups): Sweetness and tenderness in the cookie dough. Granulated sugar not only sweetens the wafers but also contributes to their crisp texture by inhibiting gluten development and promoting browning. The amount of sugar is balanced to create cookies that are sweet but not overwhelmingly so, allowing the chocolate flavor to shine.
- Unsalted Butter, softened (½ cup, 1 stick): Richness, flavor, and tenderness. Butter adds fat to the dough, which contributes to a tender crumb and a melt-in-your-mouth texture. Using unsalted butter allows you to control the overall salt level in the recipe. Ensure your butter is properly softened – it should be pliable but still cool to the touch, not melted or greasy.
- Vegetable Shortening (½ cup): Crispness and tender texture. Vegetable shortening, with its 100% fat content and lack of water, contributes significantly to the crispness of the cookies. It also helps to prevent excessive spreading during baking and creates a more tender texture compared to using all butter. You can use all butter if you prefer, but the cookies will be slightly less crisp and may spread more.
- Large Egg (1): Binds the dough and adds richness. The egg helps to emulsify the fat and liquid in the dough, creating a cohesive mixture. It also adds a touch of richness and contributes to the overall texture of the cookies.
- Vanilla Extract (1 teaspoon): Flavor enhancer. Vanilla extract enhances the chocolate flavor and adds a subtle warmth to the cookies. Use pure vanilla extract for the best flavor, or substitute with vanilla bean paste for an even more intense vanilla aroma.
- Baking Soda (1 teaspoon): Leavening agent and flavor enhancer. Baking soda helps to leaven the cookies, giving them a slightly lighter texture. It also reacts with the cocoa powder to enhance the chocolate flavor and contribute to the dark color.
- Salt (½ teaspoon): Flavor enhancer. Salt balances the sweetness and enhances all the other flavors in the cookies, particularly the chocolate. Don’t skip the salt, even in sweet recipes, as it plays a crucial role in flavor development.
- Hot Coffee (¼ cup): Liquid and flavor enhancer. Hot coffee adds moisture to the dough, helping to bring it together. More importantly, it intensifies the chocolate flavor of the cocoa powder, creating a richer and more complex chocolate taste. Use freshly brewed hot coffee for the best flavor. You can substitute with hot water if you don’t want to use coffee, but the chocolate flavor will be slightly less pronounced.
- For the Cream Filling:
- Unsalted Butter, softened (½ cup, 1 stick): Base of the creamy filling. Butter provides the richness and structure for the filling. Again, ensure your butter is properly softened for smooth creaming.
- Vegetable Shortening (½ cup): Stabilizes the filling and creates a whiter color. Vegetable shortening helps to stabilize the buttercream filling, making it less likely to melt at room temperature. It also contributes to a whiter color, mimicking the classic Oreo filling. You can use all butter for the filling if preferred, but it will be slightly softer and more yellow in color.
- Powdered Sugar (3 cups): Sweetness and structure for the filling. Powdered sugar is the primary sweetener and thickening agent for the buttercream filling. Sift your powdered sugar before measuring to remove any lumps and ensure a smooth filling.
- Vanilla Extract (2 teaspoons): Flavor enhancer for the filling. Vanilla extract provides the classic sweet vanilla flavor of Oreo cream filling. Use pure vanilla extract for the best flavor, or substitute with vanilla bean paste for a more intense vanilla aroma.
- Pinch of Salt: Balances the sweetness of the filling. A tiny pinch of salt helps to balance the sweetness of the powdered sugar and enhance the vanilla flavor in the filling.
By understanding the role of each ingredient, you can appreciate how they work together to create the perfect Faux Oreo Cookie, capturing the essence of the beloved original with a homemade touch.
Instructions: Crafting Your Homemade Oreo Masterpieces
Making Faux Oreo Cookies is a rewarding baking project that, while requiring a few steps, is entirely achievable for home bakers of all levels. Follow these detailed instructions to guide you through each stage, from creating the dark chocolate wafers to whipping up the creamy filling and assembling your homemade treats.
Part 1: Making the Chocolate Wafers
- Whisk Dry Ingredients: In a medium bowl, whisk together the all-purpose flour, cocoa powder, baking soda, and salt. Whisking ensures that these dry ingredients are evenly distributed and prevents clumps of cocoa powder or baking soda in your dough. Set aside this bowl of dry ingredients for later.
- Cream Butter, Shortening, and Sugar: In a large bowl (or the bowl of a stand mixer fitted with the paddle attachment), cream together the softened butter, vegetable shortening, and granulated sugar until light and fluffy. This step is crucial for incorporating air into the dough, which contributes to a tender cookie texture. Cream for 2-3 minutes, scraping down the sides of the bowl as needed, until the mixture is pale and noticeably lighter in texture.
- Beat in Egg and Vanilla: Beat in the egg and vanilla extract until fully incorporated. Beat until the egg is completely mixed into the creamed mixture and the batter is smooth and emulsified.
- Gradually Add Dry Ingredients: Gradually add the dry ingredients to the wet ingredients, mixing on low speed until just combined. Add the dry ingredients in two or three additions, mixing until just incorporated after each addition. Be careful not to overmix at this stage, as overmixing can develop gluten and result in tougher cookies. Mix until just combined, and a few streaks of flour are okay at this point.
- Stir in Hot Coffee: Gradually stir in the hot coffee until the dough comes together. The hot coffee will help to hydrate the cocoa powder and bring the dough together into a cohesive mass. Mix until the dough is smooth and comes together in a ball. It will be a slightly soft dough.
- Divide Dough and Chill: Divide the dough in half, flatten each half into a disc, wrap each disc in plastic wrap, and refrigerate for at least 1 hour (or up to 2 hours). Chilling the dough is essential for making it easier to roll out and prevents the cookies from spreading too much during baking. Chilling also helps to develop the flavors in the dough.
- Preheat Oven and Prepare Baking Sheets: Preheat oven to 325°F (165°C). Line baking sheets with parchment paper or silicone baking mats. Parchment paper or silicone mats prevent the cookies from sticking and ensure even baking.
- Roll Out Dough: On a lightly floured surface, roll out one disc of chilled dough to about ⅛ inch thickness. Work quickly as the dough will soften as it warms. If the dough becomes too soft to handle, return it to the refrigerator for a few minutes to firm up.
- Cut Out Cookies: Use a 1 ½-inch round cookie cutter (or a similar size) to cut out cookies. Cut out as many cookies as possible from the rolled dough. Re-roll scraps and cut out more cookies until all dough is used.
- Bake Cookies: Arrange cookies on prepared baking sheets, leaving about ½ inch space between them. Bake for 12-15 minutes, or until cookies are set and edges are just starting to look slightly firm. Baking time may vary slightly depending on your oven and the thickness of your cookies. Watch them carefully to prevent overbaking.
- Cool Completely: Let cookies cool on baking sheets for a few minutes before transferring them to a wire rack to cool completely. Cooling completely is essential before filling, as warm cookies will melt the cream filling.
Part 2: Making the Cream Filling
- Cream Butter and Shortening: In a large bowl (or the bowl of a stand mixer fitted with the paddle attachment), cream together the softened butter and vegetable shortening until smooth and creamy. Cream for 1-2 minutes until the mixture is light and fluffy.
- Gradually Add Powdered Sugar: Gradually add the powdered sugar to the butter and shortening mixture, beating on low speed until combined. Add the powdered sugar in additions, mixing until incorporated after each addition to prevent a cloud of powdered sugar. Once all powdered sugar is added, increase speed to medium and beat until light and fluffy, scraping down the sides of the bowl as needed.
- Beat in Vanilla and Salt: Beat in the vanilla extract and salt until fully incorporated. Beat for another minute until the filling is smooth, creamy, and well combined.
Part 3: Assembling the Faux Oreo Cookies
- Pipe or Spread Filling: Transfer the cream filling to a piping bag fitted with a round tip (optional, you can also spread the filling with a knife or small spatula). Pipe or spread a generous amount of cream filling onto the flat side of one cooled cookie wafer.
- Top with Second Wafer: Gently top with a second cooled cookie wafer, flat side down, pressing lightly to sandwich the filling.
- Repeat: Repeat with remaining cookie wafers and cream filling until all cookies are assembled.
- Chill (Optional): For a firmer filling, you can chill the assembled cookies in the refrigerator for about 15-20 minutes before serving. This is especially helpful if your kitchen is warm or if you prefer a firmer filling texture.
- Serve and Enjoy: Serve your Faux Oreo Cookies and enjoy the homemade goodness of these delightful black and white treats! They are best enjoyed within a few days for optimal crispness and creaminess.
By following these detailed instructions, you’ll be able to create perfect Faux Oreo Cookies that capture the essence of the original with a homemade touch, sure to impress your family and friends!
Nutrition Facts: Homemade Goodness, Mindful Indulgence
While Faux Oreo Cookies are undeniably a delicious treat, understanding their nutritional profile can help you enjoy them as part of a balanced diet, in moderation. Homemade versions offer the advantage of knowing exactly what goes into them, allowing for potential ingredient adjustments to align with dietary preferences. Here’s an approximate look at the nutrition facts for a single Faux Oreo Cookie.
(Approximate Nutrition Facts Per Cookie – Recipe yields approximately 30-36 cookies)
- Serving Size: 1 cookie
- Calories: 120-150 calories (depending on filling amount and cookie size)
- Total Fat: 7-9 grams
- Saturated Fat: 4-6 grams (depending on butter and shortening amounts)
- Trans Fat: 0 grams (from vegetable shortening, check label for specific brands)
- Monounsaturated Fat: 2-3 grams
- Polyunsaturated Fat: 1-2 grams
- Cholesterol: 15-20 mg
- Sodium: 50-70 mg
- Total Carbohydrate: 15-20 grams
- Dietary Fiber: 0.5-1 gram
- Sugars: 9-12 grams (primarily from granulated and powdered sugar)
- Protein: 1-2 grams
Important Notes on Nutrition:
- Serving Size Matters: These nutrition facts are for a single cookie. It’s easy to eat more than one, so be mindful of portion sizes to manage your calorie and nutrient intake.
- Homemade vs. Store-Bought: While these are “Faux” Oreos, homemade versions generally offer more control over ingredients. You can choose higher quality ingredients, control the amount of sugar slightly, and avoid certain additives or preservatives found in some store-bought cookies. However, calorie and fat content will be comparable to regular Oreos due to the nature of the ingredients (butter, sugar, shortening).
- Fat Content: The fat content is relatively high, primarily from butter and shortening. While some fats are necessary for flavor and texture, consume in moderation.
- Sugar Content: The sugar content is also significant, coming from both granulated sugar in the cookies and powdered sugar in the filling. Enjoy these cookies as an occasional treat rather than an everyday snack.
- Fiber and Protein: Fiber and protein content are relatively low, typical for cookies. These cookies are primarily a source of carbohydrates and fats, not significant sources of fiber or protein.
- Dutch-Processed Cocoa: Using Dutch-processed cocoa powder may offer slightly higher levels of certain antioxidants compared to natural cocoa powder.
- Ingredient Adjustments (Potential Healthier Swaps):
- Butter Substitution: You could experiment with substituting some of the butter with unsweetened applesauce or mashed banana in the cookie dough to reduce fat, but this may slightly alter the texture.
- Sugar Reduction: You could slightly reduce the granulated sugar in the cookies and powdered sugar in the filling, but be mindful that sugar impacts both sweetness and texture.
- Whole Wheat Flour (Partial): You could try substituting a portion of the all-purpose flour with whole wheat pastry flour for a slight increase in fiber, but this may also alter the texture and could make the cookies slightly denser.
Mindful Indulgence:
Faux Oreo Cookies are a treat to be enjoyed in moderation. They are perfect for special occasions, celebrations, or simply satisfying a sweet craving. Being aware of the nutrition facts allows you to make informed choices and enjoy these homemade delights as part of a balanced lifestyle. Focus on savoring each cookie and appreciating the homemade effort and delicious flavor!
Preparation Time: From Craving to Cookie in Under 3 Hours
While Faux Oreo Cookies require a few steps and chilling time, the active preparation is relatively straightforward, making them a manageable baking project even for busy individuals. From start to finish, including chilling time, you can have a batch of these homemade treats ready to enjoy in under 3 hours. Let’s break down the preparation time into different stages to give you a clear picture:
Total Preparation Time: Approximately 2 hours 45 minutes (including chilling)
This total time includes both the active time you spend preparing the cookies and the passive time for chilling and baking. Here’s a breakdown of the different stages:
- Prep Time (Active Time): 45-50 minutes
- Dry Ingredients Whisking: 5 minutes
- Creaming Butter, Shortening, and Sugar: 5-7 minutes
- Adding Egg and Vanilla: 2 minutes
- Gradually Adding Dry Ingredients and Coffee: 10 minutes
- Dough Dividing and Chilling Prep: 3-5 minutes
- Cream Filling Making: 15-20 minutes
- Chilling Time (Passive Time): 1-2 hours
- Dough Chilling: 1-2 hours (minimum 1 hour, up to 2 hours for firmer dough)
- Baking Time (Oven Time): 15-20 minutes (per batch)
- Rolling, Cutting, and Baking Cookies (per batch): 15-20 minutes per baking sheet, depending on oven and batch size. You may need to bake in multiple batches depending on the size of your oven and baking sheets.
- Cooling Time (Passive Time): 30-40 minutes
- Cookie Cooling: 30-40 minutes (cookies need to cool completely before filling)
- Assembly Time (Active Time): 15-20 minutes
- Filling and Sandwiching Cookies: 15-20 minutes, depending on batch size and piping vs. spreading method.
Factors Affecting Preparation Time:
- Chilling Time: The chilling time is the longest passive stage. You can shorten it to a minimum of 1 hour if needed, but longer chilling (up to 2 hours) will make the dough firmer and easier to handle.
- Cookie Cutting Speed: Your speed at rolling out dough and cutting out cookies will affect the baking time. Using cookie cutters efficiently and re-rolling scraps quickly can help speed up this process.
- Oven Baking Time: Baking times may vary slightly depending on your oven and the thickness of your cookies. Keep an eye on the cookies and adjust baking time accordingly.
- Filling Method: Piping the filling can be slightly faster than spreading it with a knife or spatula, especially for larger batches.
Tips for Streamlining Preparation:
- Make Dough Ahead: You can make the cookie dough up to 2 days in advance and store it wrapped in plastic wrap in the refrigerator. This allows you to break up the preparation into stages.
- Make Filling Ahead: The cream filling can also be made a day ahead and stored in an airtight container in the refrigerator. Let it soften slightly at room temperature before using.
- Chill Dough Efficiently: Flattening the dough into discs before chilling helps it chill faster and more evenly compared to chilling a ball of dough.
- Work in Batches: While one batch of cookies is baking, you can be rolling out and cutting the next batch to maximize efficiency.
- Enlist Helpers: Baking is more fun with company! Enlist family members or friends to help with rolling, cutting, filling, and assembling the cookies to speed up the process and make it a collaborative activity.
While Faux Oreo Cookies require a bit of time, the majority of it is passive chilling and baking time. The active hands-on time is less than an hour, making it a manageable project for a weekend afternoon or evening. The reward of homemade, delicious Faux Oreo Cookies is well worth the effort!
How to Serve Faux Oreo Cookies: Black and White, Endless Delight
Faux Oreo Cookies, with their iconic black and white appearance and irresistible flavor, are a treat that can be enjoyed in countless ways. From classic pairings to creative desserts, these homemade cookies are incredibly versatile and perfect for any occasion. Here are some delightful ways to serve and enjoy your Faux Oreo Cookies:
Classic and Simple Servings:
- With a Tall Glass of Milk: The quintessential Oreo pairing! Serve Faux Oreo Cookies with a cold glass of milk (dairy or non-dairy) for a timeless and satisfying snack. Dipping them in milk softens the cookies slightly and creates a perfect creamy, chocolatey bite.
- On a Cookie Platter: Faux Oreo Cookies make a visually stunning addition to any cookie platter. Their contrasting black and white appearance adds elegance and appeal. Arrange them alongside other homemade cookies for a delightful dessert spread.
- In a Lunchbox Treat: Individually wrap a few Faux Oreo Cookies and tuck them into lunchboxes for a special homemade treat that kids and adults alike will appreciate.
- After-Dinner Dessert: Serve a small plate of Faux Oreo Cookies as a simple and satisfying dessert after dinner. Their rich chocolate flavor is a perfect way to end a meal.
- Party Snack: Faux Oreo Cookies are always a crowd-pleaser at parties and gatherings. Their familiar flavor and fun appearance make them a hit with guests of all ages.
Elevated and Creative Servings:
- Oreo Milkshakes: Crumble Faux Oreo Cookies into a vanilla milkshake for an extra decadent and Oreo-flavored milkshake. Blend until smooth and creamy, and top with whipped cream and more cookie crumbles.
- Oreo Ice Cream Sandwiches: Use Faux Oreo Cookies as the base for homemade ice cream sandwiches. Sandwich a scoop of vanilla, chocolate, or cookies and cream ice cream between two cookies and freeze until firm.
- Oreo Cookie Crumb Crusts: Crush Faux Oreo Cookies (wafers only, or whole cookies for a sweeter crust) to make a delicious and flavorful crust for pies, cheesecakes, or tarts.
- Oreo Dessert Parfaits: Layer crumbled Faux Oreo Cookies with layers of pudding, whipped cream, chocolate mousse, or fruit in parfaits or dessert cups for an elegant and layered dessert.
- Oreo Cookie Balls/Truffles: Crumble Faux Oreo Cookies finely and mix with cream cheese or frosting to create Oreo cookie balls or truffles. Roll into balls, dip in melted chocolate, and decorate for a decadent treat.
- Oreo Brownie or Blondie Swirls: Swirl coarsely chopped Faux Oreo Cookies into brownie or blondie batter before baking for added texture and flavor.
- Oreo Cookie Cake/Cupcakes: Crumble Faux Oreo Cookies and fold them into cake or cupcake batter for an Oreo-flavored cake or cupcakes. You can also use them as a topping or decoration.
- Decorated Faux Oreos: For special occasions, decorate your Faux Oreo Cookies with melted chocolate drizzles, sprinkles, edible glitter, or colored icing. You can even use edible markers to draw designs on the white filling.
Serving Tips:
- Fresh is Best: Faux Oreo Cookies are best enjoyed within a few days of baking for optimal crispness and creaminess.
- Room Temperature or Chilled: Serve at room temperature for a softer filling or slightly chilled for a firmer filling, depending on your preference.
- Presentation Matters: Arrange cookies attractively on a plate, platter, or in a cookie jar for visual appeal.
- Offer Variety: If serving a cookie platter, offer a variety of cookies alongside Faux Oreos for a diverse and appealing selection.
No matter how you choose to serve them, Faux Oreo Cookies are sure to be a hit. Their familiar flavor, homemade touch, and endless versatility make them a delightful treat for any occasion, from simple snacks to elegant desserts. Get creative and enjoy the black and white bliss!
Additional Tips for Faux Oreo Cookie Perfection
While the recipe for Faux Oreo Cookies is designed to be straightforward, a few extra tips and tricks can help you achieve consistently perfect, delicious, and visually appealing results every time. Here are five essential tips to elevate your Faux Oreo Cookie game:
1. Chill Dough Thoroughly for Easy Handling and Crisp Cookies
- Minimum 1 Hour Chill Time: Chilling the dough is crucial for several reasons. It firms up the butter and shortening, making the dough much easier to roll out without sticking. It also helps to prevent excessive spreading during baking, resulting in cookies with crisp edges and defined shapes. Chill the dough for at least 1 hour, and up to 2 hours for even firmer dough.
- Chill Dough Discs: Dividing the dough into discs and flattening them slightly before chilling helps them chill faster and more evenly compared to chilling a ball of dough.
- Work with Chilled Dough: Work with one disc of chilled dough at a time, keeping the other disc refrigerated until ready to use. This prevents the dough from becoming too soft and sticky while you are rolling and cutting cookies.
- Re-chill if Dough Softens: If at any point the dough becomes too soft to handle while rolling or cutting, return it to the refrigerator for a few minutes to firm up again.
2. Roll Dough Thinly and Evenly for Authentic Oreo Crispness
- ⅛ Inch Thickness: Aim to roll the dough to about ⅛ inch thickness. Thin cookies bake faster and become crisper, mimicking the texture of classic Oreo wafers.
- Even Thickness: Strive for even thickness when rolling out the dough. Uneven thickness can lead to some cookies baking faster and becoming burnt while others are still underbaked.
- Lightly Floured Surface: Roll out the dough on a lightly floured surface to prevent sticking. Use just enough flour to prevent sticking, as too much flour can make the cookies dry.
- Rotate Dough While Rolling: Rotate the dough disc a quarter turn after each roll to ensure even thickness and a round shape.
3. Use Dutch-Processed Cocoa for Authentic Color and Flavor
- Darker Color and Smoother Flavor: Dutch-processed cocoa powder is alkalized, which results in a darker color, smoother flavor, and less acidity compared to natural cocoa powder. It gives Faux Oreo Cookies a more authentic dark color and a less bitter chocolate flavor, closer to the original Oreo taste.
- Natural Cocoa Powder Substitute (with Adjustment): If you only have natural cocoa powder, you can use it, but the cookies will be slightly lighter in color and may have a slightly more acidic flavor. You may want to add a pinch of baking soda (beyond what’s already in the recipe) to help neutralize the acidity of natural cocoa powder and enhance the dark color.
- Fresh Cocoa Powder: Ensure your cocoa powder is fresh for the best flavor and color.
4. Don’t Overbake the Cookies: Bake Until Just Set
- Bake Until Set, Not Browned: Faux Oreo Cookies are meant to be dark and not noticeably browned around the edges. Bake them until they are set and the edges are just starting to look slightly firm. Overbaking will make them dry and brittle.
- Check for Doneness at 12 Minutes: Start checking for doneness around 12 minutes of baking time. Baking time may vary slightly depending on your oven and cookie thickness.
- Slightly Soft When Warm: The cookies may still seem slightly soft when warm from the oven, but they will firm up as they cool.
5. Adjust Filling Consistency for Piping or Spreading Preference
- Piping Consistency: For piping the filling, ensure it is creamy and smooth but firm enough to hold its shape when piped. If the filling is too soft, chill it in the refrigerator for a few minutes to firm up before piping.
- Spreading Consistency: For spreading the filling with a knife or spatula, the filling can be slightly softer. If it’s too stiff, add a tiny splash of milk or cream to thin it out slightly.
- Taste and Adjust Sweetness: Taste the cream filling and adjust the amount of powdered sugar to your sweetness preference. You can add more powdered sugar for a sweeter filling or slightly less for a less sweet filling.
By incorporating these additional tips into your baking process, you’ll be well on your way to creating Faux Oreo Cookies that are not only incredibly delicious but also visually appealing and consistently perfect every time. Enjoy the journey of mastering these homemade black and white treats!
Frequently Asked Questions (FAQs) About Faux Oreo Cookies
Do you have questions about making Faux Oreo Cookies? You’re not alone! Here are five frequently asked questions, along with detailed answers to help you confidently bake these homemade delights.
Q1: Can I make these Faux Oreo Cookies gluten-free?
A: Yes, you can adapt this recipe to make gluten-free Faux Oreo Cookies! The key is to substitute the all-purpose flour with a gluten-free flour blend. Here’s how:
- Gluten-Free Flour Blend: Use a high-quality gluten-free all-purpose flour blend that is designed for baking and contains a mix of flours like rice flour, tapioca starch, and potato starch. Ensure it also contains xanthan gum or guar gum, which act as binders in gluten-free baking.
- Measure Gluten-Free Flour Carefully: Gluten-free flours can behave differently than wheat flour. Measure your gluten-free flour blend carefully, using the spoon and level method.
- Slight Texture Difference: Be aware that gluten-free Faux Oreo Cookies may have a slightly different texture compared to those made with all-purpose flour. They might be slightly more delicate and crumbly, but still delicious.
- Baking Time May Vary: Gluten-free baked goods can sometimes bake slightly faster or slower. Keep an eye on the cookies and adjust baking time as needed, baking until set.
- Recommended Gluten-Free Blend Brands: Some popular and reliable gluten-free all-purpose flour blend brands for baking include Bob’s Red Mill Gluten-Free 1-to-1 Baking Flour, King Arthur Measure for Measure Gluten-Free Flour, and Cup4Cup Multipurpose Gluten-Free Flour.
With a good gluten-free flour blend, you can successfully create delicious Faux Oreo Cookies that are suitable for those following a gluten-free diet.
Q2: Can I make the cream filling less sweet?
A: Yes, you can definitely adjust the sweetness of the cream filling to your preference. The recipe uses a significant amount of powdered sugar for the classic Oreo filling sweetness, but you can easily reduce it. Here are a few ways to make the filling less sweet:
- Reduce Powdered Sugar: Start by reducing the amount of powdered sugar in the filling recipe. You could try reducing it by ½ cup or even 1 cup initially. Taste the filling as you go and add more powdered sugar gradually until you reach your desired sweetness level.
- Add a Pinch More Salt: A tiny pinch more salt can help to balance the sweetness of the filling.
- Lemon Zest or Juice: Adding a tiny amount of lemon zest or a few drops of lemon juice can add a subtle tanginess that cuts through the sweetness of the filling.
- Unsweetened Cocoa Powder (in Filling): For a less sweet and slightly more chocolatey filling, you could add a tablespoon or two of unsweetened cocoa powder to the cream filling. This will also slightly darken the filling color.
- Vanilla Bean Paste (instead of extract): Vanilla bean paste can provide a more intense vanilla flavor, allowing you to potentially reduce the overall sweetness while still maintaining flavor.
Experiment with these adjustments until you find a sweetness level in the cream filling that you enjoy. Remember that the sweetness of the filling is balanced by the slightly less sweet chocolate wafers, so consider the overall sweetness when adjusting.
Q3: My cookie dough is too sticky, what should I do?
A: Sticky cookie dough is a common issue, especially when working with chocolate dough or in warmer environments. Here’s how to handle sticky Faux Oreo Cookie dough:
- Chill Dough Longer: The most common cause of sticky dough is not chilling it long enough. If your dough is sticky, it likely needs more time to chill in the refrigerator. Wrap it tightly in plastic wrap and chill for at least another 30 minutes to an hour, or even longer.
- Flour Your Work Surface and Rolling Pin Generously: When rolling out sticky dough, make sure to generously flour your work surface and your rolling pin. This will help prevent the dough from sticking. Re-flour as needed during rolling.
- Use Parchment Paper for Rolling: You can also try rolling the dough between two sheets of parchment paper. This can help to prevent sticking and make it easier to transfer the cut-out cookies to baking sheets.
- Cold Hands: Work quickly and try to keep your hands cool. Warm hands can soften the butter in the dough and make it stickier. Run your hands under cold water if they get too warm.
- Don’t Add More Flour (Unless Absolutely Necessary): Avoid adding excessive amounts of flour to the dough to try to make it less sticky. Adding too much flour can result in dry, tough cookies. Focus on chilling the dough properly and using flour judiciously for rolling.
Chilling is the most effective solution for sticky cookie dough. Ensure your dough is properly chilled and use flour strategically when rolling to prevent sticking and achieve manageable dough.
Q4: Can I freeze Faux Oreo Cookies (baked or unbaked)?
A: Yes, you can freeze both baked and unbaked Faux Oreo Cookies, although with slightly different approaches:
- Freezing Unbaked Cookie Dough:
- Dough Discs: Wrap the chilled cookie dough discs tightly in plastic wrap, then place them in a freezer-safe bag or container. Freeze for up to 2-3 months.
- Thawing: Thaw the dough in the refrigerator overnight before rolling out, cutting, and baking as directed in the recipe.
- Freezing Baked Cookie Wafers (Unfilled):
- Cool Completely: Ensure the baked cookie wafers are completely cooled before freezing.
- Layer Between Parchment: Layer the cooled wafers between sheets of parchment paper in a freezer-safe container or bag to prevent them from sticking together. Freeze for up to 2-3 months.
- Thawing: Thaw the cookie wafers at room temperature for about 30-60 minutes before filling.
- Freezing Assembled Cookies (Filled):
- Freeze Individually: Freeze assembled Faux Oreo Cookies individually on a baking sheet until solid (about 1-2 hours). This prevents them from sticking together in a bag or container.
- Transfer to Freezer Bag/Container: Once frozen solid, transfer the individual cookies to a freezer-safe bag or container. Freeze for up to 1-2 months.
- Thawing: Thaw assembled cookies in the refrigerator for a few hours or at room temperature for about 30-60 minutes. The filling may soften slightly upon thawing.
Freezing is a great way to prepare Faux Oreo Cookies ahead of time. Baked cookie wafers freeze particularly well and can be filled later when needed. Freezing assembled cookies is also possible, but they are best enjoyed sooner after thawing for optimal texture.
Q5: What are some flavor variations I can try with Faux Oreo Cookies?
A: Faux Oreo Cookies are a fantastic base for flavor experimentation! Here are some delicious flavor variation ideas to try:
- Mint Chocolate Oreos: Add ¼ teaspoon of peppermint extract to the cookie dough and ¼ teaspoon of peppermint extract to the cream filling for a refreshing mint chocolate version. You can also add a few drops of green food coloring to the filling for a visual cue.
- Peanut Butter Oreos: Add ½ cup of creamy peanut butter to the cream filling for a peanut butter twist on the classic.
- Lemon Oreos: Add 1 tablespoon of lemon zest to the cream filling for a bright and citrusy lemon Oreo.
- Coffee Oreos: Add 1 tablespoon of instant coffee granules to the cream filling for a coffee-flavored cream. You can also use coffee extract instead of vanilla extract in the filling.
- Spiced Chocolate Oreos: Add ½ teaspoon of cinnamon, ¼ teaspoon of ground ginger, and a pinch of nutmeg to the cookie dough for a warm and spiced chocolate flavor.
- Double Chocolate Oreos: Add ¼ cup of mini chocolate chips to the cookie dough for extra chocolatey cookies.
- Caramel Swirl Oreos: Swirl caramel sauce into the cream filling for a decadent caramel Oreo variation.
- Different Extracts: Experiment with other extracts in the cookie dough or filling, such as almond extract, orange extract, or hazelnut extract, to create unique flavor profiles.
Get creative and explore different flavor combinations to personalize your Faux Oreo Cookies and discover your own signature variations! The possibilities are endless when you start experimenting with flavors in both the cookie wafers and the cream filling.
Print
Faux Oreo Cookies Recipe
Ingredients
- For the Chocolate Wafers:
- All-Purpose Flour (2 cups): The foundation of our cookie structure. All-purpose flour provides the necessary gluten development for a slightly chewy yet crisp cookie. It’s important to measure your flour correctly – spoon it into your measuring cup and level it off with a straight edge, rather than scooping directly from the bag, which can lead to using too much flour and drier cookies. For a slightly more tender cookie, you can substitute a tablespoon or two of all-purpose flour with cornstarch.
- Unsweetened Cocoa Powder (¾ cup, Dutch-processed preferred): The heart of the intense chocolate flavor and the signature dark color of Oreo wafers. Dutch-processed cocoa powder is alkalized, resulting in a darker color, smoother flavor, and less acidity compared to natural cocoa powder. While natural cocoa powder will also work, Dutch-processed will give you a more authentic Oreo color and flavor. Ensure your cocoa powder is fresh for the best flavor.
- Granulated Sugar (1 ½ cups): Sweetness and tenderness in the cookie dough. Granulated sugar not only sweetens the wafers but also contributes to their crisp texture by inhibiting gluten development and promoting browning. The amount of sugar is balanced to create cookies that are sweet but not overwhelmingly so, allowing the chocolate flavor to shine.
- Unsalted Butter, softened (½ cup, 1 stick): Richness, flavor, and tenderness. Butter adds fat to the dough, which contributes to a tender crumb and a melt-in-your-mouth texture. Using unsalted butter allows you to control the overall salt level in the recipe. Ensure your butter is properly softened – it should be pliable but still cool to the touch, not melted or greasy.
- Vegetable Shortening (½ cup): Crispness and tender texture. Vegetable shortening, with its 100% fat content and lack of water, contributes significantly to the crispness of the cookies. It also helps to prevent excessive spreading during baking and creates a more tender texture compared to using all butter. You can use all butter if you prefer, but the cookies will be slightly less crisp and may spread more.
- Large Egg (1): Binds the dough and adds richness. The egg helps to emulsify the fat and liquid in the dough, creating a cohesive mixture. It also adds a touch of richness and contributes to the overall texture of the cookies.
- Vanilla Extract (1 teaspoon): Flavor enhancer. Vanilla extract enhances the chocolate flavor and adds a subtle warmth to the cookies. Use pure vanilla extract for the best flavor, or substitute with vanilla bean paste for an even more intense vanilla aroma.
- Baking Soda (1 teaspoon): Leavening agent and flavor enhancer. Baking soda helps to leaven the cookies, giving them a slightly lighter texture. It also reacts with the cocoa powder to enhance the chocolate flavor and contribute to the dark color.
- Salt (½ teaspoon): Flavor enhancer. Salt balances the sweetness and enhances all the other flavors in the cookies, particularly the chocolate. Don’t skip the salt, even in sweet recipes, as it plays a crucial role in flavor development.
- Hot Coffee (¼ cup): Liquid and flavor enhancer. Hot coffee adds moisture to the dough, helping to bring it together. More importantly, it intensifies the chocolate flavor of the cocoa powder, creating a richer and more complex chocolate taste. Use freshly brewed hot coffee for the best flavor. You can substitute with hot water if you don’t want to use coffee, but the chocolate flavor will be slightly less pronounced.
- For the Cream Filling:
- Unsalted Butter, softened (½ cup, 1 stick): Base of the creamy filling. Butter provides the richness and structure for the filling. Again, ensure your butter is properly softened for smooth creaming.
- Vegetable Shortening (½ cup): Stabilizes the filling and creates a whiter color. Vegetable shortening helps to stabilize the buttercream filling, making it less likely to melt at room temperature. It also contributes to a whiter color, mimicking the classic Oreo filling. You can use all butter for the filling if preferred, but it will be slightly softer and more yellow in color.
- Powdered Sugar (3 cups): Sweetness and structure for the filling. Powdered sugar is the primary sweetener and thickening agent for the buttercream filling. Sift your powdered sugar before measuring to remove any lumps and ensure a smooth filling.
- Vanilla Extract (2 teaspoons): Flavor enhancer for the filling. Vanilla extract provides the classic sweet vanilla flavor of Oreo cream filling. Use pure vanilla extract for the best flavor, or substitute with vanilla bean paste for a more intense vanilla aroma.
- Pinch of Salt: Balances the sweetness of the filling. A tiny pinch of salt helps to balance the sweetness of the powdered sugar and enhance the vanilla flavor in the filling.
Instructions
Part 1: Making the Chocolate Wafers
- Whisk Dry Ingredients: In a medium bowl, whisk together the all-purpose flour, cocoa powder, baking soda, and salt. Whisking ensures that these dry ingredients are evenly distributed and prevents clumps of cocoa powder or baking soda in your dough. Set aside this bowl of dry ingredients for later.
- Cream Butter, Shortening, and Sugar: In a large bowl (or the bowl of a stand mixer fitted with the paddle attachment), cream together the softened butter, vegetable shortening, and granulated sugar until light and fluffy. This step is crucial for incorporating air into the dough, which contributes to a tender cookie texture. Cream for 2-3 minutes, scraping down the sides of the bowl as needed, until the mixture is pale and noticeably lighter in texture.
- Beat in Egg and Vanilla: Beat in the egg and vanilla extract until fully incorporated. Beat until the egg is completely mixed into the creamed mixture and the batter is smooth and emulsified.
- Gradually Add Dry Ingredients: Gradually add the dry ingredients to the wet ingredients, mixing on low speed until just combined. Add the dry ingredients in two or three additions, mixing until just incorporated after each addition. Be careful not to overmix at this stage, as overmixing can develop gluten and result in tougher cookies. Mix until just combined, and a few streaks of flour are okay at this point.
- Stir in Hot Coffee: Gradually stir in the hot coffee until the dough comes together. The hot coffee will help to hydrate the cocoa powder and bring the dough together into a cohesive mass. Mix until the dough is smooth and comes together in a ball. It will be a slightly soft dough.
- Divide Dough and Chill: Divide the dough in half, flatten each half into a disc, wrap each disc in plastic wrap, and refrigerate for at least 1 hour (or up to 2 hours). Chilling the dough is essential for making it easier to roll out and prevents the cookies from spreading too much during baking. Chilling also helps to develop the flavors in the dough.
- Preheat Oven and Prepare Baking Sheets: Preheat oven to 325°F (165°C). Line baking sheets with parchment paper or silicone baking mats. Parchment paper or silicone mats prevent the cookies from sticking and ensure even baking.
- Roll Out Dough: On a lightly floured surface, roll out one disc of chilled dough to about ⅛ inch thickness. Work quickly as the dough will soften as it warms. If the dough becomes too soft to handle, return it to the refrigerator for a few minutes to firm up.
- Cut Out Cookies: Use a 1 ½-inch round cookie cutter (or a similar size) to cut out cookies. Cut out as many cookies as possible from the rolled dough. Re-roll scraps and cut out more cookies until all dough is used.
- Bake Cookies: Arrange cookies on prepared baking sheets, leaving about ½ inch space between them. Bake for 12-15 minutes, or until cookies are set and edges are just starting to look slightly firm. Baking time may vary slightly depending on your oven and the thickness of your cookies. Watch them carefully to prevent overbaking.
- Cool Completely: Let cookies cool on baking sheets for a few minutes before transferring them to a wire rack to cool completely. Cooling completely is essential before filling, as warm cookies will melt the cream filling.
Part 2: Making the Cream Filling
- Cream Butter and Shortening: In a large bowl (or the bowl of a stand mixer fitted with the paddle attachment), cream together the softened butter and vegetable shortening until smooth and creamy. Cream for 1-2 minutes until the mixture is light and fluffy.
- Gradually Add Powdered Sugar: Gradually add the powdered sugar to the butter and shortening mixture, beating on low speed until combined. Add the powdered sugar in additions, mixing until incorporated after each addition to prevent a cloud of powdered sugar. Once all powdered sugar is added, increase speed to medium and beat until light and fluffy, scraping down the sides of the bowl as needed.
- Beat in Vanilla and Salt: Beat in the vanilla extract and salt until fully incorporated. Beat for another minute until the filling is smooth, creamy, and well combined.
Part 3: Assembling the Faux Oreo Cookies
- Pipe or Spread Filling: Transfer the cream filling to a piping bag fitted with a round tip (optional, you can also spread the filling with a knife or small spatula). Pipe or spread a generous amount of cream filling onto the flat side of one cooled cookie wafer.
- Top with Second Wafer: Gently top with a second cooled cookie wafer, flat side down, pressing lightly to sandwich the filling.
- Repeat: Repeat with remaining cookie wafers and cream filling until all cookies are assembled.
- Chill (Optional): For a firmer filling, you can chill the assembled cookies in the refrigerator for about 15-20 minutes before serving. This is especially helpful if your kitchen is warm or if you prefer a firmer filling texture.
- Serve and Enjoy: Serve your Faux Oreo Cookies and enjoy the homemade goodness of these delightful black and white treats! They are best enjoyed within a few days for optimal crispness and creaminess.
Nutrition
- Serving Size: one normal portion
- Calories: 120-150
- Sugar: 9-12 grams
- Sodium: 50-70 mg
- Fat: 7-9 grams
- Saturated Fat: 4-6 grams
- Carbohydrates: 15-20 grams
- Fiber: 0.5-1 gram
- Protein: 1-2 grams
- Cholesterol: 15-20 mg


