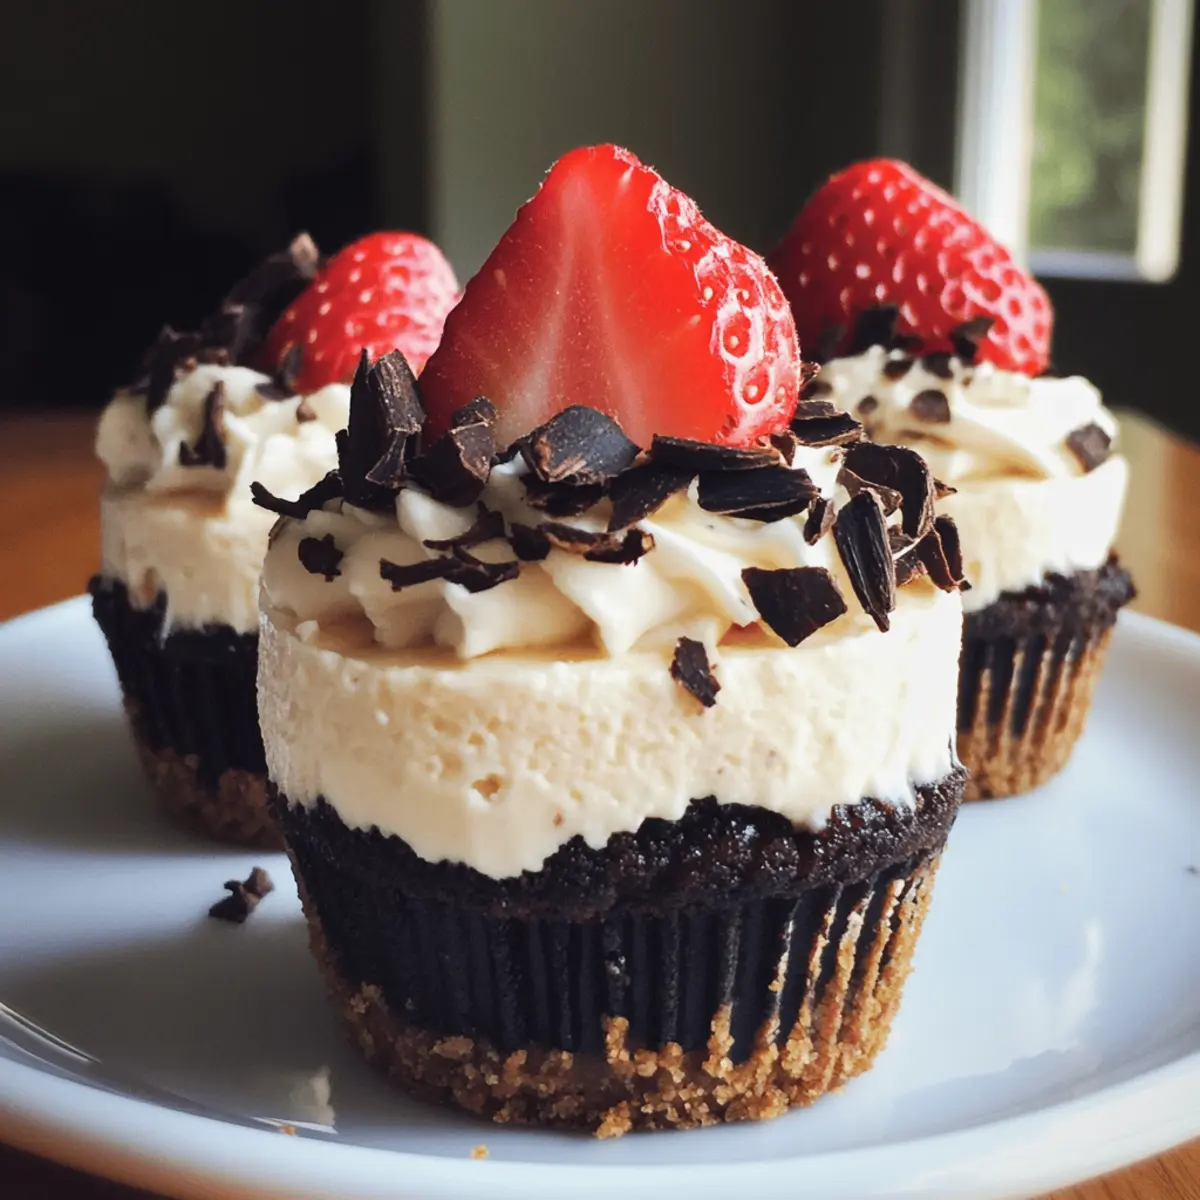
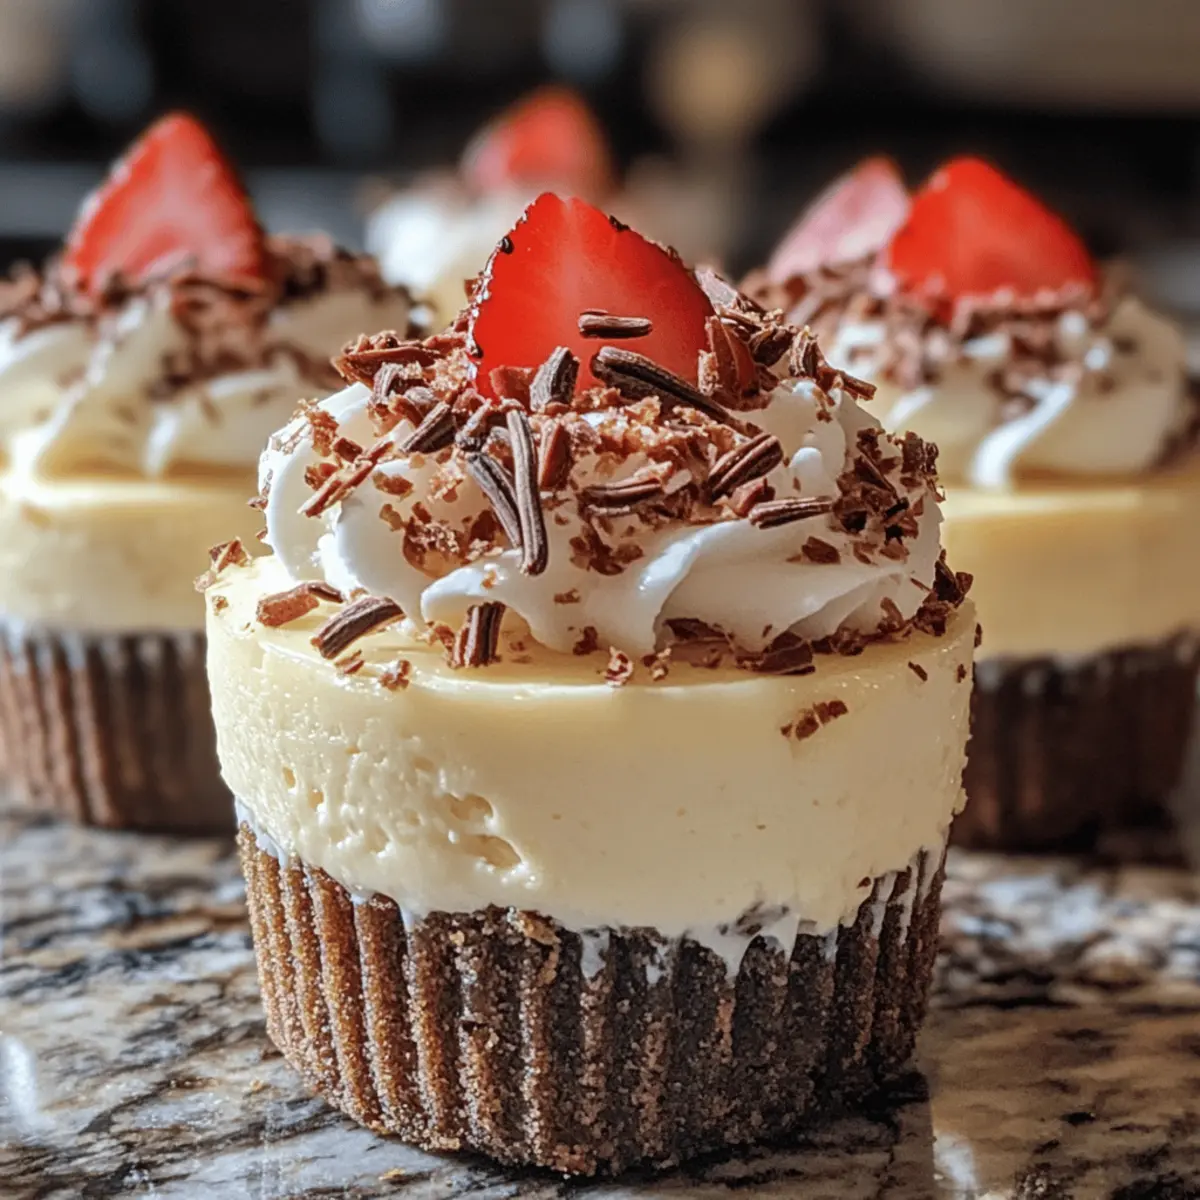
There’s something irresistible about the creamy, dreamy texture of a perfectly crafted cheesecake—yet who has the patience (or an oven free!) for baking one? That’s exactly why I fell in love with these No-Bake Vanilla Bean Cheesecake Cups. Each luscious bite bursts with rich vanilla notes and a velvety smoothness that feels indulgent but comes together in just minutes. Whether you’re craving a simple homemade dessert after a long day or need an elegant yet effortless treat for guests, these cups strike the perfect balance between ease and elegance. Trust me, once you try them, you’ll wonder why every cheesecake isn’t a no-bake one!
Why choose No-Bake Vanilla Bean Cheesecake Cups?
Effortless Prep: No oven needed, making dessert stress-free and quick. Creamy Bliss: Silky smooth texture paired with pure vanilla bean flavor feels luxurious. Versatile Elegance: Perfect for casual nights or fancy gatherings alike. Make-Ahead Friendly: Prepare in advance to save time and impress guests. Crowd-Pleaser: Light yet indulgent, these cups satisfy sweet cravings without heaviness.
Easy No-Bake Vanilla Bean Cheesecake Cups Ingredients
For the Crust
- Graham cracker crumbs – Use finely crushed crackers for a crisp, buttery base.
- Unsalted butter – Melted to bind the crumbs and add richness without overpowering.
- Granulated sugar – Adds just a touch of sweetness and balances the buttery crust.
For the Cheesecake Filling
- Cream cheese – Softened to room temperature for a perfectly smooth texture in your No-Bake Vanilla Bean Cheesecake Cups.
- Heavy cream – Whipped gently to lend lightness and luscious creaminess.
- Granulated sugar – Sweetens the filling without masking the vanilla bean flavor.
- Vanilla bean paste or seeds – The star ingredient, infusing each bite with natural, aromatic vanilla essence.
- Lemon juice – A tiny splash brightens and balances the richness beautifully.
For Garnish
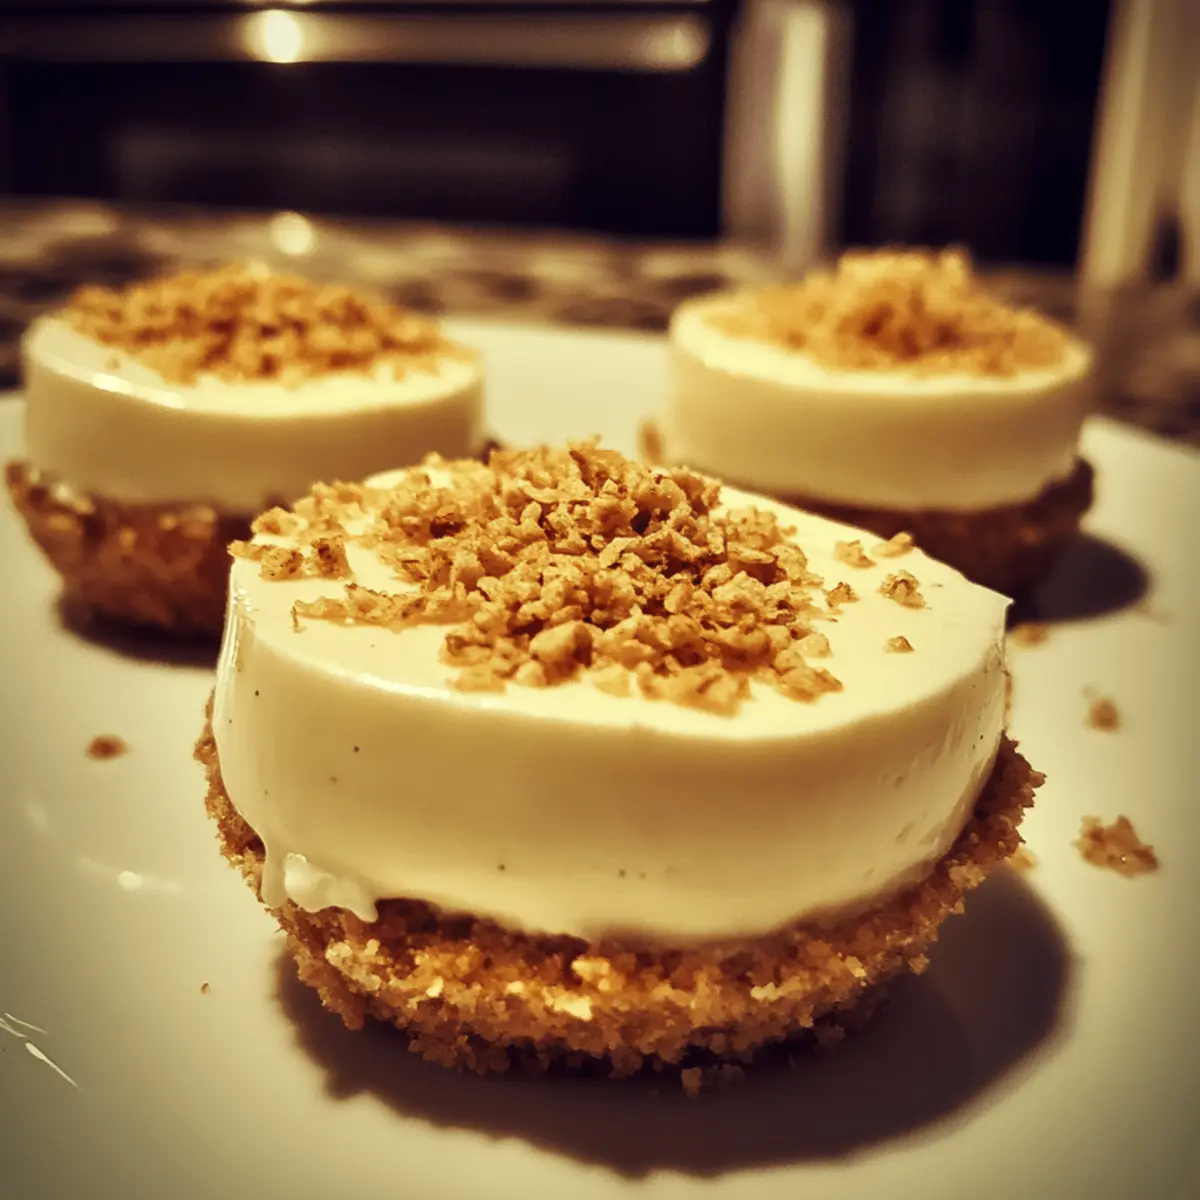
- Fresh berries or fruit slices – Adds a burst of color and a fresh contrast to the creamy cups.
- Mint leaves – Optional, for a pop of freshness and pretty presentation.
How to Make No-Bake Vanilla Bean Cheesecake Cups
- Mix: Combine graham cracker crumbs, melted butter, and granulated sugar in a bowl. Stir until you achieve a damp, sandy texture ready to form a crisp base.
- Press: Divide crust mixture among serving cups, pressing firmly with the bottom of a spoon to create an even, compact layer just 1/4-inch thick.
For the Filling:
- Whip: Beat softened cream cheese in a large bowl on medium speed until smooth and lump-free, about 2 minutes, for that perfect creamy texture.
- Add & Blend: Stir in granulated sugar and vanilla bean seeds until the mixture turns glossy and aromatic, about 1 minute.
- Whip Cream: In a separate bowl, whip cold heavy cream on high until soft peaks form, about 1–2 minutes.
- Fold: Gently fold the whipped cream into the cream cheese base using a rubber spatula, combining until just incorporated and airy without deflating the mixture.
- Assemble & Chill: Spoon cheesecake filling over the crust in each cup, smoothing tops. Refrigerate until firm, about 2 hours or overnight for best results.
- Decorate: Just before serving, top each cheesecake cup with fresh berries and mint leaves for a vibrant finish.
Optional: Serve with a drizzle of honey or chocolate sauce.
Exact quantities are listed in the recipe card below.
Expert Tips for No-Bake Vanilla Bean Cheesecake Cups
- Soften Cream Cheese Properly: Leave cream cheese at room temperature for at least 30 minutes to ensure a smooth, lump-free filling in your No-Bake Vanilla Bean Cheesecake Cups.
- Use Fresh Vanilla Beans: Vanilla bean paste or seeds provide richer flavor than extract; avoid artificial vanilla to keep your dessert naturally aromatic.
- Don’t Overwhip Cream: Whip heavy cream just until soft peaks form to maintain a light, airy texture—overwhipping will turn it grainy and stiff.
- Press Crust Firmly: Ensure the graham cracker crust is tightly packed and even to prevent it from crumbling when serving.
- Chill Thoroughly: Refrigerate cheesecake cups for at least 2 hours to let the filling set perfectly; overnight chilling improves texture and flavor melding.
- Be Gentle Folding: Fold whipped cream into cream cheese base slowly to keep the mixture fluffy and avoid deflating your creamy bliss.
Variations & Substitutions for No-Bake Vanilla Bean Cheesecake Cups
Feel free to customize these cheesecake cups to suit your taste or dietary needs!
-
Gluten-Free Crust: Substitute graham cracker crumbs with gluten-free cookies or almond flour for a crisp base.
-
Dairy-Free Option: Use dairy-free cream cheese and coconut whipped cream for a luscious vegan twist while keeping the creamy heart intact.
-
Flavor Infusions: Replace vanilla bean paste with chocolate, matcha, or fruit puree for a fun flavor adventure. Imagine the rich, chocolatey notes mingling with the creamy base!
-
Sweetness Adjustments: Use honey or maple syrup instead of granulated sugar for a natural sweetener that adds a touch of finesse.
-
Nutty Crunch: Add crushed nuts, like almonds or pecans, to the crust for an extra layer of flavor and texture.
-
Zesty Twist: Incorporate orange or lime zest in the filling for a refreshing burst that dances on your palate.
-
Fruit Swirls: Fold in fresh or pureed fruits, such as raspberries or strawberries, in the cheesecake mixture for a beautiful marbled effect and added fruity deliciousness.
-
Spicy Kick: For those who enjoy heat, consider adding a pinch of cayenne or chili powder to the filling for a surprising and delightful flavor contrast.
Make Ahead Options
These No-Bake Vanilla Bean Cheesecake Cups are perfect for busy home cooks looking to save time while still serving an indulgent treat! You can prepare the crust up to 3 days in advance and store it in an airtight container at room temperature to maintain its crispiness. The cheesecake filling can be made ahead as well; simply mix and refrigerate it for up to 24 hours. When you’re ready to assemble, spoon the chilled filling over the crusts, allow them to set in the refrigerator for at least 2 hours, and garnish with fresh berries just before serving. This way, you’ll have a delightful dessert ready with minimal last-minute effort!
What to Serve with No-Bake Vanilla Bean Cheesecake Cups?
Transform your delightful cheesecake cups into a full-fledged meal experience with these perfect pairings that enhance each creamy bite.
- Fresh Berries: Juicy strawberries, blueberries, or raspberries add a burst of color and tartness, balancing the sweetness of the cheesecake.
- Mint Sprigs: A touch of fresh mint will invigorate your dessert’s presentation and provide a refreshing hint, elevating the flavors.
For an elevated dessert, pair the cheesecake with a cup of fragrant herbal tea or a glass of sparkling water to cleanse the palate after each rich bite.
- Chocolate Drizzle: A luxurious pour of melted chocolate over the cups creates an indulgent touch and deepens the flavor profile.
- Whipped Cream: A dollop of freshly whipped cream adds extra lightness, making each bite feel even more sumptuous.
Why not consider serving these with homemade graham cracker cookies? They provide a delightful crunch and can be used to scoop up the cheesecake filling as a fun interactive treat!
How to Store and Freeze No-Bake Vanilla Bean Cheesecake Cups
Fridge: Keep your cheesecake cups covered in an airtight container and stored in the fridge for up to 3 days.
Freezer: For longer storage, freeze the cheesecake cups in a single layer, covered tightly with plastic wrap, for up to 1 month.
Thawing: When ready to enjoy, simply transfer them to the fridge to thaw overnight.
Serving: Serve chilled and add fresh toppings just before serving for the best appearance and flavor.

No-Bake Vanilla Bean Cheesecake Cups Recipe FAQs
What’s the best way to select cream cheese for these cheesecake cups?
Always choose full-fat, block-style cream cheese for a rich and creamy texture. Avoid whipped or low-fat versions, as they can affect the smoothness and structure of your No-Bake Vanilla Bean Cheesecake Cups.
How long can I store the cheesecake cups in the refrigerator?
You can safely store these cheesecake cups in an airtight container in the fridge for up to 3 days. Beyond that, the crust may soften and the texture can change, so I recommend enjoying them fresh or within this timeframe for the best experience.
Can I freeze No-Bake Vanilla Bean Cheesecake Cups? How?
Absolutely! Freeze the cups individually or in a single layer on a tray, tightly covered with plastic wrap and then placed in an airtight container or freezer bag. Freeze for up to 1 month. When ready, transfer to the fridge overnight to thaw gently—this helps maintain their creamy texture and prevents condensation.
My crust is crumbly and falls apart when serving. How can I fix this?
This usually means the crust wasn’t pressed firmly enough. Next time, press the graham cracker mixture firmly and evenly into the cup bottoms with the back of a spoon or your fingers. Also, ensure the melted butter is well combined to help bind the crumbs together. Chill thoroughly before filling to help it set.
Are these cheesecake cups safe for pets or suitable for special diets?
While delicious for humans, these treats aren’t suitable for pets due to ingredients like cream cheese and sugar. For dairy-free or vegan options, consider substituting with plant-based cream cheese and coconut cream, but be aware this will slightly change the flavor and texture of your No-Bake Vanilla Bean Cheesecake Cups.
Easy No-Bake Vanilla Bean Cheesecake Cups with Creamy Bliss
Ingredients
Equipment
Method
- Combine graham cracker crumbs, melted butter, and granulated sugar in a bowl. Stir until you achieve a damp, sandy texture.
- Divide crust mixture among serving cups and press firmly to create an even layer 1/4-inch thick.
- Beat softened cream cheese in a large bowl on medium speed until smooth and lump-free, about 2 minutes.
- Stir in granulated sugar and vanilla bean seeds until glossy and aromatic, about 1 minute.
- Whip cold heavy cream on high until soft peaks form, about 1–2 minutes.
- Gently fold whipped cream into the cream cheese base until just incorporated.
- Spoon cheesecake filling over the crust in each cup, smoothing tops. Refrigerate until firm, about 2 hours or overnight.
- Top each cup with fresh berries and mint leaves before serving.