

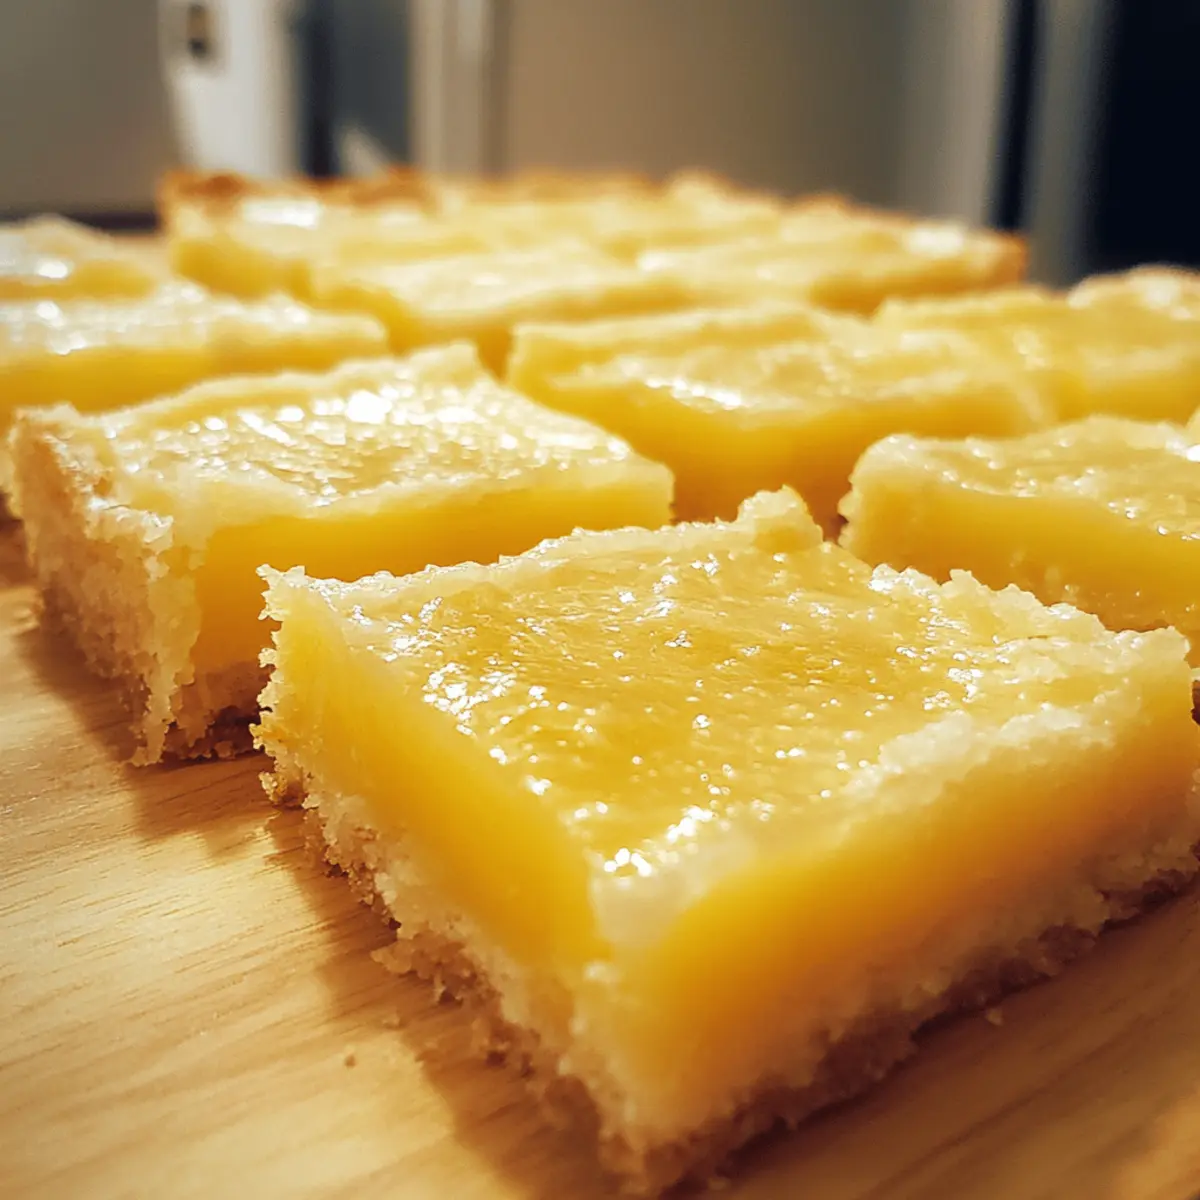
The bright zing of fresh lemon combined with a buttery, tender crust—that’s what makes these gluten-free lemon bars an irresistible treat. Just the aroma alone can brighten up any afternoon, reminding me of sunny weekends spent baking with loved ones. What’s truly wonderful about this recipe is how it transforms simple, wholesome ingredients into something so decadently refreshing, without a hint of gluten. Whether you’re hosting friends or craving a guilt-free indulgence, these lemon bars are as easy to make as they are delightful to devour. Let me show you how to bring a slice of sunshine into your kitchen!
Why choose Gluten-Free Lemon Bars?
Bright Flavor: These bars burst with zesty lemon goodness that wakes up your taste buds. Simple Ingredients: Made with easy-to-find, wholesome components perfect for any home cook. Gluten-Free Delight: Enjoy a classic treat without the gluten, ideal for sensitive diets. Quick Prep: Whip them up in no time, perfect for busy days. Crowd-Pleaser: Their refreshing tang and tender crust make them an irresistible hit at any gathering.
Gluten-Free Lemon Bars Ingredients
For the Crust
- Almond Flour – provides a naturally nutty, gluten-free base that keeps the crust tender and rich.
- Coconut Sugar – adds subtle sweetness without overpowering the lemon’s brightness.
- Unsalted Butter – chilled and cubed to create a flaky, buttery texture.
- Salt – just a pinch to balance flavors and enhance sweetness.
For the Lemon Filling
- Fresh Lemon Juice – the star ingredient delivering that bold, tangy zing essential to gluten-free lemon bars.
- Eggs – help set the lemon filling with a smooth, custardy finish.
- Granulated Sugar – sweetens while allowing the lemon flavor to shine through.
- Gluten-Free All-Purpose Flour – a small amount to give the filling structure without gluten.
- Lemon Zest – boosts the fresh citrus aroma and flavor for an irresistible punch.
For Garnish
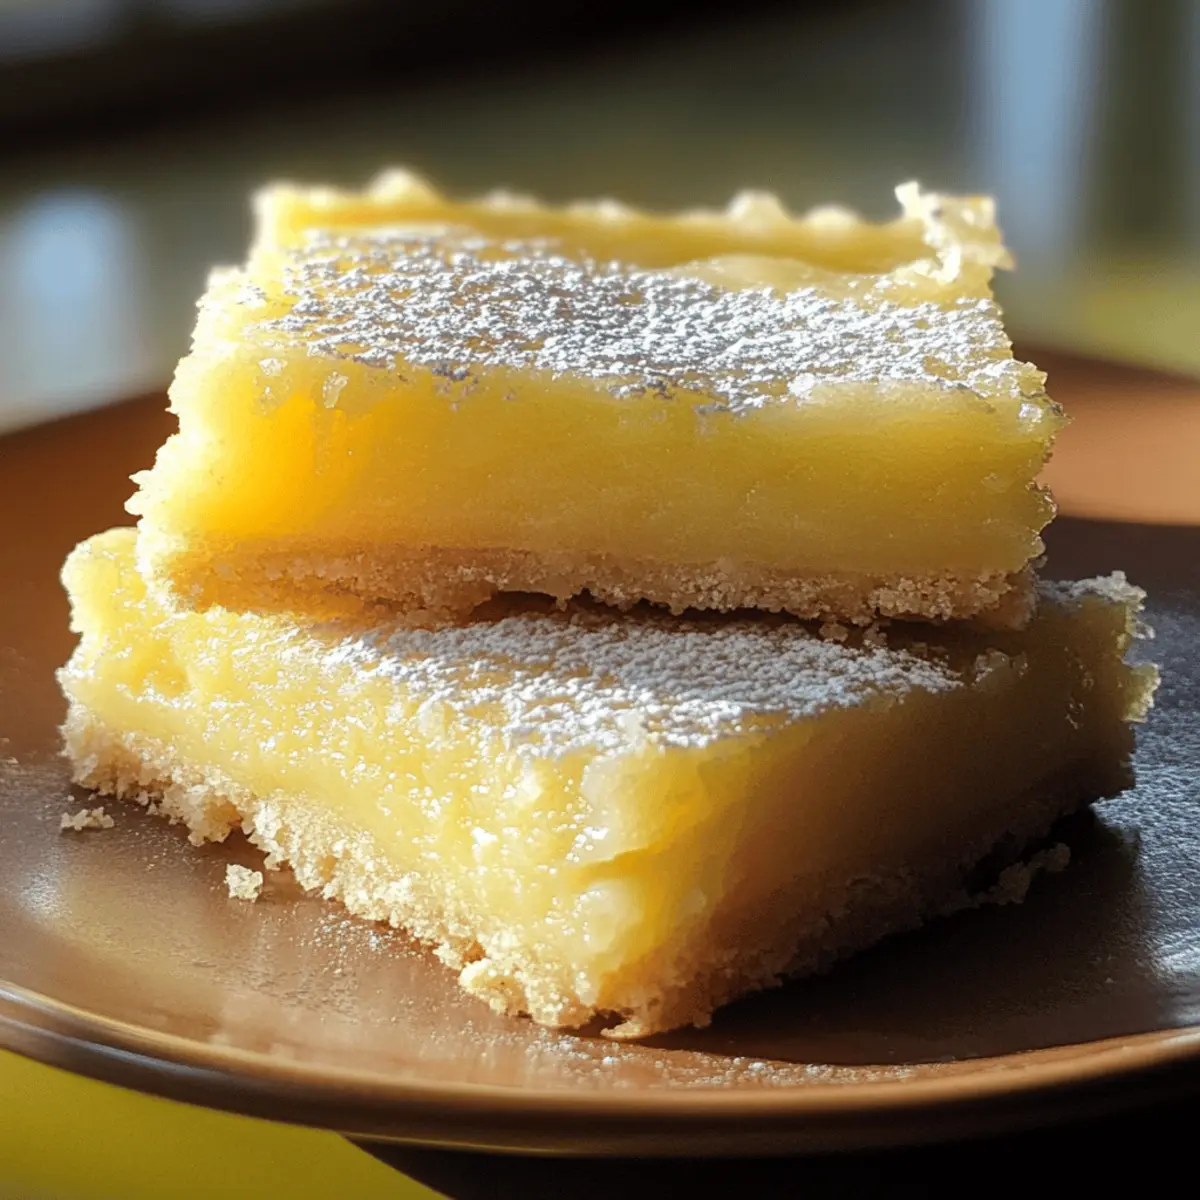
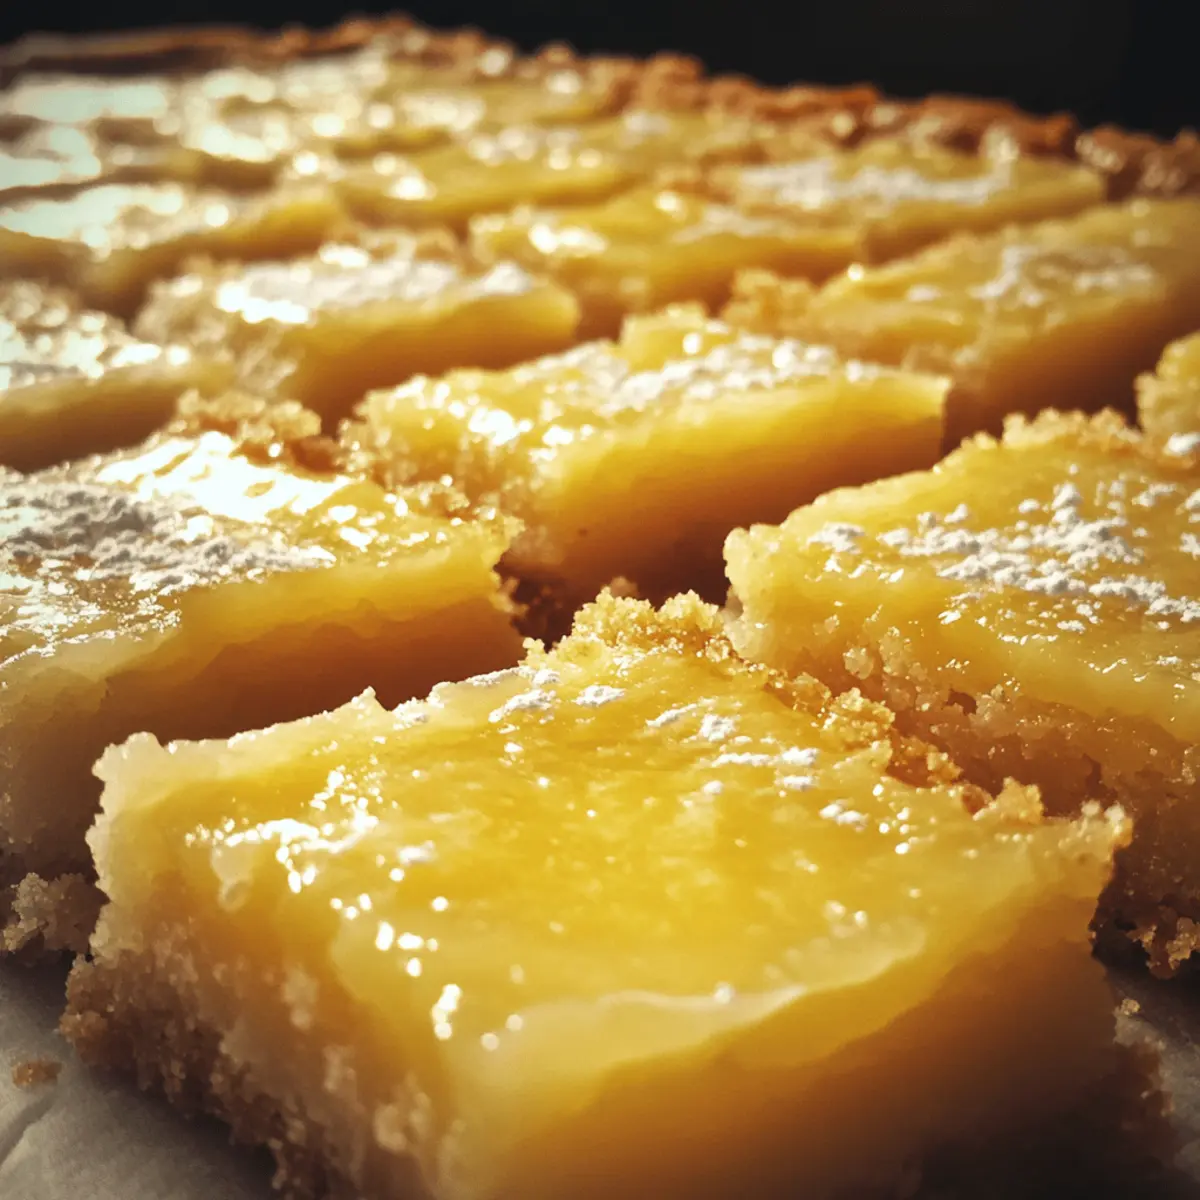
- Powdered Sugar – a light dusting that adds just the right touch of sweetness and elegance.
How to Make Gluten-Free Lemon Bars
- Preheat Oven: Warm your oven to 350°F so it’s ready to bake a tender, golden crust. Proper heat ensures your bars turn out perfectly crisp and chewy.
- Combine Dry Ingredients: In a mixing bowl, stir almond flour, coconut sugar, and a pinch of salt until the mixture looks evenly crumbly, like fine sand.
- Press Crust: Transfer crumbs into an 8×8-inch pan, then use your fingers or a flat-bottomed cup to press the mixture firmly into an even layer.
- Bake Crust: Slide the pan into the oven and bake for 15–18 minutes, until the edges are lightly golden brown and the center feels set to the touch.
For the Lemon Filling:
- Whisk Filling: In a clean bowl, vigorously whisk eggs, granulated sugar, gluten-free flour, and lemon zest until the mixture turns smooth and slightly pale.
- Add Lemon Juice: Slowly pour in fresh lemon juice, folding gently to preserve airiness, then pour the bright yellow filling over the warm crust.
- Bake Filling: Return the pan to the oven and bake another 20 minutes at 350°F, until the filling is set with a gentle wobble in the center.
- Cool & Chill: Let bars cool in the pan for 30 minutes, then chill in the refrigerator for at least 2 hours until fully firm.
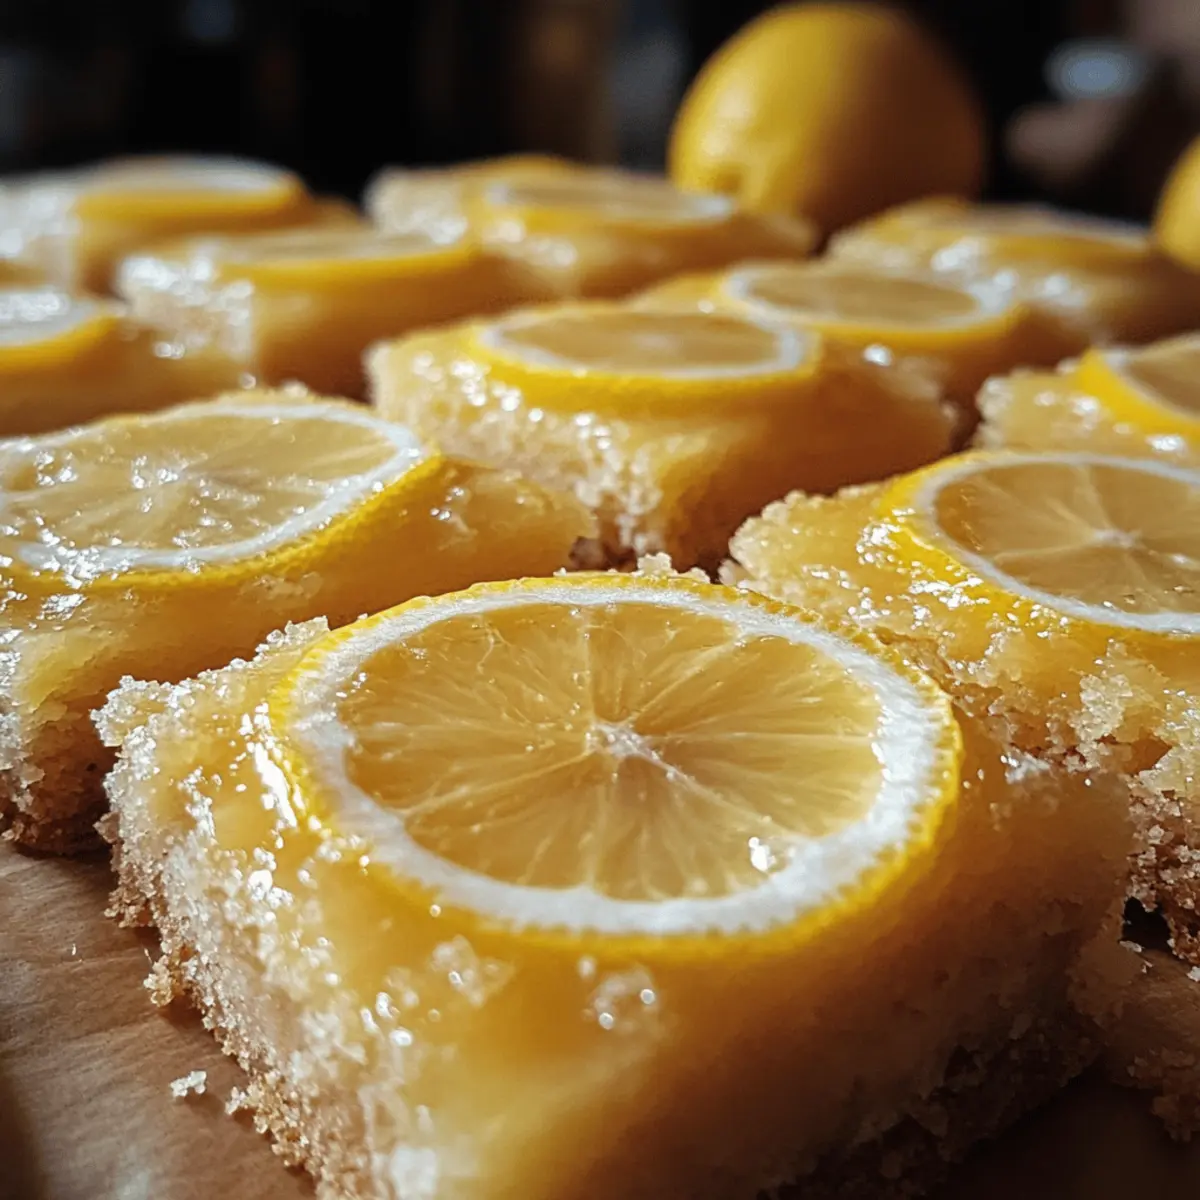
Optional: garnish with fresh berries or a sprig of mint.
Exact quantities are listed in the recipe card below.
What to Serve with Gluten-Free Lemon Bars?
The perfect addition to a delightful afternoon tea or a sunny picnic, enhancing your dessert experience.
-
Fresh Berries: The natural sweetness and tartness of raspberries or blueberries provide a vibrant contrast to the lemon bars. They add juicy bursts and delightful color to your dessert plate.
-
Whipped Cream: A dollop of lightly sweetened whipped cream perfectly balances the tangy lemon, adding a creamy richness that melts in your mouth.
-
Iced Green Tea: This refreshing drink with its subtle earthy notes offers a wonderful counterpoint, complementing the bright flavors of the lemon bars while keeping you cool.
-
Coconut Macaroons: These chewy, sweet bites harmonize beautifully with your lemon bars, bringing a satisfying texture that feels indulgent yet light.
-
Mint Salad: A simple salad of fresh mint and colorful citrus slices adds a fragrant, refreshing element that elevates both flavors and visual appeal.
-
Vanilla Ice Cream: A scoop on the side melts enticingly into the warm lemon filling, creating a dreamy combination you won’t want to miss.
-
Chocolate Drizzle: A light drizzle of melted dark chocolate offers a sophisticated twist, pairing sweet chocolate with the tart lemon for a decadent surprise that pleases all palates.
Expert Tips for Gluten-Free Lemon Bars
- Use Fresh Lemons: Always opt for fresh lemon juice and zest to achieve the brightest, most natural tang in your gluten-free lemon bars.
- Don’t Overmix Filling: Gently fold ingredients to keep the filling light and avoid a dense, rubbery texture common in gluten-free desserts.
- Chill Thoroughly: Refrigerate the bars long enough to let the filling fully set; this makes slicing cleaner and enhances flavor balance.
- Press Crust Firmly: Pack the crust evenly and firmly into the pan to prevent it from crumbling when cutting, ensuring sturdy bars.
- Room Temperature Eggs: Use eggs at room temperature to promote better mixing and a smoother lemon filling consistency.
How to Store and Freeze Gluten-Free Lemon Bars
Fridge: Store your lemon bars in an airtight container in the refrigerator for up to 5 days. This helps maintain their freshness and zesty flavor.
Freezer: For longer storage, freeze gluten-free lemon bars wrapped in plastic wrap and placed inside a freezer-friendly container. They can be kept for up to 3 months.
Thawing: To enjoy frozen bars, simply transfer them to the fridge to thaw overnight, or leave them at room temperature for about an hour before serving.
Reheating (optional): If you prefer them warm, gently reheat individual bars in the microwave for about 10-15 seconds. Enjoy the comforting taste!
Variations & Substitutions for Gluten-Free Lemon Bars
Feel free to let your creativity shine by customizing these delightful lemon bars with these tasty twists!
-
Citrus Fusion: Replace some lemon juice with orange or lime juice for a refreshing twist. Combining flavors can create a citrus medley that dances on your palate.
-
Sugar Swap: Use maple syrup or honey instead of granulated sugar for a natural sweetener. This will lend a unique flavor profile that subtly enhances the lemon’s brightness.
-
Nut-Free: Substitute almond flour with sunflower seed flour to keep the bars nut-free. This swap allows everyone to enjoy them, especially those with nut allergies.
-
Herbal Infusion: Add finely chopped fresh mint or basil to the filling for an unexpected herbal note. This infusion uplifts the tangy flavor, offering a spring-like freshness with every bite.
-
Berry Burst: Fold in fresh blueberries or raspberries before baking the filling. Their sweetness pairs beautifully with the tangy lemon, creating a deliciously fruity surprise.
-
Spiced Sensation: Add a pinch of cinnamon or ginger to the crust for a warm spice undertone. This twist can bring about a whole new layer of warmth to the citrusy treat.
-
Reduced Sugar: Decrease the sugar in both the crust and filling for a lighter version, perfect for those watching their sugar intake. Just remember to adjust the balance of flavors accordingly.
-
Gluten-Free Chocolate Drizzle: Top with a drizzle of melted dark chocolate for a decadent twist. The rich chocolate complements the lemon and adds a lavish finish to the bars that’s hard to resist.
Make Ahead Options
These Gluten-Free Lemon Bars are perfect for meal prep enthusiasts! You can prepare the crust up to 24 hours in advance by baking it and then letting it cool; simply wrap it tightly in plastic wrap to maintain its buttery texture. The lemon filling can be mixed and refrigerated for up to 3 days before pouring it over the crust, helping to enhance the flavors. When you’re ready to serve, just bake the assembled bars according to the instructions, and they will be just as delicious and tangy as if made fresh. This way, you save precious time while still enjoying a delightful homemade treat!
Easy Gluten-Free Lemon Bars with a Perfectly Tangy Twist Recipe FAQs
How do I know if my lemons are good for making lemon bars?
Look for lemons that feel heavy for their size with smooth, bright yellow skin. These tend to be juicier and more flavorful. Avoid lemons with dark spots all over or shriveled skin, as these indicate they’re past their prime.
What’s the best way to store gluten-free lemon bars?
I recommend keeping them in an airtight container in the refrigerator; they stay fresh and delicious for up to 5 days. Always place parchment paper between layers if stacking, to prevent sticking and preserve their perfect texture.
Can I freeze gluten-free lemon bars? How?
Absolutely! First, chill the bars completely, then cut them into squares. Wrap each piece tightly in plastic wrap, place them in a freezer-safe container or bag, and freeze for up to 3 months. When ready to enjoy, thaw overnight in the fridge or for about an hour at room temperature.
My lemon bars sometimes turn out too dense or rubbery—how can I fix that?
This usually means the filling was overmixed or baked too long. Try gently folding the filling ingredients to keep it light and make sure not to overbake; the center should still have a slight wobble when you take them out. Also, don’t skip the chilling step—it makes a world of difference in texture!
Are gluten-free lemon bars safe for pets or people with certain allergies?
While gluten-free lemon bars avoid wheat, they do contain eggs, butter, and almond flour, which might trigger allergies for some. Also, never share lemon bars with pets—citrus and baked goods can upset their stomachs. For allergy-friendly adjustments, consider swapping almond flour for an allergy-safe gluten-free mix, but remember this can alter texture.
Easy Gluten-Free Lemon Bars with a Perfectly Tangy Twist
Ingredients
Equipment
Method
- Preheat your oven to 350°F.
- In a mixing bowl, stir almond flour, coconut sugar, and salt until evenly crumbly.
- Transfer crumbs into an 8×8-inch pan and press firmly into an even layer.
- Bake for 15–18 minutes until edges are lightly golden brown.
- In a clean bowl, whisk eggs, granulated sugar, gluten-free flour, and lemon zest until smooth.
- Slowly pour in fresh lemon juice, folding gently to preserve airiness, then pour over the warm crust.
- Bake for another 20 minutes until filling is set with a gentle wobble.
- Let cool in the pan for 30 minutes, then chill in the refrigerator for at least 2 hours.


