

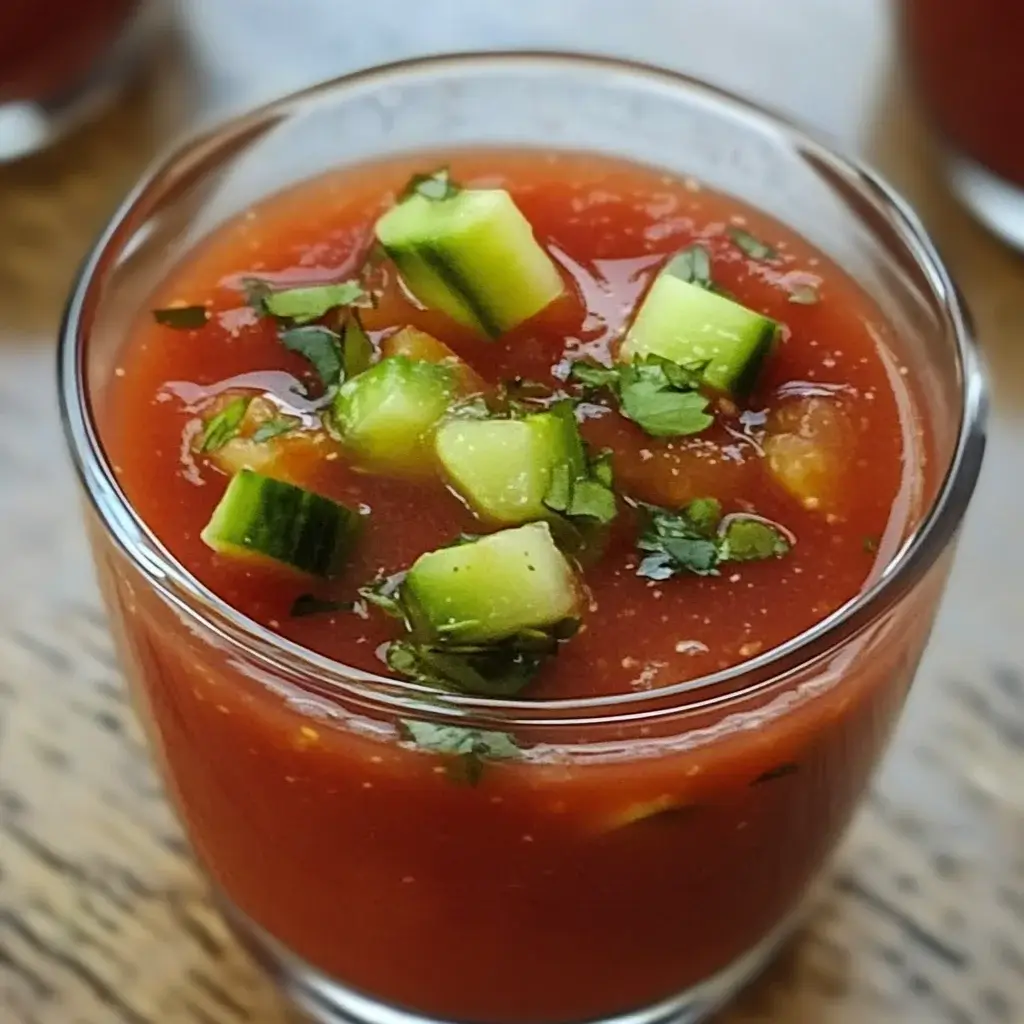

There are few things as purely refreshing on a sweltering summer day as a chilled bowl of Gazpacho. I still recall my first encounter with this vibrant Spanish soup during a trip through Andalusia, the region where it originated. Served ice-cold in a simple earthenware bowl, its bright, tangy flavor was an instant revelation – a cool oasis in the midday heat. It wasn’t cooked, yet it burst with the complex, layered flavors of ripe tomatoes, crisp cucumbers, sweet peppers, and a hint of garlic and vinegar. It tasted like sunshine and gardens distilled into liquid form. I was captivated. Back home, I became determined to recreate that experience. Initially, I thought it might be complicated, involving intricate steps passed down through generations. But I quickly discovered the beauty of “easy” gazpacho, especially with modern kitchen tools. My trusty blender turned what might have been a laborious chopping and pounding process into a quick whiz. The first time I served my own version to my family on a hot August afternoon, the reaction was pure delight. They loved the coolness, the freshness, and the fact that it was packed with vegetables yet felt light and invigorating. It became an instant summer staple in our house – our go-to solution for using up abundant garden tomatoes and cucumbers, and the perfect no-cook meal starter or light lunch when turning on the stove feels unbearable. This easy gazpacho recipe captures that authentic Spanish refreshment with minimal effort, proving that sophisticated flavor doesn’t always require complex techniques.
Ingredients for Easy Gazpacho
The key to exceptional gazpacho lies in the quality and ripeness of your ingredients. Since this soup isn’t cooked, the flavors of the raw vegetables shine through directly. Use the freshest produce you can find, ideally in season. This recipe yields approximately 6 servings.
- Ripe Tomatoes: 2 lbs (about 900g) ripe tomatoes, preferably Roma, vine-ripened, or heirloom varieties. Choose deeply colored, fragrant tomatoes that yield slightly to pressure. Avoid pale, underripe, or mealy tomatoes. Cored and roughly chopped.
- Cucumber: 1 large English or Persian cucumber (about 10-12 oz / 280-340g), peeled and roughly chopped. These varieties have thinner skins and fewer seeds, resulting in a smoother, less bitter soup. If using a standard cucumber, peel it and scoop out the seeds before chopping.
- Bell Pepper: 1 medium green bell pepper (about 5-6 oz / 140-170g), stemmed, seeded, and roughly chopped. Green pepper is traditional for its slightly grassy flavor, but you can substitute red or yellow bell pepper for a sweeter taste and different color.
- Red Onion: ¼ cup finely chopped red onion (about 1-1.5 oz / 30-40g). Provides a pungent bite. You can substitute shallots or even a sweet onion like Vidalia for a milder flavor. Soaking the chopped onion in cold water for 10 minutes can also mellow its sharpness.
- Garlic: 1-2 cloves fresh garlic, peeled and minced or roughly chopped. Adjust the amount based on your preference for garlic intensity. Start with one clove if unsure.
- Extra Virgin Olive Oil: ¼ to ⅓ cup (60-80ml) good quality extra virgin olive oil. This adds richness, flavor, and helps emulsify the soup, giving it a smoother texture. Use a fruity, flavorful oil.
- Red Wine Vinegar: 2-3 tablespoons red wine vinegar. Provides the essential tangy counterpoint to the sweet vegetables and rich olive oil. Sherry vinegar is also a traditional and excellent choice. Start with 2 tablespoons and add more to taste.
- Cold Water: ¼ to ½ cup (60-120ml) ice-cold water, or as needed to reach desired consistency.
- Salt: 1 teaspoon kosher salt or sea salt, plus more to taste. Essential for bringing out the flavors of the vegetables.
- Black Pepper: ¼ teaspoon freshly ground black pepper, plus more to taste.
- Optional additions:
- Stale Bread: 1 slice of crusty white bread (crusts removed), soaked in water for a few minutes and squeezed dry. This is a traditional way to add body and thickness.
- Cumin: ¼ teaspoon ground cumin for a subtle earthy note (common in some regional variations).
- Fresh Herbs: A small handful of fresh basil or parsley leaves can be blended in for added freshness.
Ingredient Notes & Philosophy:
- Tomatoes are King: The quality of your tomatoes will make or break your gazpacho. Use the best summer tomatoes you can find. If making this off-season, good quality canned whole peeled tomatoes (like San Marzano), drained well, can be a substitute, though the flavor will be different from fresh.
- Cucumber’s Role: Provides freshness, coolness, and a characteristic vegetal note. Peeling is generally recommended to avoid bitterness and tough skin texture.
- Pepper Power: Green bell pepper adds a slight bitterness that balances the tomato sweetness. Red or yellow peppers make the gazpacho sweeter and visually different (more orange/red).
- Oil & Vinegar Balance: The interplay between fruity olive oil and tangy vinegar is crucial. Don’t skimp on quality here. Adjust the ratio to your personal taste – some prefer it tangier, others richer.
- Consistency Control: Water and optional bread help you achieve your desired thickness, from easily drinkable to spoonably thick.
Step-by-Step Instructions
This “easy” gazpacho recipe leverages the power of a blender to minimize chopping and maximize flavor extraction. The process is straightforward and requires no cooking.
Phase 1: Preparation
- Prepare Vegetables: Wash all vegetables thoroughly.
- Tomatoes: Core the tomatoes and roughly chop them into large chunks suitable for your blender. No need for precise dicing.
- Cucumber: Peel the cucumber. If using a standard cucumber (not English or Persian), slice it lengthwise and use a spoon to scrape out the seeds. Roughly chop.
- Bell Pepper: Remove the stem and seeds from the bell pepper. Roughly chop.
- Onion & Garlic: Roughly chop the red onion and peel the garlic clove(s). If you prefer a very mild onion flavor, you can soak the chopped onion in cold water for 10 minutes, then drain well.
- Reserve Garnish (Optional but Recommended): For a classic presentation with textural contrast, reserve about ¼ cup each of finely diced tomato, cucumber, and bell pepper. Cover and refrigerate these separately to use as a garnish later. This step adds a few minutes of finer chopping but significantly enhances the final dish.
- Soak Bread (Optional): If using stale bread for thickness, tear the slice into pieces (crusts removed), place in a small bowl, cover with water, and let soak for 5-10 minutes. Squeeze out as much water as possible before adding it to the blender.
Phase 2: Blending the Gazpacho
- Combine Ingredients: Place the roughly chopped tomatoes, cucumber, bell pepper, red onion, and garlic into the jar of a high-powered blender. If using soaked bread, add it now.
- Initial Blend: Secure the lid and blend on low speed, gradually increasing to high, until the vegetables are coarsely pureed. This might take 30-60 seconds. Scrape down the sides of the blender jar if needed.
- Emulsify with Oil & Vinegar: With the blender running on low speed, slowly drizzle in the extra virgin olive oil through the lid’s opening. Continue blending until the oil is fully incorporated and the mixture looks smoother and slightly emulsified (this helps create a richer texture). Pour in the red wine vinegar (start with 2 tablespoons).
- Season: Add 1 teaspoon of salt, ¼ teaspoon of black pepper, and the optional ¼ teaspoon of cumin (if using). Add ¼ cup of the ice-cold water.
- Final Blend & Adjust Consistency: Blend again on medium-high speed until the gazpacho reaches your desired consistency.
- For Smooth Gazpacho: Blend for 1-2 minutes, or until very smooth and creamy.
- For Slightly Chunky Gazpacho: Blend for a shorter time, leaving some small texture.
If the soup is thicker than you like, add more ice-cold water, 1 tablespoon at a time, blending briefly after each addition until the desired consistency is reached.
- Taste and Adjust Seasoning: This is a crucial step! Carefully taste the gazpacho. Does it need more salt? More tang (vinegar)? More richness (a touch more olive oil)? More pepper? Adjust seasonings as needed, blending briefly after each addition. Remember that flavors will meld and slightly dull when chilled, so aim for slightly bolder flavors at this stage.
Phase 3: Chilling (Essential!)
- Transfer and Chill: Pour the blended gazpacho into a large bowl, pitcher, or airtight container. Cover tightly (press plastic wrap directly onto the surface to prevent a skin from forming, or use an airtight lid).
- Refrigerate: Chill the gazpacho in the refrigerator for at least 2 hours, but preferably 4 hours or even overnight. Chilling is absolutely essential for two reasons:
- Flavor Melding: It allows the individual flavors of the raw ingredients to marry and mellow into a harmonious blend.
- Temperature: Gazpacho is meant to be served thoroughly chilled for maximum refreshment. Room temperature or slightly cool gazpacho just isn’t the same experience.
Phase 4: Serving
- Check Consistency & Seasoning Again: Before serving, stir the chilled gazpacho well. Taste it one last time. Cold temperatures can dull flavors, so you might need a final small adjustment of salt or vinegar. If it has thickened too much upon chilling, whisk in a tiny bit more ice water.
- Serve: Ladle the chilled gazpacho into bowls, glasses, or mugs. Garnish generously (see “How to Serve” section below) and serve immediately.
Nutritional Information (Approximate)
Nutritional values for gazpacho are estimates and depend on the exact ingredients used (especially the amount of olive oil and whether bread is added) and serving size. This information is provided as a general guideline per serving, assuming the recipe yields 6 servings.
- Servings: 6
- Calories Per Serving (Approximate): 120 – 200 calories (lower end without bread and with less oil, higher end with bread and more oil).
Health Highlights:
- Rich in Vitamins: Packed with Vitamin C (from tomatoes, peppers), Vitamin A/beta-carotene (from tomatoes), and other essential vitamins from the raw vegetables.
- Antioxidants: Lycopene from tomatoes and other antioxidants from the colorful vegetables help combat oxidative stress.
- Healthy Fats: Primarily monounsaturated fats from the extra virgin olive oil, which are heart-healthy.
- Fiber: Good source of dietary fiber from the vegetables, aiding digestion.
- Hydrating: High water content from the vegetables makes it a very hydrating choice, especially in summer.
- Low Calorie Density: Provides significant nutrients and volume for relatively few calories (depending on oil/bread additions).
- Naturally Vegan & Gluten-Free (without bread): Fits easily into various dietary patterns.
Overall, Easy Gazpacho is a nutritious, refreshing, and flavorful way to increase your vegetable intake. It’s a light yet satisfying option perfect for warm weather.
Preparation Time Breakdown
This recipe is celebrated for its speed and simplicity, especially the minimal active time required.
- Active Prep Time: 15 – 25 minutes (Washing, roughly chopping vegetables, blending, initial tasting). This might take slightly longer if you opt to finely dice vegetables for garnish.
- Chilling Time (Essential): Minimum 2 hours, preferably 4+ hours (Inactive time).
Total Time (Including Minimum Chilling): Approximately 2 hours 15 minutes – 2 hours 25 minutes.
Total Active Time: Less than 30 minutes.
Key Takeaway: While the essential chilling time requires planning ahead, the hands-on preparation for this vibrant soup is remarkably short, making it an easy choice even on busy days, provided you allow for the chilling period.
How to Serve Your Easy Gazpacho
Serving gazpacho is about embracing its refreshing nature and often involves delightful garnishes that add texture and flavor contrast. Here’s how to present your chilled soup beautifully:
- Serving Vessels:
- Chilled Bowls: The classic presentation. Use ceramic or glass bowls that have been chilled in the refrigerator beforehand to keep the soup cold longer.
- Glasses or Mugs: For a more casual or appetizer-style serving, pour gazpacho into small glasses, tumblers, or even chilled mugs. Gazpacho “shooters” are a popular party appetizer.
- Pitcher: Serve it from a pitcher at a brunch or gathering, allowing guests to pour their own servings.
- Garnishes Galore (The Fun Part!): Garnishes elevate gazpacho from simple soup to a culinary experience. Mix and match based on preference:
- Reserved Diced Veggies: Sprinkle generously with the finely diced tomato, cucumber, and bell pepper you set aside earlier. This adds crucial texture.
- Homemade Croutons: Cube day-old bread, toss with olive oil and herbs/garlic powder, and bake or pan-fry until golden and crunchy. Essential for textural contrast.
- Drizzle of Olive Oil: A final swirl of high-quality extra virgin olive oil adds richness and visual appeal.
- Fresh Herbs: Chopped fresh parsley, cilantro, basil, chives, or mint add bright color and aroma.
- Creamy Element: A small dollop of plain Greek yogurt, sour cream, or crumbled feta/goat cheese can add a tangy, creamy counterpoint (note: makes it non-vegan).
- Avocado: Finely diced ripe avocado adds creaminess and healthy fats.
- Hard-Boiled Egg: Finely chopped hard-boiled egg is a very traditional Spanish garnish.
- Spice: A pinch of smoked paprika, red pepper flakes, or a few dashes of hot sauce for those who like heat.
- Protein Boost: A few grilled shrimp placed on top can turn gazpacho into a light main course.
- Edible Flowers: For a truly elegant touch at a dinner party.
- Accompaniments:
- Crusty Bread: Absolutely essential for soaking up every last drop! Serve with slices of baguette, sourdough, or rustic country bread.
- Grilled Cheese Sandwich: A modern, comforting pairing – the hot, cheesy sandwich with the cold, tangy soup is a delightful contrast.
- Tapas Spread: Serve gazpacho in small glasses as part of a larger Spanish tapas spread including olives, Manchego cheese, Serrano ham, patatas bravas, etc.
- Simple Green Salad: A light salad with a lemon vinaigrette complements the gazpacho well.
- Temperature: Always serve gazpacho thoroughly chilled. Lukewarm gazpacho loses its refreshing magic.
Think of serving gazpacho as creating a small edible canvas – start with the vibrant soup and add textures and flavors with your chosen garnishes and sides.
Pro Tips for the Best Easy Gazpacho
While this recipe is designed for ease, these tips will help you achieve the most authentic flavor and perfect texture, elevating your gazpacho from good to truly outstanding.
- Use Peak-Season, Ultra-Ripe Tomatoes: This is the single most important factor. Gazpacho is fundamentally a celebration of raw tomatoes. Use the best, ripest, most flavorful tomatoes you can find, ideally from a local farm or your own garden during peak summer season. They should be deeply colored and smell fragrant. Underripe or watery tomatoes will result in a bland, acidic, or pale gazpacho. The natural sweetness of ripe tomatoes balances the vinegar’s tang.
- Don’t Over-Blend (Unless You Want To): Decide on your preferred texture before you start the final blend. For a traditional, slightly rustic texture, blend until mostly smooth but still retaining some very fine texture from the vegetables. For a silky-smooth, almost creamy consistency (more modern style), blend on high speed for a longer duration, ensuring everything is fully liquefied. You can even strain it through a fine-mesh sieve for ultimate smoothness, though this removes beneficial fiber.
- Embrace the Chill (Seriously): Do not rush the chilling process. Chilling isn’t just about making the soup cold; it’s crucial for flavor development. As the gazpacho rests in the refrigerator, the distinct flavors of tomato, cucumber, pepper, onion, garlic, oil, and vinegar meld and mellow, creating a more harmonious and complex taste profile than you get immediately after blending. Aim for at least 2 hours, but 4 hours to overnight is even better for optimal flavor fusion.
- Taste and Adjust After Chilling: Cold temperatures mute flavors, especially saltiness and acidity. Always taste your gazpacho again just before serving, after it has fully chilled. It will likely need a final adjustment – perhaps a pinch more salt to wake up the flavors, a tiny splash more vinegar for brightness, or even a touch more olive oil for richness. Adjusting seasoning on the cold soup ensures it’s perfectly balanced when served.
- Balance is Key (Oil, Vinegar, Salt): Achieving the perfect balance between the richness of the olive oil, the tang of the vinegar, and the enhancing power of salt is critical. Start with the amounts suggested in the recipe, but be prepared to tweak based on your ingredients (especially tomato acidity) and personal preference. Add these components gradually during the final tasting stages (both before and after chilling) until the flavors pop and feel perfectly harmonious – bright but not harsh, rich but not heavy. Use good quality extra virgin olive oil and red wine or sherry vinegar for the best results.
By focusing on ingredient quality, texture control, proper chilling, and careful seasoning adjustments, you can effortlessly create a truly memorable and authentic-tasting Easy Gazpacho.
Frequently Asked Questions (FAQ)
Here are answers to some common questions about making Easy Gazpacho:
1. How long does gazpacho last in the refrigerator?
- Answer: Properly stored in an airtight container in the refrigerator, gazpacho will typically last for 3 to 5 days. Keep in mind that the flavors will continue to meld, and the texture might change slightly over time (it can sometimes separate slightly – just give it a good stir). The freshness of the raw vegetables will be most vibrant within the first 2-3 days. Discard if it develops any off smells or signs of spoilage.
2. Can I make gazpacho spicy?
- Answer: Absolutely! Adding a touch of heat is a popular variation. You can easily make spicy gazpacho by:
- Adding Fresh Chili: Blend in a small amount of a fresh chili pepper along with the other vegetables. Start with ½ a jalapeño (seeds removed for less heat) or a smaller piece of serrano pepper and add more to taste. Remember you can always add more heat, but it’s hard to take away.
- Using Hot Sauce: Add a few dashes of your favorite hot sauce (like Tabasco or a vinegar-based cayenne sauce) during the blending or seasoning phase.
- Cayenne Pepper: Blend in a pinch (⅛ to ¼ teaspoon) of cayenne pepper along with the other seasonings.
- Garnish: Sprinkle red pepper flakes on top as a garnish for adjustable heat per serving.
3. My gazpacho is too thin/watery. How can I thicken it?
- Answer: If your gazpacho turned out thinner than desired, here are a few ways to thicken it:
- Add Bread: The traditional method is to blend in a slice of stale, soaked, and squeezed white bread (as mentioned in the optional ingredients). This adds body effectively.
- More Olive Oil: Slowly drizzling in a bit more extra virgin olive oil while the blender is running can help emulsify the soup further and add richness and perceived thickness.
- Less Water: Ensure you didn’t add too much water initially. Start with less and add only as needed.
- Strain Less (If Straining): If you strained your gazpacho for smoothness, perhaps strain less next time or skip straining altogether.
- Add More Vegetables: Blend in a bit more tomato or cucumber (though this will alter the flavor balance slightly).
- Chill Longer: Sometimes gazpacho thickens slightly as it chills thoroughly.
4. Can I use canned tomatoes instead of fresh?
- Answer: While fresh, ripe, in-season tomatoes will always yield the best, most vibrant flavor, you can use good quality canned whole peeled tomatoes (like San Marzano) if making gazpacho out of season. Use approximately 28-32 oz (two standard cans), drain them very well, and proceed with the recipe. The flavor profile will be different – slightly cooked tasting and potentially more acidic than fresh – but it can still make a decent gazpacho when fresh options aren’t great. You may need to adjust the salt and vinegar accordingly.
5. Can I freeze gazpacho?
- Answer: Freezing gazpacho is generally not recommended. Because it’s an emulsion of raw vegetables, oil, and vinegar, freezing and thawing can cause the ingredients to separate significantly, resulting in a watery texture and altered flavor profile upon defrosting. The fresh “zing” of the raw vegetables is often lost. If you must freeze it, do so in an airtight container, leaving some headspace. Thaw it in the refrigerator and try whisking or even briefly re-blending it to recombine, but manage your expectations regarding the final texture and taste – it won’t be the same as fresh. It’s best enjoyed fresh within a few days of making it.
Easy Gazpacho recipe
Ingredients
-
- Ripe Tomatoes: 2 lbs (about 900g) ripe tomatoes, preferably Roma, vine-ripened, or heirloom varieties. Choose deeply colored, fragrant tomatoes that yield slightly to pressure. Avoid pale, underripe, or mealy tomatoes. Cored and roughly chopped.
-
- Cucumber: 1 large English or Persian cucumber (about 10-12 oz / 280-340g), peeled and roughly chopped. These varieties have thinner skins and fewer seeds, resulting in a smoother, less bitter soup. If using a standard cucumber, peel it and scoop out the seeds before chopping.
-
- Bell Pepper: 1 medium green bell pepper (about 5-6 oz / 140-170g), stemmed, seeded, and roughly chopped. Green pepper is traditional for its slightly grassy flavor, but you can substitute red or yellow bell pepper for a sweeter taste and different color.
-
- Red Onion: ¼ cup finely chopped red onion (about 1-1.5 oz / 30-40g). Provides a pungent bite. You can substitute shallots or even a sweet onion like Vidalia for a milder flavor. Soaking the chopped onion in cold water for 10 minutes can also mellow its sharpness.
-
- Garlic: 1-2 cloves fresh garlic, peeled and minced or roughly chopped. Adjust the amount based on your preference for garlic intensity. Start with one clove if unsure.
-
- Extra Virgin Olive Oil: ¼ to ⅓ cup (60-80ml) good quality extra virgin olive oil. This adds richness, flavor, and helps emulsify the soup, giving it a smoother texture. Use a fruity, flavorful oil.
-
- Red Wine Vinegar: 2-3 tablespoons red wine vinegar. Provides the essential tangy counterpoint to the sweet vegetables and rich olive oil. Sherry vinegar is also a traditional and excellent choice. Start with 2 tablespoons and add more to taste.
-
- Cold Water: ¼ to ½ cup (60-120ml) ice-cold water, or as needed to reach desired consistency.
-
- Salt: 1 teaspoon kosher salt or sea salt, plus more to taste. Essential for bringing out the flavors of the vegetables.
-
- Black Pepper: ¼ teaspoon freshly ground black pepper, plus more to taste.
-
- Optional additions:
-
- Stale Bread: 1 slice of crusty white bread (crusts removed), soaked in water for a few minutes and squeezed dry. This is a traditional way to add body and thickness.
-
- Cumin: ¼ teaspoon ground cumin for a subtle earthy note (common in some regional variations).
-
- Fresh Herbs: A small handful of fresh basil or parsley leaves can be blended in for added freshness.
-
- Optional additions:
Instructions
Phase 1: Preparation
-
- Prepare Vegetables: Wash all vegetables thoroughly.
-
- Tomatoes: Core the tomatoes and roughly chop them into large chunks suitable for your blender. No need for precise dicing.
-
- Cucumber: Peel the cucumber. If using a standard cucumber (not English or Persian), slice it lengthwise and use a spoon to scrape out the seeds. Roughly chop.
-
- Bell Pepper: Remove the stem and seeds from the bell pepper. Roughly chop.
-
- Onion & Garlic: Roughly chop the red onion and peel the garlic clove(s). If you prefer a very mild onion flavor, you can soak the chopped onion in cold water for 10 minutes, then drain well.
-
- Prepare Vegetables: Wash all vegetables thoroughly.
-
- Reserve Garnish (Optional but Recommended): For a classic presentation with textural contrast, reserve about ¼ cup each of finely diced tomato, cucumber, and bell pepper. Cover and refrigerate these separately to use as a garnish later. This step adds a few minutes of finer chopping but significantly enhances the final dish.
-
- Soak Bread (Optional): If using stale bread for thickness, tear the slice into pieces (crusts removed), place in a small bowl, cover with water, and let soak for 5-10 minutes. Squeeze out as much water as possible before adding it to the blender.
Phase 2: Blending the Gazpacho
-
- Combine Ingredients: Place the roughly chopped tomatoes, cucumber, bell pepper, red onion, and garlic into the jar of a high-powered blender. If using soaked bread, add it now.
-
- Initial Blend: Secure the lid and blend on low speed, gradually increasing to high, until the vegetables are coarsely pureed. This might take 30-60 seconds. Scrape down the sides of the blender jar if needed.
-
- Emulsify with Oil & Vinegar: With the blender running on low speed, slowly drizzle in the extra virgin olive oil through the lid’s opening. Continue blending until the oil is fully incorporated and the mixture looks smoother and slightly emulsified (this helps create a richer texture). Pour in the red wine vinegar (start with 2 tablespoons).
-
- Season: Add 1 teaspoon of salt, ¼ teaspoon of black pepper, and the optional ¼ teaspoon of cumin (if using). Add ¼ cup of the ice-cold water.
-
- Final Blend & Adjust Consistency: Blend again on medium-high speed until the gazpacho reaches your desired consistency.
-
- For Smooth Gazpacho: Blend for 1-2 minutes, or until very smooth and creamy.
-
- For Slightly Chunky Gazpacho: Blend for a shorter time, leaving some small texture.
If the soup is thicker than you like, add more ice-cold water, 1 tablespoon at a time, blending briefly after each addition until the desired consistency is reached.
- For Slightly Chunky Gazpacho: Blend for a shorter time, leaving some small texture.
-
- Final Blend & Adjust Consistency: Blend again on medium-high speed until the gazpacho reaches your desired consistency.
-
- Taste and Adjust Seasoning: This is a crucial step! Carefully taste the gazpacho. Does it need more salt? More tang (vinegar)? More richness (a touch more olive oil)? More pepper? Adjust seasonings as needed, blending briefly after each addition. Remember that flavors will meld and slightly dull when chilled, so aim for slightly bolder flavors at this stage.
Phase 3: Chilling (Essential!)
-
- Transfer and Chill: Pour the blended gazpacho into a large bowl, pitcher, or airtight container. Cover tightly (press plastic wrap directly onto the surface to prevent a skin from forming, or use an airtight lid).
-
- Refrigerate: Chill the gazpacho in the refrigerator for at least 2 hours, but preferably 4 hours or even overnight. Chilling is absolutely essential for two reasons:
-
- Flavor Melding: It allows the individual flavors of the raw ingredients to marry and mellow into a harmonious blend.
-
- Temperature: Gazpacho is meant to be served thoroughly chilled for maximum refreshment. Room temperature or slightly cool gazpacho just isn’t the same experience.
-
- Refrigerate: Chill the gazpacho in the refrigerator for at least 2 hours, but preferably 4 hours or even overnight. Chilling is absolutely essential for two reasons:
Phase 4: Serving
-
- Check Consistency & Seasoning Again: Before serving, stir the chilled gazpacho well. Taste it one last time. Cold temperatures can dull flavors, so you might need a final small adjustment of salt or vinegar. If it has thickened too much upon chilling, whisk in a tiny bit more ice water.
-
- Serve: Ladle the chilled gazpacho into bowls, glasses, or mugs. Garnish generously (see “How to Serve” section below) and serve immediately.
Nutrition
- Serving Size: one normal portion
- Calories: 120 – 200


