
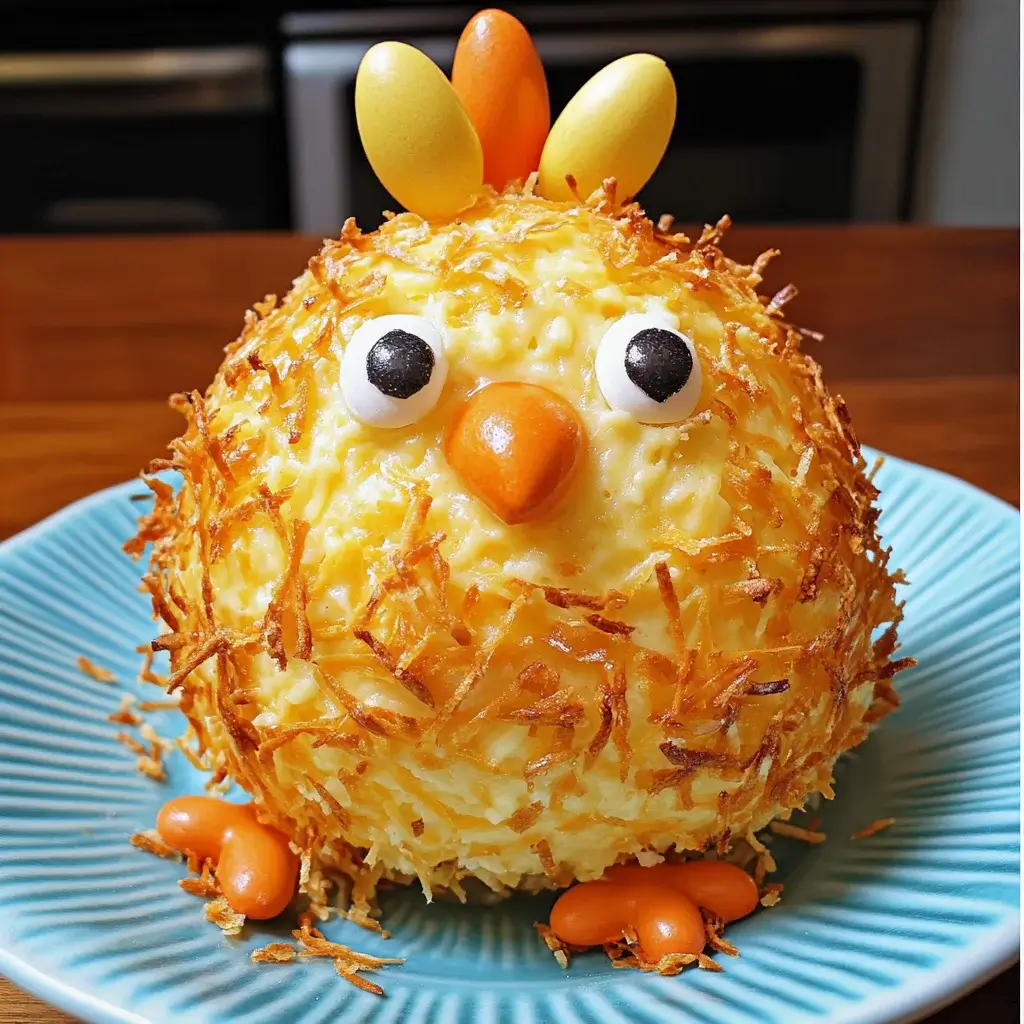

Every Easter, I aim to create a festive appetizer that’s not just delicious but also visually delightful. This year, the Easter Chick Cheese Ball was the undisputed champion of our family gathering. Honestly, when I first saw the recipe, I was charmed by its cuteness, but I wondered if it would truly taste as good as it looked. Let me tell you, it exceeded all expectations! From the moment I placed this adorable, cheesy chick on the table, it was a magnet for smiles and compliments. The kids were absolutely captivated, and the adults couldn’t stop raving about the creamy, savory flavor and the clever presentation. It wasn’t just a pretty face; the cheese ball itself was incredibly delicious – a perfect balance of tangy cream cheese, sharp cheddar, and savory seasonings. Paired with an array of crackers, pretzels, and fresh veggies, it was the first appetizer to disappear, leaving behind only crumbs and happy memories. Making the chick shape and decorating it was surprisingly fun and therapeutic, and the “oohs” and “aahs” from my family were more than worth the effort. If you’re searching for a show-stopping appetizer that’s both festive and flavorful, look no further than the Easter Chick Cheese Ball. It’s guaranteed to be the star of your Easter celebration and bring a touch of springtime joy to your table!
The Nesting Ground: Ingredients for Your Easter Chick Cheese Ball
Creating this adorable Easter Chick Cheese Ball is surprisingly straightforward, relying on simple, readily available ingredients that come together to form a creamy, flavorful, and visually stunning appetizer. The key is in the quality of the ingredients and the thoughtful decorations that transform a classic cheese ball into a festive springtime chick. Here’s a detailed list of what you’ll need to gather to build your cheesy chick masterpiece:
For the Cheese Ball Base:
- Cream Cheese: 2 (8-ounce) packages of cream cheese are the foundation of our cheese ball. It’s crucial to use full-fat cream cheese for the best texture and flavor. Make sure the cream cheese is softened to room temperature before you begin mixing. This will ensure a smooth and easily workable cheese ball. Reduced-fat cream cheese can be used, but the texture might be slightly less creamy and firm.
- Shredded Cheddar Cheese: 2 cups of shredded cheddar cheese add a sharp, savory flavor and a firmer texture to the cheese ball. Sharp or extra-sharp cheddar is recommended for a more pronounced cheese flavor that cuts through the richness of the cream cheese. You can use pre-shredded cheddar for convenience or shred your own from a block for potentially better melting and flavor. Consider using a mix of cheddar varieties (mild and sharp) for a more complex flavor profile.
- Shredded Monterey Jack Cheese: 1 cup of shredded Monterey Jack cheese contributes a mild, buttery flavor and excellent melting properties, enhancing the overall creamy texture of the cheese ball. Monterey Jack also adds a subtle sweetness that balances the sharpness of the cheddar. If you don’t have Monterey Jack, you can substitute with mild cheddar, mozzarella, or provolone cheese.
- Mayonnaise: ½ cup of mayonnaise adds moisture, creaminess, and binds the cheese ball ingredients together. Use full-fat mayonnaise for the richest flavor and texture. Light mayonnaise can be used, but it might slightly alter the texture. Consider using avocado mayonnaise for a healthier alternative.
- Worcestershire Sauce: 1 tablespoon of Worcestershire sauce provides a savory, umami depth of flavor that enhances the cheese and other seasonings. Worcestershire sauce adds a complex tanginess that elevates the overall taste profile. If you don’t have Worcestershire sauce, a dash of soy sauce or balsamic vinegar can be used as a substitute, although the flavor will be slightly different.
- Garlic Powder: 1 teaspoon of garlic powder adds a subtle savory note and aromatic complexity. Garlic powder is preferred for its even distribution and mild garlic flavor. Freshly minced garlic can also be used, but use sparingly as it can be overpowering.
- Onion Powder: 1 teaspoon of onion powder complements the garlic and adds another layer of savory depth. Similar to garlic powder, onion powder offers a mild and evenly distributed onion flavor. Finely minced shallots or chives can be used as a fresh alternative.
- Salt: ½ teaspoon of salt, or to taste, is essential for seasoning the cheese ball and enhancing all the other flavors. Start with ½ teaspoon and adjust to your preference. Kosher salt or sea salt are recommended for their pure flavor.
- Black Pepper: ¼ teaspoon of freshly ground black pepper, or to taste, adds a subtle warmth and depth of flavor. Freshly ground pepper is always preferred for its brighter flavor.
For the Chick Decorations:
- Shredded Cheddar Cheese (for coating): 2 cups of shredded cheddar cheese are used to coat the cheese ball and create the chick’s feathery appearance. Finely shredded cheddar works best for creating a smooth, even coating. You can use the same cheddar cheese as in the cheese ball base or choose a different shade of cheddar for visual contrast.
- Carrots: 1-2 medium carrots are needed to create the beak and feet for your chick. Choose bright orange carrots for the best color and visual appeal. Firm carrots are easier to carve into shapes.
- Black Olives (pitted, sliced): 6-8 sliced black olives are used to create the eyes for the chick. Pitted, sliced black olives are convenient and readily available. You can also use whole black olives and slice them yourself.
- Red Bell Pepper (optional, for comb): A small piece of red bell pepper can be used to create a comb on top of the chick’s head for extra detail and color. Choose a vibrant red bell pepper for visual impact.
Optional Ingredients and Variations:
- Chopped Green Onions or Chives: ¼ cup of finely chopped green onions or chives can be added to the cheese ball mixture for a fresh, mild oniony flavor and a touch of green.
- Pimentos or Roasted Red Peppers: ¼ cup of diced pimentos or roasted red peppers can be added for a sweet and slightly tangy flavor and a pop of red color within the cheese ball.
- Hot Sauce: A dash of hot sauce (like Tabasco or your favorite brand) can be added for a subtle kick of heat.
- Smoked Paprika: A teaspoon of smoked paprika can be added to the cheese ball mixture or sprinkled on top of the cheddar coating for a smoky flavor note.
- Fresh Parsley or Dill: Finely chopped fresh parsley or dill can be added to the cheese ball mixture for a fresh, herbaceous flavor and a touch of green.
- Different Cheese Coatings: Instead of cheddar cheese, you can use other coatings like chopped pecans, almonds, pistachios, dried cranberries, or a mixture of herbs like parsley and dill.
Ensure you have all your ingredients prepped and ready before you begin assembling your Easter Chick Cheese Ball. Softening the cream cheese and shredding the cheeses ahead of time will make the mixing process much smoother and more efficient. With these ingredients in hand, you’re ready to embark on creating this charming and delicious Easter appetizer!
From Nest to Table: Instructions for Crafting Your Easter Chick Cheese Ball
Creating this delightful Easter Chick Cheese Ball is a fun and rewarding process. It’s a great recipe to involve kids in, especially with the decorating aspects. Follow these step-by-step instructions to bring your cheesy chick to life:
Step 1: Prepare the Cheese Ball Mixture (Approximately 20 minutes)
- Soften Cream Cheese: Ensure your cream cheese is softened to room temperature for at least 30 minutes to an hour. This is crucial for a smooth and easily mixable cheese ball.
- Combine Cheeses: In a large mixing bowl, combine the softened cream cheese, shredded cheddar cheese, and shredded Monterey Jack cheese.
- Add Mayonnaise and Worcestershire Sauce: Add the mayonnaise and Worcestershire sauce to the cheese mixture.
- Incorporate Seasonings: Add the garlic powder, onion powder, salt, and black pepper to the bowl.
- Mix Thoroughly: Using an electric mixer (hand mixer or stand mixer) or a sturdy spoon, beat or stir all the ingredients together until they are completely combined and smooth. Ensure there are no lumps of cream cheese remaining. The mixture should be well-integrated and easy to shape.
- Chill the Mixture: Cover the mixing bowl tightly with plastic wrap and refrigerate for at least 2 hours, or preferably overnight. Chilling is essential for firming up the cheese ball mixture, making it easier to shape and coat. The longer chilling time will result in a firmer, more stable cheese ball.
Step 2: Shape the Cheese Ball into a Chick (Approximately 15 minutes)
- Prepare a Work Surface: Line a baking sheet or large plate with parchment paper or wax paper. This will prevent the cheese ball from sticking.
- Scoop and Shape: Remove the chilled cheese ball mixture from the refrigerator. Using a large spoon or your hands (lightly dampened with water to prevent sticking), scoop out the cheese mixture and start shaping it into an oval or rounded chick body shape. You can form it into a slightly flattened oval to resemble a sitting chick.
- Form the Head (Optional): If desired, you can create a separate, smaller cheese ball for the chick’s head. Use a smaller scoop of the cheese mixture and shape it into a smaller round ball. Attach the head to the body by gently pressing it onto the top of the larger oval shape. You can use a little extra cheese mixture to help blend the head and body seamlessly. For a simpler chick shape, you can skip the separate head and just create a single oval body shape.
- Place on Prepared Sheet: Carefully place the shaped cheese ball (or chick body and head) onto the prepared baking sheet or plate lined with parchment paper.
- Return to Chill: Return the shaped cheese ball to the refrigerator to chill for another 30 minutes to an hour to further firm up before coating. This step helps the cheese ball hold its shape during coating.
Step 3: Coat the Cheese Ball with Cheddar Cheese (Approximately 20 minutes)
- Prepare Cheddar Coating: Place the 2 cups of shredded cheddar cheese for coating in a shallow dish or bowl.
- Remove Chilled Cheese Ball: Remove the chilled and shaped cheese ball from the refrigerator.
- Coat with Cheddar: Using your hands, gently press the shredded cheddar cheese onto the entire surface of the cheese ball, ensuring it is completely coated. Work in sections, pressing the cheese firmly but gently so it adheres to the cheese ball. You may need to use your hands to pat and shape the cheddar coating to create a smooth, even, and slightly feathery appearance. If some cheddar falls off, simply press it back on.
- Refine Shape (Optional): After coating, you can gently reshape the chick if needed, patting the cheddar coating to refine the oval shape and ensure the head (if you made one) is securely attached.
Step 4: Decorate the Chick (Approximately 15-20 minutes)
- Prepare Carrot Decorations: Peel the carrots and cut thin slices. From the slices, cut out small triangles for the beak and small feet shapes. You can use a paring knife or small cookie cutters.
- Attach Beak and Feet: Gently insert a carrot triangle into the cheese ball to create the beak, positioning it in the center of the chick’s “face.” Place two carrot feet shapes at the base of the chick, underneath the cheese ball.
- Add Olive Eyes: Take the sliced black olives and carefully place two slices on the cheese ball to create eyes above the beak.
- Add Red Pepper Comb (Optional): If using, cut a small comb shape from the red bell pepper and gently attach it to the top of the chick’s head. You can use a small piece of cream cheese mixture or a toothpick (removed before serving) to help secure it if needed.
Step 5: Chill and Serve (Minimum 30 minutes chilling, up to several hours)
- Chill Decorated Cheese Ball: Return the decorated Easter Chick Cheese Ball to the refrigerator to chill for at least 30 minutes to allow the cheddar coating to set and the decorations to adhere firmly. Chilling for longer (1-2 hours or more) is recommended for optimal firmness and flavor development.
- Serve Chilled: Serve the Easter Chick Cheese Ball chilled with an assortment of crackers, pretzels, vegetable sticks (carrots, celery, cucumber), pita chips, or baguette slices for dipping and spreading.
Tips for Success:
- Softened Cream Cheese is Key: Don’t rush the softening process for the cream cheese. It’s essential for a smooth, lump-free cheese ball.
- Chill, Chill, Chill: Chilling at various stages is crucial for firming up the cheese ball and making it easier to shape, coat, and decorate.
- Gentle Handling: Handle the cheese ball gently during shaping and coating to maintain its form.
- Fresh Ingredients: Use high-quality, fresh ingredients for the best flavor.
- Get Creative with Decorations: Feel free to personalize your chick’s decorations with different vegetables or edible accents.
Following these instructions will guide you in creating a charming and crowd-pleasing Easter Chick Cheese Ball that’s sure to be a hit at your springtime gatherings!
Nutritional Nest Egg: Easter Chick Cheese Ball Nutrition Facts
The Easter Chick Cheese Ball, while undeniably festive and delicious, is a rich appetizer due to its cheese-based nature. Enjoy it in moderation as part of a balanced diet, especially during celebratory occasions. Understanding its nutritional profile can help you make informed choices about portion sizes and pairings.
Serving Size & Calories (Estimates):
- Serving Size: A typical serving size is approximately 2 tablespoons of cheese ball. This is an estimated portion size as cheese ball servings can vary.
- Calories Per Serving (Estimated): Approximately 150-200 calories per 2 tablespoons of cheese ball. This calorie count is an estimate and can vary slightly depending on the specific brands of cream cheese, mayonnaise, and cheddar cheese used, as well as the exact serving size.
Key Nutritional Information (per serving, approximate and varies based on ingredients):
- High in Fat: Cheese balls are inherently high in fat due to the cream cheese, cheddar cheese, Monterey Jack cheese, and mayonnaise. Fat content contributes to the creamy texture and rich flavor.
- Total Fat: Approximately 12-16 grams per serving
- Saturated Fat: Approximately 7-9 grams per serving (primarily from dairy fats)
- Moderate in Protein: Cheese provides a moderate amount of protein.
- Protein: Approximately 5-7 grams per serving
- Low in Carbohydrates: Cheese balls are generally low in carbohydrates, making them suitable for low-carb diets in moderation.
- Carbohydrates: Approximately 2-3 grams per serving (primarily from mayonnaise and minor ingredients)
- Sodium Content: Cheese and mayonnaise contribute to the sodium content.
- Sodium: Approximately 150-250 mg per serving (varies depending on cheese and mayonnaise brands and added salt)
- Vitamins and Minerals: Cheese provides some vitamins and minerals, including:
- Calcium: From dairy cheeses, important for bone health.
- Vitamin A: From cheese, contributes to vision and immune function.
- Riboflavin (Vitamin B2): From cheese, helps convert food into energy.
Breakdown of Approximate Nutritional Values per 2-tablespoon Serving:
- Calories: 150-200 kcal
- Fat: 12-16 grams
- Saturated Fat: 7-9 grams
- Cholesterol: 40-50 mg (from dairy cheeses and mayonnaise)
- Sodium: 150-250 mg
- Carbohydrates: 2-3 grams
- Protein: 5-7 grams
- Fiber: Less than 1 gram
Important Considerations:
- Saturated Fat Content: Cheese balls are high in saturated fat. It’s recommended to consume saturated fat in moderation as part of a balanced diet, especially for individuals concerned about heart health.
- Sodium Content: Be mindful of the sodium content, especially if you are watching your sodium intake. Choose lower-sodium cheese and mayonnaise options if desired.
- Calorie Density: Cheese balls are calorie-dense, meaning they pack a lot of calories into a small serving. Portion control is key to enjoying them as part of a healthy eating plan.
- Pairings: To balance the richness of the cheese ball, serve it with plenty of fresh vegetables like carrot sticks, celery sticks, cucumber slices, and bell pepper strips. These provide fiber, vitamins, and lower-calorie dipping options compared to crackers and chips. Choose whole-grain crackers or pita chips in moderation if serving with crackers.
Healthier Swaps and Modifications (to reduce calories and fat):
- Reduced-Fat Cream Cheese: Using reduced-fat cream cheese will lower the fat and calorie content slightly, but may alter the texture.
- Light Mayonnaise or Greek Yogurt: Substituting light mayonnaise or using part Greek yogurt and part mayonnaise can reduce fat and calories while adding a slight tang.
- Increase Vegetable Add-ins: Adding more chopped vegetables like green onions, chives, or roasted red peppers to the cheese ball mixture can increase the nutritional value and fiber content slightly.
- Serve with More Vegetables, Fewer Crackers: Emphasize vegetable dippers and limit the portion of crackers or chips served alongside the cheese ball.
While the Easter Chick Cheese Ball is not a low-calorie or low-fat appetizer, it can be enjoyed as a festive treat in moderation. Be mindful of serving sizes, pair it with healthier dipper options, and consider making healthier modifications if desired to align with your dietary goals.
Prep Time Peeps: Getting Your Easter Chick Cheese Ball Ready
Creating an Easter Chick Cheese Ball involves several stages, but the active preparation time is manageable, especially with chilling time factored in. It’s a recipe that benefits from being made ahead, which is perfect for busy hosts preparing for Easter gatherings.
Breakdown of Prep Time:
- Cheese Ball Mixture Preparation: Approximately 20 minutes (including softening cream cheese, combining ingredients, and mixing).
- Chilling Cheese Ball Mixture: Minimum 2 hours, preferably overnight (inactive time, but essential).
- Shaping Cheese Ball: Approximately 15 minutes.
- Chilling Shaped Cheese Ball: 30 minutes to 1 hour (inactive time, but helpful).
- Coating with Cheddar Cheese: Approximately 20 minutes.
- Decorating Chick: Approximately 15-20 minutes.
- Final Chilling (after decorating): Minimum 30 minutes, up to several hours (inactive time, recommended).
Total Estimated Time (Active Prep + Inactive Chilling): Approximately 2 hours – 2 hours 45 minutes (including chilling time).
Active Prep Time (Hands-on Time): Approximately 1 hour 10 minutes – 1 hour 35 minutes.
Tips to Speed Up Prep Time:
- Soften Cream Cheese in Advance: Remember to take the cream cheese out of the refrigerator well in advance to soften completely at room temperature. This significantly reduces mixing time.
- Use Pre-Shredded Cheese: Using pre-shredded cheddar and Monterey Jack cheese saves time compared to shredding your own from blocks.
- Simple Decorations: Opt for simpler chick decorations if you’re short on time. Focus on the essential beak and eyes, and skip more elaborate details like the comb if needed.
- Prepare Components in Stages: You can break down the preparation into stages over a couple of days. Make the cheese ball mixture one day, and then shape, coat, and decorate it the next day.
Make-Ahead Options:
- Cheese Ball Mixture (Up to 3 days ahead): The cheese ball mixture can be made up to 3 days in advance and stored covered in the refrigerator. This is highly recommended as it allows the flavors to meld and develop.
- Shaped Cheese Ball (Up to 2 days ahead): You can shape the cheese ball and store it, uncoated, covered in the refrigerator for up to 2 days. Coat and decorate closer to serving time.
- Coated Cheese Ball (Up to 1 day ahead): The cheese ball can be shaped and coated with cheddar cheese up to 1 day in advance and stored covered in the refrigerator. Decorate closer to serving time to keep the decorations fresh.
- Fully Decorated Cheese Ball (Up to 4-6 hours ahead): The fully decorated Easter Chick Cheese Ball can be made and refrigerated for up to 4-6 hours before serving. For best appearance, add the carrot beak and feet and olive eyes closer to serving time to prevent them from drying out slightly.
Timeline for Making Ahead (Example for serving on Easter Sunday):
- Friday: Make the cheese ball mixture. Store in the refrigerator.
- Saturday: Shape the cheese ball. Store in the refrigerator.
- Sunday (Morning/Early Afternoon): Coat the cheese ball with cheddar cheese, decorate it as a chick. Chill for at least 30 minutes before serving.
The Easter Chick Cheese Ball is a fantastic appetizer to make ahead of time, reducing stress on the day of your Easter celebration. The chilling periods are essential for the recipe’s success, but they also conveniently allow you to break up the preparation process and manage your time effectively.
How to Serve Your Easter Chick Cheese Ball: Hatching a Perfect Presentation
Serving your Easter Chick Cheese Ball is all about showcasing its adorable charm and festive appeal. Presentation is key to maximizing the “wow” factor and making it a delightful centerpiece for your appetizer spread. Here are various serving suggestions to make your cheesy chick shine:
Presentation & Plating Ideas:
- Platter Centerpiece: Place the Easter Chick Cheese Ball in the center of a large serving platter as the focal point. Surround it with an array of dippers, creating a visually appealing and accessible appetizer arrangement.
- “Nest” of Crackers: Arrange crackers, pretzels, or pita chips around the base of the cheese ball, mimicking a nest for the chick. Use a variety of colors and textures of dippers to create visual interest.
- Vegetable Garden: Create a “garden” around the cheese ball using fresh vegetable sticks like carrot sticks, celery sticks, cucumber spears, bell pepper strips, and broccoli florets. This adds color, freshness, and healthier dipping options.
- Spring Greens Base: Line the serving platter with fresh spring greens like lettuce leaves, spinach leaves, or kale leaves to create a vibrant green base for the cheese ball and dippers, enhancing the springtime theme.
- Tiered Stand Display: Use a tiered serving stand to elevate the cheese ball and dippers. Place the cheese ball on the top tier and arrange dippers on the lower tiers for a visually impressive display.
Dippers to Offer (Variety is Key):
- Crackers: Offer a variety of crackers – water crackers, wheat crackers, cheese crackers, flavored crackers.
- Pretzels: Provide pretzel sticks, pretzel crisps, or mini pretzels for a salty and crunchy option.
- Vegetable Sticks: Carrot sticks, celery sticks, cucumber spears, bell pepper strips, snap peas, broccoli florets, cauliflower florets, radishes.
- Pita Chips: Serve baked pita chips for a sturdy and flavorful dipping option.
- Baguette Slices or Crostini: Offer toasted baguette slices or crostini for a more substantial and elegant dipping option.
- Fruit Slices (for a sweet and savory contrast): Apple slices, pear slices, or grapes can offer a surprising and delicious sweet-savory pairing.
Garnish & Accents:
- Fresh Herbs: Sprinkle fresh parsley, dill, or chives around the platter for a touch of green and freshness.
- Edible Flowers: Add edible flowers like pansies or violets for a beautiful springtime garnish, especially for Easter brunch.
- Carrot Curls or Ribbons: Create carrot curls or ribbons and scatter them around the platter to echo the carrot beak and feet of the chick.
- Black Olives (sliced): Sprinkle extra sliced black olives around the base for visual continuity with the chick’s eyes.
- Paprika Dusting: Lightly dust the platter with paprika for a subtle color accent and visual warmth.
Serving Occasions & Pairings:
- Easter Brunch or Dinner: The Easter Chick Cheese Ball is the perfect centerpiece for your Easter appetizer spread.
- Spring Parties & Gatherings: Serve it at spring luncheons, garden parties, baby showers, or any springtime celebration.
- Kid-Friendly Events: This cheese ball is especially appealing to children due to its cute and fun appearance.
- Appetizer Course: Serve as a standalone appetizer or as part of a larger appetizer platter with other spring-themed bites.
- Pair with:
- Sparkling Wine or Prosecco: A festive and celebratory pairing.
- White Wine (Sauvignon Blanc, Pinot Grigio): Complements the creamy cheese with crisp acidity.
- Rosé Wine: A light and refreshing springtime wine pairing.
- Iced Tea or Lemonade: Refreshing non-alcoholic options, especially for brunch or daytime gatherings.
By focusing on creative presentation, offering a variety of dippers, and adding festive garnishes, you can transform your Easter Chick Cheese Ball into a truly show-stopping and memorable appetizer that will delight your guests and enhance your springtime celebrations!
Additional Tips for Easter Chick Cheese Ball Charm
Want to make your Easter Chick Cheese Ball truly exceptional and foolproof? Here are five additional tips to ensure your cheesy chick is the star of the Easter show:
1. Room Temperature Cream Cheese is Non-Negotiable: Seriously, don’t even attempt to mix the cheese ball ingredients unless your cream cheese is properly softened to room temperature. This is absolutely critical for a smooth, lump-free cheese ball. Take the cream cheese out of the refrigerator at least an hour (or even two, depending on your room temperature) before you plan to start mixing. Soft cream cheese blends effortlessly with the other ingredients, creating the creamy, spreadable texture you desire. Trying to mix cold cream cheese will result in a lumpy, uneven mixture that’s difficult to work with.
2. Finely Shredded Cheese for Coating is Key to “Feathers”: For that charming, feathery chick appearance, use finely shredded cheddar cheese for the coating. Pre-shredded cheese often works well for this purpose as it tends to be drier and finer than cheese you shred yourself. If you are shredding your own cheese, use the fine shredding side of a box grater. Finely shredded cheese adheres to the cheese ball more easily and creates a smoother, more even, and feather-like coating, enhancing the chick’s visual appeal.
3. Damp Hands for Shaping Success: When shaping the cheese ball into the chick body (and head, if you are making one separately), lightly dampen your hands with cold water. This simple trick prevents the cheese ball mixture from sticking to your hands, making shaping much easier and less messy. Keep a small bowl of water nearby and re-dampen your hands as needed during the shaping process.
4. Chill Time is Your Friend (Embrace It!): Don’t rush the chilling steps in this recipe. Chilling the cheese ball mixture before shaping, chilling the shaped cheese ball before coating, and chilling the fully decorated cheese ball before serving are all essential for the recipe’s success. Chilling firms up the cheese ball, making it easier to handle, shape, and coat. It also allows the flavors to meld and deepen, resulting in a more delicious and well-structured appetizer. Embrace the chilling time as a necessary part of the process and plan accordingly.
5. Edible Glue for Decorations (Cream Cheese Trick): To ensure your carrot beak, feet, olive eyes, and optional red pepper comb stay securely attached to the cheese ball, use a tiny dab of extra cream cheese as “edible glue.” Take a small amount of softened cream cheese on the tip of a knife or your finger and apply it to the back of each decoration piece before pressing it onto the cheese ball. The cream cheese will act as an adhesive, helping the decorations stick firmly and preventing them from falling off, especially if the cheese ball is being transported or handled frequently.
By incorporating these additional tips, you can master the art of the Easter Chick Cheese Ball and create a truly impressive and delightful appetizer that’s both delicious and visually captivating. These little details will make a big difference in the final result, ensuring your cheesy chick is a resounding success!
Frequently Asked Questions About the Easter Chick Cheese Ball (FAQ)
Got questions about crafting your perfect Easter Chick Cheese Ball? Here are answers to some frequently asked questions to help you troubleshoot and achieve cheesy chick perfection:
Q1: My cheese ball mixture is too soft and sticky to shape. What did I do wrong?
A: The most likely culprit is that your cream cheese was not softened enough, or you may have added too much mayonnaise. Ensure your cream cheese is completely softened to room temperature before mixing. If the mixture is still too soft, try adding a bit more shredded cheddar cheese (about ¼ cup at a time) to firm it up. You can also chill the mixture for a longer period (3-4 hours or overnight) to see if it firms up sufficiently. If it remains too soft, consider adding a stabilizer like finely grated Parmesan cheese or a tablespoon of cornstarch to help absorb excess moisture.
Q2: The cheddar cheese coating isn’t sticking to my cheese ball. How can I make it adhere better?
A: Make sure your cheese ball is well-chilled before attempting to coat it. A cold cheese ball will be firmer and provide a better surface for the cheddar to stick to. Press the shredded cheddar cheese firmly but gently onto the cheese ball, working in sections. Use your hands to pat the cheddar coating and ensure it makes good contact with the cheese ball surface. If the cheddar still isn’t sticking, you can lightly dampen your hands with water (again) to help the cheddar adhere. Alternatively, you can lightly press the cheese ball into a shallow dish of shredded cheddar, rolling it gently to coat all sides.
Q3: Can I use pre-shredded cheese for the cheese ball base and coating?
A: Yes, you can use pre-shredded cheese for both the cheese ball base and the coating for convenience. However, be aware that pre-shredded cheese often contains cellulose or other anti-caking agents, which can sometimes slightly affect the texture and melting properties. For the cheese ball base, using block cheese shredded yourself may result in a slightly creamier texture. For the coating, pre-shredded cheddar is often recommended as it tends to be finer and drier, which is ideal for creating the feathery look.
Q4: How long will the Easter Chick Cheese Ball last in the refrigerator?
A: Properly stored in an airtight container in the refrigerator, the Easter Chick Cheese Ball will last for up to 3-4 days. For best quality and flavor, it’s recommended to consume it within 2-3 days. After that, the texture and flavor may start to decline slightly. Ensure the cheese ball is always kept refrigerated and brought out only for serving to maintain food safety.
Q5: Can I freeze the Easter Chick Cheese Ball?
A: Freezing the fully assembled and decorated Easter Chick Cheese Ball is not recommended. Freezing can alter the texture of cream cheese and mayonnaise-based cheese balls, potentially making them grainy or watery upon thawing. The decorations may also become soggy or lose their shape. It is best to make the cheese ball fresh and enjoy it within a few days of preparation. However, you can freeze the cheese ball mixture itself (before shaping, coating, and decorating) for up to 1-2 months. Thaw it in the refrigerator overnight before shaping, coating, and decorating as usual.
We hope these FAQs have addressed any lingering questions and empowered you to create your own flock of charming and delicious Easter Chick Cheese Balls! Enjoy the process and the delighted reactions from your guests!
Print
Easter Chick Cheese Ball Recipe
Ingredients
For the Cheese Ball Base:
- Cream Cheese: 2 (8-ounce) packages of cream cheese are the foundation of our cheese ball. It’s crucial to use full-fat cream cheese for the best texture and flavor. Make sure the cream cheese is softened to room temperature before you begin mixing. This will ensure a smooth and easily workable cheese ball. Reduced-fat cream cheese can be used, but the texture might be slightly less creamy and firm.
- Shredded Cheddar Cheese: 2 cups of shredded cheddar cheese add a sharp, savory flavor and a firmer texture to the cheese ball. Sharp or extra-sharp cheddar is recommended for a more pronounced cheese flavor that cuts through the richness of the cream cheese. You can use pre-shredded cheddar for convenience or shred your own from a block for potentially better melting and flavor. Consider using a mix of cheddar varieties (mild and sharp) for a more complex flavor profile.
- Shredded Monterey Jack Cheese: 1 cup of shredded Monterey Jack cheese contributes a mild, buttery flavor and excellent melting properties, enhancing the overall creamy texture of the cheese ball. Monterey Jack also adds a subtle sweetness that balances the sharpness of the cheddar. If you don’t have Monterey Jack, you can substitute with mild cheddar, mozzarella, or provolone cheese.
- Mayonnaise: ½ cup of mayonnaise adds moisture, creaminess, and binds the cheese ball ingredients together. Use full-fat mayonnaise for the richest flavor and texture. Light mayonnaise can be used, but it might slightly alter the texture. Consider using avocado mayonnaise for a healthier alternative.
- Worcestershire Sauce: 1 tablespoon of Worcestershire sauce provides a savory, umami depth of flavor that enhances the cheese and other seasonings. Worcestershire sauce adds a complex tanginess that elevates the overall taste profile. If you don’t have Worcestershire sauce, a dash of soy sauce or balsamic vinegar can be used as a substitute, although the flavor will be slightly different.
- Garlic Powder: 1 teaspoon of garlic powder adds a subtle savory note and aromatic complexity. Garlic powder is preferred for its even distribution and mild garlic flavor. Freshly minced garlic can also be used, but use sparingly as it can be overpowering.
- Onion Powder: 1 teaspoon of onion powder complements the garlic and adds another layer of savory depth. Similar to garlic powder, onion powder offers a mild and evenly distributed onion flavor. Finely minced shallots or chives can be used as a fresh alternative.
- Salt: ½ teaspoon of salt, or to taste, is essential for seasoning the cheese ball and enhancing all the other flavors. Start with ½ teaspoon and adjust to your preference. Kosher salt or sea salt are recommended for their pure flavor.
- Black Pepper: ¼ teaspoon of freshly ground black pepper, or to taste, adds a subtle warmth and depth of flavor. Freshly ground pepper is always preferred for its brighter flavor.
For the Chick Decorations:
- Shredded Cheddar Cheese (for coating): 2 cups of shredded cheddar cheese are used to coat the cheese ball and create the chick’s feathery appearance. Finely shredded cheddar works best for creating a smooth, even coating. You can use the same cheddar cheese as in the cheese ball base or choose a different shade of cheddar for visual contrast.
- Carrots: 1-2 medium carrots are needed to create the beak and feet for your chick. Choose bright orange carrots for the best color and visual appeal. Firm carrots are easier to carve into shapes.
- Black Olives (pitted, sliced): 6-8 sliced black olives are used to create the eyes for the chick. Pitted, sliced black olives are convenient and readily available. You can also use whole black olives and slice them yourself.
- Red Bell Pepper (optional, for comb): A small piece of red bell pepper can be used to create a comb on top of the chick’s head for extra detail and color. Choose a vibrant red bell pepper for visual impact.
Optional Ingredients and Variations:
- Chopped Green Onions or Chives: ¼ cup of finely chopped green onions or chives can be added to the cheese ball mixture for a fresh, mild oniony flavor and a touch of green.
- Pimentos or Roasted Red Peppers: ¼ cup of diced pimentos or roasted red peppers can be added for a sweet and slightly tangy flavor and a pop of red color within the cheese ball.
- Hot Sauce: A dash of hot sauce (like Tabasco or your favorite brand) can be added for a subtle kick of heat.
- Smoked Paprika: A teaspoon of smoked paprika can be added to the cheese ball mixture or sprinkled on top of the cheddar coating for a smoky flavor note.
- Fresh Parsley or Dill: Finely chopped fresh parsley or dill can be added to the cheese ball mixture for a fresh, herbaceous flavor and a touch of green.
- Different Cheese Coatings: Instead of cheddar cheese, you can use other coatings like chopped pecans, almonds, pistachios, dried cranberries, or a mixture of herbs like parsley and dill.
Instructions
Step 1: Prepare the Cheese Ball Mixture (Approximately 20 minutes)
- Soften Cream Cheese: Ensure your cream cheese is softened to room temperature for at least 30 minutes to an hour. This is crucial for a smooth and easily mixable cheese ball.
- Combine Cheeses: In a large mixing bowl, combine the softened cream cheese, shredded cheddar cheese, and shredded Monterey Jack cheese.
- Add Mayonnaise and Worcestershire Sauce: Add the mayonnaise and Worcestershire sauce to the cheese mixture.
- Incorporate Seasonings: Add the garlic powder, onion powder, salt, and black pepper to the bowl.
- Mix Thoroughly: Using an electric mixer (hand mixer or stand mixer) or a sturdy spoon, beat or stir all the ingredients together until they are completely combined and smooth. Ensure there are no lumps of cream cheese remaining. The mixture should be well-integrated and easy to shape.
- Chill the Mixture: Cover the mixing bowl tightly with plastic wrap and refrigerate for at least 2 hours, or preferably overnight. Chilling is essential for firming up the cheese ball mixture, making it easier to shape and coat. The longer chilling time will result in a firmer, more stable cheese ball.
Step 2: Shape the Cheese Ball into a Chick (Approximately 15 minutes)
- Prepare a Work Surface: Line a baking sheet or large plate with parchment paper or wax paper. This will prevent the cheese ball from sticking.
- Scoop and Shape: Remove the chilled cheese ball mixture from the refrigerator. Using a large spoon or your hands (lightly dampened with water to prevent sticking), scoop out the cheese mixture and start shaping it into an oval or rounded chick body shape. You can form it into a slightly flattened oval to resemble a sitting chick.
- Form the Head (Optional): If desired, you can create a separate, smaller cheese ball for the chick’s head. Use a smaller scoop of the cheese mixture and shape it into a smaller round ball. Attach the head to the body by gently pressing it onto the top of the larger oval shape. You can use a little extra cheese mixture to help blend the head and body seamlessly. For a simpler chick shape, you can skip the separate head and just create a single oval body shape.
- Place on Prepared Sheet: Carefully place the shaped cheese ball (or chick body and head) onto the prepared baking sheet or plate lined with parchment paper.
- Return to Chill: Return the shaped cheese ball to the refrigerator to chill for another 30 minutes to an hour to further firm up before coating. This step helps the cheese ball hold its shape during coating.
Step 3: Coat the Cheese Ball with Cheddar Cheese (Approximately 20 minutes)
- Prepare Cheddar Coating: Place the 2 cups of shredded cheddar cheese for coating in a shallow dish or bowl.
- Remove Chilled Cheese Ball: Remove the chilled and shaped cheese ball from the refrigerator.
- Coat with Cheddar: Using your hands, gently press the shredded cheddar cheese onto the entire surface of the cheese ball, ensuring it is completely coated. Work in sections, pressing the cheese firmly but gently so it adheres to the cheese ball. You may need to use your hands to pat and shape the cheddar coating to create a smooth, even, and slightly feathery appearance. If some cheddar falls off, simply press it back on.
- Refine Shape (Optional): After coating, you can gently reshape the chick if needed, patting the cheddar coating to refine the oval shape and ensure the head (if you made one) is securely attached.
Step 4: Decorate the Chick (Approximately 15-20 minutes)
- Prepare Carrot Decorations: Peel the carrots and cut thin slices. From the slices, cut out small triangles for the beak and small feet shapes. You can use a paring knife or small cookie cutters.
- Attach Beak and Feet: Gently insert a carrot triangle into the cheese ball to create the beak, positioning it in the center of the chick’s “face.” Place two carrot feet shapes at the base of the chick, underneath the cheese ball.
- Add Olive Eyes: Take the sliced black olives and carefully place two slices on the cheese ball to create eyes above the beak.
- Add Red Pepper Comb (Optional): If using, cut a small comb shape from the red bell pepper and gently attach it to the top of the chick’s head. You can use a small piece of cream cheese mixture or a toothpick (removed before serving) to help secure it if needed.
Step 5: Chill and Serve (Minimum 30 minutes chilling, up to several hours)
- Chill Decorated Cheese Ball: Return the decorated Easter Chick Cheese Ball to the refrigerator to chill for at least 30 minutes to allow the cheddar coating to set and the decorations to adhere firmly. Chilling for longer (1-2 hours or more) is recommended for optimal firmness and flavor development.
- Serve Chilled: Serve the Easter Chick Cheese Ball chilled with an assortment of crackers, pretzels, vegetable sticks (carrots, celery, cucumber), pita chips, or baguette slices for dipping and spreading.
Tips for Success:
- Softened Cream Cheese is Key: Don’t rush the softening process for the cream cheese. It’s essential for a smooth, lump-free cheese ball.
- Chill, Chill, Chill: Chilling at various stages is crucial for firming up the cheese ball and making it easier to shape, coat, and decorate.
- Gentle Handling: Handle the cheese ball gently during shaping and coating to maintain its form.
- Fresh Ingredients: Use high-quality, fresh ingredients for the best flavor.
- Get Creative with Decorations: Feel free to personalize your chick’s decorations with different vegetables or edible accents.
Nutrition
- Serving Size: one normal portion
- Calories: 150-200 kcal
- Sodium: 150-250 mg
- Fat: 12-16 grams
- Saturated Fat: 7-9 grams
- Carbohydrates: 2-3 grams
- Fiber: Less than 1 gram
- Protein: 5-7 grams
- Cholesterol: 40-50 mg


