

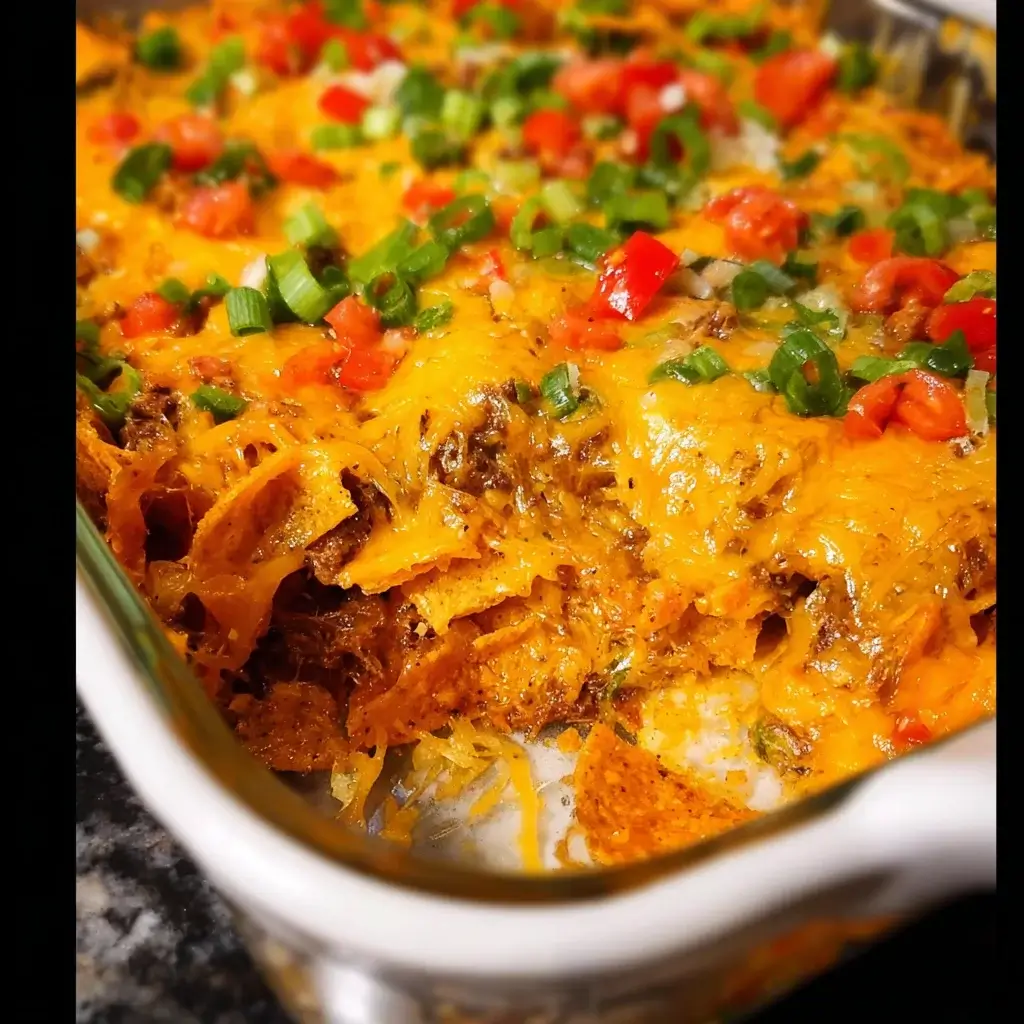

I’m going to be completely honest with you: I used to be a food snob. I believed that great food had to be complicated, with fancy French techniques and ingredients I couldn’t pronounce. Then I had kids. And one day, staring down the barrel of a 6 PM dinner deadline with two hungry, grumpy children, I found myself holding a bag of Nacho Cheese Doritos and a pound of ground beef. In a moment of sheer desperation, I threw together a concoction I’d only ever heard of in hushed, guilty-pleasure tones: a Dorito Casserole. As it baked, the most unbelievable aroma filled my kitchen—a glorious fusion of tacos, cheese, and toasted corn that was pure, unadulterated comfort. When I pulled the bubbly, cheesy, crunchy-topped casserole from the oven, my kids’ eyes went wide. We sat down and ate in what can only be described as blissful silence. That first bite—a perfect mix of savory, seasoned beef, gooey melted cheese, and the unmistakable, zesty crunch of a Dorito—was a humbling, delicious revelation. It wasn’t fancy, but it was perfect. This Dorito Casserole is now a celebrated staple in our home, a testament to the fact that sometimes, the most joyful and memorable meals are the ones that don’t take themselves too seriously.
The Ultimate Weeknight Dorito Casserole with Ground Beef
This is not just a recipe; it’s a solution. It’s the answer to the never-ending question of “What’s for dinner?” on a busy weeknight. This Dorito Casserole is a masterpiece of modern comfort food, a layered bake that combines the savory satisfaction of a taco with the irresistible crunch and bold flavor of your favorite tortilla chips. It’s a one-dish wonder that is ridiculously easy to assemble, requires common pantry staples, and guarantees a clean-plate-club victory with even the pickiest eaters. Whether you’re feeding a hungry family, looking for the perfect potluck contribution, or simply craving a delicious dose of culinary nostalgia, this recipe will deliver every single time.
Why This Recipe is an Undisputed Weeknight Hero
The enduring popularity of the Dorito Casserole isn’t a mystery. It’s a brilliantly designed dish that hits all the right notes for modern home cooks.
- The Comfort Food Factor: At its heart, this is a taco in casserole form. The combination of seasoned ground beef, melted cheese, and crunchy chips taps into a deep-seated love for familiar, satisfying flavors. It’s warm, hearty, and feels like a hug in a dish.
- Insanely Easy to Prepare: With minimal chopping and a simple layering process, this is a true “dump and bake” style recipe. You can have it prepped and in the oven in under 20 minutes, making it a lifesaver on busy schedules.
- The Kid-Approved Guarantee: What kid doesn’t love tacos and Doritos? This casserole is a surefire way to get them excited about dinner. It’s fun to eat, not too spicy (but easily adaptable), and has a familiar, friendly flavor profile.
- Budget-Friendly and Versatile: The core ingredients—ground beef, canned goods, cheese, and a bag of chips—are relatively inexpensive and readily available. Furthermore, the recipe is incredibly forgiving and easy to customize with whatever you have on hand.
- Perfect for Potlucks and Parties: This casserole travels well and can easily be doubled to feed a crowd. Arrive with a warm, bubbly Dorito Casserole, and you will instantly become the most popular person at any potluck or game-day gathering.
The Anatomy of a Perfect Dorito Casserole: The Key Ingredients
Each layer and ingredient in this casserole plays a crucial, synergistic role. Understanding what each component brings to the party will help you appreciate the delicious alchemy at work.
- The Doritos: The star of the show and the casserole’s namesake. Nacho Cheese Doritos are the classic choice, providing a cheesy, savory, and slightly spicy foundation. They create both a sturdy bottom layer and a wonderfully crunchy topping.
- The Ground Beef: The hearty, savory protein base. An 80/20 lean-to-fat ratio is ideal, providing enough fat for flavor without making the casserole greasy (as long as you drain it well!).
- The Taco Seasoning: This is the flavor engine. A standard packet of store-bought taco seasoning provides a perfectly balanced blend of chili powder, cumin, paprika, onion, and garlic powder.
- The Creamy Binder: This is what brings the filling together and gives it a luscious, creamy texture. The classic, no-fuss choice is a can of condensed Cream of Chicken or Cream of Mushroom Soup. It adds moisture, richness, and a savory quality that complements the beef.
- The Zesty Add-In: A can of Rotel Diced Tomatoes & Green Chilies is a brilliant shortcut. It adds moisture, a zesty tomato flavor, and a mild background heat all in one go.
- The Veggies: Canned or frozen corn adds pops of sweetness and texture, while black beans can be added for extra fiber and a heartier, more Southwestern feel.
- The Cheese: The gooey, melty glue that holds everything together. A generous amount of shredded Sharp Cheddar or a Mexican Cheese Blend is essential for that irresistible cheese pull.
The Complete Ingredient List for a Crowd-Pleasing Casserole
This recipe yields a 9×13 inch casserole, serving 6-8 people generously.
- 1 pound Ground Beef (80/20 recommended)
- 1 packet (1 ounce) Taco Seasoning
- 1 large bag (9.25 ounces) Nacho Cheese Doritos
- 1 can (10.5 ounces) Condensed Cream of Chicken Soup (or Cream of Mushroom)
- 1 can (10 ounces) Rotel Diced Tomatoes & Green Chilies, undrained
- 1 can (15 ounces) Corn, drained (or use 1 ½ cups frozen corn)
- 1 can (15 ounces) Black Beans, rinsed and drained (optional)
- 2 cups Shredded Cheddar Cheese or Mexican Cheese Blend, divided
- ½ cup Milk or Water (optional, to thin the sauce if needed)
- For Garnish (Optional but Recommended): Sour cream, sliced jalapeños, chopped cilantro, shredded lettuce, diced tomatoes, sliced black olives.
Step-by-Step Instructions to Casserole Perfection
This recipe is all about simple, straightforward layers. Follow these steps for a flawless result every time.
Step 1: Prepare Your Oven and Cook the Beef
- Preheat Oven: Position a rack in the center of your oven and preheat to 350°F (175°C). Lightly grease a 9×13 inch baking dish.
- Brown the Beef: In a large skillet, cook the ground beef over medium-high heat, breaking it apart with a spoon, until it is fully browned and no pink remains.
- Drain Thoroughly: Drain off all the excess grease from the skillet. This is a crucial step to prevent a greasy casserole.
- Season the Beef: Return the skillet with the drained beef to the heat. Sprinkle the packet of taco seasoning over the meat and stir to combine. Cook for another minute to toast the spices and let the flavor bloom. Remove from heat.
Step 2: Create the Creamy Filling
- Combine Ingredients: In a large mixing bowl, combine the cooked taco meat, the can of cream of chicken soup, the undrained can of Rotel, the drained corn, the rinsed black beans (if using), and 1 cup of the shredded cheese.
- Stir to Combine: Stir everything together until it is well mixed. If the mixture seems overly thick, you can stir in up to a ½ cup of milk or water to reach a more spreadable consistency.
Step 3: The Art of Layering
- First Layer (The Base): Coarsely crush about half of the bag of Doritos. Don’t turn them into dust; you want some larger pieces for texture. Create an even layer of the crushed chips on the bottom of your prepared 9×13 inch baking dish.
- Second Layer (The Filling): Spoon the prepared ground beef mixture evenly over the top of the crushed Doritos layer. Use a spatula to spread it out to the edges of the dish.
- Third Layer (The Topping): Sprinkle the remaining 1 cup of shredded cheese evenly over the beef filling.
- Fourth Layer (The Crunch): Lightly crush the remaining Doritos from the bag and sprinkle them evenly over the top of the cheese.
Step 4: Bake to Bubbly, Golden Perfection
- Bake: Place the casserole dish in the preheated oven and bake, uncovered, for 25 to 30 minutes. The casserole is done when the cheese is fully melted and the filling is hot and bubbly around the edges.
- Rest: This is an important step! Let the casserole rest on a wire rack for 10-15 minutes before serving. This allows it to set up, making it much easier to slice and serve without falling apart.
Step 5: Garnish and Serve
- Load it Up: Serve the casserole warm, topped with generous dollops of sour cream, chopped cilantro, sliced jalapeños, or any of your favorite taco toppings.
Nutritional Information: A Guideline
This is an estimate and will vary based on the specific brands of ingredients used.
- Servings: 8
- Calories per Serving: Approximately 500-600 kcal
Timing Your Masterpiece: Prep and Cook Time
- Preparation Time: 15 minutes
- Cook Time: 30 minutes
- Rest Time: 10 minutes
- Total Time: Approximately 55 minutes
How to Serve Your Dorito Casserole for Maximum Impact
The best way to serve this casserole is by setting up a “topping bar,” allowing everyone to customize their own slice.
- The Topping Bar (Non-Negotiable Fun!):
- Cool and Creamy: Sour cream or a drizzle of Mexican crema, guacamole or diced avocado.
- Fresh and Zesty: Diced tomatoes, shredded iceberg lettuce, chopped red onion, fresh cilantro.
- A Little Heat: Sliced fresh or pickled jalapeños, your favorite hot sauce or salsa.
- Extra Goodness: Sliced black olives.
- Simple Side Dishes: While a complete meal on its own, a simple side can round it out.
- Mexican Rice or Cilantro-Lime Rice: A perfect, flavorful companion.
- A Simple Green Salad: A crisp salad with a zesty lime vinaigrette can provide a fresh contrast to the rich casserole.
- Refried Beans: A classic pairing for any taco-flavored dish.
Pro-Tips for Casserole Perfection
- Don’t Pulverize the Doritos: When crushing the Doritos for the layers, leave some larger, half-inch pieces. This ensures you get a distinct, satisfying crunch and texture rather than a layer of soggy dust.
- The Layering Order is Key for Crunch: Placing a layer of cheese under the final layer of Doritos acts as a moisture barrier, helping to keep that top layer of chips as crunchy as possible during baking.
- Drain That Grease! I cannot stress this enough. Taking the extra minute to thoroughly drain the grease from your cooked ground beef is the number one secret to preventing a soggy, heavy casserole.
- Don’t Skip the Rest: That 10-15 minute rest time after the casserole comes out of the oven is crucial. It allows the molten cheese and creamy filling to set up, so you can serve beautiful, clean slices instead of a soupy mess.
- Fresh Toppings are Your Friend: The rich, savory, baked flavors of the casserole are perfectly balanced by the addition of cool, crisp, fresh toppings. A dollop of sour cream and a sprinkle of fresh cilantro can elevate the entire dish from good to great.
Frequently Asked Questions (FAQ)
Q1: Can I make Dorito Casserole ahead of time?
A: Yes, you can assemble it ahead of time with one important modification. Assemble the entire casserole except for the top layer of Doritos. Cover the dish tightly with foil and refrigerate for up to 24 hours. When you’re ready to bake, remove it from the fridge, top with the final layer of crushed Doritos, and bake as directed, adding 10-15 minutes to the baking time to account for the cold dish.
Q2: How do I prevent the Doritos from getting soggy?
A: While some softening of the bottom layer is inevitable (and delicious!), the best way to ensure maximum crunch is to follow the layering technique carefully. Having a layer of crushed chips on the bottom, the filling, a layer of cheese, and then the final layer of chips on top is the best method. The cheese acts as a barrier, and the top chips get toasted and crispy in the oven.
Q3: Can I freeze this casserole?
A: Yes, Dorito Casserole freezes surprisingly well. You can freeze it baked or unbaked. For best results, assemble in a freezer-safe dish (without the top layer of chips), cover tightly with a layer of plastic wrap and then a layer of foil, and freeze for up to 3 months. Thaw overnight in the refrigerator, top with fresh crushed Doritos, and bake as directed.
Q4: I don’t have Cream of Chicken soup. What can I use as a substitute?
A: No problem! Cream of Mushroom or Cream of Celery soup works perfectly as a 1-to-1 substitute. For a “from-scratch” alternative, you can make a simple white sauce (a béchamel) by melting 2 tablespoons of butter, whisking in 2 tablespoons of flour, and then slowly whisking in 1 cup of milk until thickened. Season with salt and pepper.
Q5: Can I use a different kind of meat or make a vegetarian version?
A: Absolutely! This recipe is incredibly versatile. You can substitute the ground beef with ground turkey or shredded rotisserie chicken. For a vegetarian version, substitute the meat with two cans of pinto or black beans (in addition to the corn), or use a plant-based ground meat alternative. If going vegetarian, use Cream of Mushroom soup.

Dorito Casserole recipe
Ingredients
-
1 pound Ground Beef (80/20 recommended)
-
1 packet (1 ounce) Taco Seasoning
-
1 large bag (9.25 ounces) Nacho Cheese Doritos
-
1 can (10.5 ounces) Condensed Cream of Chicken Soup (or Cream of Mushroom)
-
1 can (10 ounces) Rotel Diced Tomatoes & Green Chilies, undrained
-
1 can (15 ounces) Corn, drained (or use 1 ½ cups frozen corn)
-
1 can (15 ounces) Black Beans, rinsed and drained (optional)
-
2 cups Shredded Cheddar Cheese or Mexican Cheese Blend, divided
-
½ cup Milk or Water (optional, to thin the sauce if needed)
-
For Garnish (Optional but Recommended): Sour cream, sliced jalapeños, chopped cilantro, shredded lettuce, diced tomatoes, sliced black olives.
Instructions
Step 1: Prepare Your Oven and Cook the Beef
-
Preheat Oven: Position a rack in the center of your oven and preheat to 350°F (175°C). Lightly grease a 9×13 inch baking dish.
-
Brown the Beef: In a large skillet, cook the ground beef over medium-high heat, breaking it apart with a spoon, until it is fully browned and no pink remains.
-
Drain Thoroughly: Drain off all the excess grease from the skillet. This is a crucial step to prevent a greasy casserole.
-
Season the Beef: Return the skillet with the drained beef to the heat. Sprinkle the packet of taco seasoning over the meat and stir to combine. Cook for another minute to toast the spices and let the flavor bloom. Remove from heat.
Step 2: Create the Creamy Filling
-
Combine Ingredients: In a large mixing bowl, combine the cooked taco meat, the can of cream of chicken soup, the undrained can of Rotel, the drained corn, the rinsed black beans (if using), and 1 cup of the shredded cheese.
-
Stir to Combine: Stir everything together until it is well mixed. If the mixture seems overly thick, you can stir in up to a ½ cup of milk or water to reach a more spreadable consistency.
Step 3: The Art of Layering
-
First Layer (The Base): Coarsely crush about half of the bag of Doritos. Don’t turn them into dust; you want some larger pieces for texture. Create an even layer of the crushed chips on the bottom of your prepared 9×13 inch baking dish.
-
Second Layer (The Filling): Spoon the prepared ground beef mixture evenly over the top of the crushed Doritos layer. Use a spatula to spread it out to the edges of the dish.
-
Third Layer (The Topping): Sprinkle the remaining 1 cup of shredded cheese evenly over the beef filling.
-
Fourth Layer (The Crunch): Lightly crush the remaining Doritos from the bag and sprinkle them evenly over the top of the cheese.
Step 4: Bake to Bubbly, Golden Perfection
-
Bake: Place the casserole dish in the preheated oven and bake, uncovered, for 25 to 30 minutes. The casserole is done when the cheese is fully melted and the filling is hot and bubbly around the edges.
-
Rest: This is an important step! Let the casserole rest on a wire rack for 10-15 minutes before serving. This allows it to set up, making it much easier to slice and serve without falling apart.
Step 5: Garnish and Serve
-
Load it Up: Serve the casserole warm, topped with generous dollops of sour cream, chopped cilantro, sliced jalapeños, or any of your favorite taco toppings.
Nutrition
- Serving Size: one normal portion
- Calories: 500-600 kcal


