
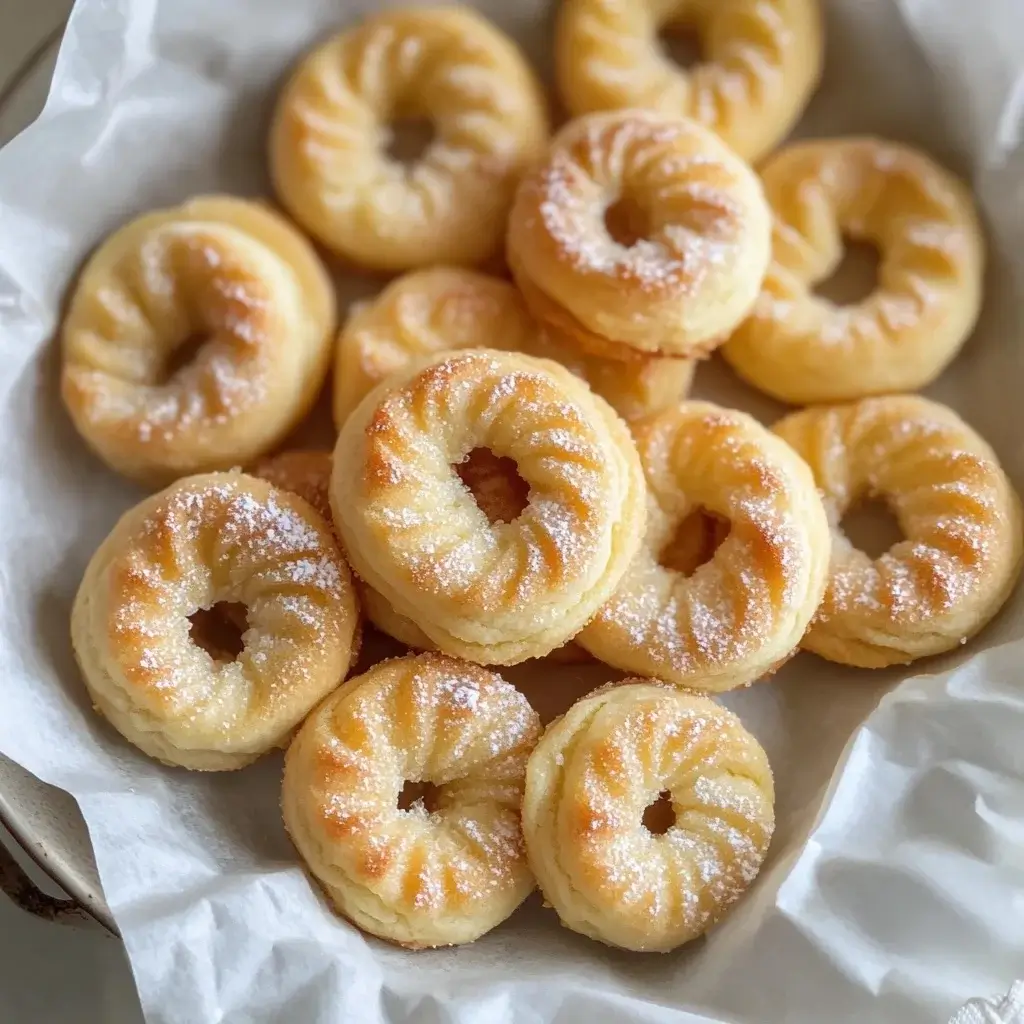

Danish Butter Cookies are a classic treat that many of us associate with the blue tin cans that appear around the holiday season. Known for their rich, buttery flavor and melt-in-your-mouth texture, these cookies are a beloved indulgence. Making them at home is surprisingly simple and allows you to enjoy this delightful treat any time of the year. In this comprehensive guide, we’ll walk you through a delicious Danish Butter Cookie recipe, explore how to serve them, and provide additional tips to ensure your homemade cookies are perfect every time.
Ingredients
Before diving into the detailed instructions, let’s gather the essential ingredients needed to craft these delectable cookies:
- 1 cup unsalted butter, softened
- ½ cup granulated sugar
- ¼ teaspoon salt
- 1 ½ teaspoons vanilla extract
- 1 large egg
- 2 cups all-purpose flour
- Extra sugar for sprinkling
Instructions
Creating Danish Butter Cookies at home is a straightforward process that even baking novices can master. Follow these step-by-step instructions to achieve perfect results:
1. Preheat Oven
- Begin by preheating your oven to 350°F (175°C). This ensures that the cookies bake evenly and develop a lovely golden-brown color.
- Line two baking sheets with parchment paper to prevent the cookies from sticking and to facilitate easy cleanup.
2. Mix Ingredients
- In a large mixing bowl, beat the softened butter and sugar together until the mixture becomes light and fluffy. This should take about 1-2 minutes and is crucial for achieving the cookies’ iconic texture.
- Add the salt, vanilla extract, and egg to the mixture. Mix until smooth and well combined.
- Gradually incorporate the all-purpose flour into the mixture, stirring until just combined. Be careful not to overmix, as this can result in tough cookies.
3. Pipe Cookies
- Transfer the dough into a piping bag fitted with a large star tip. This will give the cookies their distinctive ridged edges and circular shape.
- Pipe 2-inch circles onto the prepared baking sheets, leaving space between each cookie to allow for spreading.
- Sprinkle a little extra sugar over the tops of the cookies for added sweetness and a subtle crunch.
4. Bake
- Place one baking sheet in the preheated oven and bake for 15-17 minutes or until the cookies are lightly golden.
- Remove from the oven and allow the cookies to cool completely on the baking sheet before transferring them to a wire rack. This helps them firm up and prevents breakage.
Nutrition Facts
Understanding the nutritional content of your homemade treats is important, especially if you’re keeping an eye on your dietary intake. Here are the nutrition facts per cookie:
- Calories: 83
- Carbohydrates: 8g
- Fat: 5g
- Saturated Fat: 3g
- Cholesterol: 18mg
- Sodium: 18mg
- Sugar: 2g
How to Serve
Danish Butter Cookies are more than just a delightful treat; they are an experience to be savored. Their rich, buttery flavor and tender crumb make them incredibly versatile, allowing for a variety of serving options that can elevate any occasion. Here are some comprehensive serving suggestions to enhance your enjoyment of these delectable cookies:
1. With Coffee or Tea
One of the most traditional and beloved ways to enjoy Danish Butter Cookies is alongside a hot beverage. The contrast of flavors created by this pairing is simply exquisite.
- Coffee Pairing: The creamy texture and rich flavor of Danish Butter Cookies beautifully balance the robust bitterness of coffee. Whether you prefer a bold espresso or a smooth latte, the cookies serve as the perfect accompaniment. Consider experimenting with flavored coffees, such as hazelnut or vanilla, which can complement the cookies’ buttery notes.
- Tea Pairing: When served with tea, Danish Butter Cookies can enhance the subtlety of the beverage. A delicate green tea or a fragrant Earl Grey can highlight the cookies’ sweetness, while a spiced chai can add a warm contrast. You might also try pairing them with herbal teas, such as chamomile or peppermint, to create a soothing afternoon tea experience.
2. Dessert Platter
Creating a dessert platter featuring Danish Butter Cookies can turn an ordinary gathering into a memorable event. A well-arranged platter not only showcases the cookies but also allows for an array of flavors and textures that will delight your guests.
- Variety of Treats: Combine the cookies with other desserts such as chocolate truffles, fruit tarts, and mini cheesecakes. This variety offers something for everyone and elevates the overall experience. Consider including seasonal fruits like berries or citrus, which can add freshness and a pop of color to your platter.
- Nuts and Dried Fruits: Incorporate a selection of nuts, like almonds or pecans, and dried fruits, such as apricots or cranberries. These add crunch and chewiness, providing a wonderful contrast to the soft texture of the cookies.
- Presentation Tips: Use tiered stands or decorative platters to create an eye-catching display. Garnish the platter with edible flowers or fresh herbs, like mint or rosemary, to enhance its visual appeal and provide an aromatic element.
3. Gift-Giving
Sharing Danish Butter Cookies is a heartfelt gesture that can brighten anyone’s day. Their charming appearance and delightful taste make them an ideal homemade gift for various occasions.
- Packaging Ideas: For a thoughtful presentation, pack the cookies in a decorative tin or an elegant box lined with parchment paper. You can personalize the packaging by adding a handwritten note or a festive ribbon that reflects the season or occasion.
- Holiday Gifting: During the holidays, Danish Butter Cookies become especially popular. Consider making a batch to share with neighbors, friends, or coworkers. You could even create a cookie gift basket that includes a variety of baked goods, hot chocolate mix, or gourmet coffee to make the gift even more special.
- Special Occasions: These cookies make a lovely gift for birthdays, anniversaries, or housewarming parties. Tailor your packaging and presentation to suit the occasion, such as wrapping them in colorful paper for a birthday or using a rustic theme for a housewarming gift.
4. Creative Serving Suggestions
For those looking to experiment further, there are additional creative ways to serve Danish Butter Cookies that can add a unique twist to your enjoyment.
- Ice Cream Sandwiches: Use two Danish Butter Cookies to create an indulgent ice cream sandwich. Choose flavors like vanilla bean, salted caramel, or even fruit sorbet to complement the buttery cookies. Roll the edges in mini chocolate chips or crushed nuts for added texture and flavor.
- Toppings and Dips: Serve the cookies with a selection of toppings or dips. Consider options such as a rich chocolate ganache, a smooth caramel sauce, or a tangy fruit compote. This interactive experience allows guests to customize their cookies and adds an element of fun to the serving.
- Breakfast Treat: For a delightful breakfast option, crumble Danish Butter Cookies over yogurt or oatmeal. This not only adds a sweet crunch but also transforms a simple breakfast into a gourmet experience.
By exploring these serving suggestions, you can enhance your experience with Danish Butter Cookies, whether you’re enjoying them alone or sharing them with others. Their versatility ensures that they can suit any occasion, making them a beloved treat for all.
Additional Tips
To ensure your Danish Butter Cookies turn out perfectly every time, consider these additional tips that will enhance both the flavor and texture of your cookies:
Use High-Quality Butter
The cornerstone of flavor in Danish Butter Cookies is undeniably the butter used in the recipe. Opt for high-quality, unsalted butter for the best results. Unsalted butter allows you to control the salt content in your baked goods, letting the natural flavors of the cookies shine through. When selecting butter, look for brands that use fresh cream and minimal additives. The richer the butter, the better the cookies will taste. For an extra depth of flavor, consider using European-style butter, which has a higher fat content and a creamier texture.
Room Temperature Ingredients
To achieve a perfectly blended dough, it’s essential that your butter and egg are at room temperature before you begin mixing. Cold ingredients can result in a lumpy batter and hinder the emulsification process, which is crucial for achieving the right consistency. To speed up the process, you can cut the butter into smaller pieces and let it sit out for about 30 minutes before you start. Similarly, if you’re in a hurry, you can place your egg in a bowl of warm water for about 10 minutes to bring it to room temperature quickly.
Piping Technique
Piping the dough into beautiful shapes is a hallmark of Danish Butter Cookies. To master your piping technique, practice on a piece of parchment paper before you pipe directly onto the baking sheets. This will give you a feel for the pressure needed and help you achieve a consistent shape and size. Use a piping bag fitted with a star tip for that classic ridged look, and maintain an even pressure while piping. If you’re new to piping, start with simple shapes like circles or rosettes to build your confidence.
Cooling Time
Proper cooling is vital to ensuring your cookies maintain their shape and texture. Once you take your cookies out of the oven, allow them to cool completely on the baking sheet for at least 5 to 10 minutes before transferring them to a wire rack. This initial cooling period allows the cookies to set and firm up, which helps prevent them from breaking apart. If you try to move them too soon, they may crumble or lose their shape. Once they are cool, transfer them carefully using a spatula to avoid any damage.
Storage
To keep your Danish Butter Cookies fresh and delicious, proper storage is key. Store the cooled cookies in an airtight container at room temperature for up to a week. This will help retain their crispness and flavor. For longer storage, consider freezing them. Place the cookies in a single layer on a baking sheet and freeze until solid. Once frozen, transfer them to a sealed plastic bag or an airtight container, layering them with parchment paper to prevent sticking. Frozen cookies can last for up to three months. When you’re ready to enjoy them, simply take out the desired amount and let them thaw at room temperature for about 30 minutes.
Experiment with Flavors
While traditional Danish Butter Cookies are delicious on their own, don’t hesitate to experiment with flavors! You can incorporate a variety of extracts such as vanilla, almond, or lemon to add a unique twist to your cookies. For added texture, consider folding in finely chopped nuts, chocolate chips, or dried fruits. These additions can elevate your cookies and make them even more delightful.
Mind the Baking Time
Baking time can vary based on your oven’s calibration and your specific cookie size, so it’s important to keep an eye on them as they bake. Start checking for doneness a few minutes before the recommended time; the cookies should be lightly golden around the edges but still pale in the center. Remember that cookies continue to cook slightly after being removed from the oven, so it’s best to err on the side of underbaking slightly to achieve a soft, melt-in-your-mouth texture.
By incorporating these additional tips into your baking routine, you can ensure that your Danish Butter Cookies are not only delicious but also visually appealing and perfectly textured. Happy baking!
FAQs
1. Can I use salted butter instead of unsalted butter?
Yes, you can use salted butter, but you may want to reduce or omit the additional salt in the recipe to prevent the cookies from becoming too salty.
2. Can I add other flavors to the cookies?
Absolutely! You can experiment by adding a teaspoon of almond extract or a pinch of cinnamon for a different flavor profile.
3. What if I don’t have a piping bag?
If you don’t have a piping bag, you can use a plastic zip-top bag with a corner snipped off or simply roll the dough into balls and flatten them slightly with a fork.
4. How can I make the cookies gluten-free?
To make gluten-free Danish Butter Cookies, substitute the all-purpose flour with a gluten-free flour blend that is designed for baking.
5. Why are my cookies spreading too much?
If your cookies are spreading excessively, it may be because the butter was too warm or the dough was overmixed. Try chilling the dough briefly before piping it onto the baking sheets.
Conclusion
Danish Butter Cookies are a timeless treat that brings a touch of indulgence to any occasion. With their simple ingredients and straightforward preparation, these cookies are a delightful addition to your baking repertoire. Whether you’re enjoying them with a cup of tea, gifting them to loved ones, or savoring them as a sweet treat, homemade Danish Butter Cookies are sure to impress. So, gather your ingredients, follow our step-by-step guide, and enjoy the delicious taste of these classic cookies!
Print
Danish Butter Cookies Recipe
Ingredients
- 1 cup unsalted butter, softened
- ½ cup granulated sugar
- ¼ teaspoon salt
- 1 ½ teaspoons vanilla extract
- 1 large egg
- 2 cups all-purpose flour
- Extra sugar for sprinkling
Instructions
1. Preheat Oven
- Begin by preheating your oven to 350°F (175°C). This ensures that the cookies bake evenly and develop a lovely golden-brown color.
- Line two baking sheets with parchment paper to prevent the cookies from sticking and to facilitate easy cleanup.
2. Mix Ingredients
- In a large mixing bowl, beat the softened butter and sugar together until the mixture becomes light and fluffy. This should take about 1-2 minutes and is crucial for achieving the cookies’ iconic texture.
- Add the salt, vanilla extract, and egg to the mixture. Mix until smooth and well combined.
- Gradually incorporate the all-purpose flour into the mixture, stirring until just combined. Be careful not to overmix, as this can result in tough cookies.
3. Pipe Cookies
- Transfer the dough into a piping bag fitted with a large star tip. This will give the cookies their distinctive ridged edges and circular shape.
- Pipe 2-inch circles onto the prepared baking sheets, leaving space between each cookie to allow for spreading.
- Sprinkle a little extra sugar over the tops of the cookies for added sweetness and a subtle crunch.
4. Bake
- Place one baking sheet in the preheated oven and bake for 15-17 minutes or until the cookies are lightly golden.
- Remove from the oven and allow the cookies to cool completely on the baking sheet before transferring them to a wire rack. This helps them firm up and prevents breakage.
Nutrition
- Serving Size: one normal portion
- Calories: 83
- Sugar: 2g
- Sodium: 18mg
- Fat: 5g
- Saturated Fat: 3g
- Carbohydrates: 8g
- Cholesterol: 18mg


