
For years, the quest for the perfect french fry in my kitchen felt like chasing a delicious, yet elusive, dream. We all love the satisfying crunch and fluffy interior of a good fry, but the deep-fried version always came with a side of guilt. Greasy fingers, heavy stomachs, and the lingering aroma of frying oil – it just wasn’t an everyday pleasure. Then, I stumbled upon the secret to truly crispy baked french fries, and everything changed. This wasn’t about just throwing some potato sticks in the oven and hoping for the best. This was a method, a technique, a journey to achieving that golden, crispy exterior and soft, fluffy interior without the deep fryer. My family, initially skeptical, were instantly converted. Gone were the soggy, oven-baked disappointments of the past. These were fries that snapped when you bit into them, fries that held their crispness even as they cooled slightly, fries that tasted… well, just like the real deal, but lighter, healthier, and infinitely more satisfying. Weekends now regularly feature a batch of these crispy baked wonders, paired with everything from juicy burgers to simple grilled chicken. And the best part? I can indulge without the guilt, knowing I’m serving up a treat that’s both delicious and significantly better for us. Ready to unlock the secret to crispy baked french fries yourself? Let’s dive in!
Ingredients: The Foundation of Crispy Perfection
Creating truly crispy baked french fries isn’t just about the cooking method; it starts with selecting the right ingredients and understanding how each one contributes to the final result. Here’s a detailed breakdown of what you’ll need, along with insights into ingredient choices and substitutions to ensure your fries are nothing short of spectacular:
- Potatoes: 2 pounds, Russet or Yukon Gold are highly recommended.
- Potato Variety is Key: The type of potato you choose is arguably the most crucial factor in achieving crispy baked fries. Russet potatoes are the gold standard for fries. They are high in starch and low in moisture, which is exactly what you want for a fluffy interior and crispy exterior. Their starchy nature allows them to become incredibly light and airy inside while crisping up beautifully on the outside. Yukon Gold potatoes are another excellent option. They are slightly less starchy than Russets but still have a good balance of starch and moisture. They offer a slightly creamier interior and crisp up nicely as well. Avoid using waxy potatoes like red potatoes or fingerling potatoes. These are too high in moisture and too low in starch, resulting in fries that are more likely to steam and become soggy rather than crisp.
- Size and Shape: Choose medium to large potatoes that are relatively uniform in size. This will ensure even cooking. Look for potatoes that are firm, free of blemishes, and feel heavy for their size.
- Oil: 3-4 tablespoons, high-heat oil like avocado oil, canola oil, or vegetable oil.
- Oil Choice Matters: The type of oil you use significantly impacts both the crispiness and the flavor of your fries. High-heat oils are essential for baking at high temperatures without smoking or breaking down. Avocado oil is a fantastic choice due to its neutral flavor and high smoke point. Canola oil and vegetable oil are also good, affordable options. Avoid using olive oil for high-heat baking, as its smoke point is lower, and it can impart a strong flavor that may not be desirable in fries. Melted butter can be used for a richer flavor, but it has a lower smoke point and may not result in quite as crispy fries. If using butter, consider clarifying it to raise the smoke point and remove milk solids that can burn.
- Quantity: Don’t skimp on the oil. While we’re baking, not deep-frying, a sufficient amount of oil is still needed to coat the potatoes properly and promote crisping. 3-4 tablespoons for 2 pounds of potatoes is generally a good starting point. Adjust slightly based on the size and absorbency of your potato pieces.
- Salt: 1-1.5 teaspoons, kosher salt or sea salt, plus extra for seasoning after baking.
- Salt is Essential: Salt not only enhances the flavor of the fries but also helps to draw out moisture from the potatoes, contributing to crispiness. Kosher salt and sea salt are preferred over table salt due to their larger crystals and purer flavor. Use salt both before baking (to season the potatoes) and after baking (to season the finished fries). Don’t be shy with the salt – fries need a good amount to taste their best.
- Black Pepper: 1/2 teaspoon, freshly ground black pepper.
- Pepper for Depth: Freshly ground black pepper adds a subtle warmth and depth of flavor. Use freshly ground for the best aroma and taste.
- Optional Seasonings (to customize your fries):
- Garlic Powder: 1 teaspoon, for a savory garlic flavor.
- Onion Powder: 1 teaspoon, for a subtle oniony sweetness.
- Paprika (Smoked or Sweet): 1 teaspoon, for color and a hint of smokiness or sweetness.
- Cayenne Pepper: 1/4 teaspoon (or to taste), for a touch of heat.
- Dried Herbs (Rosemary, Thyme, Oregano): 1 teaspoon, for an herbaceous twist.
- Parmesan Cheese (grated): 2-3 tablespoons, sprinkled after baking for cheesy fries.
Ingredient Quality Matters:
While this recipe is simple, using high-quality ingredients will elevate the final product. Choose firm, good quality potatoes and fresh, flavorful seasonings. The right oil and salt can make a significant difference in the taste and texture of your crispy baked french fries.
By carefully selecting your ingredients and understanding their roles, you’re setting yourself up for success in creating truly delicious and crispy baked french fries that rival their deep-fried counterparts.
Instructions: The Step-by-Step Path to Crispy Fries
Achieving crispy baked french fries is all about technique and following the right steps. This detailed instruction guide will walk you through each stage, from potato preparation to the final bake, ensuring you create fries that are golden brown, crispy on the outside, and fluffy on the inside.
Step 1: Prepare the Potatoes (The Foundation of Crispiness)
- Wash and Scrub Potatoes: Thoroughly wash the potatoes under cold running water and scrub them clean with a vegetable brush. You can peel the potatoes if you prefer skinless fries, but leaving the skin on adds nutrients, fiber, and extra texture. For the best balance of flavor and texture, I recommend leaving the skins on.
- Cut the Potatoes into Fry Shapes: There are a few ways to cut your potatoes into fries, but uniformity is key for even cooking.
- Classic Fry Shape: Slice each potato lengthwise into planks about ½ inch thick. Then, stack the planks and cut them lengthwise again into ½ inch thick fries. Aim for fries that are roughly the same thickness and length for even baking.
- Alternative Wedges: For slightly thicker, wedge-shaped fries, simply cut each potato lengthwise into 6-8 wedges, depending on the size of the potato.
- Consistency is Key: No matter which shape you choose, try to cut the fries as consistently as possible in thickness. This will ensure they cook evenly and crisp up at the same rate.
- Soak the Potato Fries in Cold Water (Crucial for Crispiness): Place the cut potato fries in a large bowl and cover them completely with cold water. Let them soak for at least 30 minutes, or up to 2 hours. Why soak? Soaking removes excess starch from the surface of the potatoes. This excess starch is the enemy of crispiness in baked fries. When starch cooks, it can create a sticky coating that prevents the fries from browning and crisping properly. Soaking draws out this surface starch, leading to fries that are significantly crispier when baked. You’ll notice the water becoming cloudy as the starch is released.
- Drain and Rinse (Optional): After soaking, drain the potatoes in a colander. You can optionally rinse them briefly under cold water to remove any remaining surface starch, but this isn’t strictly necessary if you’ve soaked them for an adequate time.
- Thoroughly Dry the Potatoes (Absolutely Essential): This is perhaps the most critical step for achieving crispy baked fries. Excess moisture is the enemy of crispiness. We need to remove as much surface moisture as possible before adding oil and baking.
- Method 1: Kitchen Towels: Spread the drained potato fries in a single layer on clean kitchen towels (or paper towels). Gently pat them dry with more towels, pressing to absorb as much moisture as possible. You may need to use several towels to ensure they are truly dry.
- Method 2: Salad Spinner: If you have a salad spinner, this can be a very effective way to remove excess water. Place the drained fries in the salad spinner and spin vigorously to remove surface moisture. Then, finish drying them with kitchen towels to ensure they are completely dry.
- Why Dry Thoroughly? If the potatoes are still wet when you add oil and bake them, the water will steam them in the oven rather than allowing them to roast and crisp. Thorough drying allows the oil to properly coat the potatoes and promote browning and crisping. The drier the potatoes are before baking, the crispier your fries will be.
Step 2: Season and Oil the Fries (Flavor and Crispness Boosters)
- Preheat Oven and Baking Sheet: Preheat your oven to 450°F (230°C). Place a large baking sheet in the oven while it preheats. Why preheat the baking sheet? Placing the fries on a hot baking sheet from the start helps to immediately sear the bottom of the fries, promoting crisping right from the beginning.
- Toss Fries with Oil and Seasonings: In a large bowl, toss the completely dried potato fries with the oil. Make sure all sides of the fries are evenly coated with oil. Then, add the salt, pepper, and any optional seasonings you are using (garlic powder, onion powder, paprika, etc.). Toss again to distribute the seasonings evenly. You can use your hands to gently massage the oil and seasonings into the fries, ensuring they are well coated.
- Arrange Fries on Hot Baking Sheet (Single Layer, No Overcrowding): Carefully remove the hot baking sheet from the oven. Immediately spread the seasoned fries in a single layer on the hot baking sheet. Important: Do not overcrowd the baking sheet. Overcrowding will cause the fries to steam rather than bake and crisp. If necessary, use two baking sheets to ensure the fries are in a single layer with space between them for air circulation. Good air circulation is essential for even browning and crisping.
Step 3: Bake to Golden Crisp Perfection (The Transformation)
- Bake in Preheated Oven: Place the baking sheet(s) with the fries back into the preheated 450°F (230°C) oven.
- Bake for 15 Minutes, then Flip: Bake for 15 minutes. Then, using a spatula, carefully flip each fry. Flipping ensures even browning and crisping on all sides.
- Continue Baking for Another 15-25 Minutes: Continue baking for another 15-25 minutes, or until the fries are golden brown and crispy. The exact baking time will depend on the thickness of your fries, your oven, and your desired level of crispiness. Keep an eye on them towards the end of the baking time to prevent burning. You want them to be nicely browned and crispy, but not overly dark.
- Increase Heat for Extra Crispiness (Optional): For even crispier fries, you can increase the oven temperature to 475°F (245°C) for the last 5-10 minutes of baking. Watch them closely to prevent burning at this higher temperature. This higher heat can help to achieve that extra level of golden-brown crispness.
Step 4: Season and Serve Immediately (The Final Flourish)
- Season Immediately After Baking: As soon as you remove the fries from the oven, season them with additional salt to taste. This is when the salt will best adhere to the hot fries. You can also sprinkle with any other desired seasonings at this point, such as parmesan cheese, herbs, or spices.
- Serve Immediately: Baked french fries are best served immediately while they are hot and crispy. The longer they sit, the more they will soften. Serve them with your favorite dipping sauces and enjoy!
Following these detailed instructions, with a focus on soaking, thorough drying, hot baking sheet, single layer arrangement, and proper baking time, you will be amazed at how crispy and delicious your baked french fries will turn out. Enjoy the process and the incredible results!
Nutrition Facts: A Healthier Fry Option
While french fries, whether baked or fried, are still considered an indulgence, baked french fries offer a significantly healthier alternative to their deep-fried counterparts. Baking drastically reduces the amount of added fat and calories compared to deep-frying, while still providing some nutritional benefits from the potatoes themselves.
Serving Size: Approximately 1 cup of baked french fries (about 150 grams)
Approximate Nutritional Information Per Serving (estimated, values can vary based on potato type, oil quantity, and specific ingredients used):
- Calories: 180-250 calories
- Note: This is significantly lower than deep-fried french fries, which can easily contain 300-500 calories or more per serving due to the added oil absorbed during frying.
- Fat: 5-10 grams
- Note: The fat content comes primarily from the oil used to coat the fries. Using less oil will reduce the fat content. Baked fries absorb far less oil than deep-fried fries.
- Saturated Fat: 0.5-1 gram (depending on oil type)
- Note: Using oils like avocado oil or canola oil will result in lower saturated fat compared to using butter or animal fats.
- Cholesterol: 0 mg
- Note: French fries are cholesterol-free unless cooked in animal fat (which is not recommended for this recipe).
- Sodium: 200-400 mg (depending on salt added)
- Note: Sodium content can be controlled by adjusting the amount of salt used. Using less salt will reduce the sodium content.
- Carbohydrates: 30-40 grams
- Note: Potatoes are a source of carbohydrates, primarily starch. The carbohydrate content will be similar for both baked and fried fries.
- Fiber: 3-5 grams
- Note: Potatoes, especially with the skin on, are a good source of dietary fiber. Fiber is beneficial for digestion, satiety, and blood sugar control. Baked fries with skin offer more fiber than peeled fries.
- Sugar: 1-2 grams (naturally occurring in potatoes)
- Note: Potatoes naturally contain a small amount of sugar.
- Protein: 3-4 grams
- Note: Potatoes provide a small amount of protein.
- Vitamins and Minerals: Potatoes are a good source of:
- Vitamin C: Provides antioxidants and supports immune function.
- Vitamin B6: Important for brain development and function.
- Potassium: An electrolyte that helps regulate blood pressure and muscle function. Potatoes are a significant source of potassium.
- Manganese: Important for bone health and metabolism.
- Folate: Essential for cell growth and development.
Health Benefits of Baked vs. Fried Fries:
- Lower in Fat and Calories: Baked fries are significantly lower in fat and calories compared to deep-fried fries, making them a healthier choice for weight management and overall health.
- Reduced Trans Fats: Deep-frying can sometimes create trans fats, which are unhealthy fats linked to heart disease. Baking eliminates this risk.
- Retains More Nutrients: Baking is generally considered a healthier cooking method than deep-frying as it may help to retain more of the vitamins and minerals present in the potatoes.
Important Considerations:
- While baked fries are healthier than deep-fried, they are still best enjoyed in moderation as part of a balanced diet.
- Pay attention to portion sizes. Even healthier versions of indulgent foods can contribute to calorie excess if consumed in large quantities.
- Choose healthy dipping sauces. Avoid high-fat, high-sugar dips like mayonnaise-based sauces or sugary ketchup. Opt for healthier dips like salsa, Greek yogurt-based dips, or mustard.
By choosing baked french fries over deep-fried, you can enjoy a delicious treat that is significantly better for your health without sacrificing flavor or satisfaction.
Preparation Time: Quick and Easy Fry Fix
One of the many advantages of baked french fries is their relatively quick preparation time, especially compared to the more involved process of deep-frying. This recipe is perfect for satisfying your fry cravings without spending hours in the kitchen.
- Prep Time: 20-30 minutes
- This includes:
- Washing, scrubbing, and cutting potatoes (5-10 minutes)
- Soaking potatoes in cold water (30 minutes, passive time – you can do other things)
- Drying potatoes thoroughly (5-10 minutes)
- Tossing with oil and seasonings (2-3 minutes)
- Preheating oven and baking sheet (oven preheating time is passive)
- This includes:
- Cook Time: 30-40 minutes
- This includes:
- Baking time in the oven, flipping halfway through.
- This includes:
Total Time: Approximately 50-70 minutes (including soaking time)
Active Time: Approximately 25-35 minutes (hands-on time)
While the total time includes the soaking period, the active hands-on time for preparing and baking these crispy fries is relatively short, making them a great option for weeknight meals or weekend snacks. The soaking time is mostly passive – you can start soaking the potatoes while you prepare other parts of your meal or relax.
Tips to Speed Up Preparation:
- Soak Potatoes Ahead of Time: You can soak the potato fries in cold water for up to 2 hours. If you know you’ll be making fries later, you can soak them in the morning or early afternoon and keep them in the refrigerator until you’re ready to cook. Just drain and dry them thoroughly before proceeding with the recipe.
- Pre-Cut Fries (Not Recommended for Best Crispiness): While you can buy pre-cut french fries from the grocery store, these often contain added preservatives and may not result in fries that are as crispy as freshly cut potatoes. If you are very short on time, you can use pre-cut fries, but be sure to still dry them thoroughly and adjust baking time accordingly.
- Efficient Cutting Techniques: Practice your potato cutting skills to speed up the process. Using a sharp knife and efficient cutting motions will help you prepare the fries more quickly.
Despite the slightly longer total time due to soaking, the active preparation and cooking time for these crispy baked french fries are quite manageable, making them a delicious and relatively convenient homemade treat.
How to Serve Crispy Baked French Fries: Endless Possibilities
Crispy baked french fries are incredibly versatile and can be served in countless ways, from classic pairings to creative culinary adventures. Here are some delicious serving suggestions to elevate your fry experience:
Classic Pairings & Dips:
- Ketchup: The quintessential fry dip! Choose your favorite brand, from classic to organic or spiced ketchup.
- Mayonnaise: Plain mayonnaise is a simple and satisfying dip. For extra flavor, try flavored mayonnaises like garlic aioli, chipotle mayo, or sriracha mayo.
- Mustard: Dijon mustard, yellow mustard, honey mustard – the options are endless! Mustard provides a tangy and zesty contrast to the richness of the fries.
- Ranch Dressing: A creamy and herbaceous classic dip that pairs perfectly with fries.
- BBQ Sauce: Sweet and smoky BBQ sauce is a delicious and flavorful dip option.
- Cheese Sauce: Warm, melted cheese sauce (cheddar, nacho cheese, etc.) is a decadent and indulgent fry topping.
- Gravy: Poutine-style fries with gravy and cheese curds are a Canadian classic and a comforting treat.
- Spicy Dips: Sriracha, hot sauce, chili garlic sauce, or spicy mayo for those who like a kick.
- Salsa or Guacamole: For a lighter and fresher option, serve fries with salsa or guacamole.
Meal Pairings:
- Burgers: Classic burger and fries are a match made in heaven. These crispy baked fries are the perfect healthy accompaniment to homemade or grilled burgers.
- Sandwiches and Wraps: Serve fries alongside sandwiches, wraps, paninis, or subs for a complete and satisfying lunch or dinner.
- Grilled Meats: Grilled chicken, steak, fish, or sausages pair wonderfully with crispy baked french fries.
- Fried Chicken or Fish: While fries are often served with deep-fried dishes, the baked version offers a lighter and healthier complement to fried chicken or fish.
- Vegetarian Mains: Fries can be a great side dish for vegetarian mains like veggie burgers, falafel, or grilled halloumi.
- Breakfast Fries: Yes, fries for breakfast! Serve them alongside eggs, bacon, or breakfast burritos for a fun and indulgent brunch.
Creative Fry Toppings & Variations:
- Parmesan and Garlic Fries: Sprinkle freshly grated parmesan cheese and minced garlic over the hot fries for a savory and cheesy twist.
- Truffle Fries: Drizzle truffle oil over the baked fries and sprinkle with parmesan cheese and fresh parsley for a gourmet treat.
- Chili Cheese Fries: Top fries with chili (meat or vegetarian) and shredded cheese for a hearty and satisfying meal.
- Loaded Fries: Get creative with toppings! Try bacon bits, sour cream, chives, shredded cheese, jalapenos, pulled pork, or caramelized onions.
- Sweet Potato Fries: Use this recipe technique with sweet potatoes for delicious and crispy baked sweet potato fries.
- Spiced Fries: Experiment with different spice blends – Cajun seasoning, taco seasoning, curry powder, or Italian seasoning.
- Herb Fries: Toss the fries with fresh herbs like rosemary, thyme, or oregano before or after baking.
Serving Occasions:
- Weeknight Dinners: Quick and easy side dish for weeknight meals.
- Weekend BBQs: Perfect for cookouts and BBQs as a crowd-pleasing side.
- Game Day Snacks: Ideal for game day gatherings and parties.
- Movie Nights: A classic movie night treat, enjoyed guilt-free.
- Casual Gatherings: Great for potlucks, picnics, and casual get-togethers.
No matter how you choose to serve them, crispy baked french fries are a universally loved and versatile side dish that can elevate any meal or snack. Get creative with your pairings and toppings and enjoy the delicious possibilities!
Additional Tips for Ultimate Crispy Baked Fries
To consistently achieve french fry perfection in your oven, here are five additional expert tips that will take your crispy baked fries to the next level:
- Cut Fries Uniformly: This tip bears repeating – consistent fry thickness is absolutely crucial for even cooking and crisping. Take the time to cut your potatoes into fries that are roughly the same size and shape. This ensures that all the fries cook at the same rate and achieve the desired level of crispness without some being undercooked or burnt. If you are struggling with consistent knife cuts, consider using a french fry cutter or mandoline (with caution and appropriate safety guards) to achieve uniform shapes quickly.
- Double Soaking (For Extra Crispiness): For fries that are truly exceptionally crispy, consider a double soaking method. Soak the cut fries in cold water for 30 minutes, drain and replace the water with fresh cold water, and soak for another 30 minutes. This extra soaking step removes even more surface starch, resulting in fries that are incredibly light and crispy on the outside and fluffy on the inside. This is especially helpful if you are using very starchy potatoes or want to achieve restaurant-quality crispiness.
- Use Parchment Paper (But Wisely): Parchment paper can be helpful for easy cleanup, but it can also hinder crispiness if not used correctly. Parchment paper can trap steam underneath the fries, preventing them from browning and crisping on the bottom. If you use parchment paper, make sure it is not wrinkled and lies as flat as possible on the baking sheet. Alternatively, you can bake the fries directly on a lightly oiled baking sheet for maximum crispiness. For easier cleanup without parchment, you can use a silicone baking mat, which allows for good heat circulation while preventing sticking.
- Air Fryer Finish (Optional Crispness Boost): If you have an air fryer, you can give your baked fries an extra crispness boost. After baking the fries in the oven as directed, transfer them to an air fryer basket in a single layer (you may need to do this in batches). Air fry at 400°F (200°C) for 3-5 minutes, or until they are even crispier and golden brown. The intense circulating heat of the air fryer will further enhance the crispiness and create fries that are almost indistinguishable from deep-fried.
- Seasoning After Baking (Maximize Flavor): While it’s important to season the fries with salt and pepper before baking, adding a final sprinkle of salt immediately after they come out of the oven is crucial for maximizing flavor. Hot fries are more absorbent, and the salt will adhere better and penetrate deeper, resulting in fries that are perfectly seasoned throughout. You can also add other seasonings at this stage, like grated parmesan cheese, herbs, or spices, as they will also adhere better to the hot, slightly oily surface of the freshly baked fries.
By incorporating these additional tips into your crispy baked french fry routine, you’ll be well-equipped to create consistently perfect, golden brown, and irresistibly crispy fries every time, impressing family and friends with your homemade fry mastery!
FAQ: Your Crispy Baked Fry Questions Answered
Got questions about making crispy baked french fries? You’re not alone! Here are answers to five frequently asked questions to help you troubleshoot common issues and achieve fry success:
Q1: My baked fries are always soggy, not crispy. What am I doing wrong?
A: Soggy baked fries are a common frustration, but easily avoidable! The most likely culprits are:
* Not Soaking Potatoes: Soaking is crucial for removing surface starch that leads to sogginess. Don’t skip this step!
* Not Drying Potatoes Thoroughly: Excess moisture prevents crisping. Ensure your fries are bone-dry before oiling and baking. Use towels or a salad spinner.
* Overcrowding the Baking Sheet: Overcrowded fries steam instead of roasting. Use a large baking sheet or two sheets to ensure a single layer with space between fries.
* Oven Temperature Too Low: Bake at 450°F (230°C) or even 475°F (245°C) for the last few minutes for maximum crispiness. Lower temperatures will result in softer fries.
* Not Flipping Fries: Flipping ensures even browning and crisping on all sides. Flip halfway through baking.
Q2: Can I use olive oil for baked french fries?
A: While you can use olive oil, it’s not the best choice for crispy baked french fries, especially at high temperatures. Olive oil has a lower smoke point than other high-heat oils like avocado oil, canola oil, or vegetable oil. At high oven temperatures, olive oil can smoke and impart a strong, sometimes bitter flavor to the fries. For the best crispiness and neutral flavor, opt for a high-heat oil like avocado, canola, or vegetable oil. If you do use olive oil, choose a light or refined olive oil with a higher smoke point, and be mindful of the oven temperature.
Q3: How long can I store leftover baked french fries?
A: Baked french fries are best enjoyed fresh and crispy. However, if you have leftovers, you can store them in an airtight container in the refrigerator for up to 1-2 days. Keep in mind that they will lose some of their crispness as they cool and are stored.
Q4: How do I reheat leftover baked french fries and make them crispy again?
A: Reheating fries and restoring crispiness can be tricky, but here are a few methods:
* Oven Reheating: Preheat your oven to 400°F (200°C). Spread the leftover fries in a single layer on a baking sheet and bake for 5-10 minutes, or until heated through and slightly crisped up.
* Air Fryer Reheating: The air fryer is the best method for reheating fries and restoring crispness. Air fry at 350°F (175°C) for 3-5 minutes, or until heated through and crispy.
* Skillet Reheating (Less Ideal): You can reheat fries in a skillet with a little oil over medium heat, tossing frequently until heated through and slightly crisped. This method is less effective at restoring crispiness compared to oven or air fryer reheating.
* Microwave (Not Recommended for Crispiness): Microwaving leftover fries will make them soggy. Avoid microwaving if you want to retain any crispness.
Q5: Can I freeze baked french fries?
A: Freezing fully baked french fries is not recommended as they tend to become mushy and lose their texture upon thawing and reheating. However, you can partially bake the fries, freeze them, and then finish baking them later for a more convenient make-ahead option.
* Partial Baking and Freezing Method: Follow the recipe up to step 3 (baking for 15 minutes and flipping). Let the partially baked fries cool completely. Spread them in a single layer on a baking sheet and freeze until solid. Once frozen, transfer them to a freezer-safe bag or container. To bake from frozen, preheat oven to 450°F (230°C), spread frozen fries on a baking sheet, and bake for 15-20 minutes, or until golden brown and crispy, flipping halfway through.

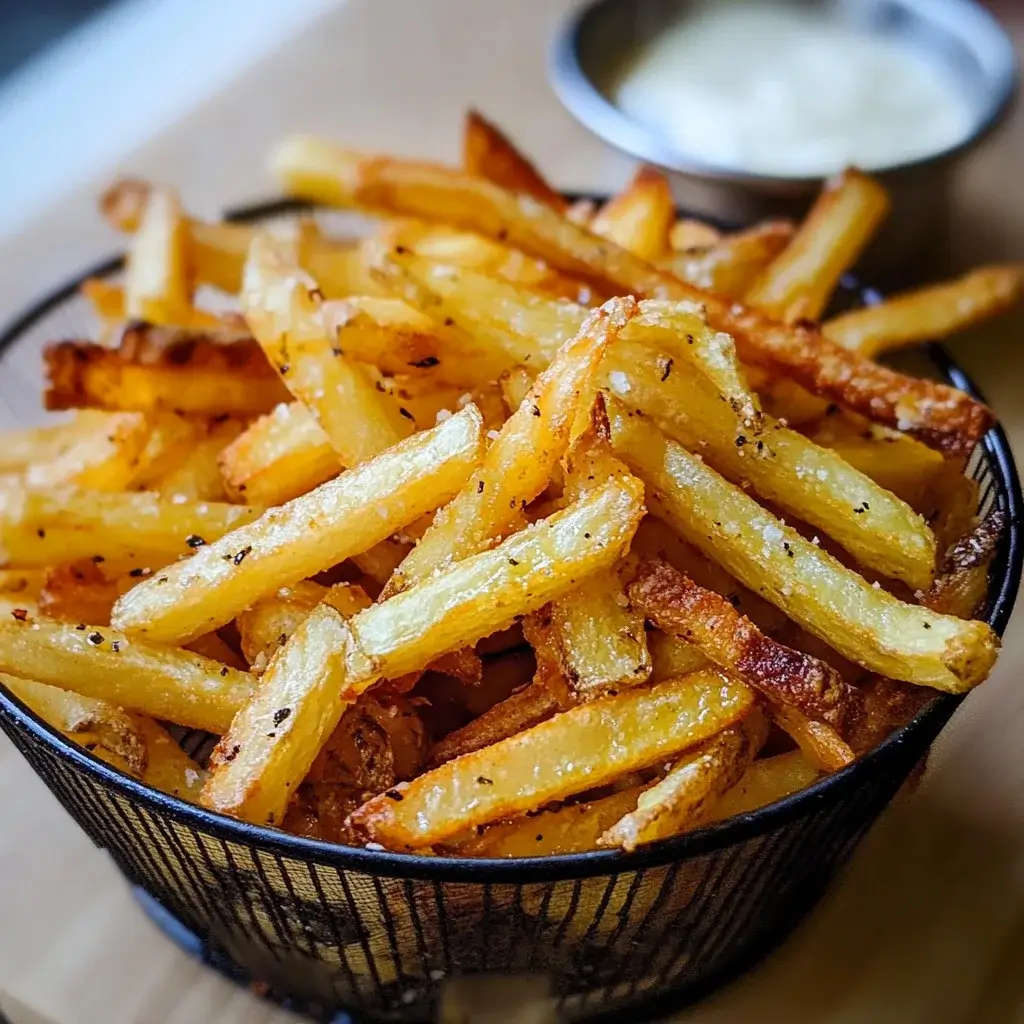
Crispy Baked French Fries recipe
Ingredients
- Potatoes: 2 pounds, Russet or Yukon Gold are highly recommended.
- Potato Variety is Key: The type of potato you choose is arguably the most crucial factor in achieving crispy baked fries. Russet potatoes are the gold standard for fries. They are high in starch and low in moisture, which is exactly what you want for a fluffy interior and crispy exterior. Their starchy nature allows them to become incredibly light and airy inside while crisping up beautifully on the outside. Yukon Gold potatoes are another excellent option. They are slightly less starchy than Russets but still have a good balance of starch and moisture. They offer a slightly creamier interior and crisp up nicely as well. Avoid using waxy potatoes like red potatoes or fingerling potatoes. These are too high in moisture and too low in starch, resulting in fries that are more likely to steam and become soggy rather than crisp.
- Size and Shape: Choose medium to large potatoes that are relatively uniform in size. This will ensure even cooking. Look for potatoes that are firm, free of blemishes, and feel heavy for their size.
- Oil: 3-4 tablespoons, high-heat oil like avocado oil, canola oil, or vegetable oil.
- Oil Choice Matters: The type of oil you use significantly impacts both the crispiness and the flavor of your fries. High-heat oils are essential for baking at high temperatures without smoking or breaking down. Avocado oil is a fantastic choice due to its neutral flavor and high smoke point. Canola oil and vegetable oil are also good, affordable options. Avoid using olive oil for high-heat baking, as its smoke point is lower, and it can impart a strong flavor that may not be desirable in fries. Melted butter can be used for a richer flavor, but it has a lower smoke point and may not result in quite as crispy fries. If using butter, consider clarifying it to raise the smoke point and remove milk solids that can burn.
- Quantity: Don’t skimp on the oil. While we’re baking, not deep-frying, a sufficient amount of oil is still needed to coat the potatoes properly and promote crisping. 3-4 tablespoons for 2 pounds of potatoes is generally a good starting point. Adjust slightly based on the size and absorbency of your potato pieces.
- Salt: 1-1.5 teaspoons, kosher salt or sea salt, plus extra for seasoning after baking.
- Salt is Essential: Salt not only enhances the flavor of the fries but also helps to draw out moisture from the potatoes, contributing to crispiness. Kosher salt and sea salt are preferred over table salt due to their larger crystals and purer flavor. Use salt both before baking (to season the potatoes) and after baking (to season the finished fries). Don’t be shy with the salt – fries need a good amount to taste their best.
- Black Pepper: 1/2 teaspoon, freshly ground black pepper.
- Pepper for Depth: Freshly ground black pepper adds a subtle warmth and depth of flavor. Use freshly ground for the best aroma and taste.
- Optional Seasonings (to customize your fries):
- Garlic Powder: 1 teaspoon, for a savory garlic flavor.
- Onion Powder: 1 teaspoon, for a subtle oniony sweetness.
- Paprika (Smoked or Sweet): 1 teaspoon, for color and a hint of smokiness or sweetness.
- Cayenne Pepper: 1/4 teaspoon (or to taste), for a touch of heat.
- Dried Herbs (Rosemary, Thyme, Oregano): 1 teaspoon, for an herbaceous twist.
- Parmesan Cheese (grated): 2-3 tablespoons, sprinkled after baking for cheesy fries.
Instructions
Step 1: Prepare the Potatoes (The Foundation of Crispiness)
- Wash and Scrub Potatoes: Thoroughly wash the potatoes under cold running water and scrub them clean with a vegetable brush. You can peel the potatoes if you prefer skinless fries, but leaving the skin on adds nutrients, fiber, and extra texture. For the best balance of flavor and texture, I recommend leaving the skins on.
- Cut the Potatoes into Fry Shapes: There are a few ways to cut your potatoes into fries, but uniformity is key for even cooking.
- Classic Fry Shape: Slice each potato lengthwise into planks about ½ inch thick. Then, stack the planks and cut them lengthwise again into ½ inch thick fries. Aim for fries that are roughly the same thickness and length for even baking.
- Alternative Wedges: For slightly thicker, wedge-shaped fries, simply cut each potato lengthwise into 6-8 wedges, depending on the size of the potato.
- Consistency is Key: No matter which shape you choose, try to cut the fries as consistently as possible in thickness. This will ensure they cook evenly and crisp up at the same rate.
- Soak the Potato Fries in Cold Water (Crucial for Crispiness): Place the cut potato fries in a large bowl and cover them completely with cold water. Let them soak for at least 30 minutes, or up to 2 hours. Why soak? Soaking removes excess starch from the surface of the potatoes. This excess starch is the enemy of crispiness in baked fries. When starch cooks, it can create a sticky coating that prevents the fries from browning and crisping properly. Soaking draws out this surface starch, leading to fries that are significantly crispier when baked. You’ll notice the water becoming cloudy as the starch is released.
- Drain and Rinse (Optional): After soaking, drain the potatoes in a colander. You can optionally rinse them briefly under cold water to remove any remaining surface starch, but this isn’t strictly necessary if you’ve soaked them for an adequate time.
- Thoroughly Dry the Potatoes (Absolutely Essential): This is perhaps the most critical step for achieving crispy baked fries. Excess moisture is the enemy of crispiness. We need to remove as much surface moisture as possible before adding oil and baking.
- Method 1: Kitchen Towels: Spread the drained potato fries in a single layer on clean kitchen towels (or paper towels). Gently pat them dry with more towels, pressing to absorb as much moisture as possible. You may need to use several towels to ensure they are truly dry.
- Method 2: Salad Spinner: If you have a salad spinner, this can be a very effective way to remove excess water. Place the drained fries in the salad spinner and spin vigorously to remove surface moisture. Then, finish drying them with kitchen towels to ensure they are completely dry.
- Why Dry Thoroughly? If the potatoes are still wet when you add oil and bake them, the water will steam them in the oven rather than allowing them to roast and crisp. Thorough drying allows the oil to properly coat the potatoes and promote browning and crisping. The drier the potatoes are before baking, the crispier your fries will be.
Step 2: Season and Oil the Fries (Flavor and Crispness Boosters)
- Preheat Oven and Baking Sheet: Preheat your oven to 450°F (230°C). Place a large baking sheet in the oven while it preheats. Why preheat the baking sheet? Placing the fries on a hot baking sheet from the start helps to immediately sear the bottom of the fries, promoting crisping right from the beginning.
- Toss Fries with Oil and Seasonings: In a large bowl, toss the completely dried potato fries with the oil. Make sure all sides of the fries are evenly coated with oil. Then, add the salt, pepper, and any optional seasonings you are using (garlic powder, onion powder, paprika, etc.). Toss again to distribute the seasonings evenly. You can use your hands to gently massage the oil and seasonings into the fries, ensuring they are well coated.
- Arrange Fries on Hot Baking Sheet (Single Layer, No Overcrowding): Carefully remove the hot baking sheet from the oven. Immediately spread the seasoned fries in a single layer on the hot baking sheet. Important: Do not overcrowd the baking sheet. Overcrowding will cause the fries to steam rather than bake and crisp. If necessary, use two baking sheets to ensure the fries are in a single layer with space between them for air circulation. Good air circulation is essential for even browning and crisping.
Step 3: Bake to Golden Crisp Perfection (The Transformation)
- Bake in Preheated Oven: Place the baking sheet(s) with the fries back into the preheated 450°F (230°C) oven.
- Bake for 15 Minutes, then Flip: Bake for 15 minutes. Then, using a spatula, carefully flip each fry. Flipping ensures even browning and crisping on all sides.
- Continue Baking for Another 15-25 Minutes: Continue baking for another 15-25 minutes, or until the fries are golden brown and crispy. The exact baking time will depend on the thickness of your fries, your oven, and your desired level of crispiness. Keep an eye on them towards the end of the baking time to prevent burning. You want them to be nicely browned and crispy, but not overly dark.
- Increase Heat for Extra Crispiness (Optional): For even crispier fries, you can increase the oven temperature to 475°F (245°C) for the last 5-10 minutes of baking. Watch them closely to prevent burning at this higher temperature. This higher heat can help to achieve that extra level of golden-brown crispness.
Step 4: Season and Serve Immediately (The Final Flourish)
- Season Immediately After Baking: As soon as you remove the fries from the oven, season them with additional salt to taste. This is when the salt will best adhere to the hot fries. You can also sprinkle with any other desired seasonings at this point, such as parmesan cheese, herbs, or spices.
- Serve Immediately: Baked french fries are best served immediately while they are hot and crispy. The longer they sit, the more they will soften. Serve them with your favorite dipping sauces and enjoy!
Nutrition
- Serving Size: one normal portion
- Calories: 180-250
- Sugar: 1-2 grams
- Sodium: 200-400 mg
- Fat: 5-10 grams
- Saturated Fat: 0.5-1 gram
- Carbohydrates: 30-40 grams
- Fiber: 3-5 grams
- Protein: 3-4 grams