
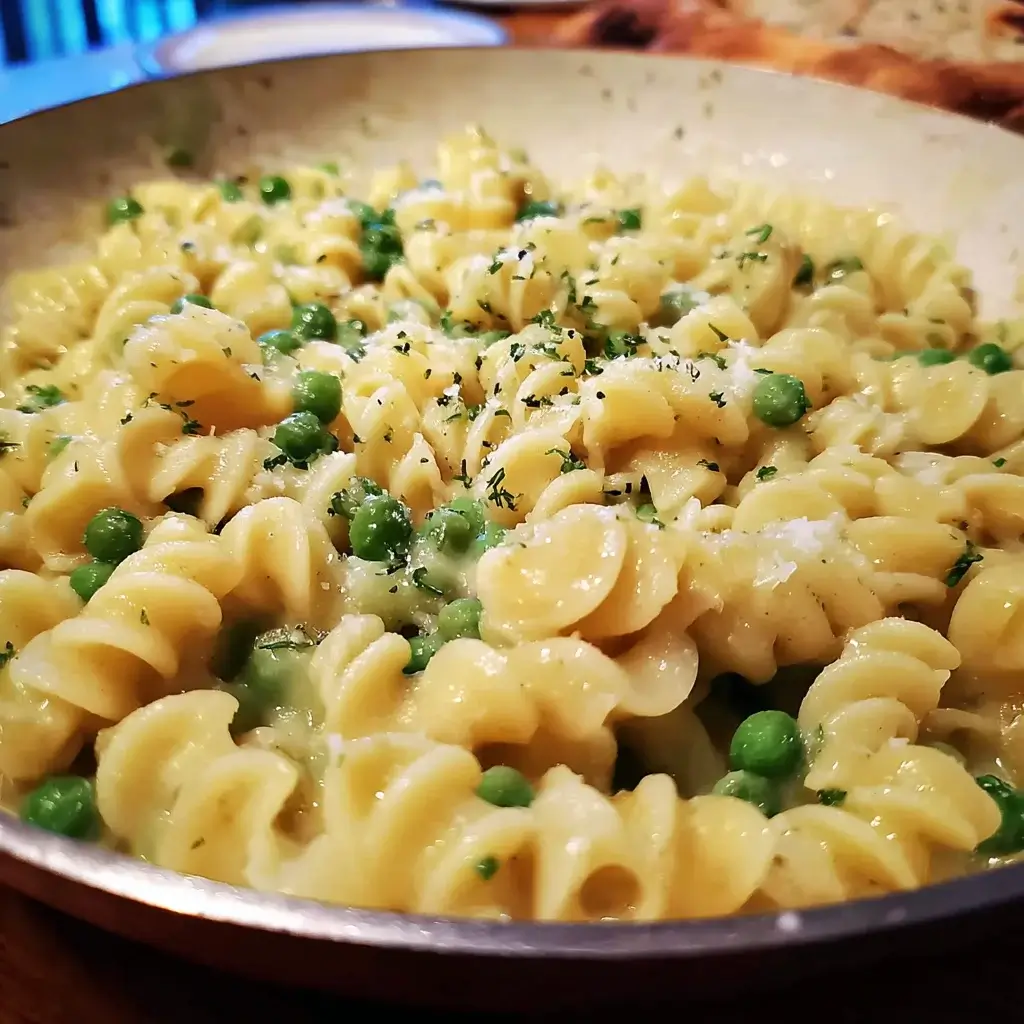

Some of the most brilliant recipes are born from what I like to call “pantry panic”—that moment when you open the fridge to find it nearly bare, and the prospect of a satisfying dinner seems bleak. This Creamy Pea Pasta was born on such a night. I had a box of pasta, a bag of frozen peas, a lone lemon, and the end of a carton of cream. It felt like the makings of a culinary compromise, not a masterpiece. But as I blitzed the vibrant green peas with garlic, Parmesan, and cream, something magical began to happen. The sauce, created in the blender in under a minute, was a stunning, sun-drenched green, smelling of spring itself. I tossed it with hot pasta, watching as it transformed into a velvety, luscious coating that clung to every noodle. My family, initially skeptical about a dinner made from “just peas,” fell silent at the first bite. The sweetness of the peas, the salty kick of Parmesan, the bright, zesty lift from the lemon, and a whisper of fresh mint—it was a symphony of simple flavors working in perfect harmony. It was creamy, comforting, and unbelievably fresh all at once. That night, this dish went from a last-ditch effort to a top-tier, most-requested meal in our home. It’s our go-to for busy weeknights, a testament to the fact that you don’t need a lot of time or fancy ingredients to create something truly spectacular.
The Magic of Simplicity: Why This Creamy Pea Pasta Works
This isn’t just another pasta dish; it’s a celebration of efficiency and flavor, proving that humble ingredients can create an elegant and deeply satisfying meal in under 20 minutes. The genius of this recipe lies in its “no-cook” sauce. While the pasta boils, all the other ingredients are blitzed together in a blender. This method is not only incredibly fast but also key to the dish’s signature freshness. By not cooking the peas into submission, we preserve their naturally sweet flavor and vibrant, beautiful green color.
The flavor profile is a masterclass in balance. The sweet peas form the base, their earthiness perfectly complemented by the salty, umami-rich Parmesan cheese. A splash of heavy cream or a dollop of crème fraîche lends a luxurious, velvety texture and richness. But the true stars that elevate the dish from simple to sublime are the lemon and fresh mint. The lemon juice and zest cut through the creaminess with a bright, zesty acidity, preventing the sauce from feeling heavy, while the fresh mint adds a surprising, cool, aromatic note that awakens the entire palate. It’s a dish that tastes like spring in a bowl, yet thanks to the convenience of frozen peas, it can bring a touch of sunshine to your table any night of the year.
Complete Ingredients for Creamy Pea Pasta
This recipe relies on a short list of pantry and freezer staples. Using good quality ingredients will make a noticeable difference in the final flavor.
For the Pasta and Peas:
- Short Pasta: 1 pound (454g) such as orecchiette, fusilli, penne, or shells (shapes with ridges or cups are excellent for holding the sauce)
- Frozen Sweet Peas: 16 ounces (450g)
- Kosher Salt: For the pasta water
For the Creamy Pea Sauce:
- Parmesan Cheese: 1 cup, freshly grated, plus more for serving
- Heavy Cream: ½ cup (can substitute with half-and-half for a lighter sauce, or crème fraîche for a tangier flavor)
- Garlic: 2 large cloves, peeled
- Lemon: 1 large, for both zest and juice
- Fresh Mint Leaves: ½ cup, packed (can substitute with fresh basil or flat-leaf parsley)
- Extra Virgin Olive Oil: 2 tablespoons
- Black Pepper: ½ teaspoon, freshly cracked, plus more for serving
- Reserved Pasta Water: About 1 cup
Step-by-Step Instructions for a Perfect Result
This recipe comes together very quickly. Read through the steps first, as the sauce is made in the time it takes for the pasta to cook.
Part 1: Cooking the Pasta and Peas
- Boil the Water: Bring a large pot of water to a rolling boil. Once boiling, season it generously with kosher salt. The water should taste like the sea. This is your only chance to season the pasta itself.
- Cook the Pasta: Add the pasta to the boiling water and cook according to the package directions until it is al dente (cooked through but still with a firm bite).
- Blanch the Peas: In the final 2 minutes of the pasta’s cooking time, add the entire bag of frozen peas directly into the pot with the pasta. This will cook them perfectly without making them mushy, preserving their sweet flavor and bright color.
- Reserve the Pasta Water: Before draining, carefully scoop out and reserve at least 1 ½ cups of the starchy, salty pasta water. This liquid gold is the secret ingredient to creating a silky, emulsified sauce that clings perfectly to the noodles. Do not skip this step!
- Drain: Drain the pasta and peas in a colander and set them aside. Do not rinse them.
Part 2: Making the “No-Cook” Sauce
This part is done while the pasta is cooking.
- Combine Ingredients in Blender: In the carafe of a high-speed blender, combine the freshly grated Parmesan cheese, heavy cream, garlic cloves, the zest of one lemon, the juice of half the lemon (about 2 tablespoons), the packed fresh mint leaves, olive oil, and ½ teaspoon of black pepper.
- Add Peas and Pasta Water: From the colander of drained pasta and peas, scoop out about 1 cup of the cooked peas and add them to the blender. Add ½ cup of the hot, reserved pasta water to the blender. The heat from the water will help melt the cheese and create a smooth sauce.
- Blend Until Velvety Smooth: Secure the lid and blend on high speed for 30-60 seconds, or until the sauce is completely smooth, creamy, and a vibrant green color. If the sauce seems too thick, add another splash of the reserved pasta water and blend again until you reach your desired consistency.
- Taste and Adjust: Taste the sauce directly from the blender. It should be well-seasoned, bright, and savory. Add more salt, pepper, or another squeeze of lemon juice if you think it needs it. Remember, it will be slightly diluted when tossed with the pasta, so it’s okay if it’s a little bold at this stage.
Part 3: Bringing It All Together
- Combine and Sauce: Return the drained pasta and the remaining whole peas to the large, empty pot. Pour the creamy pea sauce from the blender all over the pasta.
- Stir and Emulsify: Using a wooden spoon or spatula, stir everything together vigorously over low heat for about 1 minute. If the sauce seems too thick and isn’t coating the pasta nicely, add more of the reserved pasta water, a splash at a time, until the sauce reaches a perfect, luscious consistency that clings to every piece of pasta.
- Serve Immediately: Divide the pasta among warm bowls. Garnish generously with extra freshly grated Parmesan cheese, a crack of black pepper, and a few small mint leaves.
Nutrition Facts
- Servings: 6-8 servings
- Calories per serving: Approximately 450-550 kcal
Disclaimer: This nutritional information is an estimate. Actual values will vary depending on the specific type of pasta, the fat content of the cream, and the amount of cheese used.
Preparation and Cooking Time
- Preparation Time: 5 minutes (gathering ingredients, zesting lemon)
- Cooking Time: 15 minutes (boiling water, cooking pasta, blending sauce)
- Total Time: 20 minutes
How to Serve and Elevate Your Creamy Pea Pasta
This dish is wonderfully versatile. It shines on its own but also serves as a perfect canvas for additional ingredients.
- As a Simple, Satisfying Vegetarian Main:
- Top with Burrata: For an extra layer of decadence, tear a ball of fresh burrata over the top of the finished pasta. The creamy interior will meld with the warm pea sauce.
- Add Toasted Breadcrumbs: For a delightful crunch, toast some Panko breadcrumbs in a skillet with a little olive oil and garlic until golden brown, then sprinkle over the top before serving.
- A Touch of Heat: A pinch of red pepper flakes adds a gentle warmth that beautifully contrasts the sweet, creamy sauce.
- With Added Protein for a Heartier Meal:
- Crispy Prosciutto or Pancetta: While the pasta cooks, crisp up some thinly sliced prosciutto or diced pancetta in a skillet. Crumble it over the finished dish for a salty, savory crunch.
- Grilled Shrimp or Scallops: The light, sweet flavor of the pasta is a perfect match for simply grilled or pan-seared shrimp or scallops.
- Shredded Chicken: Fold in some shredded rotisserie chicken at the end for an easy and substantial protein boost.
- As a Sophisticated Side Dish:
- Serve smaller portions alongside a main course of pan-seared salmon, baked cod, or a simple grilled chicken breast. The bright, fresh flavors of the pasta cut through the richness of the protein perfectly.
5 Additional Tips for Absolute Perfection
- The Power of Pasta Water Cannot Be Overstated: It might look like cloudy water, but it’s the key to restaurant-quality pasta sauce. The starch in the water acts as an emulsifier and a thickener, helping the sauce bind to the pasta and creating a creamy, non-greasy texture. Always reserve more than you think you’ll need.
- Use Freshly Grated Parmesan: Pre-shredded Parmesan cheese is often coated with anti-caking agents like cellulose, which prevents it from melting smoothly into sauces. For the creamiest, most flavorful result, buy a block of Parmigiano-Reggiano and grate it yourself just before using. It makes a world of difference.
- Balance is Key—Taste and Adjust: The final step of tasting and adjusting the sauce is crucial. The balance between the sweet peas, salty cheese, rich cream, and acidic lemon is what makes this dish special. Before you pour the sauce over the pasta, give it a taste. Does it need another pinch of salt to make the flavors pop? A bit more lemon juice to brighten it up? Trust your palate.
- Don’t Overcook the Peas: The beauty of this recipe is the freshness of the pea flavor. By adding the frozen peas to the pasta water for only the last two minutes, you are essentially just blanching them. This cooks them through while keeping them plump, sweet, and vibrantly green. Boiling them for too long will make them mushy and dull their flavor.
- Choose Your Pasta Shape Wisely: While any pasta will work, certain shapes are better suited to catching this velvety sauce. Shapes with ridges (like rigatoni or fusilli), cups (like orecchiette or shells), or twists (like gemelli) are fantastic because they have little nooks and crannies that trap the sauce, ensuring a perfect sauce-to-pasta ratio in every single bite.
Frequently Asked Questions (FAQ)
1. Can I use fresh peas instead of frozen?
Yes, you can absolutely use fresh peas, especially if they are in season. You will prepare them the same way: add them to the boiling pasta water for the last 1-2 minutes of cooking to blanch them. Keep in mind that some fresh peas can be starchier than frozen ones, which are typically flash-frozen at peak sweetness.
2. How can I make this recipe dairy-free or vegan?
This recipe is very adaptable to be dairy-free and vegan.
- For the Cream: Substitute the heavy cream with full-fat canned coconut milk or a cashew cream (made by soaking raw cashews in hot water and blending them until smooth).
- For the Cheese: Use a high-quality store-bought vegan Parmesan alternative, or substitute it with ⅓ cup of nutritional yeast for a cheesy, savory flavor.
- Ensure your pasta is egg-free.
3. I don’t have fresh mint. What can I use instead?
Fresh mint adds a unique, bright note, but other fresh herbs work wonderfully. Fresh basil is a fantastic substitute, lending a classic Italian flavor. Fresh flat-leaf parsley will provide a clean, green, peppery flavor. You could even try a combination of parsley and a small amount of tarragon for a subtle anise note.
4. How do I store and reheat leftovers?
Store leftovers in an airtight container in the refrigerator for up to 3 days. Pasta with a creamy sauce can thicken and dry out upon refrigeration. To reheat, it’s best to do so gently in a saucepan over low heat. Add a splash of water, milk, or cream to the pan to loosen the sauce and bring back its creamy consistency as you stir. Avoid the microwave if possible, as it can make the pasta rubbery and the sauce separate.
5. My sauce isn’t as vibrant green. What happened?
The vibrant color comes from quickly blanching the peas and not over-blending the sauce. If your sauce looks a bit dull, it could be that the peas were cooked for too long. Another culprit can be adding too much lemon juice before blending, as high acidity can sometimes dull the color of green vegetables. For the brightest color, blend just until smooth and stir in any extra lemon juice at the very end.
Creamy Pea Pasta
Ingredients
For the Pasta and Peas:
-
Short Pasta: 1 pound (454g) such as orecchiette, fusilli, penne, or shells (shapes with ridges or cups are excellent for holding the sauce)
-
Frozen Sweet Peas: 16 ounces (450g)
-
Kosher Salt: For the pasta water
For the Creamy Pea Sauce:
-
Parmesan Cheese: 1 cup, freshly grated, plus more for serving
-
Heavy Cream: ½ cup (can substitute with half-and-half for a lighter sauce, or crème fraîche for a tangier flavor)
-
Garlic: 2 large cloves, peeled
-
Lemon: 1 large, for both zest and juice
-
Fresh Mint Leaves: ½ cup, packed (can substitute with fresh basil or flat-leaf parsley)
-
Extra Virgin Olive Oil: 2 tablespoons
-
Black Pepper: ½ teaspoon, freshly cracked, plus more for serving
-
Reserved Pasta Water: About 1 cup
Instructions
Part 1: Cooking the Pasta and Peas
-
Boil the Water: Bring a large pot of water to a rolling boil. Once boiling, season it generously with kosher salt. The water should taste like the sea. This is your only chance to season the pasta itself.
-
Cook the Pasta: Add the pasta to the boiling water and cook according to the package directions until it is al dente (cooked through but still with a firm bite).
-
Blanch the Peas: In the final 2 minutes of the pasta’s cooking time, add the entire bag of frozen peas directly into the pot with the pasta. This will cook them perfectly without making them mushy, preserving their sweet flavor and bright color.
-
Reserve the Pasta Water: Before draining, carefully scoop out and reserve at least 1 ½ cups of the starchy, salty pasta water. This liquid gold is the secret ingredient to creating a silky, emulsified sauce that clings perfectly to the noodles. Do not skip this step!
-
Drain: Drain the pasta and peas in a colander and set them aside. Do not rinse them.
Part 2: Making the “No-Cook” Sauce
This part is done while the pasta is cooking.
-
Combine Ingredients in Blender: In the carafe of a high-speed blender, combine the freshly grated Parmesan cheese, heavy cream, garlic cloves, the zest of one lemon, the juice of half the lemon (about 2 tablespoons), the packed fresh mint leaves, olive oil, and ½ teaspoon of black pepper.
-
Add Peas and Pasta Water: From the colander of drained pasta and peas, scoop out about 1 cup of the cooked peas and add them to the blender. Add ½ cup of the hot, reserved pasta water to the blender. The heat from the water will help melt the cheese and create a smooth sauce.
-
Blend Until Velvety Smooth: Secure the lid and blend on high speed for 30-60 seconds, or until the sauce is completely smooth, creamy, and a vibrant green color. If the sauce seems too thick, add another splash of the reserved pasta water and blend again until you reach your desired consistency.
-
Taste and Adjust: Taste the sauce directly from the blender. It should be well-seasoned, bright, and savory. Add more salt, pepper, or another squeeze of lemon juice if you think it needs it. Remember, it will be slightly diluted when tossed with the pasta, so it’s okay if it’s a little bold at this stage.
Part 3: Bringing It All Together
-
Combine and Sauce: Return the drained pasta and the remaining whole peas to the large, empty pot. Pour the creamy pea sauce from the blender all over the pasta.
-
Stir and Emulsify: Using a wooden spoon or spatula, stir everything together vigorously over low heat for about 1 minute. If the sauce seems too thick and isn’t coating the pasta nicely, add more of the reserved pasta water, a splash at a time, until the sauce reaches a perfect, luscious consistency that clings to every piece of pasta.
-
Serve Immediately: Divide the pasta among warm bowls. Garnish generously with extra freshly grated Parmesan cheese, a crack of black pepper, and a few small mint leaves.
Nutrition
- Serving Size: one normal portion
- Calories: 450-550


