

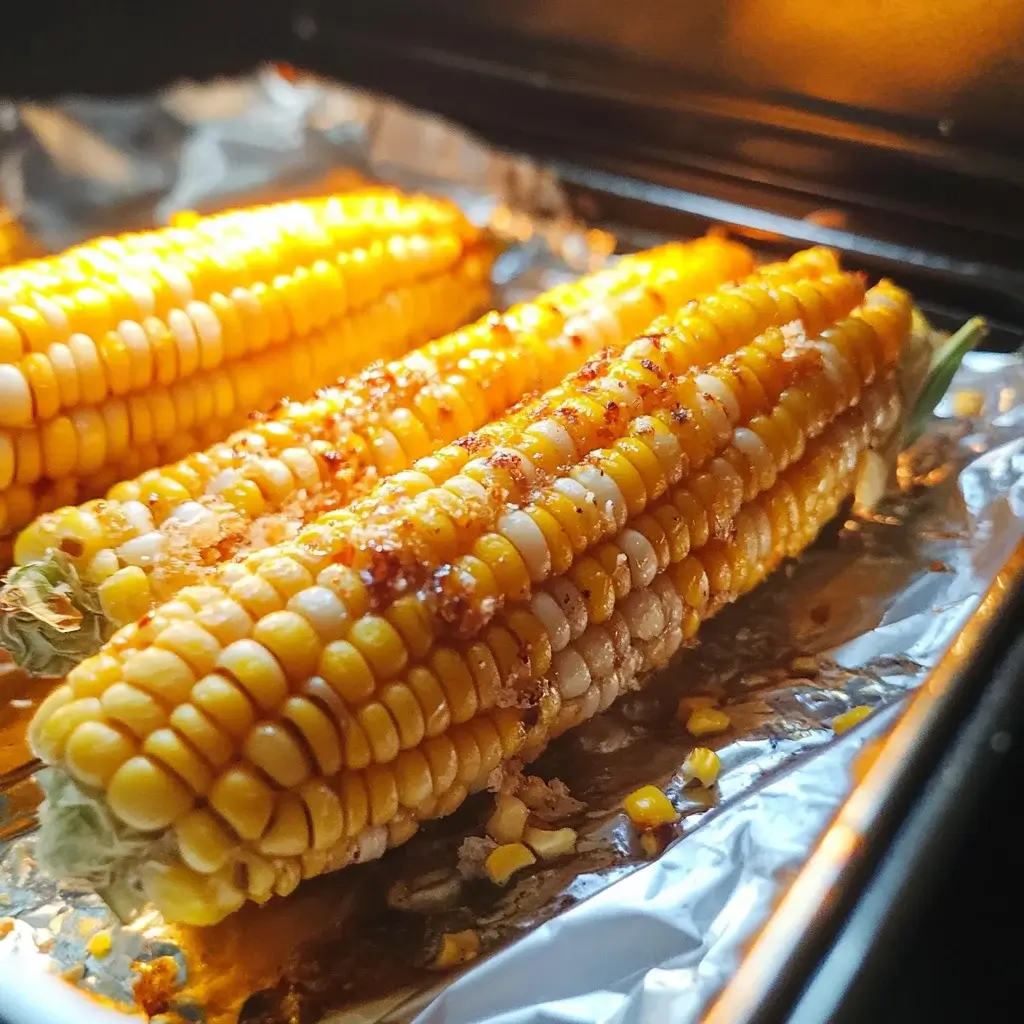

For years, summer in our house meant one thing: corn on the cob. But for years, it also meant boiling pots of water, husking sticky ears over the sink, and inevitably, some unevenly cooked, slightly waterlogged corn. Then, a few summers ago, everything changed. On a whim, I decided to try roasting corn in the oven, inspired by a recipe I’d skimmed online. Honestly, I was skeptical. Could the oven really deliver the same juicy, sweet corn we craved? The answer, unequivocally, was YES. And not just yes, but a resounding, “Wow, this is the best corn we’ve ever had!” The oven transformed our corn game completely. No more watery kernels, no more uneven cooking. Instead, we discovered corn that was incredibly tender, bursting with natural sweetness, and infused with a subtle, smoky flavor that boiling could never achieve. My kids, who were previously lukewarm about corn, became instant converts, devouring ear after ear. Suddenly, oven-roasted corn on the cob became our summer staple. We experimented with different seasonings, cooking times, and even husking methods. And now, I’m thrilled to share our perfected method with you. Get ready to ditch the boiling pot and unlock the secret to the most delicious, hassle-free corn on the cob you’ve ever tasted. Prepare to be amazed by the simple magic of oven-roasted corn – it’s a game-changer!
Ingredients: Simple Goodness for Oven-Baked Corn
The beauty of oven-roasted corn on the cob is its simplicity. You don’t need a long list of fancy ingredients to achieve incredible flavor. In fact, the best oven-baked corn relies on just a few key components, allowing the natural sweetness of the corn to shine through. Here’s what you’ll need to create this summertime classic:
Essential Ingredients:
- Fresh Corn on the Cob (as many ears as you desire): This is the star of the show! Look for fresh, plump ears of corn with bright green husks that are tightly wrapped around the cob. The silks (the stringy tassels at the top) should be slightly sticky and light brown or golden. Avoid corn with dry, browning husks or dry, brittle silks. The quantity depends on how many servings you need – plan for 1-2 ears per person.
- Olive Oil or Butter (optional, but highly recommended): A light coating of olive oil or melted butter enhances the flavor, helps the corn kernels become tender, and encourages a slight charring and caramelization in the oven. Olive oil offers a healthier option and a subtle fruity flavor, while butter adds richness and a classic buttery taste. You can use either, or even a combination of both. For a vegan option, use olive oil or a plant-based butter alternative.
- Salt: Salt is essential for enhancing the natural sweetness of the corn and balancing the flavors. Use kosher salt or sea salt for the best flavor.
- Black Pepper (optional): A sprinkle of freshly ground black pepper adds a subtle warmth and depth of flavor.
Optional Flavor Boosters (to customize your corn):
- Garlic Powder: A dash of garlic powder adds a savory, aromatic note that complements the sweetness of the corn beautifully.
- Onion Powder: Similar to garlic powder, onion powder provides a subtle savory depth and complexity.
- Paprika (Smoked or Sweet): Paprika adds a touch of color and a mild smoky or sweet flavor, depending on the type you choose. Smoked paprika is particularly delicious for oven-roasted corn, adding a hint of barbecue-like flavor.
- Chili Powder: For a touch of heat and Southwestern flair, a pinch of chili powder can add a pleasant kick.
- Cayenne Pepper (a pinch, optional): If you like a significant spicy kick, a very small pinch of cayenne pepper will do the trick. Use sparingly, as it is potent.
- Fresh Herbs (after cooking): Fresh herbs like chopped parsley, cilantro, chives, or basil, sprinkled over the cooked corn after roasting, add a vibrant freshness and herbaceous aroma.
- Lime Juice (after cooking): A squeeze of fresh lime juice after roasting adds a bright, tangy element that pairs wonderfully with the sweetness of the corn and any added spices.
- Cheese (after cooking): Grated Parmesan cheese, cotija cheese, or crumbled feta cheese, sprinkled over the hot corn, adds a salty, savory, and cheesy dimension.
- Compound Butter (before cooking): Elevate your oven-roasted corn by using a flavored compound butter. Mix softened butter with herbs, spices, garlic, or cheese to create a custom flavor infusion.
Instructions: Simple Steps to Oven-Roasted Corn Perfection
Roasting corn on the cob in the oven is incredibly easy and requires minimal effort. Here’s a step-by-step guide to achieving perfectly tender and flavorful oven-roasted corn every time:
Step 1: Prepare the Corn (Husking Options)
There are two main approaches to husking (or not husking!) corn for oven roasting, each yielding slightly different results:
Option 1: Roasting in the Husks (for Steamed, Juicy Corn):
- Leave Husks On: For this method, you leave the husks intact. This creates a steaming effect within the husks, resulting in incredibly moist and tender corn.
- Trim Silks (Optional but Recommended): Peel back the husks slightly at the top of each ear and remove as much silk (the stringy tassels) as possible. Silks can sometimes become dry and slightly burnt in the oven. You don’t need to completely remove the husks – just peel back the top enough to access the silks.
- Soak Corn (Optional but Recommended for Extra Moisture): For even more moisture, you can soak the unhusked corn in cold water for about 30 minutes to 1 hour before roasting. This helps to further steam the corn within the husks. Drain the corn well before roasting.
Option 2: Husking Before Roasting (for Slightly Charred, Caramelized Corn):
- Husk the Corn: Completely remove the husks and silks from each ear of corn. You can use your fingers to pull off the husks and silks, or use a clean kitchen towel to help grip and remove the silks.
- Rinse (Optional): Rinse the husked corn under cold water to remove any remaining silks or debris. Pat dry with paper towels.
Step 2: Season and Prepare for Roasting
- Preheat Oven: Preheat your oven to a high temperature, typically 400°F to 425°F (200°C to 220°C). Higher temperatures promote better roasting and slight caramelization.
- Prepare Baking Sheet: Line a baking sheet with parchment paper or aluminum foil for easier cleanup. While not strictly necessary, it makes cleanup much simpler.
- Coat with Oil or Butter (Optional but Recommended):
- For Unhusked Corn (Option 1): If roasting in husks, you can skip this step, as the husks will retain moisture. However, if you want to add flavor, you can gently peel back the husks (as in Step 1, Option 1), brush the kernels with olive oil or melted butter, sprinkle with salt and pepper (and any other desired seasonings), and then re-wrap the husks around the corn.
- For Husked Corn (Option 2): Place the husked corn on the prepared baking sheet. Drizzle with olive oil or melted butter and rub it evenly over the corn kernels. Sprinkle generously with salt and pepper, and any other desired seasonings (garlic powder, paprika, chili powder, etc.). Make sure the kernels are evenly coated for best flavor.
Step 3: Roast the Corn in the Oven
- Arrange Corn on Baking Sheet: Arrange the prepared corn ears in a single layer on the baking sheet. Avoid overcrowding the pan, as this can steam the corn instead of roasting it. If you have a lot of corn, you may need to use two baking sheets or roast in batches.
- Roast Time:
- Unhusked Corn (Option 1): Roast for 25-35 minutes, or until the husks are slightly browned and the corn is tender when pierced with a fork. The husks will protect the corn and steam it, so it may take slightly longer to cook.
- Husked Corn (Option 2): Roast for 20-25 minutes, or until the corn is tender and slightly charred and caramelized in spots. Husked corn will roast more directly and cook slightly faster.
- Turn Corn Halfway Through (Optional but Recommended for Even Cooking): For more even cooking and browning, you can turn the corn ears halfway through the roasting time. This ensures all sides are exposed to the heat.
Step 4: Check for Doneness and Serve
- Check for Tenderness: To check if the corn is done, carefully pierce a kernel with a fork. It should be tender and easily pierced. For unhusked corn, you can peel back a small portion of the husk to check the kernels.
- Remove from Oven: Once the corn is cooked to your liking, remove the baking sheet from the oven.
- Cool Slightly (if roasting in husks): If you roasted the corn in husks, let it cool slightly for a few minutes before handling, as the husks will be hot.
- Husk (if needed) and Serve: If you roasted in husks, peel back the husks completely and remove them and any remaining silks.
- Add Finishing Touches (Optional): While the corn is still hot, you can add finishing touches like a squeeze of lime juice, fresh herbs, grated cheese, or compound butter.
- Serve Immediately: Serve oven-roasted corn on the cob immediately while it’s hot and at its best.
Nutrition Facts: Corn on the Cob – A Nutritious Summer Treat
Corn on the cob, while often enjoyed as a side dish or treat, offers a surprising array of nutritional benefits. Here’s a general overview of the nutritional information for one medium ear of corn on the cob (approximately 7 inches long). Please note that these are estimates and can vary slightly based on corn variety and size.
- Servings: This recipe typically yields servings based on the number of ears of corn prepared. One ear of corn is generally considered one serving.
- Calories per Serving (1 medium ear, plain, estimated): 70-90 calories per ear. Adding butter or oil will increase the calorie count.
Approximate Macronutrient Breakdown per Serving (1 medium ear, plain, estimated):
- Protein: 2-3 grams
- Carbohydrates: 15-20 grams (including approximately 3-4 grams of fiber and 5-7 grams of natural sugars)
- Fat: 1-2 grams (primarily unsaturated fats)
Key Nutrients in Corn on the Cob:
- Fiber: Corn is a good source of dietary fiber, which is important for digestive health, helps regulate blood sugar levels, and promotes satiety.
- Vitamins: Corn contains various vitamins, including Vitamin C (an antioxidant), B vitamins (important for energy metabolism), and folate (important for cell growth).
- Minerals: Corn provides minerals such as potassium (important for blood pressure regulation), magnesium (involved in muscle and nerve function), and phosphorus (important for bone health).
- Antioxidants: Corn, especially yellow corn, contains antioxidants like carotenoids (including lutein and zeaxanthin), which are beneficial for eye health.
Important Note: Corn is a starchy vegetable, so it is higher in carbohydrates than some other vegetables. However, it is also a good source of fiber and nutrients. When enjoying corn on the cob as part of a balanced diet, be mindful of portion sizes and choose healthy toppings like herbs, spices, and a light drizzle of olive oil instead of excessive amounts of butter or salt.
Preparation Time: Quick and Easy Oven-Baked Corn
Oven-roasting corn on the cob is not only delicious but also incredibly efficient in terms of preparation time. Here’s a breakdown of the estimated time involved:
- Prep Time: 5-15 minutes (depending on whether you are husking and seasoning, soaking, or using compound butter). Unhusked corn requires minimal prep time, while husking and seasoning takes a bit longer.
- Cook Time: 20-35 minutes (depending on husking method and desired level of tenderness and char).
- Total Time: 25-50 minutes
Tips for Speeding Up Preparation:
- Skip Soaking: If you are short on time, you can skip the soaking step without significantly impacting the flavor or texture, especially if roasting in husks.
- Pre-chop Herbs and Spices: If using compound butter or fresh herbs for garnish, you can chop these in advance to save time during active preparation.
- Minimal Seasoning: For a truly quick option, simply use olive oil or butter and salt and pepper. The natural sweetness of the corn is delicious on its own.
- Husked Corn for Faster Roasting: Husked corn roasts slightly faster than unhusked corn, reducing the overall cook time.
How to Serve: Elevating Your Oven-Roasted Corn Experience
Serving oven-roasted corn on the cob is about showcasing its delicious flavor and making it a delightful part of your meal. Here are some ideas for serving and presentation:
- Classic on the Cob:
- Individual Plates: Serve each ear of corn directly on individual plates as a side dish.
- Corn Holders: Provide corn holders (corn picks) for easier handling and eating, especially if the corn is hot.
- Napkins: Be sure to provide plenty of napkins, as corn on the cob can be a bit messy to eat!
- Corn Kernels Off the Cob:
- Corn Salad: Cut the roasted corn kernels off the cob and use them to make a vibrant corn salad. Combine with chopped bell peppers, red onion, cilantro, lime juice, and a light vinaigrette.
- Salsa: Roasted corn kernels add a wonderful smoky sweetness to homemade salsa. Combine with diced tomatoes, onions, jalapenos, cilantro, and lime juice.
- Corn Relish: Create a corn relish by combining roasted corn kernels with diced red onion, bell peppers, vinegar, sugar, and spices.
- Soup or Chowder: Add roasted corn kernels to soups, chowders, or stews for extra flavor and texture.
- Flavor Enhancements at the Table:
- Butter Bar: Set up a “butter bar” with various flavored butters (herb butter, garlic butter, chili lime butter, etc.) for guests to customize their corn.
- Seasoning Station: Offer a seasoning station with salt, pepper, paprika, chili powder, garlic powder, onion powder, and grated Parmesan cheese for guests to add their preferred flavorings.
- Lime Wedges: Provide lime wedges for squeezing over the corn for a burst of freshness.
- Hot Sauce: Offer a selection of hot sauces for those who like a spicy kick.
- Meal Pairings:
- BBQ and Grilling: Oven-roasted corn on the cob is a perfect side dish for BBQ ribs, grilled chicken, burgers, or steaks.
- Summer Salads: Serve alongside summer salads like potato salad, coleslaw, pasta salad, or watermelon salad.
- Mexican or Southwestern Cuisine: Corn on the cob complements Mexican or Southwestern dishes like tacos, fajitas, enchiladas, or chili.
- Seafood: Roasted corn pairs well with grilled or baked fish, shrimp, or lobster.
- Vegetarian Mains: Serve alongside vegetarian main dishes like veggie burgers, grilled halloumi, or black bean burgers.
Additional Tips for Oven-Roasted Corn on the Cob Success
To ensure your oven-roasted corn on the cob is consistently delicious, here are five additional tips to keep in mind:
- Choose Fresh Corn: The quality of your corn significantly impacts the final flavor. Select fresh, plump ears of corn with bright green husks and moist silks. The kernels should be tightly packed and milky when you gently press them with your fingernail.
- Don’t Overcrowd the Pan: Overcrowding the baking sheet will steam the corn instead of roasting it, preventing proper caramelization and charring. Arrange the corn ears in a single layer with space between them for optimal roasting. If you have a lot of corn, roast in batches or use multiple baking sheets.
- High Heat is Key: Roasting corn at a high temperature (400°F-425°F) is crucial for achieving tender kernels and a slight char. High heat helps to caramelize the natural sugars in the corn, enhancing its sweetness and flavor.
- Experiment with Seasonings: While simple salt and pepper are delicious, don’t be afraid to experiment with different seasonings to customize your oven-roasted corn. Garlic powder, onion powder, paprika, chili powder, herbs, and spices can all add exciting flavor dimensions.
- Adjust Roasting Time Based on Preference: Roasting time can be adjusted based on your desired level of tenderness and char. For softer, more steamed corn, roast unhusked corn for a longer time. For slightly charred and caramelized corn, roast husked corn for a shorter time. Check for doneness by piercing a kernel with a fork – it should be tender and easily pierced.
FAQ: Your Oven-Roasted Corn on the Cob Questions Answered
Let’s address some frequently asked questions about oven-roasting corn on the cob to help you confidently create this summer favorite:
Q1: Can I roast frozen corn on the cob in the oven?
A: Yes, you can roast frozen corn on the cob in the oven, although the texture may be slightly softer than fresh corn. You don’t need to thaw frozen corn before roasting. Simply add about 5-10 minutes to the roasting time to ensure it cooks through. Coat with oil and seasonings as you would fresh corn.
Q2: Can I roast corn on the cob in foil?
A: Yes, you can roast corn on the cob wrapped in foil, similar to roasting in husks. Wrap each ear of corn individually in aluminum foil, adding butter, seasonings, or herbs inside the foil packet if desired. Roasting in foil will steam the corn and result in very tender and moist kernels. Roast at 400°F for about 25-30 minutes.
Q3: How do I store leftover oven-roasted corn on the cob?
A: Store leftover oven-roasted corn on the cob in an airtight container in the refrigerator for up to 3-4 days. You can reheat it in the oven, microwave, or skillet. Alternatively, you can cut the kernels off the cob and store them separately in an airtight container in the refrigerator or freezer.
Q4: Can I grill corn on the cob instead of roasting it in the oven?
A: Yes, grilling corn on the cob is another popular and delicious method. You can grill corn in husks or husked, directly on the grill grates. Grilling imparts a smoky flavor and char that is different from oven-roasting. Grilling time will vary depending on the heat of your grill, but it usually takes about 15-25 minutes.
Q5: What are some variations for flavored compound butter for corn on the cob?
A: There are endless possibilities for flavored compound butter! Some delicious variations include:
* Garlic Herb Butter: Mix softened butter with minced garlic, chopped parsley, thyme, and rosemary.
* Chili Lime Butter: Mix softened butter with lime zest, lime juice, chili powder, and cilantro.
* Spicy Chipotle Butter: Mix softened butter with chipotle pepper in adobo sauce (finely chopped), smoked paprika, and cumin.
* Parmesan Herb Butter: Mix softened butter with grated Parmesan cheese, garlic powder, Italian seasoning, and parsley.
* Honey Cinnamon Butter: Mix softened butter with honey, cinnamon, and a pinch of nutmeg for a sweeter option.
Oven-roasted corn on the cob is a simple yet incredibly satisfying way to enjoy this summer staple. With minimal effort and maximum flavor, it’s a recipe that’s perfect for weeknight dinners, weekend BBQs, and everything in between. So, ditch the boiling pot, embrace the oven, and get ready to savor the sweetest, most tender corn you’ve ever tasted! Enjoy!
Print
Corn on the Cob in the Oven recipe
Ingredients
Essential Ingredients:
- Fresh Corn on the Cob (as many ears as you desire): This is the star of the show! Look for fresh, plump ears of corn with bright green husks that are tightly wrapped around the cob. The silks (the stringy tassels at the top) should be slightly sticky and light brown or golden. Avoid corn with dry, browning husks or dry, brittle silks. The quantity depends on how many servings you need – plan for 1-2 ears per person.
- Olive Oil or Butter (optional, but highly recommended): A light coating of olive oil or melted butter enhances the flavor, helps the corn kernels become tender, and encourages a slight charring and caramelization in the oven. Olive oil offers a healthier option and a subtle fruity flavor, while butter adds richness and a classic buttery taste. You can use either, or even a combination of both. For a vegan option, use olive oil or a plant-based butter alternative.
- Salt: Salt is essential for enhancing the natural sweetness of the corn and balancing the flavors. Use kosher salt or sea salt for the best flavor.
- Black Pepper (optional): A sprinkle of freshly ground black pepper adds a subtle warmth and depth of flavor.
Optional Flavor Boosters (to customize your corn):
- Garlic Powder: A dash of garlic powder adds a savory, aromatic note that complements the sweetness of the corn beautifully.
- Onion Powder: Similar to garlic powder, onion powder provides a subtle savory depth and complexity.
- Paprika (Smoked or Sweet): Paprika adds a touch of color and a mild smoky or sweet flavor, depending on the type you choose. Smoked paprika is particularly delicious for oven-roasted corn, adding a hint of barbecue-like flavor.
- Chili Powder: For a touch of heat and Southwestern flair, a pinch of chili powder can add a pleasant kick.
- Cayenne Pepper (a pinch, optional): If you like a significant spicy kick, a very small pinch of cayenne pepper will do the trick. Use sparingly, as it is potent.
- Fresh Herbs (after cooking): Fresh herbs like chopped parsley, cilantro, chives, or basil, sprinkled over the cooked corn after roasting, add a vibrant freshness and herbaceous aroma.
- Lime Juice (after cooking): A squeeze of fresh lime juice after roasting adds a bright, tangy element that pairs wonderfully with the sweetness of the corn and any added spices.
- Cheese (after cooking): Grated Parmesan cheese, cotija cheese, or crumbled feta cheese, sprinkled over the hot corn, adds a salty, savory, and cheesy dimension.
- Compound Butter (before cooking): Elevate your oven-roasted corn by using a flavored compound butter. Mix softened butter with herbs, spices, garlic, or cheese to create a custom flavor infusion.
Instructions
Step 1: Prepare the Corn (Husking Options)
There are two main approaches to husking (or not husking!) corn for oven roasting, each yielding slightly different results:
Option 1: Roasting in the Husks (for Steamed, Juicy Corn):
- Leave Husks On: For this method, you leave the husks intact. This creates a steaming effect within the husks, resulting in incredibly moist and tender corn.
- Trim Silks (Optional but Recommended): Peel back the husks slightly at the top of each ear and remove as much silk (the stringy tassels) as possible. Silks can sometimes become dry and slightly burnt in the oven. You don’t need to completely remove the husks – just peel back the top enough to access the silks.
- Soak Corn (Optional but Recommended for Extra Moisture): For even more moisture, you can soak the unhusked corn in cold water for about 30 minutes to 1 hour before roasting. This helps to further steam the corn within the husks. Drain the corn well before roasting.
Option 2: Husking Before Roasting (for Slightly Charred, Caramelized Corn):
- Husk the Corn: Completely remove the husks and silks from each ear of corn. You can use your fingers to pull off the husks and silks, or use a clean kitchen towel to help grip and remove the silks.
- Rinse (Optional): Rinse the husked corn under cold water to remove any remaining silks or debris. Pat dry with paper towels.
Step 2: Season and Prepare for Roasting
- Preheat Oven: Preheat your oven to a high temperature, typically 400°F to 425°F (200°C to 220°C). Higher temperatures promote better roasting and slight caramelization.
- Prepare Baking Sheet: Line a baking sheet with parchment paper or aluminum foil for easier cleanup. While not strictly necessary, it makes cleanup much simpler.
- Coat with Oil or Butter (Optional but Recommended):
- For Unhusked Corn (Option 1): If roasting in husks, you can skip this step, as the husks will retain moisture. However, if you want to add flavor, you can gently peel back the husks (as in Step 1, Option 1), brush the kernels with olive oil or melted butter, sprinkle with salt and pepper (and any other desired seasonings), and then re-wrap the husks around the corn.
- For Husked Corn (Option 2): Place the husked corn on the prepared baking sheet. Drizzle with olive oil or melted butter and rub it evenly over the corn kernels. Sprinkle generously with salt and pepper, and any other desired seasonings (garlic powder, paprika, chili powder, etc.). Make sure the kernels are evenly coated for best flavor.
Step 3: Roast the Corn in the Oven
- Arrange Corn on Baking Sheet: Arrange the prepared corn ears in a single layer on the baking sheet. Avoid overcrowding the pan, as this can steam the corn instead of roasting it. If you have a lot of corn, you may need to use two baking sheets or roast in batches.
- Roast Time:
- Unhusked Corn (Option 1): Roast for 25-35 minutes, or until the husks are slightly browned and the corn is tender when pierced with a fork. The husks will protect the corn and steam it, so it may take slightly longer to cook.
- Husked Corn (Option 2): Roast for 20-25 minutes, or until the corn is tender and slightly charred and caramelized in spots. Husked corn will roast more directly and cook slightly faster.
- Turn Corn Halfway Through (Optional but Recommended for Even Cooking): For more even cooking and browning, you can turn the corn ears halfway through the roasting time. This ensures all sides are exposed to the heat.
Step 4: Check for Doneness and Serve
- Check for Tenderness: To check if the corn is done, carefully pierce a kernel with a fork. It should be tender and easily pierced. For unhusked corn, you can peel back a small portion of the husk to check the kernels.
- Remove from Oven: Once the corn is cooked to your liking, remove the baking sheet from the oven.
- Cool Slightly (if roasting in husks): If you roasted the corn in husks, let it cool slightly for a few minutes before handling, as the husks will be hot.
- Husk (if needed) and Serve: If you roasted in husks, peel back the husks completely and remove them and any remaining silks.
- Add Finishing Touches (Optional): While the corn is still hot, you can add finishing touches like a squeeze of lime juice, fresh herbs, grated cheese, or compound butter.
- Serve Immediately: Serve oven-roasted corn on the cob immediately while it’s hot and at its best.
Nutrition
- Serving Size: one normal portion
- Calories: 70-90
- Fat: 1-2 grams
- Carbohydrates: 15-20 grams
- Protein: 2-3 grams


