

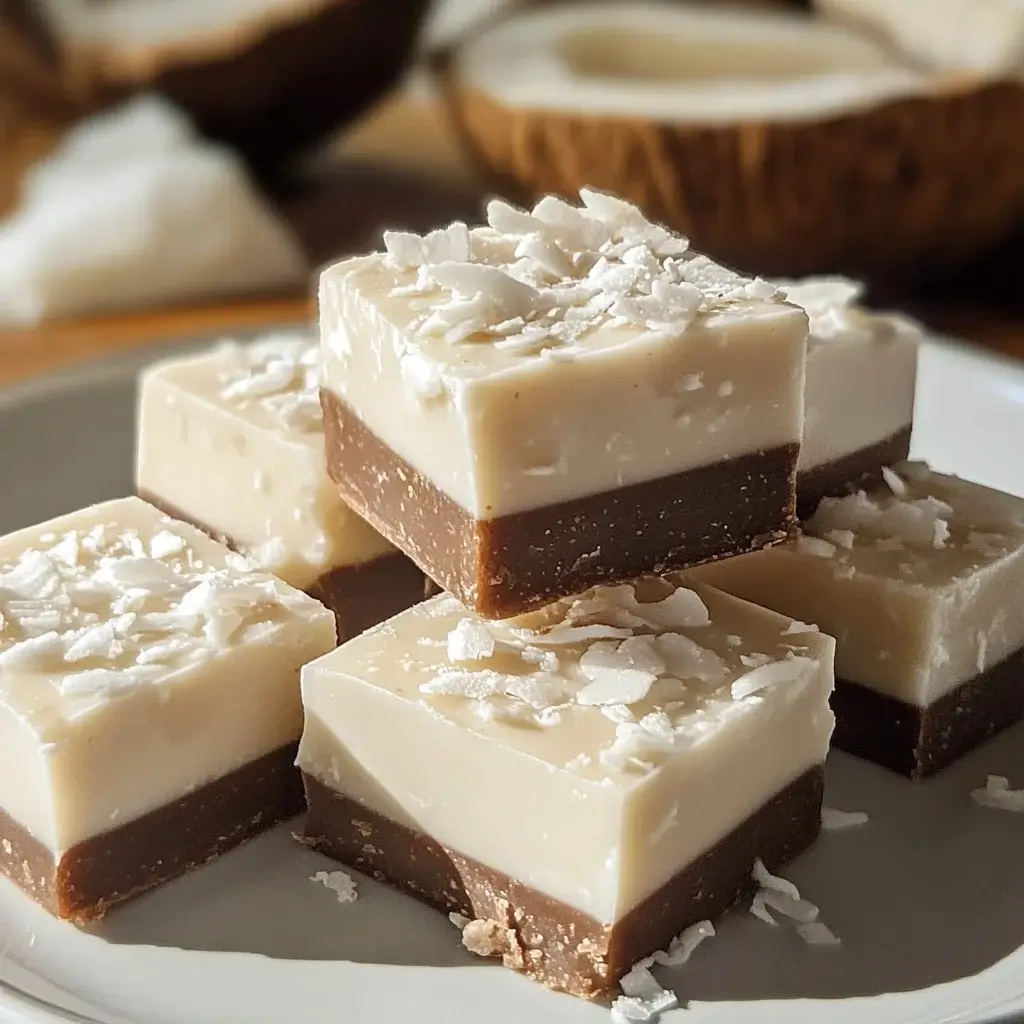

There’s a particular magic associated with homemade fudge, and when coconut enters the picture, it transforms into something truly special. I vividly recall the first time I successfully made coconut fudge. It was for a holiday potluck, and I wanted to bring something decadent yet slightly different from the usual chocolate or peanut butter varieties. The aroma that filled my kitchen as the mixture gently heated – that sweet blend of melting chocolate (I opted for white chocolate that first time to let the coconut truly sing) mingling with the tropical fragrance of coconut – was intoxicating. Pouring the thick, glossy mixture into the pan, studded with snowy flakes of shredded coconut, felt incredibly satisfying. The hardest part, as always with fudge, was waiting for it to set! When I finally cut into the firm, cool slab, revealing perfect little squares, I couldn’t resist a taste. It was pure bliss: creamy, melt-in-your-mouth texture, intensely sweet but balanced by the chewy, distinct flavour of coconut. It wasn’t just sugary; it had substance, richness. It was an instant hit at the party, disappearing faster than anything else I brought. Since then, Coconut Fudge has become a requested favourite, a go-to treat for gifting, celebrations, or simply indulging a sweet craving. It’s surprisingly straightforward to make, yet tastes like something from a high-end confectionery shop.
Ingredients for Creamy Coconut Fudge
This recipe focuses on a popular and relatively easy method using sweetened condensed milk, ensuring a smooth, creamy, and virtually foolproof fudge. This yields approximately 36 small (1-inch) squares.
- Sweetened Condensed Milk (The Base & Sweetener):
- 1 can (14 ounces / approx. 396g) Sweetened Condensed Milk: This is non-negotiable for this style of fudge. It provides sugar, moisture, and the characteristic creamy, soft texture. Do NOT substitute with evaporated milk – they are entirely different products. Use full-fat for the richest result.
- Chocolate (Structure & Flavor):
- 12 ounces (about 340g) High-Quality White Chocolate Chips or chopped White Chocolate Bar: White chocolate allows the coconut flavour to be the star. Choose a good quality brand designed for melting (avoid “white baking morsels” that may contain less cocoa butter and not melt as smoothly).
- Alternative: For Chocolate Coconut Fudge, substitute with 12 ounces of semi-sweet or milk chocolate chips/chopped chocolate. Dark chocolate (60-70% cacao) can also be used for a more intense, less sweet flavour contrast with the coconut.
- Butter (Richness & Smoothness):
- 2 Tablespoons Unsalted Butter: Adds richness, flavour, and contributes to a smoother texture. Cut into small pieces for faster melting.
- Coconut (The Star Flavor & Texture):
- 1 ½ cups Sweetened Shredded Coconut: This provides the signature coconut flavour and chewy texture. Sweetened coconut works best in this recipe to complement the condensed milk.
- Plus: ½ cup Sweetened Shredded Coconut (for topping): Adds visual appeal and extra coconut flavour. Consider toasting this portion lightly for a deeper flavour and golden colour (see Tips section).
- Alternative: Unsweetened desiccated coconut can be used for a more intense, less sweet coconut flavour, but it may result in a slightly drier fudge. You might need to adjust other sweetness levels slightly if using unsweetened.
- Flavor Enhancer & Balancer:
- 1 teaspoon Vanilla Extract: Enhances the overall sweetness and complements both coconut and chocolate.
- ⅛ teaspoon Salt: Crucial for balancing the intense sweetness of the condensed milk and chocolate. Don’t omit it!
- Optional Additions:
- ½ cup Chopped Nuts (like almonds, pecans, or macadamia nuts): Stir in with the coconut for added crunch and flavour complexity. Macadamia nuts pair exceptionally well with coconut and white chocolate.
Step-by-Step Instructions: Making Your Dreamy Coconut Fudge
Follow these instructions carefully, especially regarding heat control, for perfect, creamy Coconut Fudge every time.
- Prepare the Pan:
- Line an 8×8 inch or 9×9 inch square baking pan with parchment paper, leaving an overhang on two opposite sides. This overhang will act as “handles” to easily lift the set fudge out of the pan later. Lightly grease the parchment paper and any exposed parts of the pan with butter or non-stick spray for extra insurance against sticking, though the parchment usually suffices. An 8×8 pan will yield slightly thicker fudge squares than a 9×9 pan.
- Combine Base Ingredients:
- In a medium-sized, heavy-bottomed saucepan, combine the sweetened condensed milk, chopped chocolate (white, semi-sweet, or milk), cubed unsalted butter, and the ⅛ teaspoon of salt. A heavy-bottomed pan distributes heat more evenly, reducing the risk of scorching.
- Melt Gently (Crucial Step):
- Place the saucepan over low to medium-low heat. Heat the mixture gently, stirring constantly with a heat-resistant spatula or wooden spoon. Scrape the bottom and sides of the pan frequently to prevent sticking and scorching, especially where the condensed milk can easily catch.
- Continue heating and stirring until the chocolate and butter are completely melted and the mixture is smooth and glossy. Do NOT let the mixture come to a boil. Boiling can cause the sugar to crystallize or the mixture to separate and become oily. This melting process usually takes about 5-10 minutes. Be patient. If using chocolate chips, they might hold their shape initially, but keep stirring until they fully incorporate.
- Incorporate Flavor & Coconut:
- Once the mixture is completely smooth and melted, immediately remove the saucepan from the heat.
- Stir in the vanilla extract until well combined.
- Add the 1 ½ cups of sweetened shredded coconut (and chopped nuts, if using). Stir until the coconut is evenly distributed throughout the fudge mixture. Work relatively quickly as the fudge will begin to set as it cools.
- Transfer to Pan:
- Pour the coconut fudge mixture into the prepared baking pan.
- Using your spatula (or an offset spatula if you have one), spread the fudge evenly into the corners and level the top as smoothly as possible.
- Add Topping:
- Sprinkle the remaining ½ cup of sweetened shredded coconut (toasted or untoasted) evenly over the top of the fudge. Gently press the coconut topping into the surface of the fudge with the back of the spoon or your clean hands to help it adhere.
- Chill to Set:
- Place the pan in the refrigerator, uncovered or lightly covered (once cool to avoid condensation dripping onto the fudge).
- Chill for at least 2-4 hours, or preferably overnight, until the fudge is completely firm and set. Thorough chilling is essential for clean cutting.
- Cut into Squares:
- Once the fudge is fully set, use the parchment paper overhangs to lift the entire slab of fudge out of the pan and onto a cutting board.
- For clean cuts: Use a large, sharp knife. Run the knife under hot water, wipe it dry quickly with a towel, and then make a cut. Wipe the knife clean and repeat the heating/wiping process between each cut. This helps prevent the fudge from dragging or crumbling.
- Cut the slab into small squares, typically 6×6 for 36 pieces in an 8×8 or 9×9 pan. Adjust the size as desired.
- Store:
- Store the cut coconut fudge squares in an airtight container. See FAQ for storage details.
Nutritional Information (Approximate)
Fudge is an indulgent treat, and its nutritional profile reflects that. Values depend heavily on the specific brands of chocolate and condensed milk used, the type of chocolate (white vs. milk vs. semi-sweet), and the final size of the squares. These are rough estimates based on the recipe yielding 36 small (1-inch) squares, using white chocolate.
- Servings: Approximately 36 small squares.
- Calories per Serving (Approximate): 100 – 150 calories per square.
Key Nutritional Considerations:
- High in Sugar: The primary ingredients (sweetened condensed milk, chocolate, sweetened coconut) are high in sugar. Fudge is meant to be a sweet treat enjoyed in moderation.
- High in Fat: Fat comes from the chocolate (cocoa butter), butter, coconut, and condensed milk. White chocolate typically has a higher fat content than semi-sweet.
- Source of Saturated Fat: Significant amounts come from the butter, coconut, and cocoa butter in the chocolate.
- Minimal Protein & Fiber: While coconut offers some fibre, fudge is not a significant source of protein or fibre.
Disclaimer: These are estimates for informational purposes only. For precise nutritional data, use an online calculator with your specific ingredient brands and quantities. Coconut fudge is best considered a dessert or special occasion treat rather than a health food. Enjoy responsibly!
Preparation Time Breakdown
This quick fudge recipe comes together relatively fast in terms of active time, but requires significant chilling time to set properly.
- Active Preparation Time: 15 – 20 minutes
- Measuring ingredients: ~5 minutes
- Preparing the pan: ~2 minutes
- Melting ingredients and mixing: ~10 minutes
- Spreading in pan and topping: ~3 minutes
- Chilling Time (Passive): 2 – 4 hours minimum (longer is often better, up to overnight)
- This is crucial for the fudge to firm up completely for proper texture and cutting.
- Cutting Time: 5 – 10 minutes
- Lifting from pan and cutting into squares.
- Total Active Time: Approximately 20 – 30 minutes
- Total Time (Including Minimum Chilling): Approximately 2.5 – 4.5 hours (or longer if chilled overnight)
This makes it a great recipe to prepare ahead of time, letting it chill while you attend to other things.
How to Serve Your Delicious Coconut Fudge
Coconut fudge is delightful on its own, but presentation and context can make it even more special. Here are some ideas:
- Serving Temperature: Fudge is often best served at cool room temperature. Straight from the fridge, it can be quite hard; letting it sit out for 15-20 minutes softens it slightly for the perfect melt-in-your-mouth texture.
- Occasions:
- Holiday Treat Trays: A beautiful addition alongside cookies, candies, and other festive goodies.
- Edible Gifts: Package squares in decorative boxes, tins, or cellophane bags tied with ribbon for thoughtful homemade gifts.
- Parties & Potlucks: Arrange neatly on a platter for an easy and popular dessert contribution.
- Afternoon Pick-Me-Up: Enjoy a small square with coffee or tea.
- Dessert Platters: Include as part of a larger dessert assortment.
- Presentation:
- Simple Squares: Arrange neatly on a plate or tiered stand.
- Petit Four Liners: Place individual squares in small paper or foil liners for an elegant touch and easy handling.
- Drizzled: Once set and cut, drizzle the squares with melted dark or white chocolate for extra flair.
- Toasted Coconut: Using lightly toasted coconut as the topping adds visual contrast and deeper flavour.
- Pairings:
- Coffee or Espresso: The bitterness cuts through the sweetness beautifully.
- Black Tea: A simple cup of black tea provides a nice balance.
- Milk: A classic pairing, especially for kids (or kids at heart!).
- Dessert Wine: A sweet late-harvest Riesling or even a light port could complement the richness.
Additional Tips for Fudge Perfection
Achieve flawless coconut fudge with these extra pointers:
- Toast the Topping Coconut (Optional but Recommended): For enhanced flavour and visual appeal, lightly toast the ½ cup of coconut used for the topping. Spread it on a dry baking sheet and bake at 350°F (175°C) for 3-6 minutes, watching very closely and stirring occasionally, until lightly golden and fragrant. Coconut burns quickly! Let it cool completely before sprinkling over the fudge. This adds a nutty depth that complements the creamy fudge.
- Quality Ingredients Make a Difference: Since this recipe has few ingredients, their quality significantly impacts the final taste and texture. Use a good quality chocolate (white, milk, or semi-sweet) that you enjoy eating on its own. Avoid generic “baking chips” which may contain less cocoa butter and result in a waxy texture. Ensure your coconut and vanilla extract are fresh.
- Master the Gentle Heat: The single most common issue with condensed milk fudge is scorching or separation caused by excessive heat. Use a heavy-bottomed pan, keep the heat low (medium-low at most), and stir constantly, scraping the bottom. Patience here prevents grainy or oily fudge. If your mixture looks like it’s starting to separate or get oily, remove it from the heat immediately and stir vigorously to try and re-emulsify it.
- Don’t Rush the Chill: Fudge needs adequate time in the refrigerator to fully set and become firm. Trying to cut it too early will result in messy, soft squares that don’t hold their shape. While 2 hours might sometimes be enough, 4 hours or overnight is generally better for ensuring a perfectly firm texture and allowing flavours to meld.
- Achieve Clean Cuts: Beyond using a hot, clean knife (as described in the instructions), ensure the fudge is thoroughly chilled. If it’s very hard straight from the fridge, let it sit at room temperature for 10-15 minutes before cutting to prevent cracking. Use a long, thin, sharp knife and press straight down firmly rather than using a sawing motion. Wiping the blade clean between each cut prevents dragging crumbs onto the next piece.
Frequently Asked Questions (FAQ)
Here are answers to common questions about making and storing Coconut Fudge:
- Q: Can I use unsweetened coconut instead of sweetened?
- A: Yes, you can use unsweetened shredded or desiccated coconut. However, be aware that the overall fudge will be noticeably less sweet, and the texture might be slightly drier, especially with desiccated coconut which contains less moisture. The primary sweetness in this recipe comes from the condensed milk and chocolate, so it will still be sweet, but the coconut flavour will be more pronounced and less candy-like. You might prefer this less intense sweetness!
- Q: How should I store Coconut Fudge, and how long does it last?
- A: Store the fudge in an airtight container to prevent it from drying out. It can be stored at room temperature for about 1 week or in the refrigerator for 2-3 weeks. If storing in the fridge, layer the fudge pieces between sheets of wax paper or parchment paper to prevent sticking. Fudge also freezes well for longer storage (up to 2-3 months); wrap it tightly in plastic wrap, then place in an airtight container or freezer bag. Thaw frozen fudge in the refrigerator overnight before serving.
- Q: My fudge turned out oily or grainy. What went wrong?
- A: This usually points to issues with heat or ingredients:
- Oily: Often caused by overheating the mixture, which makes the fat separate from the chocolate and milk solids. Cook on low heat and stir constantly. Sometimes, stirring vigorously off-heat can help bring it back together. Using lower quality chocolate can also contribute.
- Grainy: Can result from undissolved sugar crystals (less common with condensed milk fudge but possible if overheated/boiled) or seized chocolate. Chocolate seizes (becomes thick and pasty) if it comes into contact with even a tiny amount of water during melting or if overheated. Ensure your pan and utensils are dry, and melt gently.
- A: This usually points to issues with heat or ingredients:
- Q: Can I use evaporated milk instead of sweetened condensed milk?
- A: No, you cannot substitute evaporated milk for sweetened condensed milk in this type of quick fudge recipe. Sweetened condensed milk has a high sugar content that is essential for the fudge’s texture, sweetness, and setting properties. Evaporated milk is unsweetened, concentrated milk with a much thinner consistency and will not work as a direct replacement.
- Q: Can I make this recipe with different types of chocolate or add other mix-ins?
- A: Absolutely! As mentioned, you can easily swap the white chocolate for semi-sweet, milk, or dark chocolate to create Chocolate Coconut Fudge. You can also add about ½ cup of chopped nuts (almonds, pecans, walnuts, macadamia nuts) or even mini marshmallows along with the coconut for different textures and flavours. Just ensure the total volume of mix-ins doesn’t overwhelm the fudge base.

Coconut Fudge recipe
Ingredients
- Sweetened Condensed Milk (The Base & Sweetener):
- 1 can (14 ounces / approx. 396g) Sweetened Condensed Milk: This is non-negotiable for this style of fudge. It provides sugar, moisture, and the characteristic creamy, soft texture. Do NOT substitute with evaporated milk – they are entirely different products. Use full-fat for the richest result.
- Chocolate (Structure & Flavor):
- 12 ounces (about 340g) High-Quality White Chocolate Chips or chopped White Chocolate Bar: White chocolate allows the coconut flavour to be the star. Choose a good quality brand designed for melting (avoid “white baking morsels” that may contain less cocoa butter and not melt as smoothly).
- Alternative: For Chocolate Coconut Fudge, substitute with 12 ounces of semi-sweet or milk chocolate chips/chopped chocolate. Dark chocolate (60-70% cacao) can also be used for a more intense, less sweet flavour contrast with the coconut.
- Butter (Richness & Smoothness):
- 2 Tablespoons Unsalted Butter: Adds richness, flavour, and contributes to a smoother texture. Cut into small pieces for faster melting.
- Coconut (The Star Flavor & Texture):
- 1 ½ cups Sweetened Shredded Coconut: This provides the signature coconut flavour and chewy texture. Sweetened coconut works best in this recipe to complement the condensed milk.
- Plus: ½ cup Sweetened Shredded Coconut (for topping): Adds visual appeal and extra coconut flavour. Consider toasting this portion lightly for a deeper flavour and golden colour (see Tips section).
- Alternative: Unsweetened desiccated coconut can be used for a more intense, less sweet coconut flavour, but it may result in a slightly drier fudge. You might need to adjust other sweetness levels slightly if using unsweetened.
- Flavor Enhancer & Balancer:
- 1 teaspoon Vanilla Extract: Enhances the overall sweetness and complements both coconut and chocolate.
- ⅛ teaspoon Salt: Crucial for balancing the intense sweetness of the condensed milk and chocolate. Don’t omit it!
- Optional Additions:
- ½ cup Chopped Nuts (like almonds, pecans, or macadamia nuts): Stir in with the coconut for added crunch and flavour complexity. Macadamia nuts pair exceptionally well with coconut and white chocolate.
Instructions
- Prepare the Pan:
- Line an 8×8 inch or 9×9 inch square baking pan with parchment paper, leaving an overhang on two opposite sides. This overhang will act as “handles” to easily lift the set fudge out of the pan later. Lightly grease the parchment paper and any exposed parts of the pan with butter or non-stick spray for extra insurance against sticking, though the parchment usually suffices. An 8×8 pan will yield slightly thicker fudge squares than a 9×9 pan.
- Combine Base Ingredients:
- In a medium-sized, heavy-bottomed saucepan, combine the sweetened condensed milk, chopped chocolate (white, semi-sweet, or milk), cubed unsalted butter, and the ⅛ teaspoon of salt. A heavy-bottomed pan distributes heat more evenly, reducing the risk of scorching.
- Melt Gently (Crucial Step):
- Place the saucepan over low to medium-low heat. Heat the mixture gently, stirring constantly with a heat-resistant spatula or wooden spoon. Scrape the bottom and sides of the pan frequently to prevent sticking and scorching, especially where the condensed milk can easily catch.
- Continue heating and stirring until the chocolate and butter are completely melted and the mixture is smooth and glossy. Do NOT let the mixture come to a boil. Boiling can cause the sugar to crystallize or the mixture to separate and become oily. This melting process usually takes about 5-10 minutes. Be patient. If using chocolate chips, they might hold their shape initially, but keep stirring until they fully incorporate.
- Incorporate Flavor & Coconut:
- Once the mixture is completely smooth and melted, immediately remove the saucepan from the heat.
- Stir in the vanilla extract until well combined.
- Add the 1 ½ cups of sweetened shredded coconut (and chopped nuts, if using). Stir until the coconut is evenly distributed throughout the fudge mixture. Work relatively quickly as the fudge will begin to set as it cools.
- Transfer to Pan:
- Pour the coconut fudge mixture into the prepared baking pan.
- Using your spatula (or an offset spatula if you have one), spread the fudge evenly into the corners and level the top as smoothly as possible.
- Add Topping:
- Sprinkle the remaining ½ cup of sweetened shredded coconut (toasted or untoasted) evenly over the top of the fudge. Gently press the coconut topping into the surface of the fudge with the back of the spoon or your clean hands to help it adhere.
- Chill to Set:
- Place the pan in the refrigerator, uncovered or lightly covered (once cool to avoid condensation dripping onto the fudge).
- Chill for at least 2-4 hours, or preferably overnight, until the fudge is completely firm and set. Thorough chilling is essential for clean cutting.
- Cut into Squares:
- Once the fudge is fully set, use the parchment paper overhangs to lift the entire slab of fudge out of the pan and onto a cutting board.
- For clean cuts: Use a large, sharp knife. Run the knife under hot water, wipe it dry quickly with a towel, and then make a cut. Wipe the knife clean and repeat the heating/wiping process between each cut. This helps prevent the fudge from dragging or crumbling.
- Cut the slab into small squares, typically 6×6 for 36 pieces in an 8×8 or 9×9 pan. Adjust the size as desired.
- Store:
- Store the cut coconut fudge squares in an airtight container. See FAQ for storage details.
Nutrition
- Serving Size: one normal portion
- Calories: 100 – 150


