

Introduction
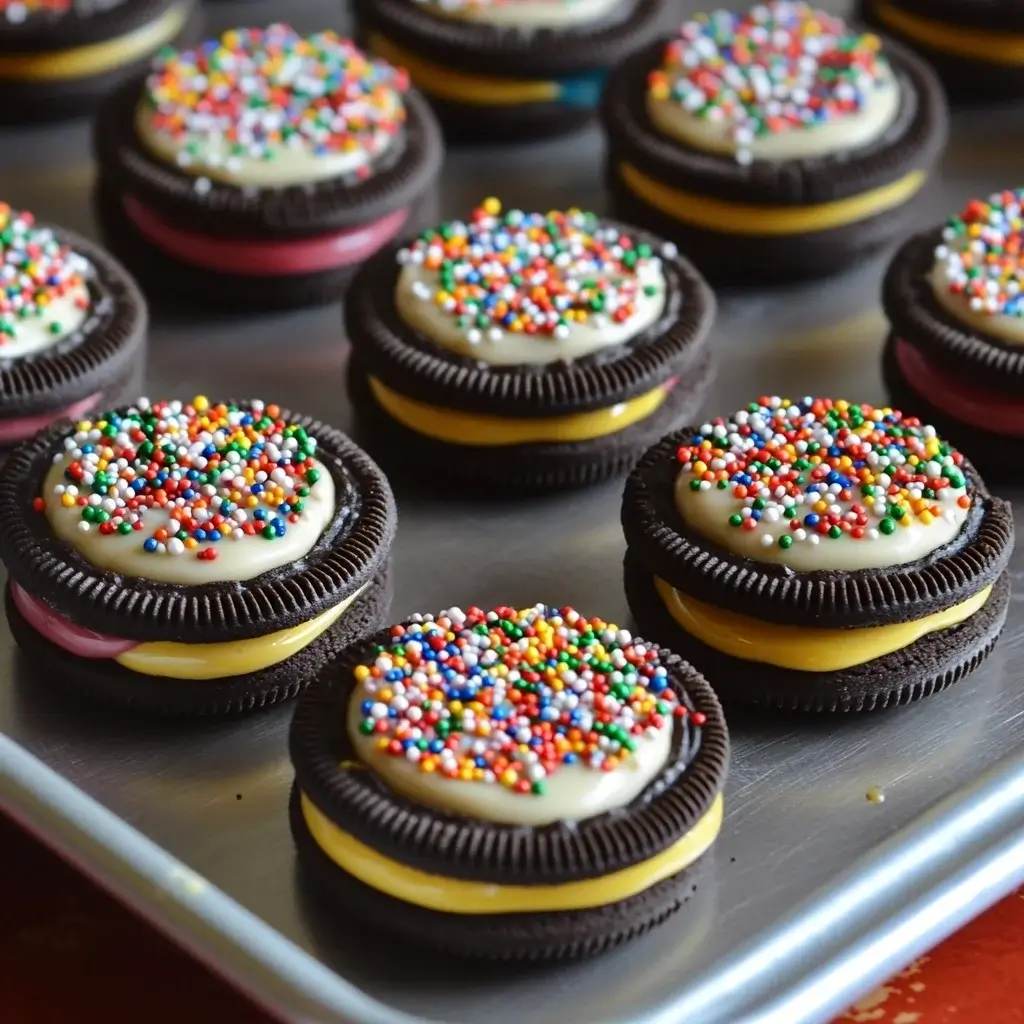
As the holiday season approaches, the spirit of Christmas brings with it the joy of creating delightful treats that not only taste heavenly but also serve as charming decorations. Among these delectable treats, Oreo Cookie Christmas Ornaments stand out as a unique and fun addition to your festive celebrations. These sweet creations are not only easy to make but also provide a delightful surprise for family and friends. Perfect for holiday parties, gift-giving, or simply as a treat for yourself, these Oreo-based delights are sure to spread joy and cheer.
Ingredients
To create these delightful Oreo Cookie Christmas Ornaments, you will need the following ingredients:
- 1 package of chocolate sandwich cookies (approximately 30), like Oreos
- 1 ½ pounds of almond bark candy coating
- 1 package of mini peanut butter cups (at least 30)
- ¼ cup of colorful sprinkles
These ingredients are readily available, making this recipe both convenient and budget-friendly. The combination of creamy almond bark, crunchy chocolate cookies, and the nutty flavor of peanut butter cups creates a harmonious blend of textures and tastes that everyone will love.
Instructions
Creating Oreo Cookie Christmas Ornaments is a fun and straightforward process that you can enjoy with your family and friends. Follow these simple steps to bring your festive treats to life:
- Melt the Almond Bark:
- Begin by melting the almond bark in the microwave according to the package directions. Use a microwave-safe bowl and heat the almond bark in short intervals, stirring in between until smooth and fully melted.
- Dip the Cookies:
- Using a fork, dip each chocolate sandwich cookie fully into the melted almond bark. Lift the cookie out, allowing any excess coating to drip off. This ensures an even layer of coating on each cookie.
- Place on Baking Sheet:
- Place the coated cookies on a baking sheet lined with parchment paper. The parchment paper prevents sticking and makes for easy cleanup.
- Decorate with Sprinkles and Peanut Butter Cups:
- Immediately after placing the cookies on the baking sheet, sprinkle colorful sprinkles on top to add a festive touch. Attach a mini peanut butter cup to the side of each cookie by gently pressing it into the coating.
- Cool and Set:
- Allow the cookies to cool and set for about 45 minutes. This time is crucial for the almond bark to harden, ensuring the decorations stay in place.
In just under an hour, you will have an array of beautiful and tasty Oreo Cookie Christmas Ornaments ready to impress your guests!
Nutrition Facts
Understanding the nutritional content of these treats is important, especially during the indulgent holiday season. Here is the nutritional breakdown for each Oreo Cookie Christmas Ornament:
- Calories: 205
- Carbohydrates: 28g
- Protein: 1g
- Fat: 9g
- Sugar: 24g
These cookies are a delightful indulgence, perfect for enjoying in moderation. They offer a sweet treat that complements the festive spirit of the holidays.
How to Serve
Oreo Cookie Christmas Ornaments are versatile in their presentation and can be served in various delightful ways, each adding a unique flair to your holiday celebrations. Here are some creative and comprehensive suggestions for showcasing these festive treats:
As Edible Ornaments
Transform your Christmas tree into a whimsical dessert display by using the Oreo Cookie Christmas Ornaments as edible decorations. To do this, simply thread a colorful ribbon through the top of each decorated cookie, ensuring it’s securely fastened. Hang them on the branches of your tree among the twinkling lights and other ornaments. This not only enhances the festive atmosphere but also serves as a delightful surprise for your guests. Imagine their delight when they discover that they can nibble on the ornaments! To elevate the visual appeal, consider using ribbons in a variety of colors that complement your overall holiday theme—think golds and reds for a classic look or blues and silvers for a winter wonderland. Additionally, you can create a mini scavenger hunt by encouraging guests to find and taste specific ornaments, adding an interactive element to your holiday gathering.
On a Dessert Platter
Presenting your Oreo Cookie Christmas Ornaments on a beautifully arranged dessert platter can elevate your holiday table. To create a stunning display, select a decorative platter or cake stand that complements your holiday décor. Arrange the cookies in an eye-catching pattern, perhaps in concentric circles or as part of a themed arrangement, such as a snowman or Christmas tree shape. Surround the cookies with an assortment of other seasonal treats—think gingerbread cookies, peppermint bark, and chocolate truffles—to create a colorful and inviting dessert spread. To further enhance the presentation, sprinkle edible glitter or powdered sugar over the platter for that extra holiday sparkle. This vibrant display not only serves as a feast for the eyes but also invites guests to indulge in a variety of festive flavors.
As Party Favors
Sending your guests home with a sweet reminder of your gathering can be a lovely gesture. Individually wrapping each Oreo Cookie Christmas Ornament in clear cellophane bags and tying them with festive ribbons creates charming party favors that are both personal and thoughtful. Consider customizing the tags attached to each bag with holiday greetings or the date of the event, adding a personal touch. You can also opt for themed bags—using bags with snowflakes or Christmas trees printed on them to carry the festive spirit a step further. These edible favors are perfect for various occasions, from holiday parties to office gatherings, and allow your guests to enjoy a delightful treat long after the festivities have ended.
With Hot Beverages
One of the most comforting ways to enjoy Oreo Cookie Christmas Ornaments is by pairing them with a warm beverage. The rich, creamy flavor of almond bark drizzled over the chocolate cookies perfectly complements the comforting warmth of hot cocoa, coffee, or tea. For a cozy gathering, set up a hot beverage station where guests can choose their drink of choice. Offer a selection of flavored syrups, whipped cream, and festive toppings like crushed candy canes, which guests can use to customize their drinks. Encourage them to dip the cookies into their beverages for a delightful experience—imagine the melty chocolate mingling with the warm drink, creating a perfect bite. This pairing not only satisfies sweet cravings but also fosters a warm, inviting atmosphere, making it the ideal way to enjoy these festive treats during chilly winter gatherings.
By incorporating these serving suggestions, you can enhance the presentation and enjoyment of Oreo Cookie Christmas Ornaments, ensuring they not only delight the palate but also contribute to the festive spirit of your holiday celebrations.
Additional Tips
Creating Oreo Cookie Christmas Ornaments can be a delightful and festive activity that brings joy to both the young and the young-at-heart. To elevate your ornament-making experience and ensure that your creations are not only delicious but also visually stunning, consider the following comprehensive tips:
Experiment with Flavors
While the classic chocolate sandwich cookies are certainly a beloved choice, don’t hesitate to step outside the box and explore a variety of Oreo flavors. Seasonal options like Peppermint Creme or Pumpkin Spice can add a unique twist to your ornaments. You might even consider using Golden Oreos for a lighter color that pairs beautifully with vibrant decorations. Additionally, try incorporating limited-edition flavors that might be available during the holiday season, such as Gingerbread or Red Velvet. Mixing and matching flavors can provide a delightful surprise for your taste buds and make your ornaments more visually interesting.
Use Different Candy Coatings
Almond bark is a popular choice for coating your Oreo ornaments, but if you can’t find it, there are plenty of alternatives to consider. White chocolate, milk chocolate, or even dark chocolate candy coatings can provide different levels of sweetness and richness that can enhance the overall flavor of your ornaments. For a more colorful presentation, consider using colored candy melts, which come in a variety of festive shades. You can also experiment with flavor-infused coatings, such as raspberry or orange chocolate, to add another layer of taste to your creations. Don’t forget to temper the chocolate properly if using regular chocolate bars to achieve a glossy finish and prevent bloom.
Get Creative with Decorations
Decorating your Oreo ornaments is where the fun truly begins! Beyond traditional sprinkles, let your imagination run wild. Edible glitter can add a magical touch, making your ornaments twinkle like stars on a Christmas tree. Crushed candy canes are not only visually appealing but also add a refreshing minty flavor that complements the chocolate. For a sophisticated look, consider using drizzles of contrasting chocolate (e.g., white chocolate drizzled over dark chocolate) or piping colorful frosting to create intricate designs. Seasonal-themed candies, such as mini marshmallows, chocolate stars, or holiday-themed M&Ms, can also add a whimsical touch. Remember, the more personalized your decorations, the more special your ornaments will be!
Involve the Kids
One of the best aspects of making Oreo Cookie Christmas Ornaments is that it can be a fantastic family bonding experience. Involving children in the process not only makes the task more enjoyable but also teaches them valuable skills like measuring, mixing, and decorating. Set up a “cookie decorating station” with various toppings and coatings, allowing children to unleash their creativity. Encourage them to come up with their designs or themes for their ornaments, fostering a sense of ownership and pride in their work. Additionally, this activity can be a great opportunity to teach kids about the spirit of giving by encouraging them to make ornaments for friends, family, or as gifts for neighbors. Be sure to take lots of pictures to capture the fun moments and preserve the memories for years to come.
Final Touches
Once your ornaments are complete, consider how you will present or use them. Stringing them with colorful ribbons or twine can turn your cookies into charming decorations for your tree or as festive gifts for teachers and friends. Alternatively, you can package them in clear bags tied with bows for a delightful treat to share during holiday gatherings. Whatever you choose, these extra touches can elevate your Oreo Cookie Christmas Ornaments from simple treats to cherished holiday keepsakes.
By following these tips, you can create stunning, flavorful, and personalized Oreo Cookie Christmas Ornaments that will surely be a hit during the holiday season. Whether enjoyed as a festive snack or given as heartfelt gifts, these ornaments will bring joy and sweetness to your celebrations. Happy decorating!
FAQs
1. Can I make these cookies in advance?
Yes, you can make Oreo Cookie Christmas Ornaments up to a week in advance. Store them in an airtight container at room temperature to maintain freshness.
2. What if I don’t have peanut butter cups?
If you don’t have mini peanut butter cups, feel free to substitute them with other small candies like chocolate truffles or caramel bites.
3. How do I ensure the almond bark sets properly?
Ensure that the cookies are placed in a cool and dry area to allow the almond bark to set properly. Avoid placing them in a humid environment, as this can prevent the coating from hardening.
4. Are there any allergy-friendly alternatives?
For those with nut allergies, substitute almond bark and peanut butter cups with nut-free candy coatings and decorations.
Conclusion
Oreo Cookie Christmas Ornaments are a delightful addition to any holiday celebration, combining the joy of creativity with the pleasure of indulgence. These charming treats not only capture the festive spirit of the season but also provide an opportunity for family and friends to come together, fostering connections and creating cherished memories.
The beauty of Oreo Cookie Christmas Ornaments lies in their versatility. They can be customized to match your personal style or the theme of your holiday decor, allowing for endless possibilities. From classic red and green sprinkles to elegant gold and silver accents, the decorations can be tailored to suit any aesthetic. This customization makes them not just a treat but a unique piece of holiday art that reflects the creativity of the maker.
In addition to their visual appeal, these easy-to-make treats offer a delightful burst of flavor that is sure to impress your guests. The rich, creamy filling of the Oreo cookies combined with various toppings—such as melted chocolate, festive sprinkles, or crushed candy canes—creates a mouthwatering experience that tantalizes the taste buds. The crunch of the cookie paired with the smoothness of the toppings provides a satisfying texture contrast that enhances the overall enjoyment.
Whether you choose to hang them on your Christmas tree, serve them at a holiday party, or give them as gifts, these festive cookies are sure to bring smiles to everyone who receives them. Their charming appearance and delicious taste make them the perfect centerpiece for a holiday dessert table, and their portability means they can easily be shared with friends, family, or co-workers. Imagine the delight on a loved one’s face when they receive a beautifully packaged box of these homemade treats!
Moreover, making Oreo Cookie Christmas Ornaments is an activity that transcends age barriers, making it a fantastic way to engage with children and adults alike. Gather your ingredients, invite your loved ones, and embark on a fun-filled baking adventure that encourages collaboration and creativity. This shared experience not only strengthens bonds but also allows everyone to express their individuality through their decorations and designs.
As you create these delightful ornaments, take a moment to appreciate the process of crafting something special together. The laughter, conversation, and shared joy of creating these treats will become a treasured part of your holiday traditions. Crafting Oreo Cookie Christmas Ornaments is not just about the end product; it’s about the journey and the memories made along the way.
In summary, Oreo Cookie Christmas Ornaments are more than just a festive treat; they are a celebration of creativity, flavor, and togetherness. This holiday season, embrace the spirit of giving and sharing by making these delightful cookies with your loved ones. Enjoy the sweet satisfaction of crafting something beautiful and delicious, and let the joy of the season fill your hearts and homes. Happy baking!
Print
Christmas Oreo Ornaments🎄
Ingredients
- 1 package of chocolate sandwich cookies (approximately 30), like Oreos
- 1 ½ pounds of almond bark candy coating
- 1 package of mini peanut butter cups (at least 30)
- ¼ cup of colorful sprinkles
Instructions
- Melt the Almond Bark:
- Begin by melting the almond bark in the microwave according to the package directions. Use a microwave-safe bowl and heat the almond bark in short intervals, stirring in between until smooth and fully melted.
- Dip the Cookies:
- Using a fork, dip each chocolate sandwich cookie fully into the melted almond bark. Lift the cookie out, allowing any excess coating to drip off. This ensures an even layer of coating on each cookie.
- Place on Baking Sheet:
- Place the coated cookies on a baking sheet lined with parchment paper. The parchment paper prevents sticking and makes for easy cleanup.
- Decorate with Sprinkles and Peanut Butter Cups:
- Immediately after placing the cookies on the baking sheet, sprinkle colorful sprinkles on top to add a festive touch. Attach a mini peanut butter cup to the side of each cookie by gently pressing it into the coating.
- Cool and Set:
- Allow the cookies to cool and set for about 45 minutes. This time is crucial for the almond bark to harden, ensuring the decorations stay in place.
Nutrition
- Serving Size: one normal portion
- Calories: 205
- Sugar: 24g
- Fat: 9g
- Carbohydrates: 28g
- Protein: 1g


