
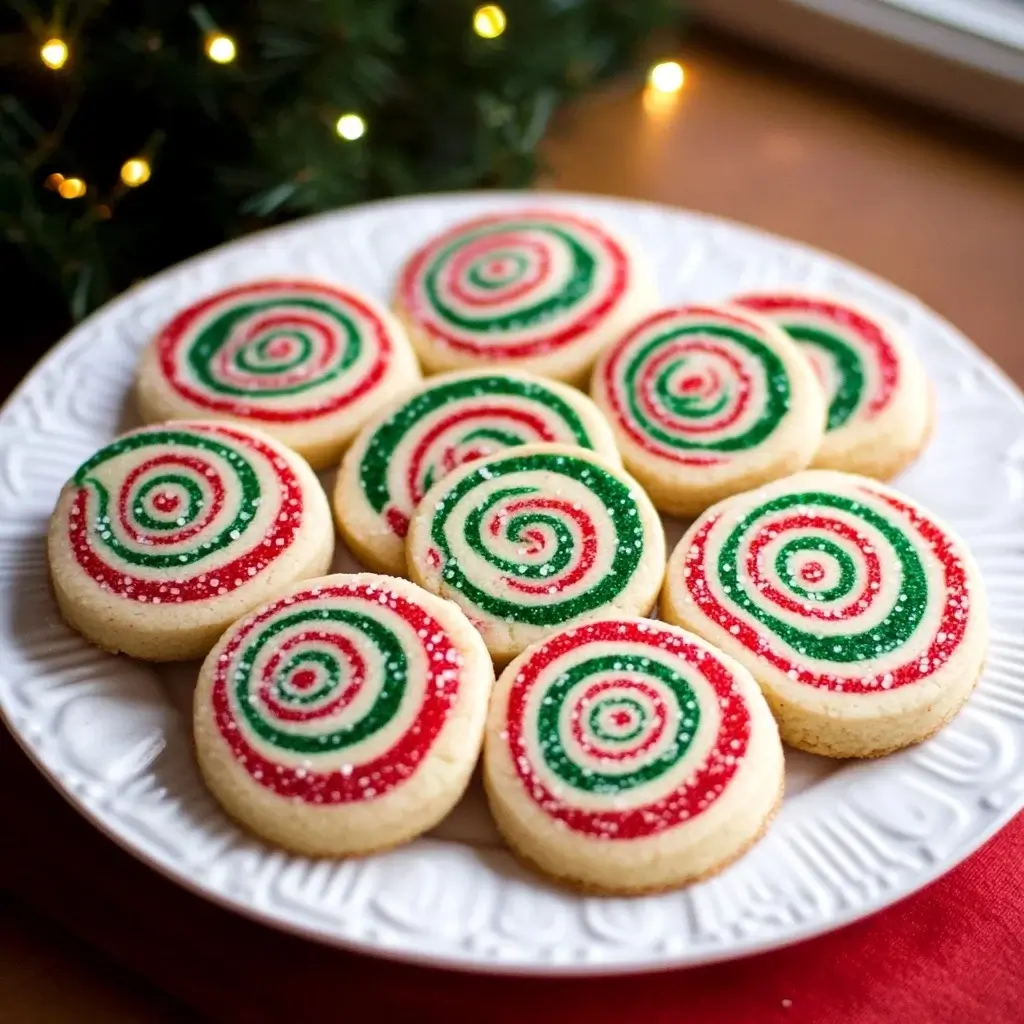

Christmas Cookie Pinwheels are a delightful addition to your holiday baking repertoire. With their vibrant red, white, and green swirls, these cookies are not only visually appealing but also delicious. Their buttery, vanilla flavor makes them a crowd favorite, and they are sure to be the star of your Christmas cookie plate. This article will guide you through the recipe, offering tips and insights to ensure your Christmas Cookie Pinwheels turn out perfectly every time.
Ingredients
Creating these festive treats requires a few simple ingredients, most of which you likely already have in your pantry. Here’s what you’ll need:
- 2 cups all-purpose flour (plus more for dusting)
- 1/2 teaspoon baking powder
- 1/4 teaspoon salt
- 12 tablespoons unsalted butter (at room temperature)
- 3/4 cup sugar
- 1 egg
- 1 teaspoon vanilla extract
- 1/2 to 1 teaspoon liquid red food coloring (to your color liking)
- 1/2 to 1 teaspoon liquid green food coloring (to your color liking)
Instructions
Follow these detailed steps to make your Christmas Cookie Pinwheels. The process involves some waiting time as the dough needs to chill, but the results are worth the wait.
- Prepare the Dry Ingredients
In a medium mixing bowl, mix together the flour, baking powder, and salt. Set aside. - Cream the Butter and Sugar
In a large mixing bowl, beat together the butter and sugar for 1-2 minutes, or until pale and fluffy. Add the egg and vanilla to the butter mixture and beat until combined, scraping the sides of the bowl as needed. - Combine Wet and Dry Ingredients
Add the dry ingredients to the wet ingredients in two additions, mixing until just combined after each addition. Scrape the sides of the bowl as needed. - Divide and Color the Dough
Divide the dough into 3 equal pieces and roll each piece into a ball. Place one piece of dough back in the bowl and add the red food coloring. Beat with your mixer until the color is completely incorporated. Clean your mixer paddle or hand mixer blades. Repeat this step with the green food coloring for the second piece of dough. Leave the third piece of dough as is. - Chill the Dough
Press each piece of dough into a flat square and wrap in plastic wrap. Refrigerate the dough for 1 hour or until firm. - Roll Out the Dough
Remove the dough squares from the fridge. Place the red dough between two sheets of parchment paper or waxed paper. Use a rolling pin to roll out the dough to a 10-inch square. Leave the dough between parchment. Repeat with the other two pieces of dough. Refrigerate cookie dough for 30 minutes. - Assemble the Dough Layers
Remove dough from fridge, and take the top layer of parchment off each sheet of cookie dough. Place the red dough down on a counter. Top with the white dough, non-parchment sides touching. Be sure to line up the edges of the dough as much as possible. Remove the parchment from the white dough. Top the white with the green, non-parchment sides touching, being sure to line up the edges. Remove parchment from green dough. Use a pizza cutter to trim the left and right edges of the cookie dough into straight lines. - Form the Dough Log
Very carefully, starting with one of the straightened sides, roll the dough into a log until you reach the other trimmed dough edge. Use the parchment paper to lift the dough to get it started. Once the dough log is complete, gently pinch the seam closed along with any breaks on the outer red layer. Wrap the dough log in plastic wrap and refrigerate for 1 hour or until firm. - Preheat and Slice
Preheat your oven to 350°F (175°C). Line a baking sheet with a silicone mat or parchment paper. Use a sharp knife to cut the dough log into 1/4-inch thick slices. Discard the ends since they don’t make a nice pinwheel design. - Bake the Cookies
Place the cookies 2 inches apart on your prepared baking sheets and bake for 12 to 15 minutes, or until the cookies are set. Carefully remove from the oven and let cool for 5 minutes on the baking sheet before transferring to a wire rack to cool completely.
Nutrition Facts
Here’s the nutritional breakdown per serving (1 cookie):
- Calories: 173 kcal
- Carbohydrates: 21g
- Protein: 2g
- Fat: 9g
- Saturated Fat: 6g
- Cholesterol: 33mg
- Sodium: 42mg
- Potassium: 36mg
- Fiber: 1g
- Sugar: 9g
- Vitamin A: 277 IU
- Calcium: 12mg
- Iron: 1mg
How to Serve
Christmas Cookie Pinwheels are not only a visual delight but also a delicious treat that can elevate any holiday gathering. While these festive cookies are best enjoyed fresh from the oven, there are several ways to serve and enjoy them that enhance their flavor and presentation.
Fresh from the Oven
The ultimate experience of Christmas Cookie Pinwheels is when they’re warm and freshly baked. The dough’s buttery aroma fills the kitchen, and the cookies melt in your mouth with each bite. To serve them fresh, allow the cookies to cool on a wire rack for a few minutes after baking. This ensures they hold their shape while still being soft and slightly gooey in the center.
To enhance the experience, consider serving them with a dusting of powdered sugar or a drizzle of melted white chocolate over the top. This adds a touch of elegance and complements the colorful swirls of the pinwheels beautifully. For an extra festive touch, you can sprinkle crushed peppermint candies or festive sprinkles on top while the chocolate is still wet.
Storing for Later Enjoyment
If you find yourself with leftover Christmas Cookie Pinwheels (which is rare, but can happen!), storing them properly is key to maintaining their deliciousness. Once the cookies are completely cooled, place them in an airtight container. To prevent them from sticking together, consider placing parchment paper between layers of cookies. Stored in this manner, they can last for up to a week at room temperature or longer if refrigerated.
When you’re ready to enjoy them again, you can gently reheat the cookies in the oven at a low temperature (around 300°F or 150°C) for about 5-10 minutes. This will restore their fresh-baked taste and warmth, making them feel like they just came out of the oven.
Holiday Cookie Platters
Christmas Cookie Pinwheels make a stunning addition to any holiday cookie platter. Their vibrant colors and unique pinwheel design create visual interest that can impress your guests. When assembling your cookie platter, consider pairing these pinwheels with an assortment of other holiday treats, such as gingerbread cookies, sugar cookies, and peppermint bark. This variety not only showcases your baking skills but also caters to diverse tastes.
For a professional touch, use decorative platters or tiered stands to display your cookies. Adding festive garnishes like sprigs of holly, cinnamon sticks, or even edible flowers can elevate the presentation and make the platter even more inviting.
Perfect for Gift-Giving
Christmas Cookie Pinwheels also make thoughtful gifts during the holiday season. Their festive appearance and delightful flavors make them a cherished treat for friends, family, or coworkers. To gift these cookies, consider packaging them in decorative tins or boxes lined with festive tissue paper. You can create a personalized touch by including a handwritten note or a festive tag that shares the cookie’s story or the recipe.
To make your gift extra special, pair the cookies with a complementary item, such as a jar of homemade hot cocoa mix or a bag of gourmet coffee. This combination not only showcases your baking prowess but also provides a complete cozy experience for the recipient.
Cozy Pairings
To truly savor Christmas Cookie Pinwheels, pairing them with a warm beverage can create a delightful holiday experience. A steaming cup of cocoa topped with whipped cream and a sprinkle of cinnamon complements the cookies perfectly, enhancing their sweet and buttery flavors. Alternatively, a rich cup of coffee, whether it be regular or flavored (think peppermint or hazelnut), can balance the sweetness of the pinwheels and provide a comforting contrast.
For a fun twist, consider serving them with spiced tea or mulled cider during holiday gatherings. These warm beverages not only keep guests cozy but also elevate the festive atmosphere.
Additional Tips
Creating the perfect pinwheel cookies involves attention to detail and a few strategic techniques. Here are some expanded tips to help you achieve the best results:
Color Variations
When it comes to coloring your pinwheel cookies, the choice of food coloring can significantly affect the final appearance of your cookies. If you prefer a more subtle hue rather than a bold, vibrant color, begin with just ¼ teaspoon of liquid food coloring. This allows you to control the intensity of the color without overwhelming the dough. Once you incorporate the initial amount, mix thoroughly and assess the shade. If you desire a more pronounced color, gradually add small increments of food coloring—about ¼ teaspoon at a time—until you achieve your ideal shade.
For those using gel food coloring, the process is slightly different due to its concentrated nature. Start with a few drops and mix well into the dough. Gel coloring is typically much more potent than liquid coloring, so a little goes a long way. It’s essential to knead the dough thoroughly to ensure the color is evenly distributed. Remember that colors may appear slightly different after baking, so keep an eye on how the color develops in the oven.
Chilling is Key
Chilling your dough is a crucial step that should not be overlooked. Properly chilling the dough helps to firm it up, making it easier to roll out and slice into neat pinwheels. After preparing your dough, wrap it in plastic wrap and refrigerate it for at least 30 minutes—though longer chilling times (up to several hours or overnight) can yield even better results. This cooling period allows the butter to solidify, which helps maintain the shape of the cookies during baking. If the dough becomes too hard to roll out, let it sit at room temperature for a few minutes until it softens slightly.
Uniform Slices
When it comes to slicing your pinwheel cookies, uniformity is essential for even baking. Use a sharp, serrated knife or a pastry cutter to slice through the chilled dough. A sharp knife minimizes the risk of squishing the pinwheel design and ensures clean cuts. Aim for slices that are about ¼ to ½ inch thick—this thickness is ideal for achieving a crisp edge while still allowing the center to cook through. If you find that the dough is sticking to the knife, try dipping the blade in flour or using a piece of wax paper to guide the cuts. Consistency in thickness will help each cookie bake evenly, resulting in a perfect balance of texture and flavor.
Storage
Proper storage is vital for maintaining the freshness and quality of your pinwheel cookies. Once baked, allow the cookies to cool completely on a wire rack. After cooling, store them in an airtight container at room temperature. This will keep them soft and delicious for up to a week. If you find that you have made too many cookies or want to prepare in advance, consider freezing the dough log before slicing. Wrap the dough tightly in plastic wrap and place it in a freezer-safe bag or container. This method allows you to keep the dough fresh for up to one month. When you’re ready to bake, simply thaw the dough in the refrigerator overnight before slicing and baking as directed. This flexibility not only helps you manage your baking schedule but also ensures you always have delicious, homemade cookies on hand.
By following these additional tips, you can enhance your pinwheel cookie-making experience, ensuring beautiful, tasty results every time. Whether you’re baking for a special occasion or simply indulging yourself, these techniques will elevate your cookies to a new level of excellence.
FAQs
Can I use different colors for the pinwheels?
Absolutely! Feel free to experiment with different color combinations to match other holiday themes or personal preferences.
What can I do if my dough cracks while rolling?
If the dough cracks, let it sit at room temperature for a few minutes to soften slightly. Then, try rolling again. You can also use your fingers to gently press the cracks back together.
Can I make the dough in advance?
Yes, the dough can be prepared and stored in the refrigerator for up to 3 days or frozen for up to a month. Just ensure it’s tightly wrapped to prevent drying out.
How do I prevent the cookies from spreading too much?
Make sure the dough is well chilled before baking and avoid overcrowding the baking sheet.
Conclusion
Christmas Cookie Pinwheels are a delightful treat that encapsulates the festive spirit of the holiday season. With their striking appearance and delectable taste, they are sure to become a holiday favorite. Whether you’re making them for a holiday party, as a gift, or simply to enjoy at home, these cookies are a perfect way to celebrate the season. Happy baking!


