

There are sandwiches, and then there’s the Chicken Club Sandwich. For me, this isn’t just a quick lunch; it’s an architectural marvel of flavors and textures that instantly elevates any mealtime. I remember the first time I decided to tackle making a “proper” club at home – I was intimidated by the layers, the precise cuts, the iconic toothpicks! But once I bit into that perfectly balanced stack of toasted bread, juicy grilled chicken, crispy bacon, fresh lettuce, ripe tomato, and creamy mayo, I knew it was worth every bit of effort. My family went absolutely wild for it; the kids loved the “tall sandwich,” and my husband declared it better than any restaurant version. Now, it’s a weekend staple, a go-to for when we want something truly satisfying and a little bit special. It’s the kind of sandwich that feels like an event, a delicious reward that’s surprisingly straightforward to create.
The Timeless Allure: Why the Chicken Club Sandwich is a Legend
The Club Sandwich, in its many glorious forms, is more than just a sandwich; it’s an institution. Its origins are debated, often traced back to exclusive gambling clubs in New York in the late 19th century, but its enduring appeal is undeniable. The Chicken Club variation takes this classic to new heights, offering a heartier, often leaner protein option that melds beautifully with the traditional club components.
What makes the Chicken Club Sandwich a perennial favorite?
- The Symphony of Textures: It’s a masterclass in textural contrast. You have the satisfying crunch of perfectly toasted bread, the crispness of fresh lettuce and bacon, the tender chew of the chicken, and the juicy softness of ripe tomatoes, all brought together by the smooth creaminess of mayonnaise.
- A Medley of Flavors: Each layer contributes a distinct yet harmonious flavor. Savory grilled or roasted chicken, smoky bacon, sweet and tangy tomatoes, slightly bitter lettuce, and the rich, eggy notes of mayonnaise, all framed by the subtle sweetness or tang of the chosen bread.
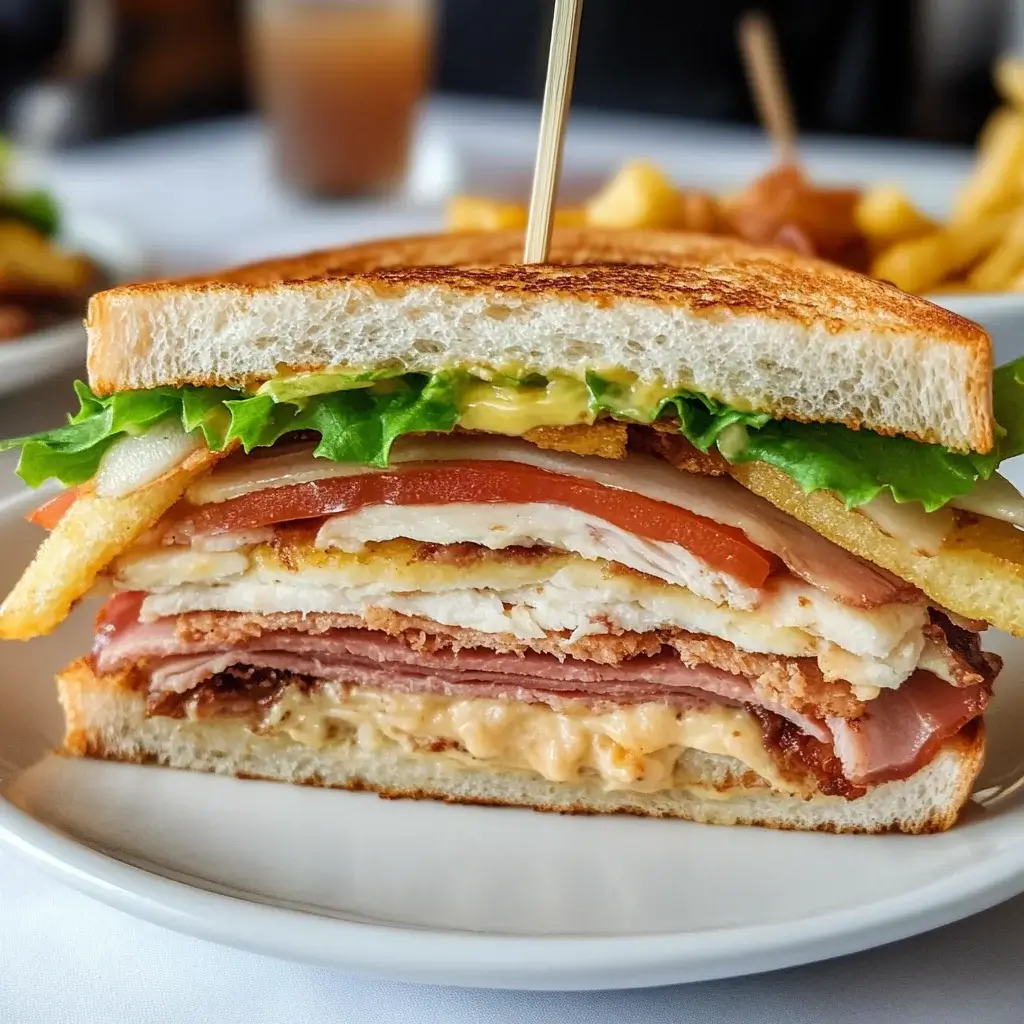
- Visual Grandeur: Let’s be honest, a well-made club sandwich is a sight to behold. The towering layers, the vibrant colors, the precise quartered cuts secured with frilled toothpicks – it’s a sandwich that commands attention and promises a substantial, satisfying meal.
- Hearty Satisfaction: This is not a flimsy, forgettable sandwich. The combination of chicken, bacon, and three slices of bread makes it a filling and gratifying meal, perfect for a hearty lunch or a casual dinner.
- Customizable Classic: While there are core components, the Chicken Club is wonderfully adaptable. Different breads, types of chicken preparation, cheese additions, or even a spicy mayo can all put a personal spin on this beloved classic.
The Chicken Club Sandwich endures because it consistently delivers a delicious, multi-layered experience that satisfies on every level. It’s a testament to the idea that simple, quality ingredients, thoughtfully assembled, can create something truly extraordinary.
Gather Your Provisions: Chicken Club Sandwich Ingredients
To construct the ultimate Chicken Club Sandwich, you’ll need a lineup of fresh, quality ingredients. Precision in preparation will make assembly smoother. This recipe makes 2 substantial sandwiches.
- Bread: 6 slices of your favorite sandwich bread (white, whole wheat, sourdough, or rye work well – choose something sturdy)
- Chicken:
- 1 large boneless, skinless chicken breast (about 8-10 oz or 225-280g), or 2 smaller ones
- 1 tablespoon olive oil
- Salt and freshly ground black pepper to taste
- Optional: 1/4 teaspoon garlic powder, 1/4 teaspoon paprika for seasoning chicken
- Bacon: 6-8 slices of good quality bacon
- Lettuce: 4-6 large leaves of crisp lettuce (Romaine, Iceberg, or Butter lettuce are good choices)
- Tomatoes: 1-2 medium ripe tomatoes, sliced about 1/4-inch thick
- Mayonnaise: 4-6 tablespoons (or to your preference)
- Optional Additions:
- Sliced cheese (Cheddar, Swiss, Provolone – 2-4 slices)
- Avocado, thinly sliced
- For Serving:
- Long toothpicks (preferably frilled, for classic presentation)
A Note on Ingredients:
- Chicken: You can use leftover roasted chicken, rotisserie chicken (shredded or sliced), or even good quality sliced deli chicken breast. However, freshly cooked chicken breast, seasoned and grilled or pan-fried, often yields the best flavor and texture.
- Bacon: Cook your bacon until it’s perfectly crispy, as this provides a crucial textural element.
- Bread: The bread needs to be sturdy enough to hold all the fillings without falling apart. Toasting is essential.
- Tomatoes: Use ripe, flavorful tomatoes. If they are very juicy, you might pat them lightly with a paper towel to prevent the sandwich from becoming soggy.
Building Your Masterpiece: Step-by-Step Instructions
Assembling a club sandwich is like building a delicious tower. Precision and even layering are key.
- Cook the Bacon:
- Cook the bacon slices in a skillet over medium heat until crispy. Alternatively, bake on a rack in a 400°F (200°C) oven for 15-20 minutes.
- Transfer the cooked bacon to a paper towel-lined plate to drain excess grease. Set aside.
- Prepare and Cook the Chicken:
- If using a whole chicken breast, you can either butterfly it for quicker, more even cooking, or pound it to an even thickness (about 1/2 inch).
- Season the chicken breast on both sides with salt, pepper, and optional garlic powder and paprika.
- Heat the olive oil in the same skillet (you can wipe out most of the bacon grease, leaving a little for flavor if desired) over medium-high heat.
- Cook the chicken for 5-7 minutes per side, or until cooked through (internal temperature reaches 165°F or 74°C) and nicely golden.
- Transfer the cooked chicken to a cutting board and let it rest for 5 minutes. Then, slice it thinly against the grain.
- Toast the Bread:
- While the chicken is resting, toast all 6 slices of bread until golden brown and crisp. You can use a toaster, a broiler, or even the skillet.
- Prepare the Vegetables:
- Wash and dry the lettuce leaves.
- Slice the tomatoes and, if very juicy, pat them lightly with a paper towel.
- Assemble the Sandwiches (this process is for one sandwich; repeat for the second):
- First Layer:
- Take one slice of toasted bread. Spread a thin layer of mayonnaise on one side.
- Top with 2-3 lettuce leaves.
- Arrange half of the sliced chicken over the lettuce.
- If using cheese, add a slice or two here.
- Second Layer:
- Take a second slice of toasted bread. Spread mayonnaise on both sides of this slice.
- Place it (mayo-side down) on top of the chicken.
- On the upward-facing mayo-coated side, arrange 3-4 slices of crispy bacon.
- Top the bacon with 2-3 slices of tomato.
- Third Layer:
- Take the third slice of toasted bread. Spread mayonnaise on one side.
- Place it mayo-side down on top of the tomatoes to complete the sandwich.
- First Layer:
- Secure and Cut:
- Carefully insert four long toothpicks through the sandwich, forming a square pattern – one near each corner, about 1-1.5 inches in from the edges. This will help hold the layers together when cutting.
- Using a sharp serrated knife, carefully cut the sandwich diagonally into quarters, cutting from one toothpick to its diagonal opposite, then repeating for the other diagonal. Each quarter should have a toothpick holding it together.
- Repeat for the Second Sandwich: Follow steps 5 and 6 to assemble and cut the second sandwich using the remaining ingredients.
- Serve Immediately: Arrange the sandwich quarters on a plate, often with the cut sides facing up to display the layers.
Nutritional Insights (Per Whole Sandwich, Approximate)
Please note that these nutritional values are estimates and can vary significantly based on the type and amount of bread, thickness of chicken and bacon, amount of mayonnaise, and any optional additions like cheese or avocado.
- Servings: This recipe makes 2 large club sandwiches.
- Calories per Whole Sandwich (approximate): 650-850 calories.
Breakdown Considerations:
- Protein: High, primarily from the chicken and bacon.
- Fat: Significant, from the bacon, mayonnaise, olive oil used for cooking chicken, and any added cheese or avocado.
- Carbohydrates: Primarily from the three slices of bread.
- Sodium: Can be high, mainly from bacon, processed chicken (if used), and seasoned salt.
To manage calorie or fat content, you can:
- Use leaner bacon or turkey bacon.
- Grill chicken without much oil.
- Use light mayonnaise.
- Opt for whole-grain bread.
- Limit or omit cheese.
For a more precise nutritional breakdown, consider using an online recipe calculator with your specific ingredients and quantities.
Timing is Everything: Preparation & Assembly Time
While a club sandwich has multiple components, the active cooking and assembly time is manageable.
- Preparation Time (Cooking Chicken & Bacon, Prepping Veggies): 20-25 minutes.
- Bacon cooking: 10-15 minutes.
- Chicken cooking & resting: 15-20 minutes (can be done concurrently with bacon).
- Slicing tomatoes, washing lettuce: 5 minutes.
- Assembly Time (Toasting Bread & Building Sandwiches): 10-15 minutes for two sandwiches.
Total Time (from start to serving): Approximately 30-40 minutes.
If you have pre-cooked chicken or bacon, the total time will be significantly reduced, focusing mainly on toasting and assembly (around 15-20 minutes).
Presentation Perfection: How to Serve Your Chicken Club
The way a Chicken Club Sandwich is served is part of its iconic appeal. Here’s how to present it like a pro:
- The Classic Cut:
- Always cut the sandwich into four triangular quarters. This is the hallmark of a club sandwich.
- Ensure each quarter is secured with a long toothpick, preferably one with a frilled cellophane top for that retro diner charm.
- Arrange the quarters on a plate with the cut edges facing upwards or outwards to showcase the beautiful layers.
- Perfect Pairings (Sides): The Chicken Club pairs wonderfully with a variety of classic sides:
- French Fries: The quintessential pairing. Shoestring, crinkle-cut, or steak fries all work.
- Potato Chips: A simple, crunchy alternative. Kettle-cooked chips add extra texture.
- Coleslaw: Creamy or vinegar-based coleslaw provides a refreshing, tangy contrast.
- Dill Pickle Spear: A crisp, acidic pickle spear on the side is a must for many.
- Side Salad: A small green salad with a light vinaigrette can balance the richness.
- Fruit Salad: For a lighter, fresher accompaniment.
- Occasions for Serving:
- Hearty Lunch: Perfect for a satisfying midday meal.
- Casual Dinner: A great option when you want something delicious but not overly formal.
- Picnics: If well-wrapped, club sandwiches can travel (though best assembled closer to eating time to prevent sogginess).
- Brunches: A surprisingly welcome addition to a brunch spread.
- Drink Pairings:
- Classic Iced Tea
- Lemonade
- Craft Soda
- A light Lager or Pale Ale for adult enjoyment.
Remember to serve immediately after assembly for the best experience – when the toast is crisp, the chicken warm, and the veggies fresh.
Elevate Your Club: Additional Tips for Success
Want to take your Chicken Club Sandwich from great to absolutely phenomenal? Here are five pro tips:
- Bread is Key – Toast it Right: Choose a good quality, sturdy bread that can handle the weight of the fillings. Toast all three slices until they are genuinely golden brown and crispy. This isn’t just for color; the crispness prevents sogginess and provides essential textural contrast.
- Season Every Layer (Subtly): Don’t just rely on the main ingredients for flavor. A light sprinkle of salt and freshly ground black pepper on your tomato slices can make a big difference. Ensure your chicken is well-seasoned. Even a tiny pinch on the lettuce can be nice.
- Strategic Mayo Application: Spread mayonnaise evenly but not too thickly on each designated bread surface. This acts as a moisture barrier (especially against tomatoes) and adds flavor throughout. For extra zing, consider a flavored mayo (garlic aioli, chipotle mayo, or herbed mayo).
- Bacon Brilliance: Cook your bacon until it’s perfectly crisp. Limp bacon is a letdown in a club sandwich. Drain it well on paper towels to remove excess grease, which can also contribute to sogginess.
- The “Middle Bread” Technique: The middle slice of bread is crucial. Spreading mayo on both sides of this slice helps it adhere to the layers above and below it, adding stability and ensuring every bite has that creamy element.
Bonus Tip: For an extra layer of flavor, lightly season your tomatoes with salt and pepper a few minutes before assembly, and pat them dry with a paper towel to remove excess moisture.
Club Conundrums: FAQ Section
Have questions about crafting the perfect Chicken Club Sandwich? Here are some common queries answered:
Q1: What’s the best type of chicken to use for a club sandwich?
A1: Freshly cooked chicken breast (grilled, pan-seared, or roasted and then sliced) often yields the best flavor and texture. However, good quality rotisserie chicken (sliced or shredded) or even premium thick-cut deli chicken breast slices can be excellent time-saving alternatives. Ensure it’s seasoned well.
Q2: How do I prevent my club sandwich from getting soggy?
A2: Sogginess is the enemy! To combat it:
* Toast your bread thoroughly until crisp.
* Use mayonnaise as a barrier on the bread slices, especially those touching tomatoes.
* Pat tomato slices with a paper towel to remove excess moisture.
* Drain bacon well.
* Assemble the sandwich just before serving.
Q3: Can I make a Chicken Club Sandwich ahead of time?
A3: It’s best assembled fresh for optimal texture (crisp toast, fresh veggies). However, you can prepare all the components ahead:
* Cook and slice the chicken (store in an airtight container in the fridge).
* Cook the bacon (store at room temp or in the fridge and crisp up briefly if needed).
* Wash and dry lettuce, slice tomatoes (store separately in the fridge).
* Then, just toast the bread and assemble when ready to eat.
Q4: Are there any common variations to the classic Chicken Club?
A4: Absolutely! Common variations include:
* Adding Cheese: Slices of cheddar, Swiss, provolone, or even pepper jack are popular.
* Avocado: Sliced or mashed avocado adds creaminess and healthy fats.
* Spicy Mayo: Mix sriracha, chipotle powder, or hot sauce into your mayonnaise.
* Different Breads: Sourdough, rye, or even a brioche can change the flavor profile.
* Egg: Some classic clubs include a slice of fried or hard-boiled egg.
Q5: Why are there three slices of bread in a club sandwich?
A5: The triple-decker design is a defining characteristic of the club sandwich. The middle slice of bread serves a few purposes: it adds structural integrity to the tall sandwich, separates distinct filling layers (often one for poultry/meat and another for bacon/tomato), and contributes to its substantial, satisfying nature. It makes the sandwich heartier and allows for more diverse layers of ingredients.
The Chicken Club Sandwich is a true culinary icon, a satisfying construction of flavors and textures that never fails to impress. With quality ingredients and a little attention to detail in assembly, you can easily create this legendary sandwich at home, ready to be devoured with delight. Enjoy the process, and even more, enjoy that first incredible bite!
Print
Chicken Club Sandwich recipe
Ingredients
-
- Bread: 6 slices of your favorite sandwich bread (white, whole wheat, sourdough, or rye work well – choose something sturdy)
-
- Chicken:
-
- 1 large boneless, skinless chicken breast (about 8–10 oz or 225-280g), or 2 smaller ones
-
- 1 tablespoon olive oil
-
- Salt and freshly ground black pepper to taste
-
- Optional: 1/4 teaspoon garlic powder, 1/4 teaspoon paprika for seasoning chicken
-
- Chicken:
-
- Bacon: 6-8 slices of good quality bacon
-
- Lettuce: 4-6 large leaves of crisp lettuce (Romaine, Iceberg, or Butter lettuce are good choices)
-
- Tomatoes: 1-2 medium ripe tomatoes, sliced about 1/4-inch thick
-
- Mayonnaise: 4-6 tablespoons (or to your preference)
-
- Optional Additions:
-
- Sliced cheese (Cheddar, Swiss, Provolone – 2-4 slices)
-
- Avocado, thinly sliced
-
- Optional Additions:
-
- For Serving:
-
- Long toothpicks (preferably frilled, for classic presentation)
-
- For Serving:
Instructions
-
- Cook the Bacon:
-
- Cook the bacon slices in a skillet over medium heat until crispy. Alternatively, bake on a rack in a 400°F (200°C) oven for 15-20 minutes.
-
- Transfer the cooked bacon to a paper towel-lined plate to drain excess grease. Set aside.
-
- Cook the Bacon:
-
- Prepare and Cook the Chicken:
-
- If using a whole chicken breast, you can either butterfly it for quicker, more even cooking, or pound it to an even thickness (about 1/2 inch).
-
- Season the chicken breast on both sides with salt, pepper, and optional garlic powder and paprika.
-
- Heat the olive oil in the same skillet (you can wipe out most of the bacon grease, leaving a little for flavor if desired) over medium-high heat.
-
- Cook the chicken for 5-7 minutes per side, or until cooked through (internal temperature reaches 165°F or 74°C) and nicely golden.
-
- Transfer the cooked chicken to a cutting board and let it rest for 5 minutes. Then, slice it thinly against the grain.
-
- Prepare and Cook the Chicken:
-
- Toast the Bread:
-
- While the chicken is resting, toast all 6 slices of bread until golden brown and crisp. You can use a toaster, a broiler, or even the skillet.
-
- Toast the Bread:
-
- Prepare the Vegetables:
-
- Wash and dry the lettuce leaves.
-
- Slice the tomatoes and, if very juicy, pat them lightly with a paper towel.
-
- Prepare the Vegetables:
-
- Assemble the Sandwiches (this process is for one sandwich; repeat for the second):
-
- First Layer:
-
- Take one slice of toasted bread. Spread a thin layer of mayonnaise on one side.
-
- Top with 2-3 lettuce leaves.
-
- Arrange half of the sliced chicken over the lettuce.
-
- If using cheese, add a slice or two here.
-
- First Layer:
-
- Second Layer:
-
- Take a second slice of toasted bread. Spread mayonnaise on both sides of this slice.
-
- Place it (mayo-side down) on top of the chicken.
-
- On the upward-facing mayo-coated side, arrange 3-4 slices of crispy bacon.
-
- Top the bacon with 2-3 slices of tomato.
-
- Second Layer:
-
- Third Layer:
-
- Take the third slice of toasted bread. Spread mayonnaise on one side.
-
- Place it mayo-side down on top of the tomatoes to complete the sandwich.
-
- Third Layer:
-
- Assemble the Sandwiches (this process is for one sandwich; repeat for the second):
-
- Secure and Cut:
-
- Carefully insert four long toothpicks through the sandwich, forming a square pattern – one near each corner, about 1-1.5 inches in from the edges. This will help hold the layers together when cutting.
-
- Using a sharp serrated knife, carefully cut the sandwich diagonally into quarters, cutting from one toothpick to its diagonal opposite, then repeating for the other diagonal. Each quarter should have a toothpick holding it together.
-
- Secure and Cut:
-
- Repeat for the Second Sandwich: Follow steps 5 and 6 to assemble and cut the second sandwich using the remaining ingredients.
-
- Serve Immediately: Arrange the sandwich quarters on a plate, often with the cut sides facing up to display the layers.
Nutrition
- Serving Size: one normal portion
- Calories: 650-850


