
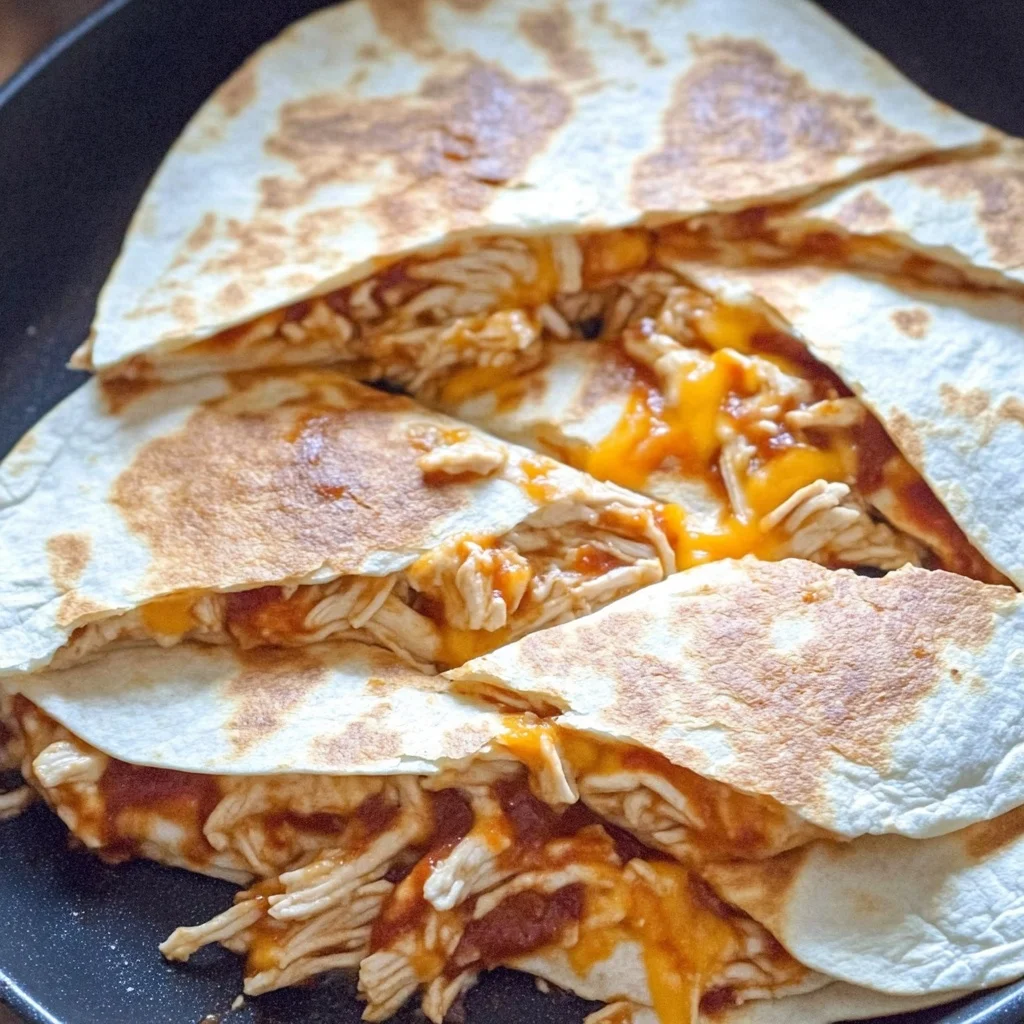

There’s something incredibly comforting about a warm, crispy quesadilla filled with the gooey goodness of cheese and the savory richness of chicken. This Chicken and Cheese Quesadillas recipe has quickly become a favorite in my household, winning over even the pickiest eaters. The combination of flavors and textures creates a delightful culinary experience that never fails to bring smiles to the table. Whether enjoyed as a quick weeknight dinner or a satisfying lunch, these quesadillas have a way of turning any meal into a special occasion. As a food enthusiast, I’m thrilled to share this recipe with you, along with some tips and tricks to make your quesadilla-making adventure as enjoyable as possible.
Ingredients
To make these delicious Chicken and Cheese Quesadillas, you will need the following ingredients:
- 2 cups cooked chicken, shredded (rotisserie chicken works great)
- 2 cups shredded cheese (cheddar, Monterey Jack, or a blend)
- 8 large flour tortillas
- 1 tablespoon olive oil
- 1 small onion, finely chopped
- 1 bell pepper, finely chopped (any color you prefer)
- 1 teaspoon garlic powder
- 1 teaspoon ground cumin
- 1 teaspoon paprika
- Salt and pepper to taste
- Optional: salsa, sour cream, guacamole for serving
Instructions
Let’s dive into the step-by-step instructions for crafting these mouth-watering quesadillas:
- Prepare the Filling: In a skillet over medium heat, add the olive oil and sauté the chopped onion and bell pepper until they are soft and translucent, about 5 minutes. Add the shredded chicken to the skillet and season with garlic powder, cumin, paprika, salt, and pepper. Stir well to combine and let the mixture heat through.
- Assemble the Quesadillas: Lay out four tortillas on a clean surface. Evenly distribute the chicken mixture over half of each tortilla. Sprinkle an equal amount of shredded cheese over the chicken mixture. Fold the empty half of each tortilla over the filling to create a half-moon shape.
- Cook the Quesadillas: Heat a large non-stick skillet over medium heat. Place one or two quesadillas in the skillet, depending on the size of your pan. Cook for about 3-4 minutes on each side, or until the tortillas are golden brown and the cheese is melted. Remove from the skillet and repeat with the remaining quesadillas.
- Slice and Serve: Once all the quesadillas are cooked, let them cool for a minute or two before slicing them into wedges. Serve the quesadillas warm with your favorite accompaniments like salsa, sour cream, or guacamole.
Nutrition Facts
This recipe serves 4 people, with each serving containing approximately 450 calories. The nutritional content may vary depending on the specific brands and ingredients used, especially if you choose different cheeses or additional toppings.
Preparation Time
One of the great things about this Chicken and Cheese Quesadillas recipe is how quickly it comes together. With a total preparation and cooking time of around 30 minutes, you can have a delicious meal ready in no time. This makes it a perfect option for busy weeknights or when you need a speedy lunch without compromising on flavor.
How to Serve
These quesadillas are incredibly versatile and can be served in a variety of ways:
- As a main dish: Pair with a simple green salad for a balanced meal.
- As an appetizer: Cut into smaller pieces and serve with a selection of dips for a crowd-pleasing snack.
- For a fun brunch: Add a fried egg on top for a twist on traditional breakfast fare.
- For a kids’ meal: Serve with carrot and celery sticks for a wholesome meal that children will love.
- As a party dish: Set up a quesadilla bar with various toppings and let guests customize their own.
Additional Tips
To ensure your Chicken and Cheese Quesadillas turn out perfectly every time, consider these helpful tips:
- Use Fresh Ingredients: Fresh, high-quality ingredients will make a noticeable difference in the flavor of your quesadillas.
- Cheese Choice: Experiment with different types of cheese to find your favorite combination, or use a pre-shredded Mexican blend for convenience.
- Control the Heat: Monitor the skillet temperature to prevent burning; medium heat is usually ideal for a crispy exterior and melted interior.
- Customize the Fillings: Feel free to add or substitute ingredients like mushrooms, spinach, or jalapeños to suit your taste preferences.
- Prep Ahead: You can prepare the chicken filling in advance and store it in the refrigerator to save time when you’re ready to cook.
FAQ Section
Here are some commonly asked questions about this Chicken and Cheese Quesadillas recipe:
-
Q1: Can I use canned sweet potatoes instead of fresh ones?
A: Yes, you can certainly use canned sweet potatoes as a substitute for fresh ones in your recipes. Canned sweet potatoes are convenient and save time, as they come pre-cooked and ready to use. However, there are a few important considerations to keep in mind to ensure the best outcome for your dish.
First, when selecting canned sweet potatoes, look for those that are packed in water or their own juices rather than syrup, as the syrup can add unwanted sweetness and alter the flavor profile of your dish. Always check the label for any added ingredients that may affect the taste or texture.
Before using canned sweet potatoes, it’s crucial to drain them thoroughly. Excess moisture can lead to a runny consistency in your final product, which is especially important if you’re making something like hummus, where you want a creamy but thick texture. After draining, you may want to rinse the sweet potatoes briefly under cold water to remove any residual flavor from the canning liquid.
While canned sweet potatoes are a great time-saver, many cooks prefer fresh sweet potatoes for their superior texture and flavor. Fresh sweet potatoes tend to have a firmer texture and a more robust, earthy sweetness compared to their canned counterparts. If you do opt for fresh sweet potatoes, consider roasting or steaming them to enhance their natural sweetness and achieve a rich flavor profile that will elevate your dish.
In summary, while canned sweet potatoes are a viable option and can be used effectively in many recipes, fresh sweet potatoes will likely yield a more flavorful and textured result.
Q2: Is it possible to make this hummus without tahini?
A: Absolutely! Making hummus without tahini is not only possible, but it can also be a delicious alternative, especially for those who may have sesame allergies or prefer a different flavor profile. Tahini, which is a paste made from ground sesame seeds, adds a rich, nutty flavor and creamy texture to hummus. However, if you find yourself without tahini, there are several effective substitutes you can use.
One popular alternative is Greek yogurt. When substituting Greek yogurt for tahini, use an equal amount for a creamy consistency. The yogurt will add a tangy flavor, which can complement the sweetness of the sweet potatoes beautifully, creating a unique twist on traditional hummus.
If you want to skip the creamy element altogether, you can simply leave out the tahini. While this will result in a hummus that is slightly less rich, you can enhance the flavor by adding a splash of lemon juice or a drizzle of olive oil, which will help to keep the hummus smooth and flavorful. You might also consider incorporating other ingredients like roasted garlic or herbs to introduce depth and complexity to the taste.
For those looking for nut-free options, you could also use sunflower seed butter or even a small amount of peanut butter to mimic the creamy texture that tahini provides. Each substitute will yield a slightly different flavor, so feel free to experiment to find the profile that best suits your palate.
In conclusion, while tahini is a traditional ingredient in hummus, there are many ways to enjoy a delicious and creamy hummus without it. Whether using Greek yogurt, omitting it entirely, or opting for nut butters, you can create a delightful hummus that suits your dietary preferences and taste.
Q3: Can I freeze sweet potato hummus?
A: Yes, sweet potato hummus freezes exceptionally well, making it a great option for meal prep or batch cooking. Freezing hummus allows you to enjoy this nutritious dip at your convenience, without worrying about it spoiling in the refrigerator. Here are some detailed steps and tips for freezing sweet potato hummus effectively.
To freeze sweet potato hummus, start by transferring it into a freezer-safe container. It’s important to leave some space at the top of the container to allow for expansion as the hummus freezes. You can also portion the hummus into smaller containers or even ice cube trays for convenient single servings.
Before sealing the container, consider drizzling a thin layer of olive oil on top of the hummus. This can help prevent freezer burn and maintain the hummus’s flavor and texture. Make sure to seal the container tightly to protect it from air exposure, which can lead to oxidation and deterioration of taste.
Sweet potato hummus can be stored in the freezer for up to three months. When you’re ready to enjoy it, transfer the container to the refrigerator and allow it to thaw overnight. After thawing, give the hummus a good stir to restore its creamy texture, as it may separate slightly during freezing.
If you’re in a hurry, you can also thaw the hummus in the microwave using the defrost setting, but be cautious not to overheat it, as this can change the texture.
In summary, freezing sweet potato hummus is a practical and efficient way to keep this healthy snack on hand. With proper storage and thawing techniques, you can enjoy the same delightful flavors and textures as when it was freshly made.
Q4: What if I don’t have smoked paprika on hand?
A: If you find yourself without smoked paprika, there are several alternatives that can help you achieve a similar smoky flavor profile in your dishes. Smoked paprika, known for its rich, smoky taste and vibrant red color, is a key ingredient that enhances the depth of flavor in many recipes, including sweet potato hummus.
One of the easiest substitutes for smoked paprika is regular paprika. While it lacks the smoky flavor, it will still provide a pleasant color and mild peppery taste. To add a hint of smokiness, consider adding a dash of liquid smoke. Use this sparingly, as it is quite potent; a few drops can go a long way in imparting that desired smoky essence.
Another option is to use a combination of regular paprika and cumin. Cumin has a warm, earthy flavor that can complement the sweet potatoes and contribute to the overall flavor complexity. Mixing equal parts of regular paprika and cumin can give you a balanced alternative, though it won’t replicate the smokiness of smoked paprika.
For those who enjoy a bit of heat, adding a pinch of cayenne pepper or chili powder can also serve as a substitute. While this will introduce a spicy element, it can enhance the overall flavor profile of your hummus, making it uniquely delicious.
If you happen to have other spices on hand, such as chipotle powder or even a touch of barbecue seasoning, these can also work as a substitute, offering a different but equally tasty twist to your dish.
In conclusion, while smoked paprika is a fantastic ingredient that adds depth to recipes, there are plenty of alternatives you can use to create a flavorful dish even when it’s not available. Whether you opt for regular paprika with a hint of liquid smoke or other spices, you can still craft a delicious sweet potato hummus that satisfies your taste buds.
Q5: How can I make the pita chips gluten-free?
A: Making gluten-free pita chips is a straightforward process that allows individuals with gluten sensitivities or celiac disease to enjoy this crispy snack without worry. The key to gluten-free pita chips lies in the type of pita bread you choose.
To start, you can easily replace traditional whole wheat pita with gluten-free pita options available in many grocery stores. These gluten-free pitas are often made from a blend of alternative flours, such as rice flour, almond flour, or chickpea flour, which can provide a delicious and nutritious alternative. When selecting gluten-free pita, be sure to check the ingredients to ensure that it meets your dietary needs.
Once you have your gluten-free pita, the preparation process remains largely the same as with regular pita chips. Preheat your oven to 375°F (190°C). Cut the gluten-free pita into triangles or strips, depending on your preference. Arrange the cut pieces on a baking sheet, ensuring they are spaced out to allow for even crisping.
For added flavor, brush the pita pieces lightly with olive oil and season them with your choice of herbs and spices. Common seasonings include garlic powder, oregano, or even a sprinkle of sea salt. Bake in the preheated oven for about 10-15 minutes, or until the chips are golden brown and crispy. Keep an eye on them to prevent burning, as gluten-free products can sometimes brown more quickly than their gluten-containing counterparts.
If you prefer a more homemade approach, you can also make your own gluten-free pita from scratch using gluten-free flour blends. There are plenty of recipes available online that guide you through the process. This way, you can customize the flavor and thickness of your pita chips to your liking.
In summary, creating gluten-free pita chips is an easy and accessible task that allows everyone to enjoy this tasty snack. By choosing gluten-free pita bread and following simple preparation steps, you can make a delicious accompaniment to your sweet potato hummus or any dip of your choice, ensuring that dietary restrictions don’t mean sacrificing flavor or enjoyment.


