


Easter Sunday brunch at my place is always a big affair, but amidst the quiches and casseroles, it’s often the unexpected dishes that steal the show. This year, wanting to try something a little different for our BBQ later in the day, I stumbled upon a recipe for Cherry Dr. Pepper Grilled Chicken. Intrigued? I was too! Skeptical at first, I must admit, but the aroma alone while grilling was enough to win me over. And the taste? Oh my goodness. The chicken was incredibly juicy, infused with a sweet and savory glaze that had just a hint of cherry and a delightful smoky char. My family, usually traditional BBQ sauce devotees, were absolutely hooked. Even my pickiest eater, my nephew, declared it his new favorite chicken recipe. It’s surprisingly simple to make, the marinade does all the work, and the result is a chicken dish that’s bursting with flavor and perfect for any occasion, not just Easter! Trust me, if you’re looking to impress your guests and tantalize their taste buds with something unique and utterly delicious, Cherry Dr. Pepper Grilled Chicken is the answer.
The Irresistible Allure of Cherry Dr. Pepper Grilled Chicken: A Flavor Explosion
Cherry Dr. Pepper Grilled Chicken might sound like an unusual combination at first, but trust me when I say it’s a culinary revelation. This isn’t your average grilled chicken recipe; it’s a flavor adventure that takes the humble chicken breast and transforms it into a juicy, tender, and incredibly flavorful masterpiece. The magic lies in the marinade, a surprisingly simple concoction built around the iconic Cherry Dr. Pepper soda.
Why does this unexpected pairing work so brilliantly? The Cherry Dr. Pepper acts as a tenderizer, thanks to its acidity, ensuring the chicken remains moist and succulent during grilling. More importantly, it imparts a unique sweet and savory flavor profile that is simply irresistible. The cherry notes are subtle yet distinct, mingling beautifully with the smoky char from the grill and the savory spices in the marinade. The soda’s caramel color also contributes to a gorgeous, caramelized glaze on the chicken as it cooks, making it as visually appealing as it is delicious.
This recipe is perfect for so many occasions. Looking for a crowd-pleasing centerpiece for your summer BBQ? Cherry Dr. Pepper Grilled Chicken is it. Want to spice up your weeknight dinner routine? This recipe is quick to prepare and always a hit. Craving something different and exciting for your next family gathering? Prepare to be showered with compliments. Beyond its incredible taste, this recipe is also incredibly easy. It requires minimal prep time, uses readily available ingredients, and the grilling process is straightforward. Whether you’re a seasoned grill master or a beginner, you can confidently create restaurant-quality grilled chicken right in your own backyard.
Forget boring, predictable grilled chicken. Cherry Dr. Pepper Grilled Chicken is a game-changer. It’s a fun, flavorful, and unforgettable dish that will have everyone asking for the recipe. Get ready to experience a grilling sensation that will redefine your definition of delicious!
Gather Your Goodies: Ingredients for Cherry Dr. Pepper Grilled Chicken
The ingredient list for Cherry Dr. Pepper Grilled Chicken is surprisingly short and sweet, focusing on pantry staples and, of course, the star of the show – Cherry Dr. Pepper! Here’s what you’ll need to create this flavor sensation:
For the Marinade:
- 1 (12-ounce) can Cherry Dr. Pepper Soda: The foundation of our flavor! Make sure it’s Cherry Dr. Pepper specifically for that signature taste. Regular Dr. Pepper will also work, but the cherry flavor is what makes this recipe truly special.
- 1/2 cup Soy Sauce: Adds savory umami depth and saltiness to balance the sweetness of the soda. Low-sodium soy sauce can be used to control salt intake.
- 1/4 cup Apple Cider Vinegar: Provides acidity to tenderize the chicken and brightens the overall flavor profile. White vinegar or rice vinegar can be substituted in a pinch.
- 1/4 cup Brown Sugar, packed: Adds sweetness and helps create a beautiful caramelized glaze on the chicken during grilling. Light or dark brown sugar works equally well.
- 2 tablespoons Worcestershire Sauce: Another umami booster that adds complexity and savory notes to the marinade.
- 2 cloves Garlic, minced: Fresh garlic is best for its pungent flavor. About 1 teaspoon of garlic powder can be used as a substitute if needed.
- 1 teaspoon Ground Ginger: Adds a warm, slightly spicy, and aromatic element that complements the cherry and savory flavors. Freshly grated ginger (about 1 tablespoon) can be used for an even more intense flavor.
- 1/2 teaspoon Black Pepper: Essential seasoning to enhance the overall flavor.
For the Chicken:
- 2 pounds Boneless, Skinless Chicken Breasts: Chicken breasts are ideal for grilling as they cook relatively quickly and are lean. You can also use boneless, skinless chicken thighs for a richer, more flavorful, and slightly more forgiving option. About 4-6 chicken breasts, depending on size.
Equipment:
- Large Resealable Plastic Bag or Shallow Dish: For marinating the chicken. A resealable bag is convenient for even marinade distribution, while a shallow dish allows for easy flipping.
- Mixing Bowl: For combining the marinade ingredients.
- Whisk or Fork: For mixing the marinade.
- Measuring Cups and Spoons: For accurate ingredient measurement.
- Grill: Gas grill, charcoal grill, or even an indoor grill pan will work.
- Tongs: For safely handling and flipping the chicken on the grill.
- Meat Thermometer: Essential for ensuring the chicken is cooked to a safe internal temperature of 165°F (74°C).
Marinade Magic: Instructions for Flavor Infusion in Cherry Dr. Pepper Grilled Chicken
The secret to incredibly flavorful Cherry Dr. Pepper Grilled Chicken lies in the marinade. This simple yet potent mixture infuses the chicken with moisture and layers of delicious taste. Here’s how to create the marinade and prepare your chicken:
Step 1: Whisk Together the Marinade
- Combine Marinade Ingredients: In a mixing bowl, pour in the Cherry Dr. Pepper soda, soy sauce, apple cider vinegar, brown sugar, Worcestershire sauce, minced garlic, ground ginger, and black pepper.
- Whisk Until Combined: Use a whisk or fork to thoroughly combine all the marinade ingredients. Whisk until the brown sugar is mostly dissolved and the marinade is well mixed. The marinade will have a dark, rich color and a slightly sweet and savory aroma.
Step 2: Marinate the Chicken
- Prepare Chicken Breasts: If your chicken breasts are very thick, you can slice them horizontally in half to create thinner cutlets. This will help them marinate more quickly and cook more evenly on the grill. Alternatively, you can pound thicker chicken breasts to an even thickness using a meat mallet.
- Place Chicken in Marinade: Place the chicken breasts in a large resealable plastic bag or a shallow dish.
- Pour Marinade Over Chicken: Pour the Cherry Dr. Pepper marinade over the chicken, ensuring all pieces are submerged or well coated in the marinade.
- Seal and Marinate: If using a plastic bag, seal the bag tightly, removing as much air as possible. If using a shallow dish, cover it tightly with plastic wrap.
- Refrigerate and Marinate: Refrigerate the chicken and let it marinate for at least 4 hours, or ideally, overnight for maximum flavor penetration. The longer the chicken marinates, the more flavorful and tender it will become. However, do not marinate for longer than 24 hours, as the acidity in the marinade can start to break down the chicken fibers too much, resulting in a mushy texture.
Step 3: Prepare for Grilling
- Remove Chicken from Refrigerator: About 30 minutes before you plan to grill, remove the marinated chicken from the refrigerator. This allows the chicken to come closer to room temperature, which helps it cook more evenly.
- Discard Marinade: When ready to grill, remove the chicken from the marinade and discard the marinade. Do not reuse the marinade, as it has been in contact with raw chicken.
- Pat Chicken Dry (Optional but Recommended): Pat the chicken breasts dry with paper towels before grilling. This helps to promote better searing and prevents steaming on the grill, leading to those beautiful grill marks and a slightly caramelized exterior.
Your chicken is now beautifully marinated and ready to be grilled to juicy perfection!
Grilling to Glory: Instructions for Cooking Cherry Dr. Pepper Grilled Chicken
Now for the exciting part – grilling your Cherry Dr. Pepper marinated chicken to smoky, caramelized perfection! Follow these grilling instructions for juicy, flavorful results:
Step 1: Preheat Your Grill
- Prepare Grill: Preheat your grill to medium-high heat. For a gas grill, this typically means setting the burners to medium-high. For a charcoal grill, light the charcoal and let it burn until it is covered with white ash, indicating it’s ready for grilling.
- Clean Grill Grates: Ensure your grill grates are clean. Use a grill brush to scrub off any leftover residue from previous grilling sessions.
- Oil Grill Grates (Optional but Recommended): Lightly oil the grill grates to prevent the chicken from sticking. You can use a paper towel dipped in cooking oil and tongs to wipe the grates, or use a grill spray.
Step 2: Grill the Chicken
- Place Chicken on Grill: Carefully place the marinated chicken breasts on the preheated grill grates. Leave some space between each piece of chicken to allow for even cooking and airflow.
- Sear and Grill: Sear the chicken for 3-4 minutes per side, without moving it, to create beautiful grill marks and caramelization. This searing step is important for flavor development and visual appeal.
- Flip and Continue Grilling: After searing one side, use tongs to flip the chicken breasts. Continue grilling for another 3-5 minutes per side, or until the chicken is cooked through and reaches an internal temperature of 165°F (74°C). Cooking time will vary depending on the thickness of your chicken breasts and the heat of your grill.
- Check for Doneness: The best way to check for doneness is to use a meat thermometer. Insert the thermometer into the thickest part of a chicken breast, avoiding the bone if using bone-in thighs. The internal temperature should read 165°F (74°C). Alternatively, you can cut into the thickest part of a chicken breast; the juices should run clear, and the meat should be opaque white, not pink.
Step 3: Rest and Serve
- Remove Chicken from Grill: Once the chicken is cooked through, carefully remove it from the grill using tongs and place it on a clean plate or cutting board.
- Rest Chicken: Let the grilled chicken rest for 5-10 minutes before slicing or serving. Resting allows the juices to redistribute throughout the meat, resulting in more tender and flavorful chicken. Do not skip this step!
- Serve and Enjoy: After resting, slice or serve the Cherry Dr. Pepper Grilled Chicken whole. Garnish with fresh herbs like parsley or cilantro, if desired. Serve immediately and enjoy the incredible flavor and juiciness!
Congratulations! You’ve just grilled up some fantastic Cherry Dr. Pepper Chicken. Get ready for rave reviews!
Nutritional Nuggets: Facts About Your Cherry Dr. Pepper Grilled Chicken
While Cherry Dr. Pepper Grilled Chicken is a deliciously indulgent treat, it’s good to be mindful of its nutritional content, especially when planning your overall meal. Here’s an estimated nutritional breakdown:
Servings: Approximately 4-6 servings (depending on chicken breast size)
Estimated Calories per Serving (per chicken breast): 300-400 calories (This is an estimate and can vary based on chicken breast size and specific ingredients used.)
Approximate Nutritional Breakdown per Serving (Estimate – per chicken breast):
- Fat: 8-12g (Primarily from chicken fat)
- Saturated Fat: 2-3g (Primarily from chicken fat)
- Cholesterol: 100-120mg (Primarily from chicken)
- Sodium: 500-700mg (Primarily from soy sauce and Worcestershire sauce)
- Carbohydrates: 15-20g (Primarily from Cherry Dr. Pepper and brown sugar)
- Sugar: 15-20g (Primarily from Cherry Dr. Pepper and brown sugar)
- Protein: 30-40g (Primarily from chicken)
Key Nutritional Considerations:
- High in Protein: Chicken is a lean protein source, essential for muscle building, satiety, and overall health. This recipe provides a significant amount of protein per serving.
- Moderate in Fat: While chicken breasts are lean, there is still some fat content. Choosing skinless, boneless breasts helps to minimize fat.
- Moderate in Calories: The calorie count is moderate for a main course, but portion control is always important.
- Higher in Sodium: The soy sauce and Worcestershire sauce contribute to a higher sodium content. Using low-sodium soy sauce can help reduce sodium levels.
- Higher in Sugar: The Cherry Dr. Pepper and brown sugar contribute to a higher sugar content. This sugar is what creates the delicious glaze and caramelization.
Tips for Making Cherry Dr. Pepper Grilled Chicken Healthier:
- Use Low-Sodium Soy Sauce: Reduce sodium intake by using low-sodium soy sauce in the marinade.
- Reduce Brown Sugar: You can slightly reduce the amount of brown sugar in the marinade without significantly impacting the flavor.
- Serve with Healthy Sides: Balance out the meal by serving the chicken with healthy sides like grilled vegetables, a fresh salad, quinoa, or brown rice.
- Trim Chicken Fat: Trim any excess visible fat from the chicken breasts before marinating.
- Portion Control: Be mindful of portion sizes and serve appropriate portions of chicken.
Enjoy Cherry Dr. Pepper Grilled Chicken as a flavorful part of a balanced diet, keeping in mind its nutritional profile and making adjustments as needed to fit your dietary needs and preferences.
Time to Grill: Preparation Timeline for Cherry Dr. Pepper Grilled Chicken
Cherry Dr. Pepper Grilled Chicken is relatively quick to prepare, especially considering the amazing flavor payoff. Here’s a breakdown of the preparation timeline:
Prep Time: 15-20 minutes (Making marinade, prepping chicken)
Marinating Time: Minimum 4 hours, ideally overnight (inactive time)
Grilling Time: 10-15 minutes (Active cooking time)
Resting Time: 5-10 minutes (Inactive time)
Total Active Time: 25-35 minutes
Total Inactive Time (Marinating + Resting): Minimum 4 hours 5 minutes, ideally overnight + 5 minutes
Timeline Breakdown:
- Prepare Marinade (5-7 minutes): Whisk together marinade ingredients.
- Prepare Chicken and Marinate (10-13 minutes): Prepare chicken breasts, place in marinade, and refrigerate for at least 4 hours, or ideally overnight.
- Preheat Grill (5-10 minutes): Preheat your grill to medium-high heat.
- Grill Chicken (10-15 minutes): Grill chicken for 3-5 minutes per side, or until cooked through.
- Rest Chicken (5-10 minutes): Let chicken rest before serving.
Make-Ahead Tips:
- Prepare Marinade Ahead: The marinade can be made up to 2-3 days in advance and stored in the refrigerator.
- Marinate Chicken Ahead: Chicken can marinate for up to 24 hours in the refrigerator.
- Assemble Meal Components Ahead: Prepare side dishes or salads while the chicken is marinating to save time on grilling day.
This timeline allows you to plan your cooking process efficiently and enjoy delicious Cherry Dr. Pepper Grilled Chicken with minimal fuss. The marinating time is mostly inactive, so you can easily fit this recipe into your schedule.
Serving Sensations: Presenting Your Cherry Dr. Pepper Grilled Chicken
Presentation and serving suggestions can elevate your Cherry Dr. Pepper Grilled Chicken from a simple meal to a dining experience. Here are some ideas to make your chicken shine:
Serving Styles:
- Whole Chicken Breasts: Serve chicken breasts whole for a classic presentation. Place a grilled chicken breast on each plate, allowing guests to slice it themselves.
- Sliced Chicken: Slice the grilled chicken breasts against the grain and arrange the slices attractively on a platter or individual plates. Slicing makes it easier to eat and showcases the juicy interior.
- Over Salad: Slice or cube the grilled chicken and serve it over a bed of fresh salad greens. This makes for a lighter and healthier meal option.
- In Tacos or Wraps: Shred or dice the grilled chicken and use it as a filling for tacos, burritos, or wraps. Pair it with slaw, salsa, and your favorite taco toppings.
- With Skewers: Cut chicken breasts into cubes before marinating and thread them onto skewers with vegetables like bell peppers, onions, and cherry tomatoes. Grill the skewers for a fun and visually appealing presentation.
Side Dish Suggestions:
- Grilled Vegetables: Grilled corn on the cob, asparagus, bell peppers, zucchini, or onions are fantastic complements to grilled chicken.
- Salads: A fresh garden salad, coleslaw, potato salad, pasta salad, or quinoa salad are all excellent side choices.
- Potatoes: Roasted potatoes, mashed potatoes, baked potatoes, or sweet potato fries pair well with the savory-sweet chicken.
- Rice or Grains: White rice, brown rice, quinoa, couscous, or farro provide a healthy carbohydrate side.
- Cornbread or Rolls: Warm cornbread or dinner rolls are always welcome additions to a BBQ meal.
- Mac and Cheese: Creamy mac and cheese is a classic comfort food side that complements grilled chicken beautifully.
Sauce and Garnish Ideas:
- Extra Marinade (Reduced): While you shouldn’t reuse the marinade directly, you can reserve a portion of the marinade before adding the chicken. Simmer this reserved marinade in a saucepan until it reduces and thickens into a glaze. Drizzle this glaze over the grilled chicken for an extra flavor boost.
- Fresh Herbs: Garnish with fresh parsley, cilantro, or thyme sprigs for a pop of color and fresh aroma.
- Lemon or Lime Wedges: Serve with lemon or lime wedges for squeezing fresh citrus juice over the chicken, brightening the flavors.
- BBQ Sauce (Optional): While the Cherry Dr. Pepper marinade is flavorful enough on its own, you can offer a side of your favorite BBQ sauce for those who prefer a more traditional BBQ flavor profile.
By thoughtfully considering your serving style, side dishes, and garnishes, you can create a complete and visually appealing meal around your delicious Cherry Dr. Pepper Grilled Chicken.
Pro-Grilling Pointers: Additional Tips for Cherry Dr. Pepper Chicken Success
To ensure your Cherry Dr. Pepper Grilled Chicken is a guaranteed hit, here are five additional tips to keep in mind:
- Don’t Over-Marinate: While marinating is crucial for flavor and tenderness, don’t marinate the chicken for too long (beyond 24 hours). Over-marinating can make the chicken mushy due to the acidity in the marinade.
- Control Grill Temperature: Grilling over medium-high heat is ideal for searing and cooking the chicken through without burning the outside. Keep an eye on the grill and adjust heat as needed. If the chicken is browning too quickly, reduce the heat or move it to a cooler part of the grill.
- Use a Meat Thermometer: A meat thermometer is your best friend when grilling chicken. It’s the most accurate way to ensure the chicken is cooked to a safe internal temperature of 165°F (74°C) without overcooking and drying it out.
- Let Chicken Rest: Resting the grilled chicken for 5-10 minutes after cooking is essential. This allows the juices to redistribute, resulting in juicier, more tender chicken. Tent the chicken loosely with foil while it rests to keep it warm.
- Experiment with Variations: Feel free to experiment with variations! Try adding a pinch of red pepper flakes to the marinade for a spicy kick. Use bone-in chicken thighs for a richer flavor and more forgiving grilling experience. Add sliced onions or bell peppers to the grill alongside the chicken for a complete grilled meal.
Cherry Dr. Pepper Chicken FAQs: Your Burning Questions Answered
Q1: Can I use regular Dr. Pepper instead of Cherry Dr. Pepper?
A: Yes, you can use regular Dr. Pepper, but the cherry flavor is what truly makes this recipe unique and special. Regular Dr. Pepper will still provide sweetness and tenderizing properties, but the cherry notes will be missing. For the best result, stick with Cherry Dr. Pepper.
Q2: Can I bake or pan-fry Cherry Dr. Pepper Chicken instead of grilling?
A: Yes, you can bake or pan-fry the chicken if you don’t have a grill or prefer those cooking methods.
- Baking: Preheat oven to 400°F (200°C). Place marinated chicken in a baking dish and bake for 20-30 minutes, or until cooked through and reaches 165°F (74°C).
- Pan-Frying: Heat a tablespoon of oil in a large skillet over medium-high heat. Remove chicken from marinade and pat dry. Sear chicken for 3-4 minutes per side, then reduce heat to medium-low, cover the skillet, and cook for another 5-10 minutes, or until cooked through and reaches 165°F (74°C).
Q3: Can I make Cherry Dr. Pepper Chicken ahead of time?
A: Yes, you can make Cherry Dr. Pepper Chicken ahead of time. Grilled chicken is best enjoyed fresh, but leftovers can be stored in an airtight container in the refrigerator for up to 3-4 days. Reheat gently in the microwave, oven, or skillet until heated through. Cold grilled chicken is also delicious in salads or sandwiches.
Q4: Can I use bone-in chicken for this recipe?
A: Yes, you can use bone-in, skin-on chicken thighs or drumsticks for this recipe. Bone-in chicken will take longer to cook than boneless, skinless chicken breasts. Grilling time will vary depending on the size and cut of chicken. Use a meat thermometer to ensure bone-in chicken reaches an internal temperature of 175°F (80°C) for thighs and drumsticks, as they are more flavorful when cooked to a slightly higher temperature.
Q5: Can I double or triple this recipe for a crowd?
A: Yes, this recipe is easily scalable for larger gatherings. Simply double, triple, or quadruple all ingredient quantities as needed to feed your crowd. You may need to grill the chicken in batches depending on the size of your grill. Ensure each batch of chicken is grilled properly and reaches the safe internal temperature.
With these tips and answers, you’re now fully prepared to create amazing Cherry Dr. Pepper Grilled Chicken that will impress your family and friends. Get grilling, experiment with variations, and enjoy the unique and delicious flavor of this unforgettable dish! Happy grilling!
Print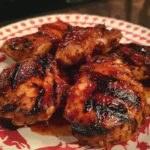
Cherry Dr. Pepper Grilled Chicken recipe
Ingredients
For the Marinade:
- 1 (12-ounce) can Cherry Dr. Pepper Soda: The foundation of our flavor! Make sure it’s Cherry Dr. Pepper specifically for that signature taste. Regular Dr. Pepper will also work, but the cherry flavor is what makes this recipe truly special.
- 1/2 cup Soy Sauce: Adds savory umami depth and saltiness to balance the sweetness of the soda. Low-sodium soy sauce can be used to control salt intake.
- 1/4 cup Apple Cider Vinegar: Provides acidity to tenderize the chicken and brightens the overall flavor profile. White vinegar or rice vinegar can be substituted in a pinch.
- 1/4 cup Brown Sugar, packed: Adds sweetness and helps create a beautiful caramelized glaze on the chicken during grilling. Light or dark brown sugar works equally well.
- 2 tablespoons Worcestershire Sauce: Another umami booster that adds complexity and savory notes to the marinade.
- 2 cloves Garlic, minced: Fresh garlic is best for its pungent flavor. About 1 teaspoon of garlic powder can be used as a substitute if needed.
- 1 teaspoon Ground Ginger: Adds a warm, slightly spicy, and aromatic element that complements the cherry and savory flavors. Freshly grated ginger (about 1 tablespoon) can be used for an even more intense flavor.
- 1/2 teaspoon Black Pepper: Essential seasoning to enhance the overall flavor.
For the Chicken:
- 2 pounds Boneless, Skinless Chicken Breasts: Chicken breasts are ideal for grilling as they cook relatively quickly and are lean. You can also use boneless, skinless chicken thighs for a richer, more flavorful, and slightly more forgiving option. About 4-6 chicken breasts, depending on size.
Instructions
Step 1: Whisk Together the Marinade
- Combine Marinade Ingredients: In a mixing bowl, pour in the Cherry Dr. Pepper soda, soy sauce, apple cider vinegar, brown sugar, Worcestershire sauce, minced garlic, ground ginger, and black pepper.
- Whisk Until Combined: Use a whisk or fork to thoroughly combine all the marinade ingredients. Whisk until the brown sugar is mostly dissolved and the marinade is well mixed. The marinade will have a dark, rich color and a slightly sweet and savory aroma.
Step 2: Marinate the Chicken
- Prepare Chicken Breasts: If your chicken breasts are very thick, you can slice them horizontally in half to create thinner cutlets. This will help them marinate more quickly and cook more evenly on the grill. Alternatively, you can pound thicker chicken breasts to an even thickness using a meat mallet.
- Place Chicken in Marinade: Place the chicken breasts in a large resealable plastic bag or a shallow dish.
- Pour Marinade Over Chicken: Pour the Cherry Dr. Pepper marinade over the chicken, ensuring all pieces are submerged or well coated in the marinade.
- Seal and Marinate: If using a plastic bag, seal the bag tightly, removing as much air as possible. If using a shallow dish, cover it tightly with plastic wrap.
- Refrigerate and Marinate: Refrigerate the chicken and let it marinate for at least 4 hours, or ideally, overnight for maximum flavor penetration. The longer the chicken marinates, the more flavorful and tender it will become. However, do not marinate for longer than 24 hours, as the acidity in the marinade can start to break down the chicken fibers too much, resulting in a mushy texture.
Step 3: Prepare for Grilling
- Remove Chicken from Refrigerator: About 30 minutes before you plan to grill, remove the marinated chicken from the refrigerator. This allows the chicken to come closer to room temperature, which helps it cook more evenly.
- Discard Marinade: When ready to grill, remove the chicken from the marinade and discard the marinade. Do not reuse the marinade, as it has been in contact with raw chicken.
- Pat Chicken Dry (Optional but Recommended): Pat the chicken breasts dry with paper towels before grilling. This helps to promote better searing and prevents steaming on the grill, leading to those beautiful grill marks and a slightly caramelized exterior.Now for the exciting part – grilling your Cherry Dr. Pepper marinated chicken to smoky, caramelized perfection! Follow these grilling instructions for juicy, flavorful results:
Step 1: Preheat Your Grill
- Prepare Grill: Preheat your grill to medium-high heat. For a gas grill, this typically means setting the burners to medium-high. For a charcoal grill, light the charcoal and let it burn until it is covered with white ash, indicating it’s ready for grilling.
- Clean Grill Grates: Ensure your grill grates are clean. Use a grill brush to scrub off any leftover residue from previous grilling sessions.
- Oil Grill Grates (Optional but Recommended): Lightly oil the grill grates to prevent the chicken from sticking. You can use a paper towel dipped in cooking oil and tongs to wipe the grates, or use a grill spray.
Step 2: Grill the Chicken
- Place Chicken on Grill: Carefully place the marinated chicken breasts on the preheated grill grates. Leave some space between each piece of chicken to allow for even cooking and airflow.
- Sear and Grill: Sear the chicken for 3-4 minutes per side, without moving it, to create beautiful grill marks and caramelization. This searing step is important for flavor development and visual appeal.
- Flip and Continue Grilling: After searing one side, use tongs to flip the chicken breasts. Continue grilling for another 3-5 minutes per side, or until the chicken is cooked through and reaches an internal temperature of 165°F (74°C). Cooking time will vary depending on the thickness of your chicken breasts and the heat of your grill.
- Check for Doneness: The best way to check for doneness is to use a meat thermometer. Insert the thermometer into the thickest part of a chicken breast, avoiding the bone if using bone-in thighs. The internal temperature should read 165°F (74°C). Alternatively, you can cut into the thickest part of a chicken breast; the juices should run clear, and the meat should be opaque white, not pink.
Step 3: Rest and Serve
- Remove Chicken from Grill: Once the chicken is cooked through, carefully remove it from the grill using tongs and place it on a clean plate or cutting board.
- Rest Chicken: Let the grilled chicken rest for 5-10 minutes before slicing or serving. Resting allows the juices to redistribute throughout the meat, resulting in more tender and flavorful chicken. Do not skip this step!
- Serve and Enjoy: After resting, slice or serve the Cherry Dr. Pepper Grilled Chicken whole. Garnish with fresh herbs like parsley or cilantro, if desired. Serve immediately and enjoy the incredible flavor and juiciness!
Nutrition
- Serving Size: one normal portion
- Calories: 300-400
- Sugar: 15-20g
- Sodium: 500-700mg
- Fat: 8-12g
- Saturated Fat: 2-3g
- Carbohydrates: 15-20g
- Protein: 30-40g
- Cholesterol: 100-120mg


