
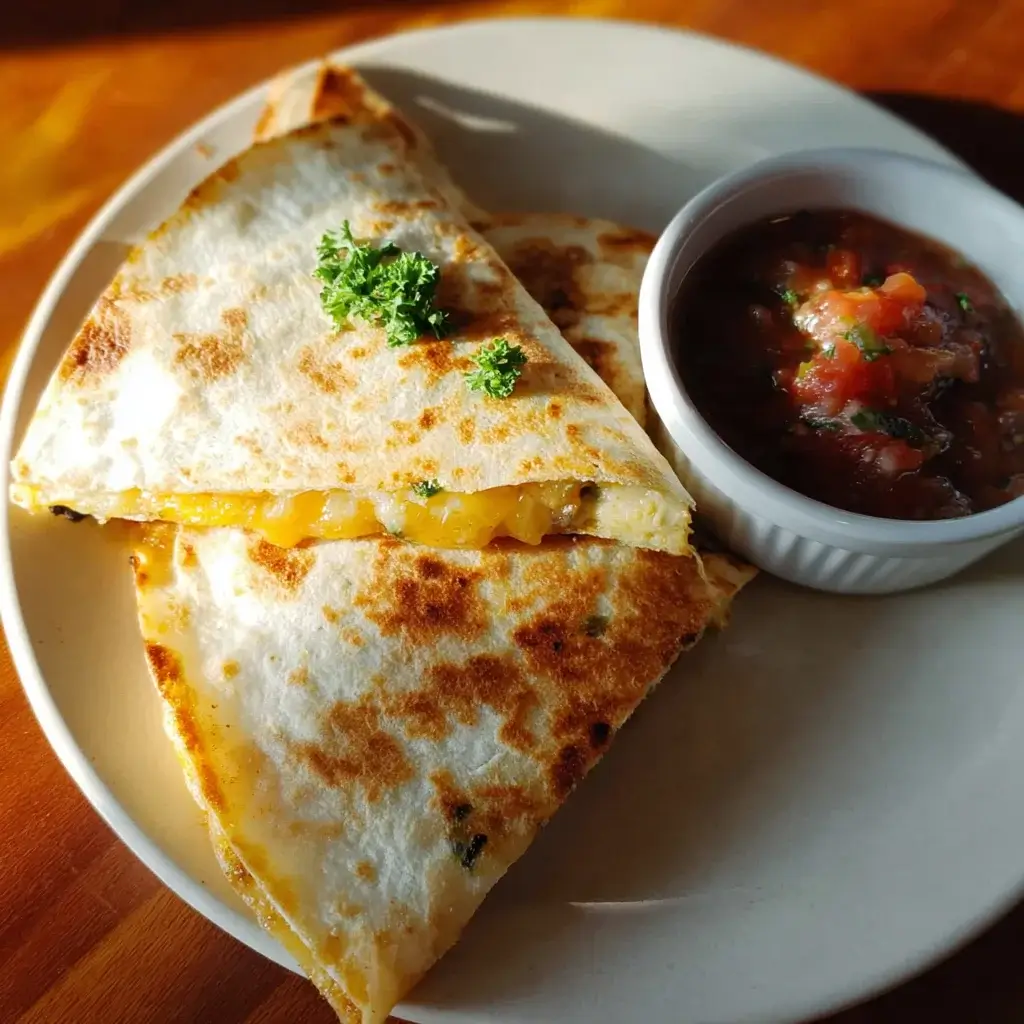

There are certain foods so fundamentally simple that they feel like a culinary magic trick. For me, the cheese quesadilla is the grandmaster of this illusion. It’s the meal I turn to on nights when my energy is gone but my craving for something genuinely satisfying is not. It’s the first “real” food my kids learned to cook for themselves, a symbol of delicious independence. And it’s my secret weapon for a last-minute lunch that feels like a treat. For years, I thought a quesadilla was just cheese melted in a tortilla. But then I started to obsess over the details: the quest for the perfect golden-brown, crispy-chewy tortilla; the science of the ultimate cheesy “pull”; and the creation of a vibrant, fresh salsa that could cut through the richness and elevate the entire experience. This recipe is the culmination of that obsession. It’s a tribute to the simple, profound joy of a perfectly executed cheese quesadilla, served with a bright, zesty salsa that tastes like pure sunshine. It’s proof that you don’t need a long list of ingredients to create something truly spectacular.
The Ultimate Crispy Cheese Quesadilla with Fresh Salsa
This guide is more than just a recipe; it’s a masterclass in perfecting one of the world’s most beloved comfort foods. We will explore the three key elements—the tortilla, the cheese, and the cooking method—to ensure a flawless result every time. We will also craft a simple, vibrant Pico de Gallo from scratch, because a truly great quesadilla deserves a truly great salsa.
Ingredients for an Unforgettable Meal
The beauty of this recipe lies in its simplicity. Using high-quality, fresh ingredients will make all the difference.
For the Fresh Salsa (Pico de Gallo):
- Tomatoes: 4-5 ripe Roma tomatoes, finely diced
- White Onion: ½ medium, finely chopped
- Cilantro: ½ cup, fresh, finely chopped
- Jalapeño: 1 small, seeds and ribs removed, minced (adjust to your heat preference)
- Lime: 1 large, juiced (about 2 tablespoons)
- Salt: ½ teaspoon, or to taste
For the Cheese Quesadillas (Makes 4):
- Flour Tortillas: 4 large (10-inch “burrito size”)
- Cheese: 4 cups, freshly shredded (see notes on cheese selection)
- Unsalted Butter: 2-3 tablespoons (or a neutral oil like canola)
Step-by-Step Instructions for Quesadilla and Salsa Perfection
We’ll start by making the salsa to allow the flavors to meld, then move on to crafting the perfectly crispy and cheesy quesadillas.
Part 1: Making the Fresh Salsa (Pico de Gallo)
- Prepare the Vegetables: Finely dice the Roma tomatoes and place them in a medium bowl. Finely chop the white onion and fresh cilantro, and mince the jalapeño. For less heat, be sure to remove all the white membranes and seeds from the jalapeño.
- Combine Ingredients: Add the chopped onion, cilantro, and minced jalapeño to the bowl with the tomatoes.
- Season and Rest: Pour the fresh lime juice over the mixture and sprinkle with ½ teaspoon of salt. Stir everything together until well combined.
- Meld the Flavors: For the best flavor, cover the salsa and let it rest in the refrigerator for at least 30 minutes. This allows the salt to draw out the juices from the tomatoes and the flavors to marry beautifully. Taste and adjust salt and lime juice before serving.
Part 2: Crafting the Perfect Cheese Quesadilla
- Shred the Cheese: Using a box grater, shred your cheese(s) into a bowl. Tossing them together ensures an even distribution of flavor and melting properties.
- Preheat the Skillet: Place a large non-stick skillet or a well-seasoned cast-iron pan over medium heat. Let the pan get properly heated before you begin.
- Melt the Butter: Add about ½ tablespoon of butter to the hot skillet and swirl it around to coat the surface. It should sizzle gently, not smoke aggressively.
- Place the Tortilla: Lay one large flour tortilla in the skillet. Let it warm for about 30 seconds.
- Add the Cheese: Sprinkle approximately 1 cup of the shredded cheese evenly over the entire surface of the tortilla. Spreading it to the edges helps create a crispy, browned “frico” cheese edge.
- The Fold (Stovetop Method) or The Stack (Skillet Method):
- Classic Fold-Over: Once the cheese begins to melt (about 1-2 minutes), use a spatula to carefully fold one half of the tortilla over the other to create a half-moon shape.
- Full Quesadilla Stack: A slightly more advanced method. Sprinkle the cheese over the first tortilla. Place a second tortilla on top of the melting cheese. Cook for 2-3 minutes, then carefully flip the entire quesadilla to cook the other side. This method is great for cutting into wedges.
- Press and Crisp: Gently press down on the top of the quesadilla with your spatula. This encourages the cheese to melt evenly and helps the tortilla make full contact with the pan for maximum crispiness.
- Cook to Golden Perfection: Continue to cook for another 2-3 minutes per side, until the cheese is completely melted and gooey, and both sides of the tortilla are a beautiful golden-brown with crispy, browned spots.
- Rest and Slice: Transfer the finished quesadilla to a cutting board and let it rest for a minute or two. This is a crucial step that allows the molten cheese to set slightly, preventing it from oozing out everywhere when you cut. Slice into wedges and serve immediately with your fresh salsa.
- Repeat: Repeat the process with the remaining tortillas and cheese, adding more butter to the pan as needed.
Nutritional Information (Estimated)
These values are an approximation and will vary based on the types of tortillas and cheese used. This estimate is for one quesadilla.
- Servings: 4 quesadillas
- Calories per serving: Approximately 550-650 kcal
Time Commitment
- Preparation Time: 15 minutes (mostly for the salsa)
- Cook Time: 20 minutes (about 5 minutes per quesadilla)
- Total Time: Approximately 35 minutes
The Anatomy of a Perfect Quesadilla: The Three Pillars
Mastering the quesadilla is about understanding its core components.
Pillar 1: The Tortilla
The vessel for your cheese is critical. While you can use any tortilla, some are better suited for the task.
- Flour Tortillas: This is the superior choice for classic quesadillas. Their higher fat content allows them to become both crispy and chewy when pan-fried, and their pliability makes them easy to fold without cracking. A “burrito-size” (10-12 inch) tortilla gives you a substantial quesadilla perfect for a meal.
- Corn Tortillas: For a more traditional, rustic flavor, you can use corn tortillas. They will be smaller and have a crunchier, firmer texture. The Trick: To prevent them from cracking, you must warm them first. Heat them in a dry skillet for about 20-30 seconds per side or wrap a stack in a damp paper towel and microwave for 30 seconds until they are soft and pliable.
Pillar 2: The Cheese (The Soul of the Quesadilla)
This is where the magic happens. The best quesadillas use a blend of cheeses—one for flavor and one for that glorious, stretchy “cheese pull.”
- The Melters (For Stretch): These are the cheeses that give you that iconic gooey pull. The best traditional choice is Oaxaca cheese, often sold in a ball that unwinds like string cheese. Other fantastic melters include Asadero, Chihuahua cheese, and low-moisture Monterey Jack.
- The Flavor-Drivers (For Taste): These cheeses might not be as stretchy, but they pack a punch. A medium or sharp Cheddar adds a wonderful tang. A bit of Pepper Jack can add a spicy kick.
- The Perfect Blend: A 50/50 mix of a great melter like Monterey Jack and a great flavor-driver like medium Cheddar is a foolproof combination that delivers both stretch and taste.
- The Golden Rule: Shred Your Own! Pre-shredded cheese is coated in starches and powders (like cellulose) to prevent it from clumping in the bag. These additives inhibit melting, creating a texture that can be grainy or greasy. Taking two minutes to shred a block of cheese will result in a vastly superior, creamier, and gooier melt.
Pillar 3: The Cooking Method
How you cook it determines the final texture.
- The Skillet (The Gold Standard): A heavy-bottomed pan (non-stick or cast iron) over medium heat provides the most control. It allows you to achieve a perfectly crisp, evenly browned exterior while gently melting the cheese inside.
- Butter vs. Oil: Using butter will give you a richer flavor and a beautifully even, golden-brown color. Using a neutral oil like canola or vegetable oil will result in a slightly crisper, more “fried” texture. Both are excellent choices.
How to Serve Cheese Quesadillas: The Full Experience
A quesadilla is a fantastic canvas. While delicious on its own with salsa, you can easily turn it into a full, festive meal.
- The Holy Trinity of Dips:
- Fresh Salsa (Pico de Gallo): The recipe provided offers a fresh, acidic counterpoint that cuts through the richness of the cheese.
- Sour Cream or Crema: A cool, tangy dollop of sour cream or Mexican crema adds another layer of creamy texture.
- Guacamole: A simple guacamole made from mashed avocados, lime juice, and salt is a rich and satisfying partner.
- As a Main Course:
- Serve a whole quesadilla alongside a side of Mexican rice and refried or black beans.
- Pair it with a simple, crisp side salad with a cilantro-lime vinaigrette.
- As an Appetizer or Party Food:
- Make several quesadillas and slice them into 6 or 8 small wedges.
- Arrange them on a platter with small bowls of the various dips for a perfect, easy-to-eat party snack.
5 Pro-Tips for Quesadilla Mastery
- Don’t Overstuff: It’s tempting to load your tortilla with a mountain of cheese, but this is a common mistake. An overstuffed quesadilla will ooze cheese before the tortilla is crisp, leading to a greasy mess. The cheese won’t melt evenly, and the quesadilla will be difficult to flip. A single, even layer is all you need.
- Control Your Heat: A common error is cooking quesadillas on high heat. This will scorch the tortilla on the outside before the cheese has a chance to fully melt on the inside. Medium heat is your best friend. It gives you enough time to achieve a golden-brown crust while ensuring a perfectly gooey interior.
- Spread Cheese to the Edges: Don’t be shy about getting the cheese all the way to the outer rim of the tortilla. As it melts, some cheese will seep out and fry directly on the skillet, creating a crispy, browned, irresistible cheese crust known as a “frico.” This adds an amazing textural element.
- Press, Don’t Smash: When you fold or top your quesadilla, use a spatula to apply gentle, even pressure. This helps the top and bottom layers of the tortilla make contact with the cheese, creating a cohesive pocket, and it maximizes contact with the hot pan for better browning. Don’t smash it so hard that all the cheese squishes out.
- Let It Rest Before Cutting: It’s hard to wait, but letting the quesadilla rest on the cutting board for 60 seconds is a game-changer. This brief pause allows the molten cheese to set up just enough so that when you slice into it, you get clean wedges instead of a messy puddle of cheese.
Beyond the Basics: Delicious Quesadilla Variations
Once you’ve mastered the classic cheese quesadilla, the possibilities are endless. Simply add a thin layer of these ingredients on top of the cheese before folding.
- Chicken and Black Bean: Add shredded rotisserie chicken and a sprinkle of rinsed black beans.
- Steak and Onion: Use leftover grilled steak (thinly sliced) and some caramelized onions.
- Veggie Supreme: Add sautéed bell peppers and onions, corn, and a sprinkle of taco seasoning.
- Mushroom and Spinach: Sauté sliced mushrooms and wilted spinach (be sure to squeeze out all the excess water from the spinach) before adding.
- The “Pizzadilla”: Use mozzarella cheese, add a thin layer of marinara sauce, and some mini pepperonis.
Frequently Asked Questions (FAQ)
1. Why are my quesadillas soggy instead of crispy?
Sogginess is usually caused by two things: using low heat, which steams the tortilla, or moisture from the fillings. Ensure your pan is at a solid medium heat. If adding veggies like spinach or mushrooms, you must cook them first and squeeze out all excess liquid. For cheese, use a lower-moisture cheese like Monterey Jack or a medium cheddar, and avoid fresh, watery cheeses unless you dry them very well.
2. Can I make quesadillas in the oven?
Yes, the oven is great for making many quesadillas at once for a crowd. Preheat the oven to 400°F (200°C). Lightly brush both sides of the tortillas with melted butter or oil. Place them on a baking sheet, sprinkle cheese on one half, and fold. Bake for 8-12 minutes, flipping halfway through, until golden and crispy. They won’t be quite as deeply browned as a skillet version, but they will be delicious.
3. What’s the best way to reheat a quesadilla?
The microwave will make it soft and steamy. The best way to revive the crispiness is to reheat it in a dry skillet over medium-low heat for a few minutes on each side. An air fryer at 350°F (175°C) for 2-3 minutes also works wonderfully.
4. Can I make quesadillas ahead of time for a party?
Quesadillas are truly best served fresh from the pan. However, you can prep all your components ahead of time: make the salsa, shred the cheese, and chop any additional fillings. When guests arrive, you can cook the quesadillas to order in minutes. To keep them warm for a short period, you can place them in a single layer on a baking sheet in an oven set to 200°F (95°C).
5. I only have pre-shredded cheese. Will it work?
Yes, it will absolutely work, and your quesadilla will still be tasty! Just be aware that because of the anti-caking agents, the cheese might not melt as smoothly or have the same creamy, stretchy consistency as a freshly shredded block. It’s a small step that makes a big difference, but don’t let it stop you from making a quesadilla if that’s all you have.

Cheese Quesadillas with Salsa recipe
Ingredients
For the Fresh Salsa (Pico de Gallo):
-
Tomatoes: 4-5 ripe Roma tomatoes, finely diced
-
White Onion: ½ medium, finely chopped
-
Cilantro: ½ cup, fresh, finely chopped
-
Jalapeño: 1 small, seeds and ribs removed, minced (adjust to your heat preference)
-
Lime: 1 large, juiced (about 2 tablespoons)
-
Salt: ½ teaspoon, or to taste
For the Cheese Quesadillas (Makes 4):
-
Flour Tortillas: 4 large (10-inch “burrito size”)
-
Cheese: 4 cups, freshly shredded (see notes on cheese selection)
-
Unsalted Butter: 2-3 tablespoons (or a neutral oil like canola)
Instructions
Part 1: Making the Fresh Salsa (Pico de Gallo)
-
Prepare the Vegetables: Finely dice the Roma tomatoes and place them in a medium bowl. Finely chop the white onion and fresh cilantro, and mince the jalapeño. For less heat, be sure to remove all the white membranes and seeds from the jalapeño.
-
Combine Ingredients: Add the chopped onion, cilantro, and minced jalapeño to the bowl with the tomatoes.
-
Season and Rest: Pour the fresh lime juice over the mixture and sprinkle with ½ teaspoon of salt. Stir everything together until well combined.
-
Meld the Flavors: For the best flavor, cover the salsa and let it rest in the refrigerator for at least 30 minutes. This allows the salt to draw out the juices from the tomatoes and the flavors to marry beautifully. Taste and adjust salt and lime juice before serving.
Part 2: Crafting the Perfect Cheese Quesadilla
-
Shred the Cheese: Using a box grater, shred your cheese(s) into a bowl. Tossing them together ensures an even distribution of flavor and melting properties.
-
Preheat the Skillet: Place a large non-stick skillet or a well-seasoned cast-iron pan over medium heat. Let the pan get properly heated before you begin.
-
Melt the Butter: Add about ½ tablespoon of butter to the hot skillet and swirl it around to coat the surface. It should sizzle gently, not smoke aggressively.
-
Place the Tortilla: Lay one large flour tortilla in the skillet. Let it warm for about 30 seconds.
-
Add the Cheese: Sprinkle approximately 1 cup of the shredded cheese evenly over the entire surface of the tortilla. Spreading it to the edges helps create a crispy, browned “frico” cheese edge.
-
The Fold (Stovetop Method) or The Stack (Skillet Method):
-
Classic Fold-Over: Once the cheese begins to melt (about 1-2 minutes), use a spatula to carefully fold one half of the tortilla over the other to create a half-moon shape.
-
Full Quesadilla Stack: A slightly more advanced method. Sprinkle the cheese over the first tortilla. Place a second tortilla on top of the melting cheese. Cook for 2-3 minutes, then carefully flip the entire quesadilla to cook the other side. This method is great for cutting into wedges.
-
-
Press and Crisp: Gently press down on the top of the quesadilla with your spatula. This encourages the cheese to melt evenly and helps the tortilla make full contact with the pan for maximum crispiness.
-
Cook to Golden Perfection: Continue to cook for another 2-3 minutes per side, until the cheese is completely melted and gooey, and both sides of the tortilla are a beautiful golden-brown with crispy, browned spots.
-
Rest and Slice: Transfer the finished quesadilla to a cutting board and let it rest for a minute or two. This is a crucial step that allows the molten cheese to set slightly, preventing it from oozing out everywhere when you cut. Slice into wedges and serve immediately with your fresh salsa.
-
Repeat: Repeat the process with the remaining tortillas and cheese, adding more butter to the pan as needed.
Nutrition
- Serving Size: one normal portion
- Calories: 550-650 kcal


