
I used to think that a truly decadent, satisfying chocolate pudding had to be a guilty pleasure, a confection of sugar, cream, and complex stovetop simmering. It was a treat reserved for special occasions, one that often left me feeling sluggish afterward. That all changed the day I discovered the magic of Cacao Chia Pudding. It was born from a desire for something deeply chocolatey but also nourishing enough to eat for breakfast. The first time I mixed the simple ingredients together and left the jar in the fridge overnight, I was skeptical. How could something so easy possibly be good? The next morning, I was greeted by a thick, creamy, rich pudding that was almost black in its intensity. The first spoonful was a revelation—it had the deep, complex flavor of dark chocolate with a wonderfully unique texture, and it was packed with so much energy that it completely transformed my morning routine. Now, it’s my go-to recipe, a weekly meal prep staple that serves as a virtuous breakfast, an energizing afternoon snack, or a guilt-free dessert that my whole family adores. It’s proof that the most satisfying foods can also be the best for you.
The Ultimate Cacao Chia Pudding: Ingredients for a Perfect Batch
The beauty of this recipe lies in its simplicity and the powerhouse nature of each component. While the list is short, the quality of your ingredients will directly impact the flavor and nutritional value of your final pudding. Here’s a detailed look at what you’ll need to create this nutrient-dense treat.
- Chia Seeds: ⅓ cup (65g) – These tiny seeds are the structural backbone of the pudding. They can be black or white; there is no significant nutritional or functional difference between them. When submerged in liquid, they form a hydrophilic gel, absorbing up to 12 times their weight and creating the signature thick, pudding-like consistency. They are a fantastic source of omega-3 fatty acids, dietary fiber, and plant-based protein.
- Raw Cacao Powder: ¼ cup (25g), unsweetened – This is the heart and soul of our pudding’s flavor. It’s crucial to use raw cacao powder, not to be confused with Dutch-processed cocoa powder. Cacao is the raw, unprocessed form made from cold-pressing un-roasted cacao beans. This process preserves the living enzymes and a wealth of antioxidants (specifically flavonoids), magnesium, and iron. It lends an intensely rich, slightly bitter, and complex dark chocolate flavor.
- Plant-Based Milk: 1 ½ cups (360ml) – The choice of milk will influence the creaminess and flavor profile. For the richest, most decadent pudding, use full-fat canned coconut milk. For a lighter but still creamy version, unsweetened almond milk, oat milk (which is naturally creamy), or cashew milk are all excellent choices. Ensure it’s unsweetened to control the final sweetness of the pudding.
- Pure Maple Syrup: 2-4 tablespoons, or to taste – This natural, unrefined sweetener provides a lovely caramel-like sweetness that complements the bitterness of the cacao perfectly. Start with 2 tablespoons and adjust based on your personal preference. You can also use other liquid sweeteners like raw honey (note: not vegan) or date syrup.
- Vanilla Extract: 1 teaspoon – Vanilla is a crucial flavor enhancer. It doesn’t make the pudding taste like vanilla; instead, it rounds out the harsh edges of the cacao and deepens the overall chocolate flavor, making it taste richer and more complex.
- Pinch of Fine Sea Salt: Just a tiny pinch (less than ⅛ teaspoon) is all you need. Salt in sweet recipes acts as a flavor balancer, suppressing bitterness and making the sweetness and chocolate notes pop. It’s a small step that makes a huge difference.
Step-by-Step Instructions for a Perfectly Smooth Pudding
Creating this pudding is less about cooking and more about assembly and patience. The key to a perfectly smooth, non-clumpy result lies in the mixing technique. Follow these steps carefully for pudding perfection every time.
Part 1: The Initial Mix
- Combine Dry Ingredients First: In a medium-sized bowl or a large mason jar (at least 24oz/700ml capacity), add the chia seeds, raw cacao powder, and the pinch of salt. Use a small whisk or a fork to thoroughly mix these dry ingredients together. This preliminary step is vital as it evenly distributes the cacao powder and salt amongst the chia seeds, which is your first line of defense against clumping when the liquid is added.
- Add Wet Ingredients: Pour the plant-based milk, maple syrup, and vanilla extract into the bowl with the dry ingredients.
Part 2: The Secret to a Clump-Free Texture
- The First Whisk: Immediately begin to whisk everything together vigorously for a full minute. Scrape down the sides and bottom of the bowl or jar to ensure every last bit of cacao powder and every chia seed is incorporated into the liquid. At this stage, the mixture will look very thin and liquidy, almost like chocolate milk. This is completely normal.
- The Crucial Rest and Second Whisk: Let the mixture rest at room temperature for 5 to 10 minutes. During this short rest, the chia seeds will begin to absorb the liquid and start their gelling process. You will notice the mixture has already started to thicken slightly. Now, give the pudding a second, equally vigorous whisk for another 30-45 seconds. This second whisk is the single most important step for preventing clumps. It breaks up any seed clusters that have begun to form, ensuring a smooth, homogenous final texture.
Part 3: The Overnight Chill
- Refrigerate: Cover the bowl with plastic wrap or seal your mason jar with its lid. Place the pudding in the refrigerator to chill and set. It needs a minimum of 4 hours, but for the best texture and flavor development, let it rest overnight (8 hours). During this time, the chia seeds will fully hydrate and swell, transforming the liquid into a thick, rich, and spoonable pudding.
Part 4: The Finishing Touch
- Final Stir Before Serving: After its long chill, remove the pudding from the refrigerator. It will be very thick. Give it one final, good stir to create a perfectly smooth and creamy consistency before portioning it out to serve. If it’s thicker than you’d like, you can stir in an extra splash of milk to reach your desired texture.
Nutrition Facts: A Nutrient-Dense Powerhouse
Please note that these nutritional values are an estimate and will vary based on the type of milk, sweetener, and any toppings you use.
- Servings: This recipe makes approximately 2 cups of pudding, yielding 2 large (breakfast-sized) servings or 4 smaller (dessert-sized) servings.
- Calories per Serving (approximate): For one of two large servings, the pudding is approximately 350-400 calories. For one of four smaller servings, it is approximately 175-200 calories. This is packed with fiber, healthy fats, and plant-based protein.
Preparation Time: An Exercise in Simplicity
The beauty of this recipe is its minimal active time, making it perfect for busy schedules and meal prepping.
- Active Preparation Time: 10 minutes
- Chilling Time: 4 hours minimum, overnight recommended
- Total Time: 4 hours 10 minutes to overnight
Creative Ways to Serve Your Cacao Chia Pudding
This pudding is a delicious blank canvas. While fantastic on its own, adding toppings elevates it from a simple snack to a gourmet experience. Here are some ideas to inspire you:
- The Ultimate Breakfast Parfait:
- In a clear glass or jar, create layers. Start with a layer of cacao chia pudding, followed by a layer of a tangy dairy-free yogurt (like coconut or almond yogurt).
- Add a layer of crunchy, low-sugar granola.
- Top with a generous handful of fresh berries like raspberries, strawberries, or blueberries for a burst of freshness and antioxidants.
- The Decadent Dessert Bowl:
- Spoon the pudding into a beautiful bowl.
- Add a large dollop of fluffy coconut whipped cream.
- Sprinkle with dark chocolate shavings or, for a sophisticated crunch, raw cacao nibs.
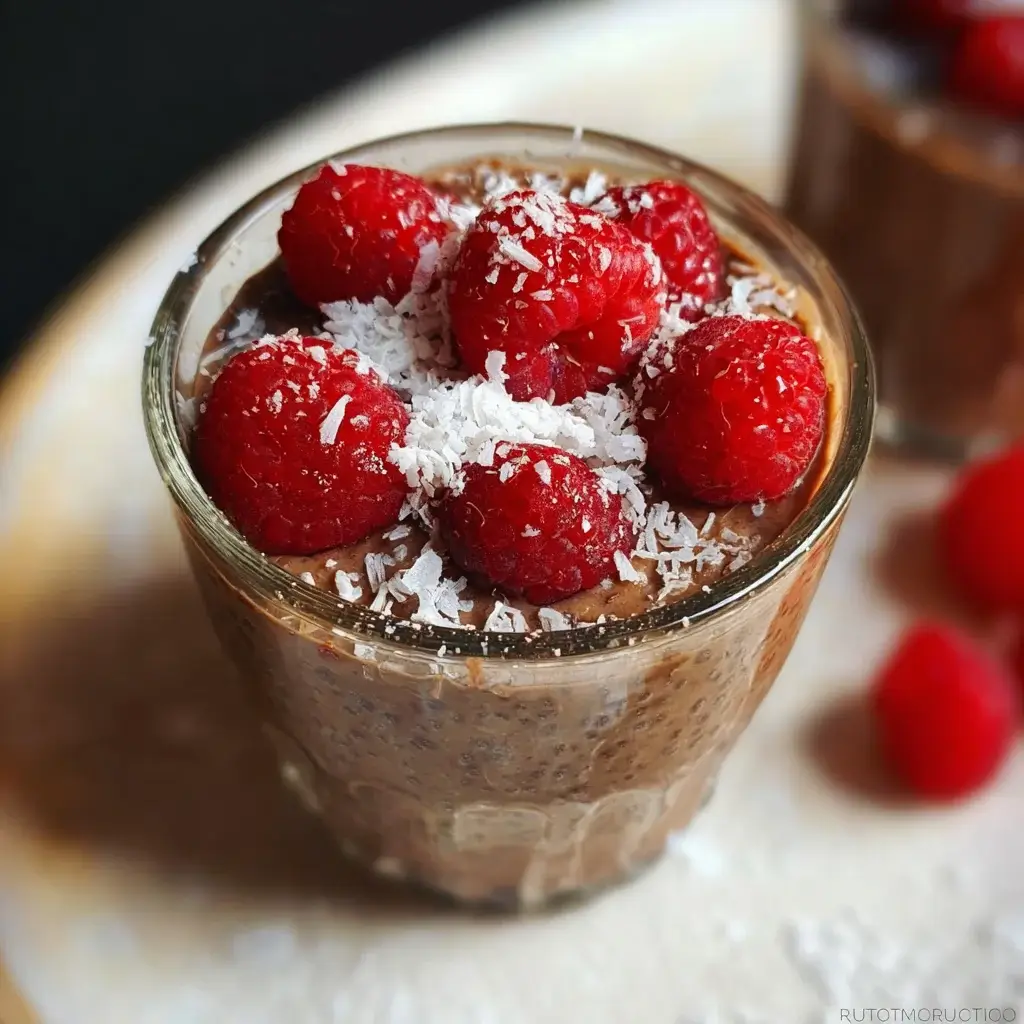
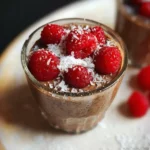
- Garnish with a single perfect raspberry and a fresh mint leaf for a restaurant-quality presentation.
- The “Almond Joy” Inspired Bowl:
- Top a serving of the pudding with a tablespoon of toasted, slivered almonds.
- Sprinkle generously with unsweetened shredded coconut.
- Add a few semi-sweet chocolate chips for an extra touch of sweetness.
- The PB & J(elly) Pudding:
- Create a well in the center of your pudding and add a spoonful of your favorite all-natural peanut butter or almond butter.
- Add a spoonful of raspberry or strawberry chia jam next to it.
- Top with a few chopped, roasted peanuts.
- The Tropical Escape:
- Top the rich chocolate pudding with vibrant, sweet chunks of fresh mango or pineapple.
- Add a sprinkle of toasted coconut flakes and some macadamia nuts for a tropical crunch.
Pro-Level Secrets: 5 Additional Tips for Success
Take your cacao chia pudding from great to absolutely perfect with these professional tips.
- For an Ultra-Silky Mousse, Blend It: If you or your family members are sensitive to the tapioca-like texture of whole chia seeds, there’s an easy solution. After the pudding has fully chilled and set overnight, transfer it to a high-speed blender. Blend for 30-60 seconds until the mixture is completely silky and smooth. The result is a light, airy, and incredibly rich chocolate mousse that is texturally indistinguishable from a traditional dairy-based pudding.
- Bloom Your Cacao for Deeper Flavor: For the ultimate chocolate aficionados, try this flavor-enhancing trick. In your bowl, first whisk the cacao powder with just a few tablespoons of hot (not boiling) water or milk to form a thick, smooth paste. This process, called “blooming,” helps to release the cacao’s deepest flavor compounds. Once you have a smooth paste, proceed with the recipe as written, whisking in the remaining ingredients.
- Master Your Consistency: The chia-to-liquid ratio is key. The recipe as written creates a standard, thick pudding. If you prefer a thinner, more spoonable consistency, simply increase the milk to 1 ¾ cups. If you want an extra-thick, almost solid pudding, decrease the milk to 1 ¼ cups or increase the chia seeds to a heaping ⅓ cup. You can always adjust the consistency after chilling by stirring in more milk.
- Infuse Your Flavors: Don’t be afraid to experiment! You can create stunning flavor variations by adding spices and extracts.
- Mexican Hot Chocolate: Add ½ teaspoon of cinnamon and a tiny pinch of cayenne pepper to the dry ingredients.
- Mint Chocolate: Add ¼ to ½ teaspoon of pure peppermint extract along with the vanilla.
- Mocha Power: Add 1-2 teaspoons of instant espresso powder to the dry ingredients to intensify the chocolate flavor and add a coffee kick.
- Become a Meal Prep Pro: This recipe is a meal prepper’s dream. Make a double or triple batch on a Sunday. Portion it out into individual airtight containers or small mason jars. They will keep perfectly in the refrigerator for up to 5 days. You can pre-portion your toppings into small bags or containers as well, so you have a healthy, delicious, and satisfying grab-and-go breakfast or snack ready for every day of the work week.
Your Questions Answered: Cacao Chia Pudding FAQ
1. What is the difference between cacao powder and cocoa powder? Can I use cocoa powder instead?
This is a fantastic question. The difference lies in the processing. Raw Cacao Powder is made by cold-pressing unroasted cacao beans, which keeps its enzymes and nutrient profile intact, making it a superfood rich in antioxidants and magnesium. Cocoa Powder is made from cacao beans that have been roasted at high temperatures, which changes the molecular structure, reducing the enzyme content and overall nutritional value (though it’s still a source of antioxidants). You absolutely can use unsweetened cocoa powder (not hot chocolate mix) as a 1:1 substitute in this recipe. The pudding will still be delicious, but the flavor will be more one-dimensional and “classic chocolate” rather than the rich, complex, and slightly fruity notes of raw cacao.
2. My chia pudding is lumpy! How can I fix it?
Clumps are the number one enemy of a good chia pudding, and they happen when the seeds cluster together before they have a chance to gel individually. The cause is almost always insufficient whisking. To fix a lumpy pudding, your best bet is to use a fork or whisk and vigorously break up the clumps as best you can. If it’s stubbornly lumpy, pour it into a blender and blend for 15-20 seconds. This will instantly smooth it out. To prevent it next time, remember the “double whisk” method: whisk thoroughly, let it rest for 5-10 minutes, and then whisk it again with equal enthusiasm.
3. Can I make this pudding sugar-free?
Yes, you can. Raw cacao is naturally very bitter, so some form of sweetness is usually desired to balance the flavor. For a completely sugar-free version using whole foods, substitute the maple syrup with 1 or 2 very ripe, mashed bananas or 2-3 soft, pitted Medjool dates blended with the milk before mixing. These options will add natural sweetness and extra nutrients. For a zero-calorie option, you can use a few drops of liquid stevia or monk fruit sweetener to taste.
4. How long will this Cacao Chia Pudding last in the refrigerator?
When stored in an airtight container (like a sealed mason jar or a container with a tight-fitting lid), the pudding will stay fresh and delicious for up to 5 days. The texture may continue to thicken slightly as the days go on, which you can easily remedy by stirring in an extra splash of milk before serving. It is not recommended for freezing, as the texture can become watery upon thawing.
5. Is Cacao Chia Pudding actually a healthy choice?
Emphatically, yes! It’s a nutritional powerhouse disguised as a decadent dessert. Each serving is packed with:
- Fiber: From the chia seeds, which promotes digestive health, helps regulate blood sugar, and keeps you feeling full and satisfied for hours.
- Healthy Fats: Primarily omega-3 fatty acids from the chia seeds, which are crucial for brain health, reducing inflammation, and supporting a healthy heart.
- Plant-Based Protein: Chia seeds provide a complete protein, helping with muscle repair and satiety.
- Antioxidants and Minerals: Raw cacao is one of the most antioxidant-rich foods on the planet, helping to fight free radical damage. It’s also an excellent source of magnesium (for muscle and nerve function), iron (for energy), and potassium.
It truly is one of the healthiest and most delicious ways to satisfy a chocolate craving.
Cacao Chia Pudding recipe
Ingredients
-
Chia Seeds: ⅓ cup (65g) – These tiny seeds are the structural backbone of the pudding. They can be black or white; there is no significant nutritional or functional difference between them. When submerged in liquid, they form a hydrophilic gel, absorbing up to 12 times their weight and creating the signature thick, pudding-like consistency. They are a fantastic source of omega-3 fatty acids, dietary fiber, and plant-based protein.
-
Raw Cacao Powder: ¼ cup (25g), unsweetened – This is the heart and soul of our pudding’s flavor. It’s crucial to use raw cacao powder, not to be confused with Dutch-processed cocoa powder. Cacao is the raw, unprocessed form made from cold-pressing un-roasted cacao beans. This process preserves the living enzymes and a wealth of antioxidants (specifically flavonoids), magnesium, and iron. It lends an intensely rich, slightly bitter, and complex dark chocolate flavor.
-
Plant-Based Milk: 1 ½ cups (360ml) – The choice of milk will influence the creaminess and flavor profile. For the richest, most decadent pudding, use full-fat canned coconut milk. For a lighter but still creamy version, unsweetened almond milk, oat milk (which is naturally creamy), or cashew milk are all excellent choices. Ensure it’s unsweetened to control the final sweetness of the pudding.
-
Pure Maple Syrup: 2-4 tablespoons, or to taste – This natural, unrefined sweetener provides a lovely caramel-like sweetness that complements the bitterness of the cacao perfectly. Start with 2 tablespoons and adjust based on your personal preference. You can also use other liquid sweeteners like raw honey (note: not vegan) or date syrup.
-
Vanilla Extract: 1 teaspoon – Vanilla is a crucial flavor enhancer. It doesn’t make the pudding taste like vanilla; instead, it rounds out the harsh edges of the cacao and deepens the overall chocolate flavor, making it taste richer and more complex.
-
Pinch of Fine Sea Salt: Just a tiny pinch (less than ⅛ teaspoon) is all you need. Salt in sweet recipes acts as a flavor balancer, suppressing bitterness and making the sweetness and chocolate notes pop. It’s a small step that makes a huge difference.
Instructions
Part 1: The Initial Mix
-
Combine Dry Ingredients First: In a medium-sized bowl or a large mason jar (at least 24oz/700ml capacity), add the chia seeds, raw cacao powder, and the pinch of salt. Use a small whisk or a fork to thoroughly mix these dry ingredients together. This preliminary step is vital as it evenly distributes the cacao powder and salt amongst the chia seeds, which is your first line of defense against clumping when the liquid is added.
-
Add Wet Ingredients: Pour the plant-based milk, maple syrup, and vanilla extract into the bowl with the dry ingredients.
Part 2: The Secret to a Clump-Free Texture
-
The First Whisk: Immediately begin to whisk everything together vigorously for a full minute. Scrape down the sides and bottom of the bowl or jar to ensure every last bit of cacao powder and every chia seed is incorporated into the liquid. At this stage, the mixture will look very thin and liquidy, almost like chocolate milk. This is completely normal.
-
The Crucial Rest and Second Whisk: Let the mixture rest at room temperature for 5 to 10 minutes. During this short rest, the chia seeds will begin to absorb the liquid and start their gelling process. You will notice the mixture has already started to thicken slightly. Now, give the pudding a second, equally vigorous whisk for another 30-45 seconds. This second whisk is the single most important step for preventing clumps. It breaks up any seed clusters that have begun to form, ensuring a smooth, homogenous final texture.
Part 3: The Overnight Chill
-
Refrigerate: Cover the bowl with plastic wrap or seal your mason jar with its lid. Place the pudding in the refrigerator to chill and set. It needs a minimum of 4 hours, but for the best texture and flavor development, let it rest overnight (8 hours). During this time, the chia seeds will fully hydrate and swell, transforming the liquid into a thick, rich, and spoonable pudding.
Part 4: The Finishing Touch
-
Final Stir Before Serving: After its long chill, remove the pudding from the refrigerator. It will be very thick. Give it one final, good stir to create a perfectly smooth and creamy consistency before portioning it out to serve. If it’s thicker than you’d like, you can stir in an extra splash of milk to reach your desired texture.
Nutrition
- Serving Size: one normal portion
- Calories: 350-400