

There are certain foods that aren’t just meals; they are events. They signify a gathering, a celebration, a moment of pure, unadulterated indulgence. For my circle of friends and family, that food is unequivocally Buffalo chicken wings. For years, I was on a quest for the perfect homemade wing. I tried deep-frying, which, while delicious, left my kitchen smelling like a fast-food joint for days and came with a side of splatter-related anxiety. I tried countless baked recipes that promised crispiness but delivered disappointment, resulting in wings with soft, flabby skin. The frustration was real. Then, one day, I stumbled upon a technique that changed everything: a simple, scientific trick using a common pantry staple. I combined it with a two-temperature baking method and my classic, no-frills Buffalo sauce. The first time I pulled that batch from the oven, I knew I had cracked the code. The skin was audibly crunchy, blistered, and golden brown, rivaling any deep-fried wing I’d ever had. I tossed them in the buttery, tangy sauce, and the aroma filled the house. That night, watching the game, we didn’t just eat wings; we devoured them. There were happy groans, sticky fingers, and a pile of clean-picked bones. Now, this isn’t just a recipe in my house; it’s a legend. It’s the recipe that has turned my home into the go-to spot for game day, and it’s the one I’m most excited to share with you.
The Anatomy of a Perfect Buffalo Wing
Before we dive into the recipe itself, it’s crucial to understand what separates a decent wing from an unforgettable one. True Buffalo wing perfection hinges on three distinct elements working in harmony: the chicken itself, the cooking method that achieves ultimate crispiness, and the iconic, perfectly balanced sauce. Mastering each of these is the key to wing nirvana.
The Wing: Drumette vs. Flat
The eternal debate. A whole chicken wing is actually composed of three parts: the drumette (looks like a mini drumstick), the flat (or wingette), and the tip. The tip is usually discarded or saved for making stock as it has very little meat.
- Drumettes: These are meatier and easier to eat with one hand, closely resembling a small chicken leg. They are juicy and a favorite for many.
- Flats: These are thinner, have two small bones running through them, and possess a higher skin-to-meat ratio. This is a huge advantage for crispiness lovers, as you get more of that crunchy, sauce-coated skin in every bite.
You can buy packages of “party wings” which are already separated into drums and flats. If you buy whole wings, separating them is easy. Simply find the joint between the drumette and the flat, and cut firmly through it with a sharp knife or kitchen shears.
The Cooking Method: The Quest for Crunch
The texture of the wing skin is non-negotiable. It must be crispy. Soggy-skinned wings are a culinary crime. While deep-frying is the traditional restaurant method, it’s messy and intimidating for many home cooks. Our recipe focuses on a superior baking method that leverages science to achieve a fry-like crunch without the vat of oil. The secret lies in two things: using baking powder in the coating and a two-stage baking process. This method renders the fat from under the skin slowly, then crisps the skin to perfection at a higher heat. We’ll also provide notes for the air fryer enthusiasts.
The Sauce: A Masterpiece of Simplicity
Authentic Buffalo sauce is a testament to the idea that less is more. It’s not a thick, BBQ-style sauce. It’s a thin, rich, emulsified coating of two primary ingredients: a cayenne pepper-based hot sauce and melted butter. The butter tames the heat of the pepper sauce just enough, adding a rich, luscious mouthfeel that makes the wings so addictive. The key is using the right hot sauce—Frank’s RedHot Original is the undisputed classic—and whisking it with the butter to create a smooth, homogenous sauce that clings perfectly to every nook and cranny of the crispy wing.
Classic Buffalo Chicken Wings: The Ultimate Recipe
This recipe is designed to produce incredibly crispy baked wings that will rival any you’d get at your favorite sports bar. Pay close attention to the details, as each step is crucial for the final result.
Ingredients
For the Crispy Baked Chicken Wings:
- 3 lbs (about 1.4 kg) chicken wings, a mix of drumettes and flats (party wings)
- 1 tablespoon baking powder (Make sure it is aluminum-free for the best taste, and do not confuse this with baking soda!)
- 2 teaspoons kosher salt
- 1 teaspoon black pepper
- 1 teaspoon garlic powder
- ½ teaspoon smoked paprika (optional, but adds a nice color and subtle smoky flavor)
For the Classic Buffalo Sauce:
- ½ cup (1 stick / 113g) unsalted butter
- ⅔ cup Frank’s RedHot Original Cayenne Pepper Sauce (This specific brand is highly recommended for the authentic Buffalo flavor)
- 1 tablespoon Worcestershire sauce (optional, adds a layer of umami depth)
- ¼ teaspoon garlic powder
For Serving:
- Celery sticks
- Carrot sticks
- Blue cheese dressing or Ranch dressing
Step-by-Step Instructions for Crispy Baked Wings
Follow these steps precisely for wings that are guaranteed to be crispy, juicy, and utterly delicious.
Step 1: Prepare the Oven and Baking Sheet
Position an oven rack in the upper-middle position and another in the lower-middle position. Preheat the oven to 250°F (120°C). This initial low temperature is key for slowly rendering the fat from under the skin, which is the first step towards crispiness.
Line a large, rimmed baking sheet with aluminum foil for easy cleanup. Place an oven-safe wire rack on top of the baking sheet. The wire rack is essential. It allows hot air to circulate all around the wings, ensuring the bottoms get as crispy as the tops. Without it, the bottoms will steam in their own rendered fat and become soggy.
Step 2: Dry and Coat the Wings
This is the single most important step for achieving crispy skin. Place the chicken wings on a layer of paper towels and pat them thoroughly dry. Get them as dry as you possibly can. Moisture is the enemy of crispiness.
In a large bowl, whisk together the baking powder, kosher salt, black pepper, garlic powder, and smoked paprika (if using). Add the completely dry wings to the bowl and toss them vigorously until every single wing is evenly coated in the seasoning mixture. The coating should look like a light, dusty layer.
Step 3: Arrange the Wings for Baking
Arrange the coated wings in a single layer on the wire rack, making sure they are not touching. Leaving space between the wings allows for better air circulation and even cooking.
Step 4: The Two-Stage Bake
Stage 1 (Low and Slow): Place the baking sheet with the wings on the lower-middle oven rack. Bake at 250°F (120°C) for 30 minutes. This low-temperature bake slowly renders out the fat from under the skin.
Stage 2 (High and Crispy): After 30 minutes, move the baking sheet to the upper-middle rack. Increase the oven temperature to 425°F (220°C). Continue to bake for another 40-50 minutes, flipping the wings halfway through this time. The wings are done when the skin is deep golden brown, puffed, and very crispy. The exact time will depend on the size of your wings. Don’t be afraid to let them get nice and brown—that’s where the flavor is!
Step 5: Make the Buffalo Sauce
While the wings are in their final stage of baking, prepare the sauce. In a small saucepan over low heat, melt the unsalted butter. Once the butter is fully melted, remove it from the heat. Whisk in the Frank’s RedHot sauce, Worcestershire sauce, and garlic powder until the mixture is smooth and emulsified. It should be a uniform, vibrant orange color. Keep the sauce warm over very low heat, but do not let it boil, as this can cause the sauce to break or separate.
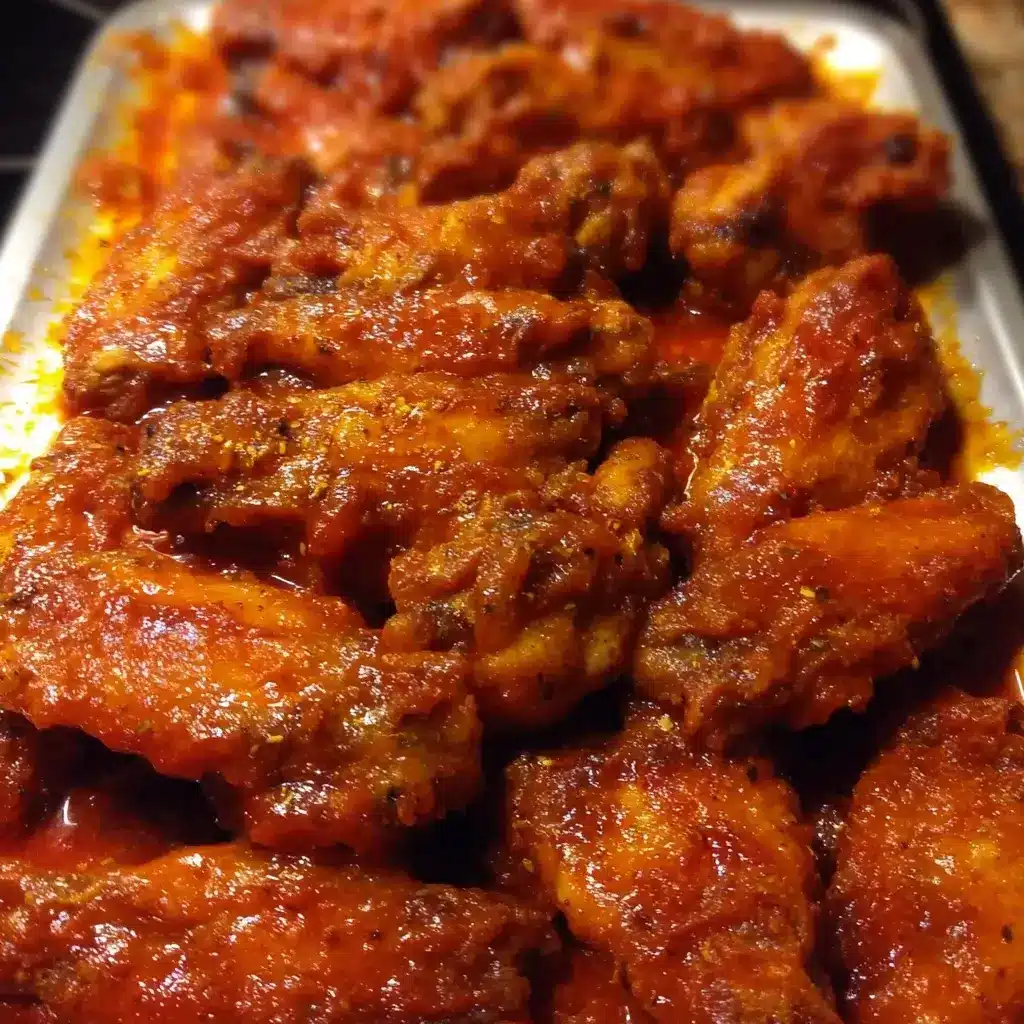
Step 6: Toss to Coat and Serve
Once the wings are gloriously crispy and brown, remove them from the oven. Let them rest for just a minute or two. Place the hot, crispy wings into a large, clean bowl. Pour the warm Buffalo sauce over the wings and toss gently with tongs until every wing is thoroughly coated.
Step 7: Serve Immediately
Transfer the sauced wings to a platter and serve immediately with celery sticks, carrot sticks, and your choice of blue cheese or ranch dressing on the side.
Nutrition Facts
- Servings: 4-6 appetizer servings
- Calories per serving (approximate): 450-550 calories (This includes the wings and sauce, but not the dipping dressing)
Disclaimer: The nutritional information provided is an estimate and can vary based on the specific ingredients used, the size of the wings, and the final serving size.
Preparation Time
- Prep Time: 15 minutes
- Cook Time: 1 hour 10 minutes – 1 hour 20 minutes
- Total Time: Approximately 1 hour 30 minutes
How to Serve Buffalo Wings Like a Pro
Serving Buffalo wings is all about embracing the classic, casual vibe of this iconic dish. The presentation should be functional, inviting, and prepared for a little bit of mess.
The Classic Platter
This is the tried-and-true method you’ll see in bars and restaurants across the country for a reason—it works perfectly.
- The Centerpiece: Pile the hot, sauced wings high in the center of a large platter or board.
- The Cool Down: Arrange fresh, crisp celery and carrot sticks around the wings. Their cool, watery crunch is the perfect palate cleanser to offset the spicy, rich flavor of the wings.
- The Dips: Place small bowls of dipping sauces directly on the platter or alongside it. This allows guests to dip and dunk as they please.
- The Necessities: Don’t forget to provide a small, empty bowl for discarded bones and a generous stack of napkins!
Essential Dipping Sauces
The dip is a crucial part of the Buffalo wing experience, offering a creamy, cooling contrast.
- Classic Blue Cheese Dressing: This is the traditional and, for many purists, the only acceptable dip. The tangy, funky flavor of the blue cheese beautifully complements the spicy vinegar notes of the Buffalo sauce. You can use a quality store-bought version or make your own by mixing blue cheese crumbles, mayonnaise, sour cream, a little milk, lemon juice, and black pepper.
- Cool Ranch Dressing: Ranch has become an incredibly popular alternative. Its creamy, herbaceous flavor is less funky than blue cheese and appeals to a wider range of palates, especially kids.
Perfect Pairings to Make it a Meal
If you want to elevate your wings from an appetizer to a full meal, here are some excellent side dishes:
- Potatoes:
- Crispy French Fries (shoestring or steak fries)
- Tater Tots
- Wedge Potatoes
- Fried Favorites:
- Beer-Battered Onion Rings
- Mozzarella Sticks
- Lighter Fare:
- A simple, crisp green salad with a light vinaigrette
- Coleslaw
Additional Tips for Wing Perfection
- The Overnight Dry-Brine for Ultimate Crispiness: For the absolute crispiest skin possible, take it a step further. After patting the wings dry and tossing them in the baking powder and seasoning mix, arrange them on the wire rack over the baking sheet and place them in the refrigerator, uncovered, for at least 8 hours or overnight. This process completely desiccates the skin, guaranteeing an unbelievably crackly crust when baked.
- Air Fryer Instructions: This recipe adapts beautifully to the air fryer. Prepare the wings exactly as described through Step 2. Preheat your air fryer to 380°F (195°C). Place the wings in the air fryer basket in a single layer (you will need to work in batches). Cook for 20-25 minutes, flipping them halfway through, until golden brown and crispy. Toss with the sauce and serve.
- Controlling the Heat Level: The classic sauce is a perfect medium heat. To customize it:
- For Milder Wings: Increase the butter-to-hot-sauce ratio. Use ¾ cup of butter to ⅔ cup of hot sauce.
- For Hotter Wings: Add 1-2 teaspoons of cayenne pepper to the sauce mixture.
- For “Atomic” Wings: Add a few dashes of a hotter, habanero or ghost pepper-based hot sauce to the mix.
- Sauce Variations: While classic Buffalo is king, don’t be afraid to experiment! Make the crispy baked wings as directed and toss them in one of these delicious alternatives:
- Garlic Parmesan: Toss wings with melted butter, tons of freshly minced garlic, and grated Parmesan cheese. Finish with fresh parsley.
- Honey BBQ: Mix your favorite BBQ sauce with a few tablespoons of honey for a sweet and smoky glaze.
- Lemon Pepper: Toss wings in melted butter, a generous amount of lemon zest, and lots of coarse black pepper for a zesty “wet” lemon pepper style.
- The Secret to Reheating Leftovers: Never use a microwave to reheat wings unless you enjoy soggy sadness. To bring leftover wings back to their crispy glory, place them on a wire rack in an oven or air fryer preheated to 375°F (190°C). Heat for 5-8 minutes, or until the skin is re-crisped and the wing is heated through.
Frequently Asked Questions (FAQ)
1. Why do you use baking powder on the wings?
Baking powder is the secret ingredient for crispy baked wings. It is alkaline, which raises the pH level of the chicken skin. This helps to break down the peptide bonds in the skin and draws moisture to the surface, allowing it to brown faster and become incredibly crisp, mimicking the effect of deep-frying. It is not the same as baking soda, which will leave a strong, unpleasant chemical taste.
2. Can I use frozen chicken wings for this recipe?
Yes, but you must thaw them completely first. The best way is to let them thaw overnight in the refrigerator. Once thawed, it is even more critical that you follow Step 2 and pat them extremely dry with paper towels, as thawed wings will release a lot of excess moisture.
3. What’s the difference between Frank’s RedHot Original and Frank’s RedHot Wing Sauce?
Frank’s RedHot Original is the pure, cayenne pepper-based hot sauce. Frank’s RedHot Wing Sauce is a pre-made product that already contains butter-like flavoring, emulsifiers, and other ingredients to create a “just pour and toss” sauce. For the best flavor, control, and authentic taste, we strongly recommend starting with the Original sauce and adding real, unsalted butter yourself.
4. How can I prepare these wings ahead of time for a party?
You can bake the wings completely and let them cool. Store them in an airtight container in the refrigerator for up to a day. When you’re ready to serve, reheat the wings on a wire rack in a 375°F (190°C) oven for about 10-15 minutes until hot and re-crisped. While they are reheating, prepare the sauce. Toss the hot wings in the warm sauce just before serving.
5. My sauce separated or looks greasy. What did I do wrong?
This usually happens if the sauce gets too hot. Butter and hot sauce form a delicate emulsion. If you boil the mixture or get it too hot, the milk solids in the butter can separate from the fat, causing the sauce to “break” and become greasy. To prevent this, only use very low heat to melt the butter and whisk the hot sauce in off the heat. Keep it warm, not hot. If it does separate, you can sometimes save it by whisking vigorously while adding a teaspoon of hot water.

Buffalo Chicken Wings recipe
Ingredients
For the Crispy Baked Chicken Wings:
-
3 lbs (about 1.4 kg) chicken wings, a mix of drumettes and flats (party wings)
-
1 tablespoon baking powder (Make sure it is aluminum-free for the best taste, and do not confuse this with baking soda!)
-
2 teaspoons kosher salt
-
1 teaspoon black pepper
-
1 teaspoon garlic powder
-
½ teaspoon smoked paprika (optional, but adds a nice color and subtle smoky flavor)
For the Classic Buffalo Sauce:
-
½ cup (1 stick / 113g) unsalted butter
-
⅔ cup Frank’s RedHot Original Cayenne Pepper Sauce (This specific brand is highly recommended for the authentic Buffalo flavor)
-
1 tablespoon Worcestershire sauce (optional, adds a layer of umami depth)
-
¼ teaspoon garlic powder
For Serving:
-
Celery sticks
-
Carrot sticks
-
Blue cheese dressing or Ranch dressing
Instructions
Position an oven rack in the upper-middle position and another in the lower-middle position. Preheat the oven to 250°F (120°C). This initial low temperature is key for slowly rendering the fat from under the skin, which is the first step towards crispiness.
Line a large, rimmed baking sheet with aluminum foil for easy cleanup. Place an oven-safe wire rack on top of the baking sheet. The wire rack is essential. It allows hot air to circulate all around the wings, ensuring the bottoms get as crispy as the tops. Without it, the bottoms will steam in their own rendered fat and become soggy.
This is the single most important step for achieving crispy skin. Place the chicken wings on a layer of paper towels and pat them thoroughly dry. Get them as dry as you possibly can. Moisture is the enemy of crispiness.
In a large bowl, whisk together the baking powder, kosher salt, black pepper, garlic powder, and smoked paprika (if using). Add the completely dry wings to the bowl and toss them vigorously until every single wing is evenly coated in the seasoning mixture. The coating should look like a light, dusty layer.
Arrange the coated wings in a single layer on the wire rack, making sure they are not touching. Leaving space between the wings allows for better air circulation and even cooking.
Stage 1 (Low and Slow): Place the baking sheet with the wings on the lower-middle oven rack. Bake at 250°F (120°C) for 30 minutes. This low-temperature bake slowly renders out the fat from under the skin.
Stage 2 (High and Crispy): After 30 minutes, move the baking sheet to the upper-middle rack. Increase the oven temperature to 425°F (220°C). Continue to bake for another 40-50 minutes, flipping the wings halfway through this time. The wings are done when the skin is deep golden brown, puffed, and very crispy. The exact time will depend on the size of your wings. Don’t be afraid to let them get nice and brown—that’s where the flavor is!
While the wings are in their final stage of baking, prepare the sauce. In a small saucepan over low heat, melt the unsalted butter. Once the butter is fully melted, remove it from the heat. Whisk in the Frank’s RedHot sauce, Worcestershire sauce, and garlic powder until the mixture is smooth and emulsified. It should be a uniform, vibrant orange color. Keep the sauce warm over very low heat, but do not let it boil, as this can cause the sauce to break or separate.
Once the wings are gloriously crispy and brown, remove them from the oven. Let them rest for just a minute or two. Place the hot, crispy wings into a large, clean bowl. Pour the warm Buffalo sauce over the wings and toss gently with tongs until every wing is thoroughly coated.
Transfer the sauced wings to a platter and serve immediately with celery sticks, carrot sticks, and your choice of blue cheese or ranch dressing on the side.
Nutrition
- Serving Size: one normal portion
- Calories: 450-550


