


There are food trends, and then there are cultural phenomena. The brown sugar boba craze falls firmly into the latter. I remember the first time I saw a “tiger stripe” milk tea, with dark, syrupy streaks cascading down the inside of the cup. It was a work of art. My obsession, like many, quickly followed. When the first Brown Sugar Boba Ice Cream Bars hit the market, it was a revelation. The promise of creamy milk tea ice cream, rich brown sugar syrup, and those signature chewy pearls, all in a convenient frozen bar? I bought a box immediately. The flavor was there, but I was often met with a slight disappointment: the boba pearls were often icy and hard, a far cry from the delightful, soft chewiness I craved. That’s when the challenge began. I was determined to crack the code at home. My kitchen became a laboratory of frozen tapioca experiments. My freezer was a graveyard of icy, rock-hard pearls. Then, after what felt like the hundredth try, I discovered the secret—a simple, two-part technique involving a rich syrup soak and a final, magical coating. The first time I bit into a successful homemade bar and was met with a perfectly soft, chewy boba pearl surrounded by silky ice cream, I practically danced. I gave one to my partner, a notorious boba critic, and watched his eyes widen. “How is the boba still chewy?” he asked. That was my victory. This recipe isn’t just a copycat; it’s an improvement, a way to achieve the Brown Sugar Boba Ice Cream Bar of your dreams, with perfectly chewy boba in every single bite.
The Ultimate Homemade Brown Sugar Boba Ice Cream Bar: A Complete Guide
This comprehensive guide will walk you through every step of creating these viral-worthy treats. We will cover how to make truly chewy boba that stays soft when frozen, a rich and decadent milk tea ice cream base (no churn!), and the signature “tiger stripe” syrup that makes these bars so visually stunning.
Complete Ingredients List
This recipe is broken into three main components: the boba, the syrup, and the ice cream base. Making them in this order works best.
For the Chewy Brown Sugar Boba (The Star of the Show):
- 1/2 cup Tapioca Starch (also called Tapioca Flour), plus more for dusting and coating: This is the essential ingredient for making boba from scratch.
- 2 tablespoons Grade A Dark Brown Sugar (Muscovado preferred): The dark, molasses-rich sugar gives the boba its signature color and flavor.
- 3 tablespoons Water
- 1 tablespoon Tapioca Starch (for the “anti-freeze” coating): This is the secret ingredient! Do not skip this.
For the Brown Sugar “Tiger Stripe” Syrup:
- 1 cup Grade A Dark Brown Sugar (Muscovado preferred): Using a high-quality, dark brown sugar is key for a deep, toffee-like flavor.
- 1/2 cup Water
- Pinch of Salt: Balances the sweetness and enhances the caramel notes.
For the No-Churn Milk Tea Ice Cream Base:
- 3-4 strong Black Tea Bags (Assam or English Breakfast work best): You need a robust tea flavor to stand up to the freezing process.
- 2 cups Heavy Whipping Cream (at least 36% milk fat), chilled very well: The high fat content is crucial for a creamy, no-churn ice cream.
- 1 can (14 oz / 396g) Sweetened Condensed Milk, chilled very well: This provides the sugar and creaminess, and its high sugar content helps keep the ice cream from freezing rock solid.
- 1 teaspoon Pure Vanilla Extract
Special Equipment:
- Popsicle Molds (for 8-10 bars)
- Popsicle Sticks
Step-by-Step Instructions
Follow these detailed steps in order for perfect results. The process involves making each component and then assembling them with care.
Step 1: Make the Chewy Brown Sugar Boba
This from-scratch method yields a far superior texture to most store-bought pearls.
- Start the Syrup Base: In a small saucepan, combine the 2 tablespoons of dark brown sugar and 3 tablespoons of water. Bring to a simmer over medium heat, stirring until the sugar is completely dissolved.
- Form the Dough: Turn the heat down to low. Add 1 tablespoon of the tapioca starch to the simmering syrup and whisk vigorously. It will immediately thicken into a goopy, sticky paste. This is called a “tangzhong,” and it gives the boba its signature chew.
- Combine: Remove the pan from the heat. Immediately dump the remaining tapioca starch (from the 1/2 cup measurement) into the pan. Use a rubber spatula to mix and fold everything together. It will look shaggy and crumbly at first.
- Knead: Turn the rough dough out onto a clean, lightly dusted work surface (use more tapioca starch). The dough will be hot, so be careful. Knead it for 3-5 minutes until it becomes smooth, elastic, and no longer sticky, like Play-Doh. If it’s too dry, wet your hands slightly; if it’s too sticky, add a tiny bit more starch.
- Roll and Cut: Roll the dough into a long, thin rope about 1/4-inch in diameter. Use a bench scraper or knife to cut the rope into small, 1/4-inch pieces.
- Shape: Roll each small piece between your palms to form a small ball. This is the most time-consuming part, so put on some music! Place the finished pearls in a bowl dusted with more tapioca starch to prevent sticking.
- Cook the Boba: Bring a medium pot of water to a rolling boil. Add the fresh boba pearls and stir gently. They will sink at first. Once they float to the top (after about 2-3 minutes), reduce the heat to a simmer and continue to cook for 15-20 minutes, stirring occasionally.
- Rest: Turn off the heat, cover the pot, and let the boba rest in the hot water for another 15 minutes to ensure they are cooked through and chewy.
- Drain and Cool: Drain the boba using a sieve and immediately rinse them under cold water to stop the cooking process and wash off excess starch. Set aside. We will add them to the syrup later.
Step 2: Create the Brown Sugar “Tiger Stripe” Syrup
- Combine: In a clean saucepan, combine the 1 cup of dark brown sugar, 1/2 cup of water, and the pinch of salt.
- Dissolve and Simmer: Bring the mixture to a simmer over medium heat, stirring until the sugar is fully dissolved.
- Thicken: Once simmering, reduce the heat to medium-low and let it bubble gently for 5-7 minutes, or until the syrup has thickened slightly. It should coat the back of a spoon. It will thicken more as it cools.
- Syrup Soak for Boba: Pour about 1/2 cup of this hot syrup over your cooked boba pearls in a small bowl. Stir to coat. Let them soak for at least 30 minutes. This infuses them with flavor and is the first step to keeping them soft.
- Cool the Rest: Pour the remaining syrup into a separate jar or bowl and let it cool completely. This will be used for the “tiger stripes” and for coating the boba.
Step 3: Brew the Milk Tea Ice Cream Base
- Steep the Tea: In a small saucepan, heat 1/2 cup of the heavy cream until it is steaming but not boiling. Remove from heat, add the 3-4 tea bags, cover, and let them steep for at least 30 minutes (or up to an hour for a very strong flavor).
- Chill the Tea Infusion: Once steeped, squeeze the tea bags firmly to extract all the liquid and flavor, then discard them. Place the tea-infused cream in the refrigerator to chill completely, for at least 30 minutes. All ingredients must be cold.
- Whip the Cream: In a large, chilled bowl, pour the remaining 1.5 cups of heavy cream and the chilled tea-infused cream. Using a hand mixer or a stand mixer with a whisk attachment, whip the cream on medium-high speed until it forms stiff peaks. This means when you lift the beaters, the peak holds its shape and doesn’t flop over.
- Combine: In a separate medium bowl, whisk together the chilled sweetened condensed milk and the vanilla extract.
- Fold Gently: Pour the condensed milk mixture into the whipped cream. Using a spatula, gently fold the two mixtures together until just combined. Be careful not to overmix or you will deflate all the air you whipped into the cream. The final base should be smooth and airy.
Step 4: Assemble the Ice Cream Bars
- The Secret Coating: Drain the boba from the syrup they were soaking in (you can discard that small amount of syrup). Place the drained boba in a small bowl. Add the remaining 1 tablespoon of tapioca starch and toss gently to coat every pearl in a thin, dry layer of starch. This starch coating forms a gel-like barrier that prevents the boba from freezing into an icy rock. This is the most important step for chewy boba.
- Create the Tiger Stripes: Take your cooled brown sugar syrup. Drizzle and drip it down the inside walls of your popsicle molds. Get creative! Swirl it around to create the signature “tiger stripe” effect.
- Layer the Bars: Spoon a small amount of the milk tea ice cream base into the bottom of each mold.
- Add the Boba: Drop a spoonful of the starch-coated boba into each mold.
- Fold Boba into Base: Gently add the rest of your coated boba directly into the main bowl of ice cream base and fold them in until they are evenly distributed.
- Fill the Molds: Carefully spoon or pipe the final ice cream and boba mixture into the molds, filling them to the top.
- Remove Air Bubbles: Tap the molds firmly on the counter a few times to remove any air pockets. Insert your popsicle sticks into the center of each mold.
Step 5: Freeze to Perfection
- Initial Freeze: Place the molds in the coldest part of your freezer. Freeze for at least 8 hours, but overnight is best to ensure they are completely solid.
- Unmold: To release the ice cream bars, fill a container (that’s taller than your molds) with warm (not hot) water. Dip the mold into the water for just 10-15 seconds. Do not submerge past the top. Gently pull on the popsicle stick to release the bar. Work quickly!
- Store: If not eating immediately, wrap each bar individually in wax paper or plastic wrap and store them in a freezer bag or airtight container to prevent freezer burn.
Nutrition Facts
- Servings: Makes 8-10 bars (depending on mold size)
- Calories per serving: Approximately 380-450 kcal
This is an indulgent dessert, rich in dairy and sugar, designed to be a special, decadent treat.
Preparation Time
- Active Time: 45-60 minutes (includes making boba, syrup, and ice cream base)
- Inactive Time: 1.5 hours (for steeping, cooling, and soaking)
- Freezing Time: 8 hours (minimum)
- Total Time: Approximately 10.5 hours
How to Serve (and Enjoy!)
While these bars are a complete treat on their own, here are a few ways to enhance the experience.
- Straight from the Freezer: The purest way. Enjoy the perfect contrast of the cold, creamy ice cream, the rich syrup, and the surprisingly soft, chewy boba.
- With an Extra Drizzle: If you have any leftover brown sugar syrup, give the bar an extra drizzle just before serving for a more intense caramel-toffee hit.
- The Deconstructed Bowl: Don’t have popsicle molds? No problem! Simply layer the tiger stripe syrup, ice cream base, and coated boba in a freezer-safe loaf pan. Freeze solid and then scoop into bowls like regular ice cream.
- Party Perfect: Unmold all the bars at once and place them on a tray lined with wax paper in the freezer. This way, they are ready to be served to guests without any last-minute fuss.
Additional Tips for Success
- The Boba Secret is the Coating: I cannot stress this enough. The combination of soaking the boba in a high-sugar syrup and then coating them in a dry layer of tapioca starch is what keeps them soft and chewy. The sugar and starch act as natural “anti-freeze,” lowering the freezing point of the water within the boba and creating a protective, gel-like layer.
- Don’t Scrimp on the Tea Strength: The flavor of tea becomes muted when frozen. Steeping the tea bags in hot cream (instead of water) extracts more fat-soluble flavor compounds, and using 3-4 bags ensures the final product tastes distinctly of milk tea, not just sweet cream.
- The Chill Factor is Crucial: For the fluffiest no-churn ice cream, all your core ingredients—the heavy cream, the sweetened condensed milk, and even your mixing bowl and beaters—should be thoroughly chilled. Cold cream whips up with more volume and stability.
- Work Quickly During Assembly: Once your ice cream base is made, it will begin to soften. Have your syrup, boba, and molds ready to go. Work efficiently to get the bars assembled and back into the freezer to maintain that light, airy texture.
- Master the Unmolding: The 10-15 second warm water bath is the key. Too short, and it won’t release. Too long, and the outside of your beautiful bar will melt into a sticky mess. It’s a delicate balance, so be prepared to pull gently as soon as you see the edges start to melt slightly.
Frequently Asked Questions (FAQ)
1. Why did my boba freeze hard and icy?
This is the most common issue. There are two likely reasons: a) You skipped the final, crucial step of coating the syrup-soaked boba in a layer of dry tapioca starch. b) Your brown sugar syrup was too thin (not enough sugar concentration). The high sugar content of the syrup and the starchy coating are what prevent the water inside the boba from forming large, hard ice crystals.
2. Can I use store-bought quick-cook tapioca pearls?
Yes, you can, and it will save you a lot of time. Cook them according to the package directions (it’s usually just a few minutes). However, you must still give them the full treatment after cooking: soak them in the thick brown sugar syrup for at least 30 minutes and then coat them in the dry tapioca starch before adding them to the ice cream base. Be aware that from-scratch boba generally has a better, chewier texture.
3. How can I make this recipe dairy-free or vegan?
Yes, this recipe is adaptable! For the ice cream base, use a can of chilled, full-fat coconut cream in place of the heavy whipping cream, and use a can of coconut sweetened condensed milk (widely available now). The rest of the ingredients (boba, syrup) are already vegan. The texture will be slightly more coconut-forward and a little icier than the dairy version, but still incredibly delicious.
4. I don’t have popsicle molds. What else can I use?
You can absolutely make this without special molds. Small paper or plastic cups work wonderfully—just pour in the layers and insert a popsicle stick. The easiest alternative is the “Deconstructed Bowl” method mentioned above: layer everything in a standard loaf pan, freeze solid, and serve it by the scoop. It has all the same flavor and texture, just in a different form.
5. How long will these ice cream bars last in the freezer?
If stored properly, these bars will be at their best quality for up to 2 weeks. To prevent freezer burn and keep them tasting fresh, make sure to wrap each bar individually and tightly in plastic wrap or wax paper, and then place them in a freezer-safe, airtight container or bag. After a couple of weeks, the texture of the ice cream may start to become more crystalline.
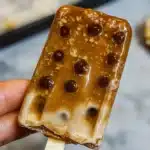
Brown Sugar Boba Ice Cream Bar recipe
Ingredients
For the Chewy Brown Sugar Boba (The Star of the Show):
-
1/2 cup Tapioca Starch (also called Tapioca Flour), plus more for dusting and coating: This is the essential ingredient for making boba from scratch.
-
2 tablespoons Grade A Dark Brown Sugar (Muscovado preferred): The dark, molasses-rich sugar gives the boba its signature color and flavor.
-
3 tablespoons Water
-
1 tablespoon Tapioca Starch (for the “anti-freeze” coating): This is the secret ingredient! Do not skip this.
For the Brown Sugar “Tiger Stripe” Syrup:
-
1 cup Grade A Dark Brown Sugar (Muscovado preferred): Using a high-quality, dark brown sugar is key for a deep, toffee-like flavor.
-
1/2 cup Water
-
Pinch of Salt: Balances the sweetness and enhances the caramel notes.
For the No-Churn Milk Tea Ice Cream Base:
-
3-4 strong Black Tea Bags (Assam or English Breakfast work best): You need a robust tea flavor to stand up to the freezing process.
-
2 cups Heavy Whipping Cream (at least 36% milk fat), chilled very well: The high fat content is crucial for a creamy, no-churn ice cream.
-
1 can (14 oz / 396g) Sweetened Condensed Milk, chilled very well: This provides the sugar and creaminess, and its high sugar content helps keep the ice cream from freezing rock solid.
-
1 teaspoon Pure Vanilla Extract
Instructions
Step 1: Make the Chewy Brown Sugar Boba
This from-scratch method yields a far superior texture to most store-bought pearls.
-
Start the Syrup Base: In a small saucepan, combine the 2 tablespoons of dark brown sugar and 3 tablespoons of water. Bring to a simmer over medium heat, stirring until the sugar is completely dissolved.
-
Form the Dough: Turn the heat down to low. Add 1 tablespoon of the tapioca starch to the simmering syrup and whisk vigorously. It will immediately thicken into a goopy, sticky paste. This is called a “tangzhong,” and it gives the boba its signature chew.
-
Combine: Remove the pan from the heat. Immediately dump the remaining tapioca starch (from the 1/2 cup measurement) into the pan. Use a rubber spatula to mix and fold everything together. It will look shaggy and crumbly at first.
-
Knead: Turn the rough dough out onto a clean, lightly dusted work surface (use more tapioca starch). The dough will be hot, so be careful. Knead it for 3-5 minutes until it becomes smooth, elastic, and no longer sticky, like Play-Doh. If it’s too dry, wet your hands slightly; if it’s too sticky, add a tiny bit more starch.
-
Roll and Cut: Roll the dough into a long, thin rope about 1/4-inch in diameter. Use a bench scraper or knife to cut the rope into small, 1/4-inch pieces.
-
Shape: Roll each small piece between your palms to form a small ball. This is the most time-consuming part, so put on some music! Place the finished pearls in a bowl dusted with more tapioca starch to prevent sticking.
-
Cook the Boba: Bring a medium pot of water to a rolling boil. Add the fresh boba pearls and stir gently. They will sink at first. Once they float to the top (after about 2-3 minutes), reduce the heat to a simmer and continue to cook for 15-20 minutes, stirring occasionally.
-
Rest: Turn off the heat, cover the pot, and let the boba rest in the hot water for another 15 minutes to ensure they are cooked through and chewy.
-
Drain and Cool: Drain the boba using a sieve and immediately rinse them under cold water to stop the cooking process and wash off excess starch. Set aside. We will add them to the syrup later.
Step 2: Create the Brown Sugar “Tiger Stripe” Syrup
-
Combine: In a clean saucepan, combine the 1 cup of dark brown sugar, 1/2 cup of water, and the pinch of salt.
-
Dissolve and Simmer: Bring the mixture to a simmer over medium heat, stirring until the sugar is fully dissolved.
-
Thicken: Once simmering, reduce the heat to medium-low and let it bubble gently for 5-7 minutes, or until the syrup has thickened slightly. It should coat the back of a spoon. It will thicken more as it cools.
-
Syrup Soak for Boba: Pour about 1/2 cup of this hot syrup over your cooked boba pearls in a small bowl. Stir to coat. Let them soak for at least 30 minutes. This infuses them with flavor and is the first step to keeping them soft.
-
Cool the Rest: Pour the remaining syrup into a separate jar or bowl and let it cool completely. This will be used for the “tiger stripes” and for coating the boba.
Step 3: Brew the Milk Tea Ice Cream Base
-
Steep the Tea: In a small saucepan, heat 1/2 cup of the heavy cream until it is steaming but not boiling. Remove from heat, add the 3-4 tea bags, cover, and let them steep for at least 30 minutes (or up to an hour for a very strong flavor).
-
Chill the Tea Infusion: Once steeped, squeeze the tea bags firmly to extract all the liquid and flavor, then discard them. Place the tea-infused cream in the refrigerator to chill completely, for at least 30 minutes. All ingredients must be cold.
-
Whip the Cream: In a large, chilled bowl, pour the remaining 1.5 cups of heavy cream and the chilled tea-infused cream. Using a hand mixer or a stand mixer with a whisk attachment, whip the cream on medium-high speed until it forms stiff peaks. This means when you lift the beaters, the peak holds its shape and doesn’t flop over.
-
Combine: In a separate medium bowl, whisk together the chilled sweetened condensed milk and the vanilla extract.
-
Fold Gently: Pour the condensed milk mixture into the whipped cream. Using a spatula, gently fold the two mixtures together until just combined. Be careful not to overmix or you will deflate all the air you whipped into the cream. The final base should be smooth and airy.
Step 4: Assemble the Ice Cream Bars
-
The Secret Coating: Drain the boba from the syrup they were soaking in (you can discard that small amount of syrup). Place the drained boba in a small bowl. Add the remaining 1 tablespoon of tapioca starch and toss gently to coat every pearl in a thin, dry layer of starch. This starch coating forms a gel-like barrier that prevents the boba from freezing into an icy rock. This is the most important step for chewy boba.
-
Create the Tiger Stripes: Take your cooled brown sugar syrup. Drizzle and drip it down the inside walls of your popsicle molds. Get creative! Swirl it around to create the signature “tiger stripe” effect.
-
Layer the Bars: Spoon a small amount of the milk tea ice cream base into the bottom of each mold.
-
Add the Boba: Drop a spoonful of the starch-coated boba into each mold.
-
Fold Boba into Base: Gently add the rest of your coated boba directly into the main bowl of ice cream base and fold them in until they are evenly distributed.
-
Fill the Molds: Carefully spoon or pipe the final ice cream and boba mixture into the molds, filling them to the top.
-
Remove Air Bubbles: Tap the molds firmly on the counter a few times to remove any air pockets. Insert your popsicle sticks into the center of each mold.
Step 5: Freeze to Perfection
-
Initial Freeze: Place the molds in the coldest part of your freezer. Freeze for at least 8 hours, but overnight is best to ensure they are completely solid.
-
Unmold: To release the ice cream bars, fill a container (that’s taller than your molds) with warm (not hot) water. Dip the mold into the water for just 10-15 seconds. Do not submerge past the top. Gently pull on the popsicle stick to release the bar. Work quickly!
-
Store: If not eating immediately, wrap each bar individually in wax paper or plastic wrap and store them in a freezer bag or airtight container to prevent freezer burn.
Nutrition
- Serving Size: one normal portion
- Calories: 380-450 kcal


