
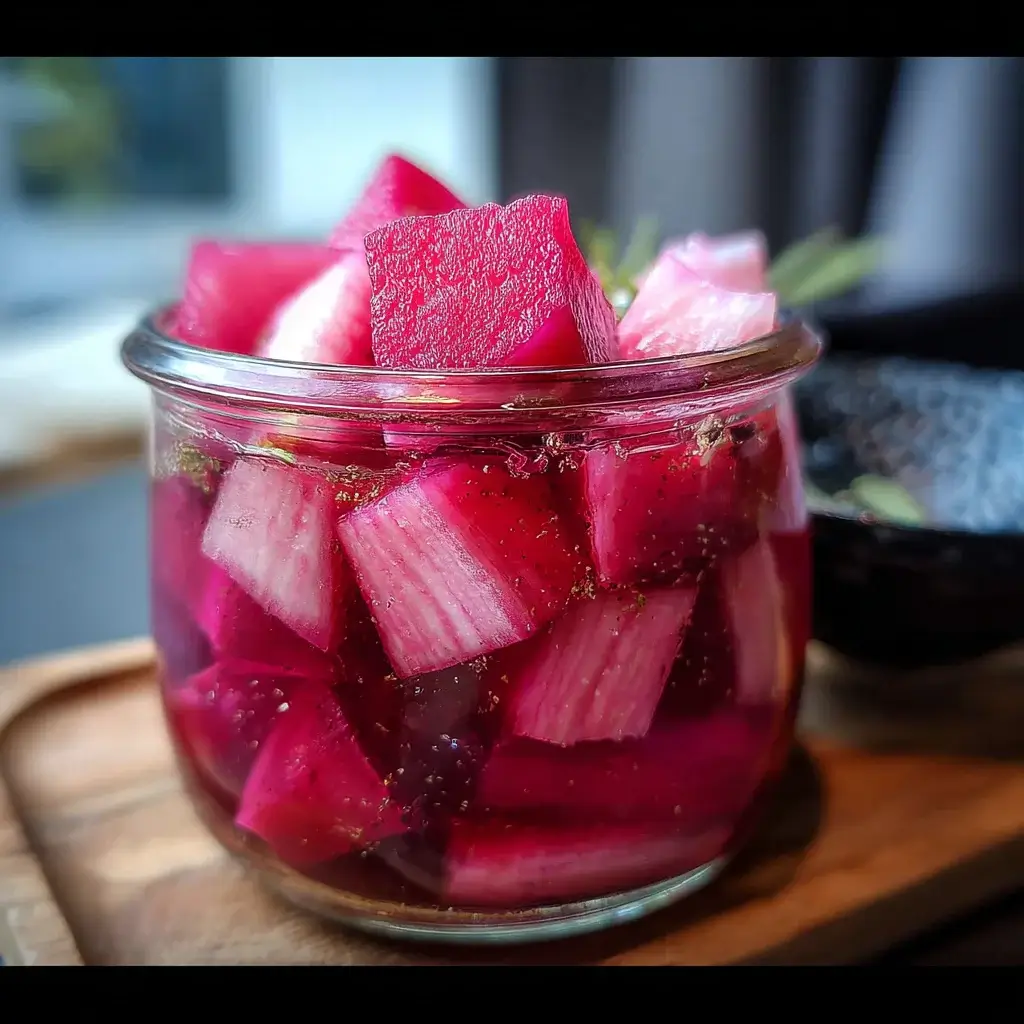

There are certain culinary discoveries that feel like uncovering a secret weapon for your kitchen. For me, that discovery was this stunningly vibrant Pickled Beetroot and Daikon Radish. I first encountered a version of it served alongside a steaming bowl of pho at a tiny, family-run Vietnamese restaurant. I was immediately captivated by its electric, fuchsia-pink hue. It was so beautiful it almost looked artificial. But one bite revealed a world of complex, natural flavor—a perfect harmony of sweet, sour, earthy, and peppery, all delivered with an addictively crisp crunch. I knew I had to recreate it at home. After a few batches of tweaking the brine and perfecting the cut of the vegetables, I landed on this recipe. It has since become a permanent resident in my refrigerator door, a jewel-toned condiment that has the power to elevate the simplest of meals. It transforms a humble rice bowl, adds a zesty crunch to tacos, and turns an ordinary sandwich into something truly special. It’s the pop of color and flavor that makes everyone ask, “Wow, what is that?”
The Magic Behind This Beetroot and Daikon Pickle
Before we dive into the simple process of making this pickle, let’s appreciate what makes this combination so uniquely brilliant. It’s not just a random pairing; it’s a masterful blend of color, texture, and flavor that works on multiple levels.
First and foremost is the breathtaking visual appeal. We eat with our eyes first, and this pickle is a feast. The single, humble beetroot acts as a powerful natural dye, infusing the pale, crisp daikon with a spectacular, jewel-toned magenta color. It’s a completely natural way to add a “wow” factor to any dish, making your food look like it came from a high-end restaurant.
Second is the dynamic flavor profile. This is a pickle that dances on the palate. The daikon radish provides a mild, peppery bite and a refreshing, juicy quality. This is beautifully complemented by the subtle, earthy sweetness of the beetroot. All of this is suspended in a sweet and sour rice vinegar brine that provides a bright, tangy kick. It’s a palate-cleansing condiment that can cut through rich flavors and brighten up savory dishes.
Third, and arguably most important, is the unbeatable crunch. These are quick pickles, also known as refrigerator pickles, which means they are not heat-processed for long-term canning. This is a huge advantage for texture. The vegetables are essentially bathed in the brine rather than cooked in it, allowing them to retain their incredible, satisfying crispness. Every bite is a delightful snap, a textural contrast that is so often missing from everyday meals.
Finally, it’s a powerhouse of health benefits and versatility. You’re getting all the wonderful nutrients from raw beetroot (like folate, manganese, and potassium) and daikon (rich in Vitamin C and digestive enzymes) in a delicious, easy-to-digest form. Because it’s so low in calories, it’s a fantastic way to add a huge amount of flavor and excitement to your meals without adding significant fat or calories. Its versatility is boundless, making it the perfect companion for an incredible array of global cuisines.
A Complete Guide to Making Pickled Beetroot and Daikon Radish
This recipe yields approximately one quart-sized jar of pickles. The process is incredibly simple and requires no special canning equipment.
Ingredients for Your Vibrant Pickles
Choosing fresh, firm vegetables is the first step to a crisp, delicious pickle.
For the Vegetables:
- 1 medium daikon radish (about 1 pound), peeled – Look for a daikon that is firm to the touch, heavy for its size, and has smooth, unblemished skin.
- 1 small beetroot (about 3-4 ounces), peeled – A small beet is all you need to provide the magnificent color and a subtle earthy sweetness without overpowering the daikon.
For the Sweet and Sour Brine:
- 1 ½ cups rice vinegar – Rice vinegar is ideal for its mild, slightly sweet flavor that doesn’t overpower the vegetables. Apple cider vinegar or white vinegar can be substituted.
- 1 cup water
- ½ cup granulated sugar – This balances the acidity of the vinegar. You can adjust the amount to your personal preference.
- 2 tablespoons kosher salt or sea salt – It is crucial to use non-iodized salt. Iodized table salt can make the pickling liquid cloudy and impart a bitter flavor.
Optional Aromatics for Extra Flavor:
- 1-inch piece of ginger, peeled and thinly sliced – Adds a warm, zesty spice.
- 1-2 cloves garlic, peeled and smashed – For a subtle, savory depth.
- 1 teaspoon black peppercorns – Provides a gentle, lingering heat.
- 1 star anise – Lends a beautiful, subtle licorice-like aroma.
Step-by-Step Instructions
Follow these simple steps to create your jar of jewel-toned magic.
Step 1: Prepare the Vegetables
- Peel: Use a vegetable peeler to peel both the daikon radish and the beetroot. Be mindful that the beetroot will stain everything it touches! You may want to wear gloves for this step to avoid pink fingers.
- Julienne: The goal is to cut the vegetables into thin, uniform matchsticks. A mandoline slicer with a julienne blade is the fastest and most effective tool for this, creating perfectly even pieces. If you don’t have a mandoline, you can do it by hand with a sharp knife. First, slice the vegetables into thin planks, then stack the planks and slice them into thin matchsticks. Uniformity is key for a consistent texture.
Step 2: Prepare Your Jar
- Wash a 1-quart glass jar and its lid thoroughly with hot, soapy water and rinse well. Make sure it is completely clean. Since these are refrigerator pickles and not meant for long-term shelf storage, full sterilization is not strictly necessary, but cleanliness is essential.
Step 3: Make the Pickling Brine
- In a medium, non-reactive saucepan (such as stainless steel or enamel), combine the rice vinegar, water, sugar, and salt.
- Heat the mixture over medium heat, stirring occasionally, just until the sugar and salt have completely dissolved. You do not need to bring it to a rolling boil.
- Once the solids are dissolved, remove the brine from the heat.
Step 4: Pack the Jar and Pickle!
- Place your optional aromatics (sliced ginger, smashed garlic, peppercorns, star anise) at the bottom of the clean jar.
- Tightly pack the julienned daikon radish and beetroot into the jar. Mix them together as you pack them in to ensure the color distributes evenly. Pack them in as tightly as you can without crushing them.
- Carefully pour the warm brine over the vegetables in the jar until they are completely submerged. You may have a little extra brine, which you can discard.
- Gently tap the jar on the counter a few times to release any trapped air bubbles.
Step 5: Cool, Seal, and Refrigerate
- Let the jar cool to room temperature on your countertop, which will take about an hour.
- Once cool, seal the jar with its lid and place it in the refrigerator.
- The pickles will be ready to eat in as little as 12 hours, but they are at their absolute best after chilling for 2-3 days. This allows the flavors to fully meld and the color to deepen into its iconic vibrant pink.
Nutrition Facts: A Flavor Bomb, Not a Calorie Bomb
This condiment is a fantastic way to add a huge burst of flavor and visual appeal to your meals with very minimal caloric impact. The estimates below are based on a standard serving size.
- Servings per 1-quart jar: About 16 servings
- Serving Size: Approximately ¼ cup
- Calories per serving (approximate): 25-35 kcal
These pickles are virtually fat-free and low in calories. They are a good source of fiber from the vegetables. Beetroots provide folate, manganese, and potassium, while daikon radish is an excellent source of Vitamin C. The brine’s primary caloric contribution is from sugar, which can be adjusted to your dietary needs.
Preparation and Pickling Time
Understanding the timeline is key to planning your pickling project.
- Active Preparation Time: Approximately 15-20 minutes (This includes peeling and chopping the vegetables and making the brine).
- Cooling Time: 1 hour
- Pickling Time (in the refrigerator): Minimum 12 hours, but best after 48-72 hours.
- Total Hands-On Time: Under 20 minutes!
How to Serve Your Stunning Pickled Beetroot and Daikon
The beauty of these pickles lies in their incredible versatility. Here are some of our favorite ways to use them:
- To Elevate Asian-Inspired Dishes:
- Banh Mi Sandwiches: This is their classic home, providing the perfect tangy crunch to balance the rich savory fillings.
- Rice Bowls and Buddha Bowls: Spoon them generously over rice bowls with tofu, chicken, or fish for a pop of color and flavor.
- Noodle Dishes: Add them to cold soba noodle salads or as a final topping on a hot bowl of ramen or pho.
- Fresh Spring Rolls: Tuck a few strands inside your spring rolls for a hidden crunch.
- To Brighten Up Your Lunch Routine:
- Tacos: They are absolutely sensational on fish tacos, carnitas tacos, or vegetarian black bean tacos.
- Sandwiches and Wraps: Layer them into any sandwich for a surprising zesty bite. They’re especially good with rich fillings like pulled pork or creamy chicken salad.
- Avocado Toast: Transform your avocado toast into a work of art with a scattering of these jewel-toned pickles.
- Salads: Toss them into green salads for a vibrant, crunchy element that can replace a heavy dressing.
- As a Striking Side or Garnish:
- On a Cheese or Charcuterie Board: Their bright acidity cuts through the richness of cheeses and cured meats beautifully.
- Alongside Grilled Foods: Serve them as a refreshing side dish with grilled fish, chicken, steak, or tofu.
- As a Burger Topping: Ditch the boring pickle slices and top your burgers with this for a gourmet twist.
5 Additional Tips for Perfect Pickles Every Time
These are the small details that will ensure your pickling success.
- Uniformity is Your Best Friend: Take the time to cut your vegetables into pieces of a similar size and thickness. This ensures that every piece pickles at the same rate and delivers a consistent, satisfying crunch in every bite. A mandoline is your greatest ally here.
- Use Non-Iodized Salt: This is a crucial tip for any pickling project. Standard iodized table salt contains anti-caking agents and iodine that can turn your beautiful, clear brine cloudy and sometimes impart a metallic taste. Stick to kosher salt, sea salt, or pickling salt.
- Don’t Boil the Brine Excessively: You only need to heat the brine enough to dissolve the sugar and salt. You are not trying to cook the vegetables. Pouring the warm (not boiling) brine over the raw vegetables is the key to maintaining their fantastic crisp texture.
- Embrace the Aromatics: The base recipe is delicious on its own, but the optional aromatics are what can make the recipe uniquely yours. Feel free to experiment! A few coriander seeds, a bay leaf, or a sliced chili pepper can add wonderful new dimensions of flavor.
- Patience is a Virtue: While you can technically eat these pickles after a few hours, they won’t have reached their full potential. The magic truly happens after at least 48 hours in the refrigerator. This time allows the daikon to fully absorb the color from the beet and for all the flavors in the brine to penetrate the vegetables and mellow into a perfect harmony.
Frequently Asked Questions (FAQ)
Here are answers to some of the most common questions about making these quick pickles.
1. How long will these refrigerator pickles last?
Because they are not canned using a high-heat processing method, these pickles must be stored in the refrigerator. In a sealed jar in the fridge, they will stay crisp and delicious for about 3 to 4 weeks. Their color and crunch are best in the first two weeks.
2. Can I use a different kind of vinegar?
Yes, you can. Apple cider vinegar will give the pickles a fruitier, more robust flavor. Distilled white vinegar will provide a sharper, more neutral tang. You can even use a combination. Rice vinegar is recommended for its delicate flavor that allows the vegetables to shine.
3. Why do I have to use raw beetroot? Can I use cooked?
It is essential to use raw beetroot for this recipe. The vibrant, iconic color comes from the raw beet bleeding its natural dye into the brine, which then stains the daikon. Cooked beets have already lost much of their color-bleeding potential and will not give you that electric pink hue. Furthermore, raw beets provide a much better crunchy texture.
4. Can I make this recipe with less sugar?
Yes, you can reduce the sugar, but it will affect the final flavor profile, making the pickles much more tart and sour. The sugar plays the crucial role of balancing the vinegar’s acidity. If you want to reduce it, I suggest starting by cutting the amount by a quarter, tasting the brine, and adjusting from there. You can also use alternatives like maple syrup or honey, which will add their own distinct flavors.
5. Are these pickles fermented and do they contain probiotics?
This is a very common and important question. No, these pickles are not fermented and do not contain probiotics. These are “quick pickles” or “vinegar pickles,” which rely on the acidity of the vinegar to preserve them. Fermented foods (like sauerkraut or kimchi) are preserved through a process of lacto-fermentation, where beneficial bacteria (probiotics) break down sugars. While these pickles are not a source of probiotics, they are still a very healthy, low-calorie food packed with nutrients and fiber from the vegetables.
Beetroot Daikon Radish Pickled recipe
Ingredients
or the Vegetables:
-
1 medium daikon radish (about 1 pound), peeled – Look for a daikon that is firm to the touch, heavy for its size, and has smooth, unblemished skin.
-
1 small beetroot (about 3-4 ounces), peeled – A small beet is all you need to provide the magnificent color and a subtle earthy sweetness without overpowering the daikon.
For the Sweet and Sour Brine:
-
1 ½ cups rice vinegar – Rice vinegar is ideal for its mild, slightly sweet flavor that doesn’t overpower the vegetables. Apple cider vinegar or white vinegar can be substituted.
-
1 cup water
-
½ cup granulated sugar – This balances the acidity of the vinegar. You can adjust the amount to your personal preference.
-
2 tablespoons kosher salt or sea salt – It is crucial to use non-iodized salt. Iodized table salt can make the pickling liquid cloudy and impart a bitter flavor.
Optional Aromatics for Extra Flavor:
-
1-inch piece of ginger, peeled and thinly sliced – Adds a warm, zesty spice.
-
1-2 cloves garlic, peeled and smashed – For a subtle, savory depth.
-
1 teaspoon black peppercorns – Provides a gentle, lingering heat.
-
1 star anise – Lends a beautiful, subtle licorice-like aroma.
Instructions
Step 1: Prepare the Vegetables
-
Peel: Use a vegetable peeler to peel both the daikon radish and the beetroot. Be mindful that the beetroot will stain everything it touches! You may want to wear gloves for this step to avoid pink fingers.
-
Julienne: The goal is to cut the vegetables into thin, uniform matchsticks. A mandoline slicer with a julienne blade is the fastest and most effective tool for this, creating perfectly even pieces. If you don’t have a mandoline, you can do it by hand with a sharp knife. First, slice the vegetables into thin planks, then stack the planks and slice them into thin matchsticks. Uniformity is key for a consistent texture.
Step 2: Prepare Your Jar
-
Wash a 1-quart glass jar and its lid thoroughly with hot, soapy water and rinse well. Make sure it is completely clean. Since these are refrigerator pickles and not meant for long-term shelf storage, full sterilization is not strictly necessary, but cleanliness is essential.
Step 3: Make the Pickling Brine
-
In a medium, non-reactive saucepan (such as stainless steel or enamel), combine the rice vinegar, water, sugar, and salt.
-
Heat the mixture over medium heat, stirring occasionally, just until the sugar and salt have completely dissolved. You do not need to bring it to a rolling boil.
-
Once the solids are dissolved, remove the brine from the heat.
Step 4: Pack the Jar and Pickle!
-
Place your optional aromatics (sliced ginger, smashed garlic, peppercorns, star anise) at the bottom of the clean jar.
-
Tightly pack the julienned daikon radish and beetroot into the jar. Mix them together as you pack them in to ensure the color distributes evenly. Pack them in as tightly as you can without crushing them.
-
Carefully pour the warm brine over the vegetables in the jar until they are completely submerged. You may have a little extra brine, which you can discard.
-
Gently tap the jar on the counter a few times to release any trapped air bubbles.
Step 5: Cool, Seal, and Refrigerate
-
Let the jar cool to room temperature on your countertop, which will take about an hour.
-
Once cool, seal the jar with its lid and place it in the refrigerator.
-
The pickles will be ready to eat in as little as 12 hours, but they are at their absolute best after chilling for 2-3 days. This allows the flavors to fully meld and the color to deepen into its iconic vibrant pink.
Nutrition
- Serving Size: one normal portion
- Calories: 25-35 kcal


