

Of all the culinary challenges I embrace throughout the year, nothing gets my creative gears turning quite like planning a Halloween party menu. The pressure is on to create something that is not only delicious but also fits the spooky, fun-filled theme of the night. For years, I cycled through the usual suspects: mummy-wrapped hot dogs, spiderweb seven-layer dip, and eyeball-themed cake pops. They were cute, but they weren’t showstoppers. I wanted a centerpiece dish that adults would crave, something with real, grown-up flavor that still screamed Halloween. The idea struck me like a lightning bolt in a haunted castle: Bat Wings. The name alone was perfect. But they couldn’t just be regular wings dyed black with food coloring—that felt like a cheat. They needed to earn their name through their flavor. This led me down the rabbit hole of blackening seasoning. The first time I tested this recipe, the aroma that filled my kitchen was intoxicating—a smoky, spicy, savory cloud of pure magic. When I pulled the first batch from the oven, they were magnificent. The wings were a deep, dark, almost-black mahogany, with a craggy, crispy-looking crust. My husband, the official taste-tester, was hesitant at first. “Are they… burnt?” he asked. I handed him one. The crunch was audible, followed by a moment of silence, and then, “Wow. That’s incredible.” He was right. The exterior was intensely flavorful and crispy, but the meat inside was perfectly juicy and tender. They were an absolute sensation at that year’s party. People hovered over the platter, devouring them by the dozen, marveling at the complex flavor. Now, these Spicy Blackened “Bat Wings” are the undisputed star of our annual Halloween bash, the legendary dish people start asking about in September.
The Ultimate “Bat Wings” (Spicy Blackened Chicken Wings) Recipe
This recipe is engineered for maximum flavor and an unbelievably crispy skin, all without a deep fryer. The magic lies in the homemade blackened seasoning and a specific baking technique that renders the fat and dehydrates the skin to crackling perfection.
Complete List of Ingredients
This recipe yields approximately 4-5 appetizer servings or 2-3 main course servings. It can easily be doubled or tripled for a larger crowd.
For the Chicken Wings:
- 3 lbs Chicken Wings: Use “party style” wings, which are already separated into drumettes and flats (wingettes), with the tips discarded. This saves you a step and they are easier to eat.
- 1 tablespoon Baking Powder (NOT baking soda): This is the non-negotiable secret ingredient for crispy oven-baked wings. The baking powder raises the pH of the chicken skin, which helps break down the proteins more efficiently and encourages browning, resulting in an exceptionally crisp and blistered skin.
- 1 tablespoon Avocado Oil or other high-smoke-point oil: This helps the seasoning adhere and promotes even browning under the broiler.
For the Homemade Blackened Seasoning:
- 3 tablespoons Smoked Paprika: This is the backbone of the seasoning, providing a deep, smoky flavor and the essential dark red color that will turn “black” when cooked. Do not substitute with sweet or hot paprika.
- 1 tablespoon Cayenne Pepper: This brings the heat! You can adjust this amount to your personal spice tolerance. Start with 2 teaspoons for medium heat or increase to 1 ½ tablespoons for a serious kick.
- 1 tablespoon Garlic Powder: For a savory, aromatic base.
- 1 tablespoon Onion Powder: Complements the garlic powder and adds another layer of savory depth.
- 2 teaspoons Dried Thyme: Adds a classic, earthy, herbal note common in Cajun and Creole cooking.
- 1 teaspoon Dried Oregano: Provides a slightly peppery, pungent herbal flavor.
- 2 teaspoons Freshly Ground Black Pepper: Freshly ground pepper offers a much more potent and complex flavor than pre-ground.
- 2 teaspoons Kosher Salt: Essential for bringing all the flavors to life.
- 1 teaspoon Brown Sugar (Optional but highly recommended): This small amount of sugar doesn’t make the wings sweet. Instead, it perfectly balances the intense savory and spicy notes and, crucially, helps the spices caramelize and darken under heat, contributing to the “blackened” effect.
Detailed Step-by-Step Instructions for Making Bat Wings
Follow these steps meticulously for wings that are crispy, juicy, and packed with flavor.
Step 1: Prepare Your Oven and Baking Sheet
Position a rack in the center of your oven and preheat it to 425°F (220°C). Line a large, rimmed baking sheet with aluminum foil for easy cleanup. Place an oven-safe wire rack on top of the foil-lined sheet. This setup is critical. Baking the wings on a wire rack allows hot air to circulate all around each wing, which is essential for rendering the fat and getting the skin on all sides uniformly crispy.
Step 2: Dry the Chicken Wings Thoroughly
This is arguably the most important step for achieving crispy skin. Place the chicken wings in a single layer on a tray or plate lined with paper towels. Use additional paper towels to pat each wing completely dry. Moisture is the enemy of crispiness, so be as thorough as possible.
Step 3: Make the Blackened Seasoning Blend
In a small bowl, combine all the seasoning ingredients: the smoked paprika, cayenne pepper, garlic powder, onion powder, dried thyme, dried oregano, black pepper, kosher salt, and the optional brown sugar. Whisk them together until the mixture is uniform in color and completely combined.
Step 4: The Two-Stage Coating Process
Place the thoroughly dried wings into a large mixing bowl. First, sprinkle the 1 tablespoon of baking powder over the wings. Toss the wings with tongs or your hands until they are evenly and lightly coated. Next, sprinkle about three-quarters of your prepared blackened seasoning mixture over the wings. Drizzle with the 1 tablespoon of oil. Toss again, very thoroughly, until every single wing is completely coated in the dark red spice blend. The oil will help it stick and form a pasty coating.
Step 5: Arrange and Bake
Arrange the seasoned wings in a single layer on the prepared wire rack, making sure they are not touching each other. Leaving space between the wings allows them to cook evenly and prevents them from steaming. Place the baking sheet in the preheated oven and bake for 20 minutes.
Step 6: Flip for Even Crisping
After 20 minutes, remove the baking sheet from the oven. Using tongs, carefully flip each wing over. They should already be starting to brown and crisp up. Place them back in the oven and continue to bake for another 15-20 minutes.
Step 7: The Final “Blackening” Broil
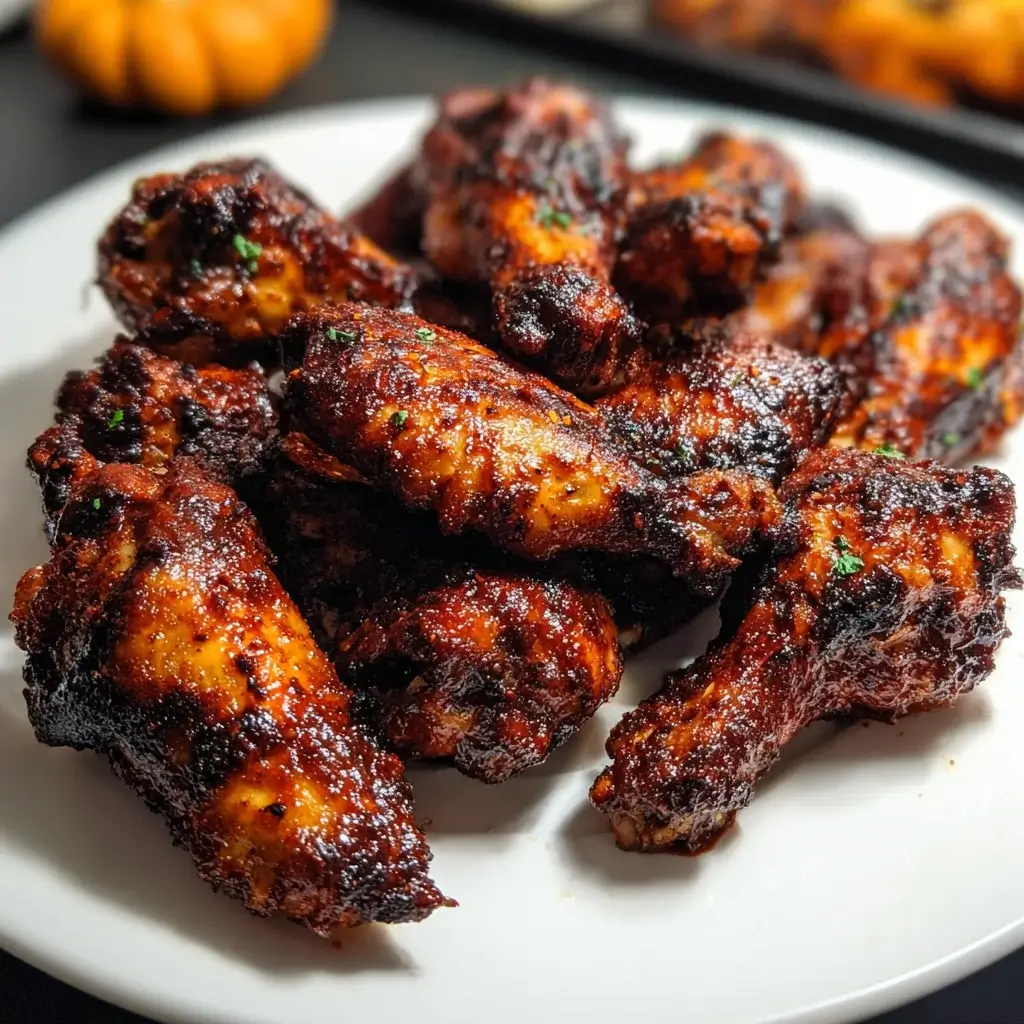
After the second bake, the wings should be cooked through and crispy. Now it’s time for the final touch that makes them “Bat Wings.” Turn your oven’s broiler on high. Move the oven rack so it is about 6-8 inches from the broiler element. Broil the wings for 2-4 minutes, watching them like a hawk. The spices and sugars will caramelize and darken rapidly, creating that signature blackened crust. You are looking for a deep mahogany or dark brown color, not burnt black. This step requires your full attention as the wings can go from perfectly blackened to burnt in a matter of seconds.
Step 8: Rest and Serve
Carefully remove the wings from the oven. Let them rest on the wire rack for 5-10 minutes. This allows the juices inside to redistribute, ensuring the meat is as moist as possible, and allows the crust to set. Serve hot with your favorite dipping sauces.
Nutrition Facts
Please note these are estimates. The final values will depend on the size of your wings and the specific brands of ingredients used. This calculation does not include any dipping sauces.
- Servings: Approximately 5 appetizer-sized servings
- Calories Per Serving: Approximately 450-500 kcal
Nutritional Highlights: While certainly an indulgence, these wings are a good source of protein. Baking them on a wire rack allows a significant amount of fat to render out and drip away, making them a healthier alternative to their deep-fried counterparts.
Preparation Time
- Active Preparation Time: 15 minutes
- Baking & Broiling Time: 45-50 minutes
- Resting Time: 5-10 minutes
- Total Time: Approximately 1 hour and 10 minutes
How to Serve Your Spicy Blackened Bat Wings
Presentation is key for a themed party! Here’s how to serve these wings to maximize their spooky appeal and deliciousness.
- Create a Spooky Platter:
- Arrange the dark, crispy wings on a black or dark grey platter to enhance their “bat wing” appearance.
- Garnish with thinly sliced red chiles or a sprinkle of bright green chopped cilantro or parsley for a shocking color contrast.
- For the ultimate effect, carefully place a small bowl of dry ice with a little warm water on the platter. The resulting fog will swirl around the wings, creating a dramatic, eerie presentation.
- Offer Cooling Dipping Sauces: The intense spice of the wings begs for a cool, creamy dipping sauce to balance the heat. Serve a variety to please all your guests.
- Ghoulish Green Goddess Dip: A vibrant green dip made from blending avocado, Greek yogurt, cilantro, parsley, lime juice, and a touch of garlic.
- Bloody Good Ranch: A classic homemade ranch dressing with a swirl of sriracha or a few drops of red food coloring to give it a “bloody” look.
- Phantom Blue Cheese: The quintessential wing pairing. A chunky, tangy blue cheese dip is the perfect counterpoint to the spicy, smoky flavor of the wings.
- Simple Sour Cream & Chive: A simple, cooling dip that lets the flavor of the wings shine.
- Classic Wing Accompaniments:
- Serve with ice-cold, crunchy celery and carrot sticks on the side. The cool crunch is incredibly refreshing between spicy bites.
- Offer plenty of napkins!
- Perfect Party Pairings:
- These wings are fantastic alongside other savory appetizers. They pair well with a dark pumpernickel bread and a sharp cheddar cheese spread.
- For drinks, a cold, crisp lager or a hoppy IPA beer is the perfect beverage to cut through the richness and spice. A slightly sweet cider also works wonderfully.
5 Additional Tips for Wing Perfection
Elevate your wing game with these expert tips.
- The Ultimate Crispy Skin Secret (Revisited): The Overnight Dry Brine. If you have the time and want to guarantee the crispiest wings of your life, try an overnight dry brine. After patting the wings dry (Step 2), toss them with the baking powder and salt only. Arrange them on the wire rack over the baking sheet and place them in the refrigerator, uncovered, for at least 8 hours or up to 24 hours. This process draws out even more moisture from the skin, leaving it incredibly dry and ready to crisp up beautifully. When you’re ready to bake, toss them with the remaining spices and oil and proceed with the recipe.
- Air Fryer Instructions for “Bat Wings.” These wings are phenomenal in an air fryer. To adapt the recipe, preheat your air fryer to 400°F (200°C). Prepare the wings exactly as described through Step 4. Place the wings in the air fryer basket in a single layer (you will likely need to cook in two batches). Air fry for 10 minutes, then shake the basket or flip the wings and cook for another 8-10 minutes, or until the wings are cooked through and crispy. You may not need the final broiling step as the air fryer does an excellent job of crisping and darkening the seasoning.
- Mastering the Spice Level. The blackened seasoning is meant to be bold. However, you can easily customize it. For less heat, reduce the cayenne pepper to 1-2 teaspoons. For a different kind of smoky heat, substitute half of the cayenne with an equal amount of chipotle powder. For a purely smoky wing with minimal heat, omit the cayenne entirely and use an extra tablespoon of smoked paprika. Always taste your seasoning blend before coating the chicken.
- Make the Blackened Seasoning in Bulk. This seasoning blend is incredibly versatile and delicious on chicken breasts, fish (especially salmon or catfish), shrimp, and even roasted potatoes. Triple or quadruple the seasoning recipe and store it in an airtight jar in your pantry for up to 6 months. Having it on hand makes this recipe (and many others) even faster to prepare.
- Don’t Sauce These Wings! Unlike traditional Buffalo wings that are tossed in a wet sauce after cooking, these wings are a “dry rub” style wing. Their incredible flavor and crispy texture come from the seasoning that’s cooked directly onto the skin. Drowning them in a sauce would hide the beautiful blackened crust and make the skin soggy. Serve all sauces on the side for dipping.
Frequently Asked Questions (FAQ)
Q1: My wings look dark. Are they burnt or is that how they should be?
A: This is the most common question! They are “blackened,” not burnt. The term “blackened” in cooking refers to a specific technique where food is coated in a spice mixture and cooked at a high heat. The spices, particularly the paprika and a touch of sugar, toast and caramelize, creating a dark, intensely flavorful crust. A burnt wing would taste acrid, bitter, and like carbon. A properly blackened wing tastes smoky, spicy, and deeply savory. As long as you watch them carefully under the broiler, you will achieve the perfect blackened crust, not a burnt one.
Q2: Can I make these wings on the grill?
A: Yes, grilling is an excellent method that adds even more smoky flavor. Set up your grill for two-zone cooking (one side with direct high heat, one side with indirect heat). Start the wings on the indirect heat side, cover the grill, and cook for about 20-25 minutes, flipping once. Then, move them to the direct-heat side for a few minutes per side to crisp up and char slightly, watching carefully to get that blackened effect without burning them.
Q3: How do I store and reheat leftover “Bat Wings”?
A: Store any leftover wings in an airtight container in the refrigerator for up to 3-4 days. The key to reheating is to get the skin crispy again. The microwave will make them soggy, so avoid it. For best results, reheat them in an oven or toaster oven at 375°F (190°C) for 10-15 minutes, or in an air fryer at 375°F (190°C) for 4-6 minutes, until they are heated through and the skin has re-crisped.
Q4: Can I prepare these wings ahead of time for a party?
A: Yes, you can do most of the prep in advance. You can mix the spice blend days or weeks ahead. You can also season the wings (as per Step 4) up to 4 hours before you plan to bake them. Keep them covered in the refrigerator until you’re ready to cook. For the best results (hot and crispy wings), it’s highly recommended to bake them fresh just before your guests arrive.
Q5: I’m all out of baking powder. Is there a substitute?
A: While baking powder is truly the superior ingredient for this task due to its chemical properties, if you’re in a pinch, you can try substituting it with an equal amount of cornstarch. Cornstarch helps to absorb moisture and create a dry surface, which will aid in crisping, but it won’t provide the same bubbly, blistered, crackly texture that baking powder does. Do NOT use baking soda, as it can leave a distinct metallic or soapy taste.

Bat Wings (Spicy Blackened Chicken Wings) recipe
Ingredients
For the Chicken Wings:
-
3 lbs Chicken Wings: Use “party style” wings, which are already separated into drumettes and flats (wingettes), with the tips discarded. This saves you a step and they are easier to eat.
-
1 tablespoon Baking Powder (NOT baking soda): This is the non-negotiable secret ingredient for crispy oven-baked wings. The baking powder raises the pH of the chicken skin, which helps break down the proteins more efficiently and encourages browning, resulting in an exceptionally crisp and blistered skin.
-
1 tablespoon Avocado Oil or other high-smoke-point oil: This helps the seasoning adhere and promotes even browning under the broiler.
For the Homemade Blackened Seasoning:
-
3 tablespoons Smoked Paprika: This is the backbone of the seasoning, providing a deep, smoky flavor and the essential dark red color that will turn “black” when cooked. Do not substitute with sweet or hot paprika.
-
1 tablespoon Cayenne Pepper: This brings the heat! You can adjust this amount to your personal spice tolerance. Start with 2 teaspoons for medium heat or increase to 1 ½ tablespoons for a serious kick.
-
1 tablespoon Garlic Powder: For a savory, aromatic base.
-
1 tablespoon Onion Powder: Complements the garlic powder and adds another layer of savory depth.
-
2 teaspoons Dried Thyme: Adds a classic, earthy, herbal note common in Cajun and Creole cooking.
-
1 teaspoon Dried Oregano: Provides a slightly peppery, pungent herbal flavor.
-
2 teaspoons Freshly Ground Black Pepper: Freshly ground pepper offers a much more potent and complex flavor than pre-ground.
-
2 teaspoons Kosher Salt: Essential for bringing all the flavors to life.
-
1 teaspoon Brown Sugar (Optional but highly recommended): This small amount of sugar doesn’t make the wings sweet. Instead, it perfectly balances the intense savory and spicy notes and, crucially, helps the spices caramelize and darken under heat, contributing to the “blackened” effect.
Instructions
Step 1: Prepare Your Oven and Baking Sheet
Position a rack in the center of your oven and preheat it to 425°F (220°C). Line a large, rimmed baking sheet with aluminum foil for easy cleanup. Place an oven-safe wire rack on top of the foil-lined sheet. This setup is critical. Baking the wings on a wire rack allows hot air to circulate all around each wing, which is essential for rendering the fat and getting the skin on all sides uniformly crispy.
Step 2: Dry the Chicken Wings Thoroughly
This is arguably the most important step for achieving crispy skin. Place the chicken wings in a single layer on a tray or plate lined with paper towels. Use additional paper towels to pat each wing completely dry. Moisture is the enemy of crispiness, so be as thorough as possible.
Step 3: Make the Blackened Seasoning Blend
In a small bowl, combine all the seasoning ingredients: the smoked paprika, cayenne pepper, garlic powder, onion powder, dried thyme, dried oregano, black pepper, kosher salt, and the optional brown sugar. Whisk them together until the mixture is uniform in color and completely combined.
Step 4: The Two-Stage Coating Process
Place the thoroughly dried wings into a large mixing bowl. First, sprinkle the 1 tablespoon of baking powder over the wings. Toss the wings with tongs or your hands until they are evenly and lightly coated. Next, sprinkle about three-quarters of your prepared blackened seasoning mixture over the wings. Drizzle with the 1 tablespoon of oil. Toss again, very thoroughly, until every single wing is completely coated in the dark red spice blend. The oil will help it stick and form a pasty coating.
Step 5: Arrange and Bake
Arrange the seasoned wings in a single layer on the prepared wire rack, making sure they are not touching each other. Leaving space between the wings allows them to cook evenly and prevents them from steaming. Place the baking sheet in the preheated oven and bake for 20 minutes.
Step 6: Flip for Even Crisping
After 20 minutes, remove the baking sheet from the oven. Using tongs, carefully flip each wing over. They should already be starting to brown and crisp up. Place them back in the oven and continue to bake for another 15-20 minutes.
Step 7: The Final “Blackening” Broil
After the second bake, the wings should be cooked through and crispy. Now it’s time for the final touch that makes them “Bat Wings.” Turn your oven’s broiler on high. Move the oven rack so it is about 6-8 inches from the broiler element. Broil the wings for 2-4 minutes, watching them like a hawk. The spices and sugars will caramelize and darken rapidly, creating that signature blackened crust. You are looking for a deep mahogany or dark brown color, not burnt black. This step requires your full attention as the wings can go from perfectly blackened to burnt in a matter of seconds.
Step 8: Rest and Serve
Carefully remove the wings from the oven. Let them rest on the wire rack for 5-10 minutes. This allows the juices inside to redistribute, ensuring the meat is as moist as possible, and allows the crust to set. Serve hot with your favorite dipping sauces.
Nutrition
- Serving Size: one normal portion
- Calories: 450-500


