

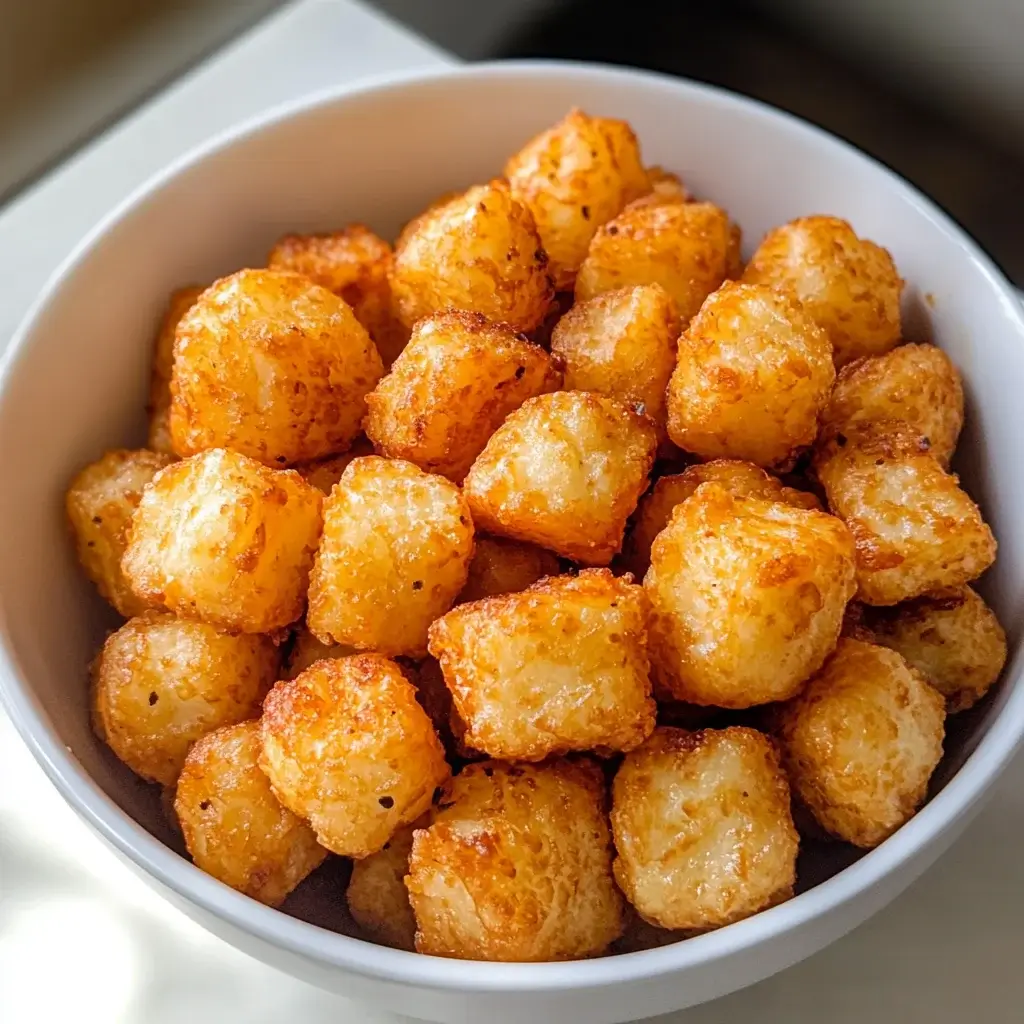

I have a confession to make. For years, I was living in a state of tater tot mediocrity. I’d bake them in the oven, following the package directions with hopeful optimism, only to be met with disappointment. They were often a mixed bag—some were passably crisp on the edges, while others remained stubbornly soft, pale shadows of the crunchy, golden gems I craved. Then the air fryer entered my life. The very first thing I cooked in it was a batch of frozen tater tots, and the result was nothing short of a culinary epiphany. As I pulled out the basket, I was greeted by a treasure trove of perfectly uniform, deeply golden-brown nuggets, sizzling and crackling with promise. The first bite was a revelation—a loud, satisfying crunch giving way to a fluffy, steaming potato interior. It was the tater tot of my childhood dreams, realized in my own kitchen in under 15 minutes. My family devoured them, and the sound of that collective, happy crunching has since become the official soundtrack to our movie nights, game days, and quick weeknight dinners.
The Air Fryer Tater Tot Revolution: Why It’s the Only Way
Before we get to the simple instructions, it’s worth understanding why the air fryer transforms these humble frozen potato puffs into something truly spectacular. It’s not just a kitchen gadget; it’s a crispy-texture machine, and it far surpasses other cooking methods for several scientific reasons.
The Oven’s Downfall: A conventional oven works by heating the air inside a large box. This process is slow and inefficient. The tots sit on a baking sheet, and the side facing down often steams in its own moisture, leading to the dreaded “soggy bottom” syndrome. Even with convection ovens, the sheer size of the cooking space means the heat isn’t as intense or direct.
The Deep Fryer’s Dilemma: Deep frying, of course, produces an incredibly crispy result. However, it comes with significant drawbacks. It requires a large amount of oil, which is expensive, messy, and adds a substantial amount of fat and calories. It’s also a hassle to set up, and the lingering smell of hot oil can permeate your house for days.
The Air Fryer’s Triumph: An air fryer is essentially a small, high-powered convection oven. Its compact size and powerful fan create a vortex of scorching hot air that circulates rapidly and evenly around each individual tater tot. This intense, dry heat does two things perfectly:
- Rapid Dehydration: It quickly evaporates any surface moisture (like ice crystals) from the frozen tots, which is the enemy of crispiness.
- Maillard Reaction on Overdrive: It promotes a fast and even Maillard reaction—the chemical process that gives browned food its distinctive, delicious flavor and deep golden color.
The perforated basket allows any excess oil from the tots themselves to drip away, preventing them from becoming greasy. The result is a tater tot that is significantly crispier than an oven-baked one and nearly indistinguishable from a deep-fried one, all while using little to no added oil and taking half the time. It is, without exaggeration, the perfect tool for the job.
Ingredients for Perfect Air Fryer Tater Tots
Simplicity is the soul of this recipe. You are just a few basic items away from crispy perfection.
- Tater Tots: 1 bag (16-32 oz) of your favorite frozen tater tots (classic cylinders, crowns, or puffs all work).
- Oil: 1-2 teaspoons of a high-smoke-point oil (like avocado, canola, or grapeseed oil) OR a non-aerosol cooking oil spray.
- Seasoning:
- ½ teaspoon salt (or to taste)
- ¼ teaspoon black pepper (optional)
- ¼ teaspoon garlic powder (optional, but recommended)
Step-by-Step Instructions for Ultimate Crispiness
The process is incredibly simple, but a few key details will take your tots from good to great.
Step 1: Preheat Your Air Fryer
This is a crucial first step. Preheating ensures the tots are hit with intense heat the moment they go in, kick-starting the crisping process immediately. Set your air fryer to 400°F (200°C) and let it preheat for 3-5 minutes.
Step 2: Lightly Oil the Tots (Optional but Recommended)
While many tots have oil in them, a very light coating helps guarantee an even, golden-brown crust and gives the seasonings something to cling to. Place the frozen tater tots in a bowl. Drizzle with the teaspoon of oil or give them a light, even coating with the cooking spray. Toss gently to coat. You don’t want them swimming in oil, just lightly glistening.
Step 3: Arrange Tots in the Air Fryer Basket
Pour the tater tots into the preheated air fryer basket. Arrange them in a single, even layer. This is the most important rule of air frying. The hot air needs to be able to circulate around each tot. If they are piled on top of each other, they will steam and become soggy. Cook in batches if necessary to maintain a single layer.
Step 4: Air Fry to Crispy Perfection
Cook at 400°F (200°C) for 12-18 minutes, shaking the basket vigorously halfway through the cooking time. The exact time will depend on the size and power of your air fryer and the type of tots you are using.
- For standard tots, start checking around the 12-minute mark.
- For extra-crispy tots, let them go for the full 15-18 minutes, or until they are a deep golden brown.
Step 5: Season and Serve Immediately
The moment the tots are done, transfer them to a mixing bowl. Immediately sprinkle with the salt, pepper, and garlic powder while they are still piping hot and slightly oily. Toss well to coat evenly. The heat and residual oil will help the seasonings adhere perfectly. Serve immediately for maximum crunch and enjoyment.
Nutrition Facts
Nutritional information will vary significantly based on the brand of tater tots used. This is a general estimate for a standard serving size.
- Servings: 4-8 (depending on bag size)
- Serving Size: Approximately 1 cup (about 85g)
- Calories per serving: Approximately 160-200 kcal
Preparation Time
This is one of the fastest and easiest snacks or side dishes you can make.
- Prep Time: 2 minutes
- Cook Time: 12-18 minutes
- Total Time: Under 20 minutes
Beyond Ketchup: Creative Ways to Serve Your Tater Tots
Perfectly crispy tater tots are a blank canvas for a world of flavor. Move beyond the ketchup bottle and elevate your tot game with these delicious ideas.
The Ultimate Dipping Sauce Bar
Set up a variety of sauces to turn a simple side into a fun, interactive experience.
- Spicy Sriracha Mayo: Mix ½ cup of mayonnaise with 1-2 tablespoons of Sriracha and a squeeze of lime juice.
- Creamy Garlic Aioli: Combine ½ cup of mayonnaise, 2 minced garlic cloves, 1 tablespoon of lemon juice, and a pinch of salt.
- Zesty “Fry Sauce”: A classic combination of equal parts ketchup and mayonnaise, with a dash of pickle relish or Worcestershire sauce.
- Honey Mustard: Whisk together ¼ cup of Dijon mustard, 2 tablespoons of honey, and 1 tablespoon of mayonnaise.
- Gourmet Truffle Ketchup: Simply stir a ¼ teaspoon of truffle oil into ½ cup of your favorite ketchup for an instant fancy upgrade.
Loaded “Totchos” (Tater Tot Nachos)
This is the ultimate comfort food creation.
- Air fry your tots until extra crispy.
- While still in the air fryer basket (or transferred to an oven-safe dish), immediately top with a generous amount of shredded cheddar or Monterey Jack cheese.
- Air fry for another 1-2 minutes, or just until the cheese is completely melted and bubbly.
- Carefully transfer the cheesy tots to a platter and top with your favorite nacho fixings:
- Crispy bacon bits
- A dollop of sour cream or Greek yogurt
- Sliced green onions or chives
- Diced jalapeños (fresh or pickled)
- A scoop of guacamole or diced avocado
As the Perfect Side Dish
Their crispy texture makes them a fantastic partner for a variety of main courses.
- Burgers and Sandwiches: The classic pairing for any juicy burger, grilled cheese, or hot dog.
- Fried Chicken: A perfect starchy complement to crispy fried or air-fried chicken.
- Breakfast for Dinner: Serve alongside scrambled eggs, bacon, and sausage.
- As a Base for a “Breakfast Poutine”: Top with a fried egg and sausage gravy for a decadent brunch dish.
Additional Tips for Foolproof Air Fryer Tots
- The Golden Rule: Do Not Overcrowd the Basket. This cannot be stressed enough. For maximum crispiness, the hot air needs to circulate freely around every single tot. If they are piled up, the ones in the middle will steam. Work in batches if your air fryer is small—it’s worth the extra few minutes.
- Shake, Shake, Shake. Shaking the basket vigorously halfway through the cooking process is essential. It redistributes the tots, ensuring that all sides are exposed to the direct heat, which leads to a more uniform and deeply golden-brown color.
- Cook from Frozen. Do not thaw your tater tots before air frying. Cooking them directly from their frozen state is what allows the outside to get super crispy while the inside stays soft and fluffy. Thawing them will lead to a mushy, undesirable texture.
- Season After Cooking. While you can lightly season them before, the best time to add salt and other powdered seasonings is immediately after they come out of the air fryer. They will be piping hot and have a very light film of oil on the surface, which acts like a glue, helping the seasonings to adhere perfectly.
- For “Extra, Extra Crispy” Tots, Go Longer. Don’t be afraid to push the cooking time. The times on the package are for oven baking. Air fryers are more powerful. If at 15 minutes they look good, try giving them another 2-3 minutes. They will go from golden brown to a deeper, richer brown with an even more satisfying crunch. Keep an eye on them so they don’t burn.
FAQ: Your Air Fryer Tater Tot Questions Answered
1. Why are my tater tots still soggy in the middle?
This is almost always due to overcrowding the basket. When the tots are packed too tightly, they trap steam, which prevents them from crisping up. Cook a smaller batch in a single layer, and you will see a dramatic difference. It could also mean they just need another 3-5 minutes of cooking time.
2. How do I get seasonings to stick better?
The key is to season them the second they come out of the air fryer while they are scorching hot. A very light spritz with a cooking oil spray just before seasoning can also help. For larger seasonings like flakes of rosemary or Parmesan cheese, toss the hot tots with a tiny bit of oil or melted butter first, then add the seasonings and toss again.
3. Can I use the air fryer for other frozen potato products?
Absolutely! The air fryer is fantastic for almost any frozen potato product. French fries (shoestring, crinkle-cut, steak fries), curly fries, sweet potato fries, and potato wedges all come out wonderfully crispy. Follow the same principles: preheat, single layer, and shake halfway through.
4. Why is my air fryer starting to smoke?
If you see white smoke, it’s likely because grease or food particles from a previous cooking session are burning on the heating element or in the bottom of the drawer. It’s important to keep your air fryer clean. If this happens while cooking tots, you can place a tablespoon or two of water in the drawer underneath the basket, which can help prevent any dripping oil from smoking.
5. What’s the real difference between tater tots, crowns, and puffs?
It all comes down to shape and surface area.
- Tots: The classic cylinder shape. A good balance of crispy exterior and fluffy interior.
- Crowns: Flat, round discs. They have a higher surface-area-to-volume ratio, which means they tend to get even crispier than classic tots.
- Puffs: Often slightly smaller and rounder. They cook quickly and are like little bites of crispy potato goodness.
All three work wonderfully in the air fryer, so the choice comes down to personal preference

Air Fryer Tater Tots recipe
Ingredients
- Tater Tots: 1 bag (16-32 oz) of your favorite frozen tater tots (classic cylinders, crowns, or puffs all work).
- Oil: 1-2 teaspoons of a high-smoke-point oil (like avocado, canola, or grapeseed oil) OR a non-aerosol cooking oil spray.
- Seasoning:
- ½ teaspoon salt (or to taste)
- ¼ teaspoon black pepper (optional)
- ¼ teaspoon garlic powder (optional, but recommended)
Instructions
Step 1: Preheat Your Air Fryer
This is a crucial first step. Preheating ensures the tots are hit with intense heat the moment they go in, kick-starting the crisping process immediately. Set your air fryer to 400°F (200°C) and let it preheat for 3-5 minutes.
Step 2: Lightly Oil the Tots (Optional but Recommended)
While many tots have oil in them, a very light coating helps guarantee an even, golden-brown crust and gives the seasonings something to cling to. Place the frozen tater tots in a bowl. Drizzle with the teaspoon of oil or give them a light, even coating with the cooking spray. Toss gently to coat. You don’t want them swimming in oil, just lightly glistening.
Step 3: Arrange Tots in the Air Fryer Basket
Pour the tater tots into the preheated air fryer basket. Arrange them in a single, even layer. This is the most important rule of air frying. The hot air needs to be able to circulate around each tot. If they are piled on top of each other, they will steam and become soggy. Cook in batches if necessary to maintain a single layer.
Step 4: Air Fry to Crispy Perfection
Cook at 400°F (200°C) for 12-18 minutes, shaking the basket vigorously halfway through the cooking time. The exact time will depend on the size and power of your air fryer and the type of tots you are using.
- For standard tots, start checking around the 12-minute mark.
- For extra-crispy tots, let them go for the full 15-18 minutes, or until they are a deep golden brown.
Step 5: Season and Serve Immediately
The moment the tots are done, transfer them to a mixing bowl. Immediately sprinkle with the salt, pepper, and garlic powder while they are still piping hot and slightly oily. Toss well to coat evenly. The heat and residual oil will help the seasonings adhere perfectly. Serve immediately for maximum crunch and enjoyment.
Nutrition
- Serving Size: one normal portion
- Calories: 160-200 kcal


