

Of all the snacks that have emerged from my air fryer, golden-brown and impossibly crunchy, none have captured my heart (and my family’s appetite) quite like homemade fried pickles. For years, I chased the dragon of that perfect restaurant-style fried pickle—the kind that delivers an audible crunch, followed by a burst of tangy, briny dill, all without being a greasy mess. My attempts at deep-frying were messy, and oven-baking never quite achieved that satisfying shatter. Then, the air fryer entered my life, and everything changed. The first time I pulled a basket of these pickles out, I knew I’d cracked the code. The kitchen filled with the savory scent of toasted panko and spices, not hot oil. My partner, a self-proclaimed fried pickle connoisseur, took one bite, his eyes widened, and he simply said, “You’ve done it. These are better than any bar’s.” My kids, who usually approach green things with suspicion, devoured them like potato chips, fighting over the last one and demanding to know when I was making them again. This recipe isn’t just a method for cooking pickles; it’s the key to unlocking a healthier, cleaner, and frankly, more delicious version of a beloved classic. It has become our go-to for game days, movie nights, and whenever we need a snack that feels like a true indulgence.
Why the Air Fryer is the Secret to Perfect Fried Pickles
Before we dive into the recipe itself, let’s discuss why the air fryer isn’t just an alternative method—it’s the superior method for making fried pickles at home. Traditional deep-frying, while effective, comes with a host of downsides: it uses a large amount of oil, creates a greasy final product, and can be a messy and hazardous process. Baking, on the other hand, often results in a soggy bottom and a coating that’s more toasted than truly fried and crispy.
The air fryer offers the best of both worlds, creating a “fried” texture with a minimal amount of oil. Here’s how it works its magic:
- Intense, Circulating Heat: An air fryer works like a super-powered convection oven. A powerful fan circulates extremely hot air at high speed around the food. This rapid air movement is what crisps up the panko breading on all sides simultaneously, creating an incredibly even and crunchy crust that rivals deep-frying.
- Less Oil, Less Grease: You only need a light spritz of cooking spray or a tiny drizzle of oil to encourage browning and crisping. This dramatically cuts down on the fat and calories compared to deep-frying, where the pickles are completely submerged in oil. The result is a snack that feels light and crisp, not heavy and greasy.
- Moisture Evaporation: The intense airflow is incredibly efficient at wicking away surface moisture from the breading. This is the key to preventing sogginess. It dehydrates the outer layer, allowing it to become brittle and crunchy while the pickle inside remains juicy and tangy.
- Speed and Convenience: An air fryer preheats in minutes, and the pickles cook in under 10 minutes per batch. There’s no waiting for a large pot of oil to come to temperature and no messy cleanup or oil disposal afterward. It’s a clean, efficient, and fast way to get from craving to crunch.
In essence, the air fryer provides the crunchy, golden-brown satisfaction of deep-frying without the guilt, mess, or excess fat, making it the undisputed champion for creating this irresistible snack at home.
The Complete Ingredients for Crispy Air Fryer Fried Pickles
The beauty of this recipe lies in its simplicity. You only need a handful of pantry staples to transform a humble jar of pickles into a show-stopping appetizer. Quality matters, so choose your favorite brand of pickles and fresh seasonings for the best results.
For the Fried Pickles:
- 1 (16-ounce) jar Dill Pickle Chips: Look for crinkle-cut chips if possible, as the ridges help the breading adhere better. Ensure they are well-chilled, as cold pickles hold their shape and crunch better.
- 1/2 cup (60g) All-Purpose Flour: This is the first layer of our dredge, and it’s essential for giving the egg wash something to cling to.
- 2 large Eggs: This acts as the binder, the “glue” that holds the crispy panko coating onto the pickle.
- 1 cup (100g) Panko Breadcrumbs: This is a non-negotiable ingredient! Panko breadcrumbs are lighter and flakier than traditional breadcrumbs, which allows them to absorb less oil and become significantly crispier.
- 1 teaspoon Smoked Paprika: Adds a beautiful color and a subtle smoky depth to the breading.
- 1/2 teaspoon Garlic Powder: For a savory, aromatic kick.
- 1/2 teaspoon Onion Powder: Complements the garlic powder and adds another layer of flavor.
- 1/4 teaspoon Cayenne Pepper (optional): For a gentle touch of background heat. Adjust to your preference.
- 1/4 teaspoon Black Pepper: For a classic bite.
- Cooking Spray or Oil Mister: Avocado oil or another high-smoke-point oil spray is perfect for this.
For the Zesty Dipping Sauce (Highly Recommended):
- 1/2 cup (120g) Mayonnaise or Vegan Mayo: The creamy base of our sauce.
- 1/4 cup (60g) Sour Cream or Plain Greek Yogurt: Adds a pleasant tang and lightens up the mayo.
- 1 tablespoon Ketchup: For a touch of sweetness and color.
- 1 teaspoon Worcestershire Sauce (or vegan alternative): Adds a deep, savory umami flavor.
- 1/2 teaspoon Hot Sauce (e.g., Tabasco or Frank’s RedHot): For a kick of heat.
- 1/2 teaspoon Paprika: Echoes the flavor in the breading.
- 1/4 teaspoon Garlic Powder: Ties the sauce flavors together.
- Pinch of Salt and Black Pepper: To taste.
Step-by-Step Instructions: Your Path to Pickle Perfection
Follow these steps precisely for a flawless batch of crispy fried pickles. The key to success is in the preparation and the dredging process. Don’t rush these steps!
Step 1: The All-Important Pickle Prep
This is the most crucial step for avoiding a soggy outcome. Open your jar of pickles and drain them thoroughly. Lay the pickle chips out in a single layer on a baking sheet lined with several layers of paper towels. Use more paper towels to press down firmly on the pickles, absorbing as much excess brine as possible. Let them sit and air dry for at least 10-15 minutes while you prepare the rest of your ingredients. The drier the pickle, the better the breading will stick.
Step 2: Set Up Your Breading Station
To make the breading process smooth and efficient, set up an assembly line with three shallow dishes or pie plates.
- Dish 1 (Flour): In the first dish, whisk together the all-purpose flour, black pepper, and a pinch of salt.
- Dish 2 (Egg): In the second dish, crack the two eggs and whisk them vigorously until they are smooth and no streaks of yolk or white remain.
- Dish 3 (Panko): In the third dish, combine the panko breadcrumbs, smoked paprika, garlic powder, onion powder, and cayenne pepper (if using). Mix well to ensure the spices are evenly distributed throughout the breadcrumbs.
Step 3: The Dredging Process
This is where the magic happens. To keep things clean, use the “wet hand, dry hand” method. Use your left hand for the wet ingredients (egg) and your right hand for the dry ingredients (flour and panko).
- Take a thoroughly dried pickle chip and dredge it in the seasoned flour mixture, tossing to coat it completely. Gently tap off any excess flour.
- Using your “dry hand,” transfer the flour-coated pickle to the egg wash dish. Using your “wet hand,” turn the pickle over in the egg, making sure it is fully submerged and coated.
- Lift the pickle out of the egg, allowing any excess to drip back into the dish. Transfer it to the panko mixture.
- Using your “dry hand,” scoop and press the panko breadcrumbs firmly onto all surfaces of the pickle chip. A thick, even coating is what you’re aiming for.
- Place the breaded pickle on a clean baking sheet or wire rack in a single layer. Repeat with the remaining pickles.
Step 4: Air Fry to Golden Perfection
Preheat your air fryer to 400°F (200°C) for 3-5 minutes. This ensures the cooking starts immediately, which helps set the crust quickly.
Once preheated, arrange the breaded pickles in a single layer in the air fryer basket. It is critical that you do not overcrowd the basket. The hot air needs to circulate around each pickle to make it crispy. Cook in batches if necessary.
Lightly spritz the tops of the pickles with cooking spray. This helps them turn a beautiful golden-brown and enhances the crunch.
Air fry for 7-9 minutes, flipping the pickles halfway through the cooking time and giving them another light spritz of oil. The pickles are done when they are deep golden-brown, crispy, and sizzling.
Step 5: Prepare the Sauce and Serve Immediately
While the pickles are in the air fryer, whip up the zesty dipping sauce. In a small bowl, combine all the sauce ingredients (mayonnaise, sour cream, ketchup, Worcestershire, hot sauce, paprika, garlic powder, salt, and pepper) and stir until smooth and well-combined.
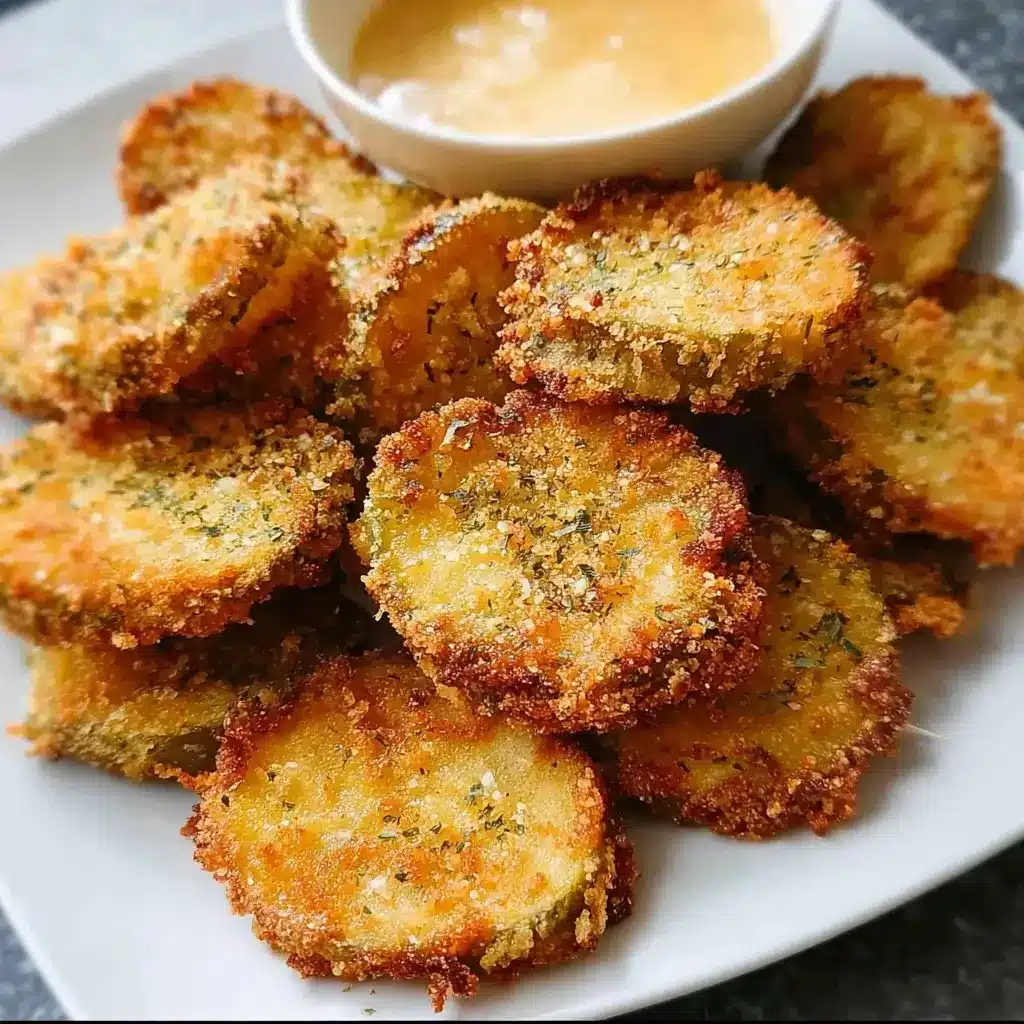
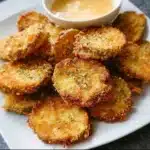
As soon as the pickles are done, transfer them to a serving platter. For the best experience, serve them piping hot with the cool, creamy dipping sauce on the side.
Nutrition Facts: A Lighter Indulgence
This air fryer version offers a significant reduction in fat and calories compared to its deep-fried counterpart, making it a much more sensible indulgence.
- Servings: This recipe makes approximately 4 appetizer-sized servings.
- Calories per Serving (approximate): 180-220 calories (pickles only, excluding dipping sauce). The dipping sauce will add approximately 100-150 calories per serving, depending on the amount used.
Quick and Easy: Preparation & Cooking Time
This is the perfect quick appetizer for unexpected guests or a sudden snack attack.
- Preparation Time: 20 minutes (includes drying pickles and breading)
- Cook Time: 8 minutes per batch (you may need 2-3 batches)
- Total Time: Approximately 35-45 minutes
How to Serve: Dips, Pairings, and Perfect Occasions
While fantastic on their own, these Air Fryer Fried Pickles truly shine when served with the right accompaniments and for the right event.
- The Ultimate Dipping Sauces:
- Zesty Ranch Dip: A classic for a reason. The creamy, herby flavor of ranch is the perfect cooling counterpoint to the tangy pickle.
- Cajun Remoulade: Mix mayonnaise with Creole mustard, horseradish, hot sauce, and finely chopped celery and green onions for a spicy, complex dip.
- Spicy Aioli: Simply mix mayonnaise with minced garlic, a squeeze of lemon juice, and a generous amount of sriracha or your favorite chili paste.
- Honey Mustard: A great option for those who prefer a sweet and tangy combination.
- Perfect Meal Pairings:
- Serve as an appetizer before a main course of juicy burgers or grilled chicken sandwiches.
- They make an incredible side dish for BBQ pulled pork or brisket.
- Pair them with a platter of chicken wings and celery sticks for the ultimate game day spread.
- Ideal Occasions:
- Game Day: The quintessential finger food for watching sports.
- Party Appetizer: Easy to make in batches and always a crowd-pleaser.
- Movie Night: A fun and crunchy alternative to popcorn.
- Happy Hour at Home: Serve alongside a cold beer or a crisp cocktail.
Additional Tips: 5 Secrets to the Crispiest Pickles Ever
Elevate your fried pickle game from good to unforgettable with these professional tips.
- The Dry Pickle Mandate: We’ve said it before, but it bears repeating: your pickles must be bone dry. Moisture is the enemy of a crispy crust. After patting them with paper towels, let them air dry for a few extra minutes. This tiny bit of patience pays off with a crust that stays firmly attached and shatters when you bite into it.
- Double-Dredge for an Extra-Thick Crust: If you are a true crunch fanatic, consider a double dredge. After the first coating of panko, briefly dip the pickle back into the egg wash and then back into the panko for a second time, pressing firmly. This creates an ultra-thick, super-crunchy shell.
- Chill Your Breaded Pickles: For a truly foolproof coating that will not fall off, place your breaded pickles on a baking sheet in the freezer for 10-15 minutes before air frying. This helps the breading set and adhere to the pickle, ensuring it stays put during the high-velocity cooking process.
- Don’t Skip the Oil Spritz: While the air fryer requires minimal oil, a light spritz is essential. It helps the panko toast evenly and develop that beautiful deep golden-brown color. Without it, the breading can sometimes look pale and dry, even when it’s fully cooked and crispy.
- Season Every Single Layer: Flavor is built in layers. Don’t just season the panko. Add a pinch of salt and pepper to your flour mixture as well. This ensures that every component of the breading is flavorful, leading to a much more delicious and well-rounded final product.
Frequently Asked Questions (FAQ)
1. Can I use pickle spears instead of chips?
Yes, you absolutely can! Pickle spears make for a heartier, more substantial fried pickle. The process is the same, but you will need to increase the air frying time. Start with 10-12 minutes at 400°F (200°C), flipping halfway, and add a few more minutes if they aren’t golden and crispy enough.
2. My breading keeps falling off. What am I doing wrong?
This is the most common issue, and it almost always comes down to two things: moisture or a weak dredge. First, ensure your pickles are patted extremely dry. Second, make sure you get a complete and even coating at each station—fully coated in flour, then fully coated in egg, then firmly pressed into the panko. Finally, don’t move the pickles around too much during the first few minutes of cooking, as this is when the crust is setting.
3. How can I make these gluten-free?
It’s very easy to adapt this recipe to be gluten-free. Simply substitute the all-purpose flour with a gluten-free all-purpose blend (like one from Bob’s Red Mill or King Arthur) and use gluten-free panko breadcrumbs, which are now widely available in most grocery stores. The results will be just as crispy and delicious.
4. Can I make these vegan?
Yes! To make a vegan version, you’ll need to create a vegan “egg” wash. The best method is to whisk together 1/2 cup of unsweetened plant-based milk (like almond or soy) with 2 tablespoons of all-purpose flour or cornstarch until smooth. Use this mixture in place of the whisked eggs. Also, ensure your dipping sauce is made with a vegan mayonnaise.
5. How do I reheat leftovers to make them crispy again?
While fried pickles are undeniably best when eaten fresh, you can revive leftovers. Do not use the microwave, as it will make them hopelessly soggy. The best way is to preheat your air fryer to 375°F (190°C) and cook the leftover pickles for 2-4 minutes, or until they are heated through and the crust is crispy again.
Air Fryer Fried Pickles recipe
Ingredients
For the Fried Pickles:
-
1 (16-ounce) jar Dill Pickle Chips: Look for crinkle-cut chips if possible, as the ridges help the breading adhere better. Ensure they are well-chilled, as cold pickles hold their shape and crunch better.
-
1/2 cup (60g) All-Purpose Flour: This is the first layer of our dredge, and it’s essential for giving the egg wash something to cling to.
-
2 large Eggs: This acts as the binder, the “glue” that holds the crispy panko coating onto the pickle.
-
1 cup (100g) Panko Breadcrumbs: This is a non-negotiable ingredient! Panko breadcrumbs are lighter and flakier than traditional breadcrumbs, which allows them to absorb less oil and become significantly crispier.
-
1 teaspoon Smoked Paprika: Adds a beautiful color and a subtle smoky depth to the breading.
-
1/2 teaspoon Garlic Powder: For a savory, aromatic kick.
-
1/2 teaspoon Onion Powder: Complements the garlic powder and adds another layer of flavor.
-
1/4 teaspoon Cayenne Pepper (optional): For a gentle touch of background heat. Adjust to your preference.
-
1/4 teaspoon Black Pepper: For a classic bite.
-
Cooking Spray or Oil Mister: Avocado oil or another high-smoke-point oil spray is perfect for this.
For the Zesty Dipping Sauce (Highly Recommended):
-
1/2 cup (120g) Mayonnaise or Vegan Mayo: The creamy base of our sauce.
-
1/4 cup (60g) Sour Cream or Plain Greek Yogurt: Adds a pleasant tang and lightens up the mayo.
-
1 tablespoon Ketchup: For a touch of sweetness and color.
-
1 teaspoon Worcestershire Sauce (or vegan alternative): Adds a deep, savory umami flavor.
-
1/2 teaspoon Hot Sauce (e.g., Tabasco or Frank’s RedHot): For a kick of heat.
-
1/2 teaspoon Paprika: Echoes the flavor in the breading.
-
1/4 teaspoon Garlic Powder: Ties the sauce flavors together.
-
Pinch of Salt and Black Pepper: To taste.
Instructions
Step 1: The All-Important Pickle Prep
This is the most crucial step for avoiding a soggy outcome. Open your jar of pickles and drain them thoroughly. Lay the pickle chips out in a single layer on a baking sheet lined with several layers of paper towels. Use more paper towels to press down firmly on the pickles, absorbing as much excess brine as possible. Let them sit and air dry for at least 10-15 minutes while you prepare the rest of your ingredients. The drier the pickle, the better the breading will stick.
Step 2: Set Up Your Breading Station
To make the breading process smooth and efficient, set up an assembly line with three shallow dishes or pie plates.
-
Dish 1 (Flour): In the first dish, whisk together the all-purpose flour, black pepper, and a pinch of salt.
-
Dish 2 (Egg): In the second dish, crack the two eggs and whisk them vigorously until they are smooth and no streaks of yolk or white remain.
-
Dish 3 (Panko): In the third dish, combine the panko breadcrumbs, smoked paprika, garlic powder, onion powder, and cayenne pepper (if using). Mix well to ensure the spices are evenly distributed throughout the breadcrumbs.
Step 3: The Dredging Process
This is where the magic happens. To keep things clean, use the “wet hand, dry hand” method. Use your left hand for the wet ingredients (egg) and your right hand for the dry ingredients (flour and panko).
-
Take a thoroughly dried pickle chip and dredge it in the seasoned flour mixture, tossing to coat it completely. Gently tap off any excess flour.
-
Using your “dry hand,” transfer the flour-coated pickle to the egg wash dish. Using your “wet hand,” turn the pickle over in the egg, making sure it is fully submerged and coated.
-
Lift the pickle out of the egg, allowing any excess to drip back into the dish. Transfer it to the panko mixture.
-
Using your “dry hand,” scoop and press the panko breadcrumbs firmly onto all surfaces of the pickle chip. A thick, even coating is what you’re aiming for.
-
Place the breaded pickle on a clean baking sheet or wire rack in a single layer. Repeat with the remaining pickles.
Step 4: Air Fry to Golden Perfection
Preheat your air fryer to 400°F (200°C) for 3-5 minutes. This ensures the cooking starts immediately, which helps set the crust quickly.
Once preheated, arrange the breaded pickles in a single layer in the air fryer basket. It is critical that you do not overcrowd the basket. The hot air needs to circulate around each pickle to make it crispy. Cook in batches if necessary.
Lightly spritz the tops of the pickles with cooking spray. This helps them turn a beautiful golden-brown and enhances the crunch.
Air fry for 7-9 minutes, flipping the pickles halfway through the cooking time and giving them another light spritz of oil. The pickles are done when they are deep golden-brown, crispy, and sizzling.
Step 5: Prepare the Sauce and Serve Immediately
While the pickles are in the air fryer, whip up the zesty dipping sauce. In a small bowl, combine all the sauce ingredients (mayonnaise, sour cream, ketchup, Worcestershire, hot sauce, paprika, garlic powder, salt, and pepper) and stir until smooth and well-combined.
As soon as the pickles are done, transfer them to a serving platter. For the best experience, serve them piping hot with the cool, creamy dipping sauce on the side.
Nutrition
- Serving Size: one normal portion
- Calories: 180-220


