

There’s a specific sound that signifies pure, unadulterated snack satisfaction: the sharp, resonant crunch of a perfect potato chip. For years, I believed that sound was the exclusive domain of multi-billion dollar snack corporations. My own attempts at homemade chips were either greasy, flimsy disappointments from a pot of oil or sad, leathery discs from the oven. I had all but given up, resigning myself to the crinkly bag from the grocery store. Then, the air fryer entered my kitchen, and with it, a renewed sense of hope. My first batch was a learning experience, but by the third, I had unlocked the code. The moment I pulled that basket out, shaking a pile of impossibly golden, paper-thin potato slices, I knew I had stumbled onto something special. They were so light, so crispy, and when I took that first bite, the resulting CRUNCH echoed through the kitchen. My kids came running. We devoured the entire batch standing around the counter, marveling at how something made with just potatoes, a teaspoon of oil, and a sprinkle of salt could taste so profoundly delicious and satisfying. This recipe isn’t just about making a healthier snack; it’s about reclaiming one of life’s simple pleasures and making it infinitely better, right in your own home.
The Magic of Homemade Air Fryer Chips
Before we get to the recipe, let’s break down why making chips in an air fryer is a culinary revelation. This isn’t just a novelty; it’s a fundamentally superior way to create this iconic snack, transforming it from a guilty pleasure into a wholesome, customizable treat.
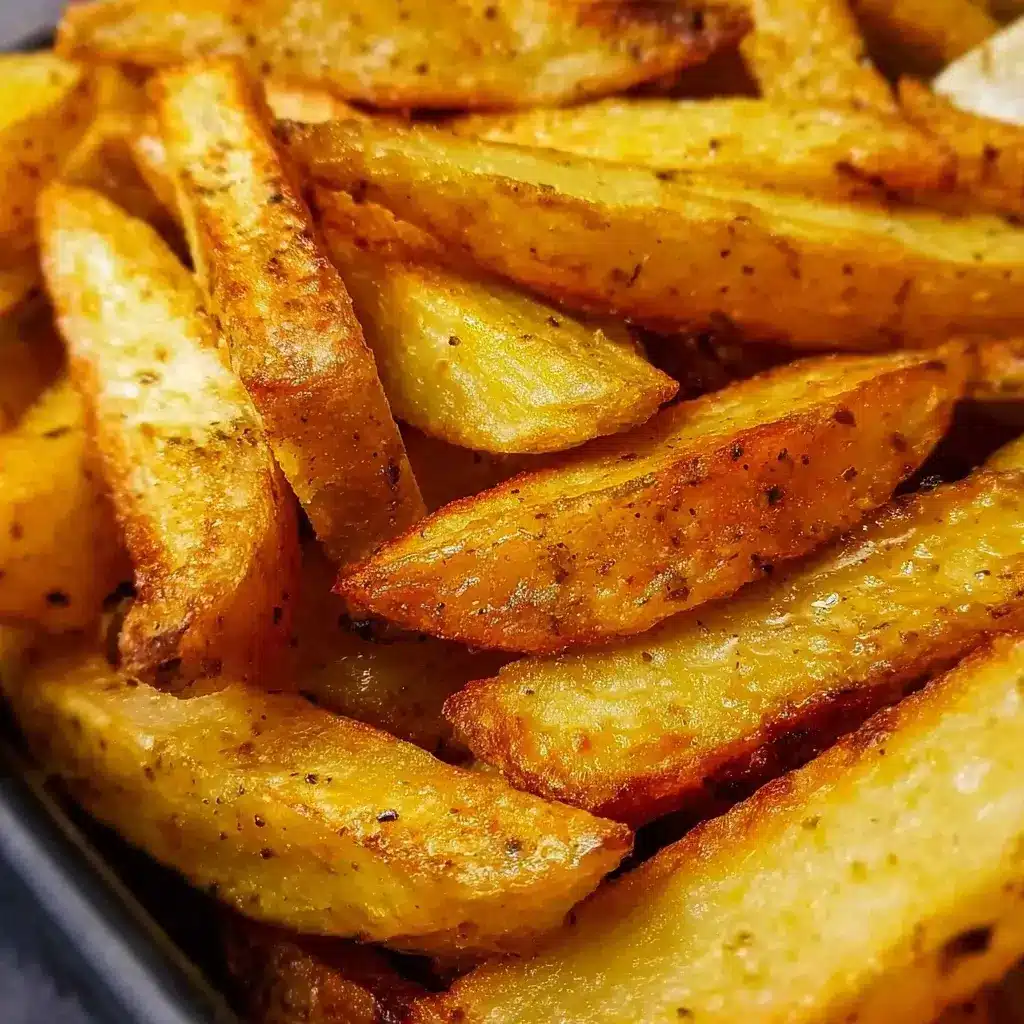
- Unbeatable Crispiness: The core technology of an air fryer is a high-powered convection fan that circulates superheated air at high speed. When this hits the thin potato slices, it rapidly evaporates moisture from the surface. This process, known as the Maillard reaction, creates a golden-brown, incredibly brittle structure that shatters when you bite into it. It’s a level of crispiness that is difficult to achieve in a home oven and far less greasy than deep frying.
- The Health Factor: A standard single-serving bag of potato chips can contain 10-15 grams of fat. Our air fryer recipe uses just a teaspoon or two of oil for an entire batch that serves multiple people. You are in complete control of the ingredients, which means no mystery preservatives, no trans fats, and the ability to control the sodium level to your exact preference. It’s the snack you can feel genuinely good about eating and serving.
- Endless Customization: This is where the real fun begins. The potato chip is a blank canvas. Once you master the basic technique, you can become a flavor artist. From smoky BBQ to tangy salt and vinegar, zesty garlic parmesan to spicy Cajun, you can create your dream chip. You can experiment with different types of potatoes, various oils, and an infinite combination of herbs and spices.
- Incredibly Cost-Effective: A large bag of potatoes is one of the most economical purchases you can make at the grocery store. For the price of one single bag of premium kettle-cooked chips, you can buy enough potatoes to make fresh, delicious air fryer chips for the entire week. It’s a win for your wallet and your taste buds.
Ingredients for Perfectly Crisp Air Fryer Chips
Simplicity is the key to perfection here. The quality of your few ingredients will directly impact the final product.
- 2 large Russet or Idaho Potatoes (about 1.5 lbs): Russets are the gold standard for chips and fries due to their high starch content and low moisture, which leads to a fluffier interior (not as important for thin chips) and a crispier exterior. Yukon Golds are a great alternative for a slightly more buttery flavor and golden color.
- 1 tablespoon Olive Oil or Avocado Oil: A high-smoke-point oil is best. You need just enough to lightly coat the slices, which helps with browning and flavor transfer for your seasonings.
- 1 teaspoon Fine Sea Salt: Or more, to taste. Fine salt adheres better to the chips than coarse or kosher salt.
- Optional Seasonings:
- ½ teaspoon Black Pepper, freshly ground
- ½ teaspoon Garlic Powder
- ½ teaspoon Smoked Paprika
The Ultimate Guide to Making Air Fryer Chips: A Step-by-Step Method
Achieving chip-perfection requires attention to detail. Follow these steps precisely, and you will be rewarded with the best chips you’ve ever had.
Step 1: The Slice – Uniformity is Everything
This is the most critical step for an evenly cooked batch. If your slices are inconsistent in thickness, the thin ones will burn before the thick ones are crisp.
- Wash and Scrub: Thoroughly wash and scrub the potatoes. You can peel them if you prefer, but the skin adds a nice rustic flavor, texture, and extra nutrients.
- Use a Mandoline: For best results, use a mandoline slicer set to a 1/16-inch (1.5mm) setting. This will give you paper-thin, perfectly uniform slices. Please use the safety guard that comes with your mandoline! The blades are incredibly sharp.
- By Hand (If Necessary): If you don’t have a mandoline, use your sharpest chef’s knife. Work slowly and carefully to get the slices as thin and even as possible. It’s more challenging but still achievable. Slice the potato in half lengthwise first to create a flat, stable base to work from.
Step 2: The Soak – The Secret to a Superior Crunch
Do not skip this step! Potatoes are full of starch, which can make the chips gummy and prevent them from crisping up properly. This soak removes that excess surface starch.
- Prepare a Cold Water Bath: As you slice the potatoes, immediately place the slices into a large bowl of cold water. This prevents them from oxidizing and turning brown.
- Soak: Once all potatoes are sliced, let them soak in the cold water for at least 30 minutes. You will see the water become cloudy; that’s the starch you’re removing.
- Rinse: Drain the cloudy water and rinse the potato slices under fresh, cold running water until the water runs clear.
Step 3: The Dry – Moisture is the Enemy of Crispy
This is just as important as the soak. Any residual moisture on the slices will turn to steam in the air fryer, which will prevent the chips from getting crispy. You need them to be as dry as humanly possible.
- First Pass (Salad Spinner): If you have a salad spinner, it is the best tool for this job. Work in batches, placing the rinsed potato slices in the spinner and spinning them until no more water is being flung off.
- Second Pass (Towels): Lay the spun-dry (or just drained) slices in a single layer on a clean kitchen towel or several layers of paper towels. Place another towel on top and gently but firmly press down to blot away all remaining moisture. The slices should feel dry to the touch.
Step 4: Seasoning the Chips
Now that your potato slices are perfectly prepped, it’s time to add flavor.
- Oil First: Place the dry potato slices in a large, dry bowl. Drizzle with the 1 tablespoon of oil.
- Toss Thoroughly: Use your hands to gently toss the slices, ensuring every single one has a very thin, even coating of oil. They should be glistening, not dripping.
- Add Seasonings: Sprinkle the salt and any other desired seasonings over the oiled slices. Toss again to distribute the seasonings evenly.
Step 5: Air Frying to Golden-Brown Perfection
The final stage! The key here is working in batches and not overcrowding the basket.
- Preheat Your Air Fryer: Preheat your air fryer to 360°F (180°C) for 3-5 minutes. An initial blast of hot air helps set the crispiness.
- Arrange in a Single Layer: Place the seasoned potato slices in the air fryer basket in a single layer. It’s okay if they overlap slightly, but do not pile them on top of each other. You will need to cook in 2-3 batches.
- Air Fry: Cook for 15-20 minutes, shaking the basket and tossing the chips every 5-7 minutes. This ensures they cook and brown evenly.
- Watch Closely: In the last 5 minutes of cooking, watch them carefully. They can go from perfectly golden to burnt very quickly. They are done when they are golden-brown and feel rigid and crispy. Cooking time will vary depending on your air fryer model and the thickness of your chips.
- Cool and Crisp: Remove the chips from the basket and spread them on a wire rack to cool. They will continue to crisp up as they cool down! Repeat the process with the remaining batches. Sprinkle with a little extra salt while they are still warm, if desired.
Nutrition Facts and Preparation Time
Preparation Time:
- Active Prep Time: 20 minutes
- Soaking Time: 30 minutes
- Cook Time: 15-20 minutes per batch (approx. 45 minutes total for 2 large potatoes)
Nutrition Facts:
- Servings: 4
- Calories per serving (approximate): 150-180 kcal (This is a significant reduction from the ~250-300 calories found in a comparable serving of deep-fried chips.)
How to Serve and Elevate Your Homemade Chips
These chips are incredible on their own, but they also serve as the perfect vehicle for a world of flavors.
- The Ultimate Dip Vehicle:
- Classic French Onion Dip: Mix a packet of onion soup mix with sour cream for an instant party classic.
- Creamy Guacamole: Mash ripe avocados with lime juice, cilantro, onion, and jalapeño.
- Spicy Black Bean Dip: A hearty and healthy option that pairs beautifully with the salty crunch.
- Herbed Yogurt Dip: Mix plain Greek yogurt with fresh dill, chives, garlic, and a squeeze of lemon.
- As a Perfect Side Dish:
- Serve alongside a juicy homemade burger or a grilled chicken sandwich.
- Pair with a deli-style turkey club or a hearty panini.
- Offer them as a lighter alternative to fries with steak or fish.
- Get Creative with Toppings:
- Loaded Nacho-Style Chips: After cooking, pile them on a plate, top with cheese, and air fry for another minute to melt. Then top with jalapeños, sour cream, and salsa.
- The Ultimate Garnish: Crumble the chips over soups (like tomato or potato leek) or creamy macaroni and cheese for an unexpected crunchy topping.
5 Pro Tips for Flawless Air Fryer Chips
- A Mandoline is a Game-Changer: While you can use a knife, a mandoline is the single best investment for consistently perfect chips. The ultra-thin, uniform slices it produces are impossible to replicate by hand and guarantee every chip cooks at the same rate.
- Don’t Underestimate the Soak and Dry: It might seem tedious, but the 30-minute soak to remove starch and the meticulous drying process are the two non-negotiable secrets to achieving that shatteringly crisp texture. Skipping either will result in chewier, less satisfying chips.
- The Single Layer Rule is Law: Resist the temptation to dump all the potatoes in at once. Overcrowding the basket traps steam, and steam is the mortal enemy of crispiness. It’s far better to cook three perfect batches than one big soggy one.
- Shake It Up: Don’t just set the timer and walk away. Shaking the basket every 5-7 minutes is crucial. It redistributes the chips, flips them over, and allows the hot air to hit every surface, ensuring an even, golden-brown color without burnt edges.
- Cool for the Final Crunch: Don’t judge the final crispiness straight out of the hot basket. The chips will get significantly crispier as they cool and the last bits of moisture evaporate. Spreading them on a wire rack is the best way to facilitate this process.
Frequently Asked Questions (FAQ) About Air Fryer Chips
1. Why are my chips coming out soggy or chewy?
This is the most common issue and almost always comes down to one of three things: 1) The slices were too thick. 2) You skipped the cold water soak, leaving too much starch on the potato. 3) You didn’t dry the slices thoroughly enough before oiling and cooking, causing them to steam instead of fry. Go back and ensure you follow the slicing, soaking, and drying steps meticulously.
2. Can I make these with sweet potatoes?
Yes, absolutely! The process is identical, but keep a closer eye on them. Sweet potatoes have a higher sugar content, which means they can burn more quickly than regular potatoes. You may need to slightly reduce the temperature to 350°F (175°C) and check them more frequently towards the end of the cooking time.
3. How do I make Salt and Vinegar chips?
This is a popular variation! For the best flavor, you need a two-step process. First, add 1/4 cup of white vinegar to the cold water bath during the 30-minute soak. Dry and cook the chips as directed with oil and just a little salt. As soon as they come out of the air fryer, while they are still hot, spritz them with a fine mist of white vinegar and immediately sprinkle with more salt. The heat helps the vinegar evaporate quickly, leaving the tangy flavor behind.
4. Can I make these with zero oil?
You can, but the result will be different. The oil helps the seasonings adhere and promotes even browning. Without oil, the chips will be much drier, more cracker-like in texture, and may look pale or have burnt spots. They will still be crunchy, but a tiny bit of oil vastly improves the taste, texture, and appearance.
5. What’s the best way to store leftover chips?
Homemade chips are best enjoyed the day they are made for maximum crispiness. However, if you have leftovers, let them cool completely to room temperature. Store them in an airtight container or a zip-top bag with as much air pressed out as possible. They can lose some crispness overnight. To revive them, toss them back in the air fryer at 350°F (175°C) for 2-3 minutes to crisp them up again.

Air Fryer Chips Recipe
Ingredients
-
2 large Russet or Idaho Potatoes (about 1.5 lbs): Russets are the gold standard for chips and fries due to their high starch content and low moisture, which leads to a fluffier interior (not as important for thin chips) and a crispier exterior. Yukon Golds are a great alternative for a slightly more buttery flavor and golden color.
-
1 tablespoon Olive Oil or Avocado Oil: A high-smoke-point oil is best. You need just enough to lightly coat the slices, which helps with browning and flavor transfer for your seasonings.
-
1 teaspoon Fine Sea Salt: Or more, to taste. Fine salt adheres better to the chips than coarse or kosher salt.
-
Optional Seasonings:
-
½ teaspoon Black Pepper, freshly ground
-
½ teaspoon Garlic Powder
-
½ teaspoon Smoked Paprika
-
Instructions
Step 1: The Slice – Uniformity is Everything
This is the most critical step for an evenly cooked batch. If your slices are inconsistent in thickness, the thin ones will burn before the thick ones are crisp.
-
Wash and Scrub: Thoroughly wash and scrub the potatoes. You can peel them if you prefer, but the skin adds a nice rustic flavor, texture, and extra nutrients.
-
Use a Mandoline: For best results, use a mandoline slicer set to a 1/16-inch (1.5mm) setting. This will give you paper-thin, perfectly uniform slices. Please use the safety guard that comes with your mandoline! The blades are incredibly sharp.
-
By Hand (If Necessary): If you don’t have a mandoline, use your sharpest chef’s knife. Work slowly and carefully to get the slices as thin and even as possible. It’s more challenging but still achievable. Slice the potato in half lengthwise first to create a flat, stable base to work from.
Step 2: The Soak – The Secret to a Superior Crunch
Do not skip this step! Potatoes are full of starch, which can make the chips gummy and prevent them from crisping up properly. This soak removes that excess surface starch.
-
Prepare a Cold Water Bath: As you slice the potatoes, immediately place the slices into a large bowl of cold water. This prevents them from oxidizing and turning brown.
-
Soak: Once all potatoes are sliced, let them soak in the cold water for at least 30 minutes. You will see the water become cloudy; that’s the starch you’re removing.
-
Rinse: Drain the cloudy water and rinse the potato slices under fresh, cold running water until the water runs clear.
Step 3: The Dry – Moisture is the Enemy of Crispy
This is just as important as the soak. Any residual moisture on the slices will turn to steam in the air fryer, which will prevent the chips from getting crispy. You need them to be as dry as humanly possible.
-
First Pass (Salad Spinner): If you have a salad spinner, it is the best tool for this job. Work in batches, placing the rinsed potato slices in the spinner and spinning them until no more water is being flung off.
-
Second Pass (Towels): Lay the spun-dry (or just drained) slices in a single layer on a clean kitchen towel or several layers of paper towels. Place another towel on top and gently but firmly press down to blot away all remaining moisture. The slices should feel dry to the touch.
Step 4: Seasoning the Chips
Now that your potato slices are perfectly prepped, it’s time to add flavor.
-
Oil First: Place the dry potato slices in a large, dry bowl. Drizzle with the 1 tablespoon of oil.
-
Toss Thoroughly: Use your hands to gently toss the slices, ensuring every single one has a very thin, even coating of oil. They should be glistening, not dripping.
-
Add Seasonings: Sprinkle the salt and any other desired seasonings over the oiled slices. Toss again to distribute the seasonings evenly.
Step 5: Air Frying to Golden-Brown Perfection
The final stage! The key here is working in batches and not overcrowding the basket.
-
Preheat Your Air Fryer: Preheat your air fryer to 360°F (180°C) for 3-5 minutes. An initial blast of hot air helps set the crispiness.
-
Arrange in a Single Layer: Place the seasoned potato slices in the air fryer basket in a single layer. It’s okay if they overlap slightly, but do not pile them on top of each other. You will need to cook in 2-3 batches.
-
Air Fry: Cook for 15-20 minutes, shaking the basket and tossing the chips every 5-7 minutes. This ensures they cook and brown evenly.
-
Watch Closely: In the last 5 minutes of cooking, watch them carefully. They can go from perfectly golden to burnt very quickly. They are done when they are golden-brown and feel rigid and crispy. Cooking time will vary depending on your air fryer model and the thickness of your chips.
-
Cool and Crisp: Remove the chips from the basket and spread them on a wire rack to cool. They will continue to crisp up as they cool down! Repeat the process with the remaining batches. Sprinkle with a little extra salt while they are still warm, if desired.
Nutrition
- Serving Size: one normal portion
- Calories: 150-180


