

For years, the boneless, skinless chicken breast was my weeknight workhorse. It was lean, it was quick, but if I’m being honest, it was often a culinary letdown. No matter how I brined, pounded, or pan-seared it, the margin for error was razor-thin, and I often ended up with something disappointingly dry. I had relegated the bone-in, skin-on chicken breast to the world of oven roasting—a delicious but time-consuming weekend affair. Then, on a whim, I decided to see if my air fryer could bridge the gap. I was skeptical, worried it would dry out the meat before the bone had time to heat through. I seasoned it simply, placed it in the basket, and set the timer. What emerged 25 minutes later was nothing short of a poultry epiphany. The skin was a landscape of crackling, golden-brown perfection, audibly shattering under my fork. But the real shock was the meat itself. It was succulent, tender, and dripping with juice in a way I had never achieved with its boneless counterpart. The bone had worked its magic, insulating the meat and ensuring it cooked gently, while the skin rendered and basted it in its own flavorful fat. It was a Sunday-roast-quality chicken dinner achieved on a Tuesday night. My family was floored. It has since become one of our most requested meals, proving that the secret to the best chicken of your life isn’t a complicated technique, but the brilliant combination of a humble cut of meat and a revolutionary appliance.
Why This Air Fryer Bone-In Chicken Breast Recipe is a Revelation
This recipe isn’t just an alternative to roasting; in many ways, it’s a superior method that will fundamentally change how you cook chicken. It combines the best attributes of multiple cooking techniques into one simple, foolproof process.
- The Bone-In Advantage: Your Flavor Insurance Policy: The single biggest reason this recipe is so successful is the bone. The bone acts as an insulator, slowing down the cooking process around it. This means the meat cooks more gently and evenly, preventing the outer layers from drying out before the center is cooked through. Furthermore, the bone and the surrounding marrow impart a deeper, richer, more savory flavor into the meat that you simply cannot get from a boneless cut. It’s built-in flavor insurance that guarantees a more succulent result.
- The Crispy Skin Miracle: The air fryer is, at its heart, a small, high-powered convection oven. The rapidly circulating hot air is a master at rendering fat and wicking away moisture. When this technology meets chicken skin, magic happens. The air fryer transforms the skin into an incredibly thin, brittle, and uniformly crispy layer that crackles like a potato chip. It’s the kind of skin you dream about, achieved without the mess or added oil of deep-frying or the long, slow rendering required in a conventional oven.
- Unmatched Juiciness and Tenderness: The combination of the insulating bone and the protective layer of skin creates a perfect cooking environment for the delicate breast meat. As the skin crisps and the fat renders, it continuously bastes the chicken, keeping it incredibly moist. Because the air fryer cooks so efficiently, the chicken spends less time exposed to heat, further preventing it from drying out. The result is a level of juiciness that will genuinely surprise you.
- Speed, Simplicity, and Easy Cleanup: While a traditional oven roast for bone-in chicken can take 45 minutes to an hour (plus preheating time), this entire recipe is done in under 30 minutes. The seasoning is a simple rub, and the process is largely hands-off. Best of all, the cleanup is a dream. There are no roasting pans to scrub or oil splatters to wipe off the stovetop. The entire process is contained within the air fryer basket, which is typically non-stick and dishwasher-safe. It’s a gourmet-quality meal with a weeknight-friendly workflow.
Ingredients for the Juiciest Air Fryer Chicken Breast
The beauty of this recipe lies in its simplicity. A well-balanced, smoky, and herbaceous spice rub is all you need to complement the rich flavor of the chicken.
For the Chicken:
- 2 Bone-in, skin-on split chicken breasts (approximately 1 to 1.5 lbs each)
For the Simple & Savory Rub:
- 1 tablespoon Olive oil or Avocado oil
- 1 ½ teaspoons Smoked paprika (This is key for that beautiful roasted color and smoky flavor)
- 1 teaspoon Garlic powder
- 1 teaspoon Onion powder
- 1 teaspoon Dried thyme
- ½ teaspoon Dried rosemary, lightly crushed
- 1 teaspoon Kosher salt
- ½ teaspoon Black pepper, freshly ground
Step-by-Step Instructions for Perfect Air Fryer Bone-In Chicken
Follow these steps carefully, paying close attention to the preparation of the skin and the use of a meat thermometer. This will guarantee a perfect result every single time.
Step 1: Prepare the Chicken
This first step is crucial for achieving that coveted crispy skin. Moisture is the enemy of crispiness, so be thorough.
- Unpack and Dry: Remove the chicken breasts from their packaging. Using paper towels, pat them completely dry on all sides. Make sure to get into any crevices and pat the underside as well. The drier the skin, the crispier it will get.
- Let it Air-Chill (Optional but Recommended): For the absolute best results, place the dried chicken breasts on a plate or wire rack and let them sit, uncovered, in the refrigerator for 30 minutes to an hour. This further dries out the skin, setting you up for an exceptionally crackly finish.
Step 2: Mix the Seasoning Rub
- Combine Spices: In a small bowl, combine all the dry rub ingredients: smoked paprika, garlic powder, onion powder, dried thyme, dried rosemary, kosher salt, and black pepper.
- Whisk Together: Use a fork or a small whisk to mix the spices until they are evenly distributed.
Step 3: Season the Chicken Thoroughly
This technique ensures flavor on the skin and, more importantly, directly on the meat itself.
- Oil the Chicken: Drizzle the olive oil over the chicken breasts. Use your hands to rub it evenly all over the skin and the underside of each piece. The oil helps the seasonings adhere and promotes browning.
- Season Under the Skin: Gently slide your fingers between the skin and the breast meat, creating a pocket. Be careful not to tear the skin completely off. Take about half of your seasoning blend and rub it directly onto the meat under the skin. This ensures the breast meat is deeply flavorful, not just the skin.
- Season the Exterior: Sprinkle the remaining half of the seasoning blend evenly over the outside of the chicken breasts, covering the entire skin-on surface. Pat the spices gently to help them adhere.
Step 4: Air Fry to Golden-Brown Perfection
Now it’s time for the air fryer to work its magic.
- Preheat the Air Fryer: Preheat your air fryer to 380°F (193°C) for 5 minutes. Preheating ensures the chicken starts cooking the moment it goes in, which helps to crisp the skin immediately.
- Arrange in the Basket: Place the seasoned chicken breasts in the air fryer basket, skin-side down. Do not overcrowd the basket; there should be space around each piece for air to circulate. If your chicken breasts are very large, you may need to cook them one at a time.
- First Cook (Skin-Side Down): Air fry for 15 minutes at 380°F (193°C). Cooking skin-side down first allows some of the fat under the skin to begin rendering without the risk of the top burning.
- Flip and Finish: After 15 minutes, use tongs to carefully flip the chicken breasts so they are now skin-side up. Continue to cook for another 8-12 minutes. The skin should be deep golden-brown, and the chicken should be cooked through.
- Verify Doneness with a Thermometer: The chicken is done when an instant-read thermometer inserted into the thickest part of the breast (without touching the bone) registers 165°F (74°C). This is the most reliable way to ensure your chicken is both safe to eat and perfectly juicy.
- Let it Rest: Remove the chicken from the air fryer and place it on a cutting board. Let it rest for 5-10 minutes before slicing. This crucial step allows the juices to redistribute throughout the meat, ensuring every bite is moist and tender.
Nutrition Facts and Preparation Time
Preparation Time:
- Active Prep Time: 10 minutes
- Inactive Chill Time (Optional): 30 minutes
- Cook Time: 23-27 minutes
Nutrition Facts:
- Servings: 2
- Calories per serving (approximate): 480-550 kcal (This is an estimate and depends on the size of the chicken breast.)
How to Serve Your Crispy & Juicy Chicken Breast
This versatile chicken breast can be the star of many different meals, from classic comfort food to light and healthy fare.
- The Comfort Food Classic:
- Serve with creamy garlic mashed potatoes, allowing them to soak up the chicken juices.
- Pair with a side of air-fried or roasted root vegetables like carrots and parsnips.
- Add a simple pan gravy and a fluffy dinner roll to complete the Sunday dinner experience.
- The Healthy & Vibrant Plate:
- Slice the chicken off the bone and serve it over a bed of quinoa or farro.
- Pair with a side of steamed green beans with lemon zest or roasted asparagus.
- Serve alongside a large, crisp garden salad with a simple vinaigrette dressing.
- The Smart Low-Carb Meal:
- Serve the chicken breast with a generous portion of cauliflower mash.
- Pair with air-fried Brussels sprouts or a sautéed spinach and mushroom medley.
- Serve over a bed of zucchini noodles tossed in pesto for a fresh, flavorful meal.
- For Meal Prep & Leftovers:
- Once cooled, pull the meat from the bone and shred or dice it. It’s perfect for adding to salads, wraps, soups, or chicken salad sandwiches throughout the week.
5 Pro Tips for the Best Air Fryer Chicken Breast
- Pat the Skin Bone-Dry: This cannot be overstated. Moisture is the number one enemy of crispy skin. Use paper towels and be meticulous. The optional step of air-chilling in the fridge makes a remarkable difference if you have the extra 30 minutes.
- Season Directly on the Meat: The trick of getting the seasoning rub under the skin is a professional chef’s secret. It ensures that the meat itself is deeply flavorful, not just the exterior. This turns a good piece of chicken into a great one.
- Don’t Crowd the Air Fryer Basket: Proper air circulation is the key to how an air fryer works. If the chicken pieces are touching or packed in too tightly, the air can’t move freely, and you’ll end up with steamed, soggy spots on your skin instead of an even, crispy crust.
- A Meat Thermometer is Your Best Friend: Cooking times are always an estimate and can vary based on the size of your chicken and the model of your air fryer. An instant-read thermometer takes all the guesswork out of it. It is the single best tool for guaranteeing your chicken is cooked to a safe temperature (165°F) without being overcooked and dry.
- Resting is a Non-Negotiable Step: The 5-10 minute rest after cooking is just as important as the cooking itself. As the chicken cooks, the juices are forced toward the center. Resting allows those juices to relax and redistribute throughout the entire piece of meat. If you slice into it immediately, all that delicious moisture will pour out onto your cutting board instead of staying in the chicken.
Frequently Asked Questions (FAQ)
1. Can I use different seasonings on the chicken?
Absolutely! This recipe is a fantastic template. Feel free to customize the rub. For a spicy kick, add ¼ to ½ teaspoon of cayenne pepper. For an Italian flair, use dried oregano, basil, and parsley. For a Tex-Mex vibe, use chili powder, cumin, and a pinch of coriander.
2. My chicken skin didn’t get crispy. What went wrong?
There are three likely culprits. First, the skin was not dry enough to begin with. Be sure to pat it thoroughly dry with paper towels. Second, the basket may have been overcrowded, which traps steam. Third, you may have skipped the preheating step, which is important for giving the skin an initial blast of heat to kickstart the crisping process.
3. Is it safe to cook chicken on the bone in the air fryer?
Yes, it is perfectly safe, and as this recipe shows, it’s a fantastic method! The key is to ensure the chicken reaches the proper internal temperature. Always use a meat thermometer and check the thickest part of the meat without touching the bone. The safe internal temperature for chicken is 165°F (74°C).
4. Can I use frozen bone-in chicken breasts for this recipe?
It is not recommended to cook chicken from frozen in the air fryer, especially bone-in pieces. The outside will likely overcook and dry out long before the inside and the area around the bone are cooked to a safe temperature. For the best and safest results, always thaw your chicken completely in the refrigerator before cooking.
5. How do I store and reheat leftovers?
Store leftover chicken in an airtight container in the refrigerator for up to 3-4 days. The best way to reheat it and bring the skin back to life is in the air fryer! Place the cold chicken in the air fryer at 375°F (190°C) for 4-6 minutes, or until warmed through. The skin will become wonderfully crispy again, something a microwave can never do.

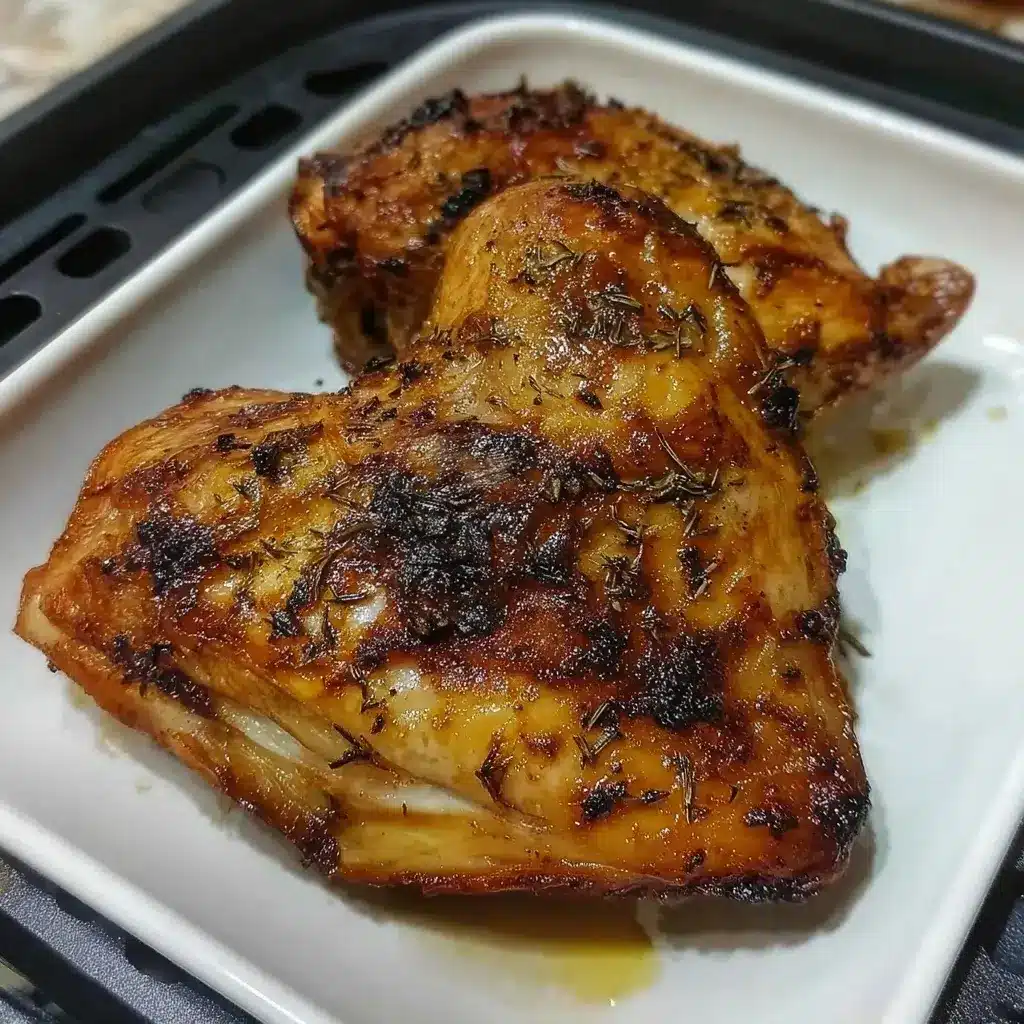
Air Fryer Bone-In Chicken Breasts recipe
Ingredients
For the Chicken:
-
2 Bone-in, skin-on split chicken breasts (approximately 1 to 1.5 lbs each)
For the Simple & Savory Rub:
-
1 tablespoon Olive oil or Avocado oil
-
1 ½ teaspoons Smoked paprika (This is key for that beautiful roasted color and smoky flavor)
-
1 teaspoon Garlic powder
-
1 teaspoon Onion powder
-
1 teaspoon Dried thyme
-
½ teaspoon Dried rosemary, lightly crushed
-
1 teaspoon Kosher salt
-
½ teaspoon Black pepper, freshly ground
Instructions
Step 1: Prepare the Chicken
This first step is crucial for achieving that coveted crispy skin. Moisture is the enemy of crispiness, so be thorough.
-
Unpack and Dry: Remove the chicken breasts from their packaging. Using paper towels, pat them completely dry on all sides. Make sure to get into any crevices and pat the underside as well. The drier the skin, the crispier it will get.
-
Let it Air-Chill (Optional but Recommended): For the absolute best results, place the dried chicken breasts on a plate or wire rack and let them sit, uncovered, in the refrigerator for 30 minutes to an hour. This further dries out the skin, setting you up for an exceptionally crackly finish.
Step 2: Mix the Seasoning Rub
-
Combine Spices: In a small bowl, combine all the dry rub ingredients: smoked paprika, garlic powder, onion powder, dried thyme, dried rosemary, kosher salt, and black pepper.
-
Whisk Together: Use a fork or a small whisk to mix the spices until they are evenly distributed.
Step 3: Season the Chicken Thoroughly
This technique ensures flavor on the skin and, more importantly, directly on the meat itself.
-
Oil the Chicken: Drizzle the olive oil over the chicken breasts. Use your hands to rub it evenly all over the skin and the underside of each piece. The oil helps the seasonings adhere and promotes browning.
-
Season Under the Skin: Gently slide your fingers between the skin and the breast meat, creating a pocket. Be careful not to tear the skin completely off. Take about half of your seasoning blend and rub it directly onto the meat under the skin. This ensures the breast meat is deeply flavorful, not just the skin.
-
Season the Exterior: Sprinkle the remaining half of the seasoning blend evenly over the outside of the chicken breasts, covering the entire skin-on surface. Pat the spices gently to help them adhere.
Step 4: Air Fry to Golden-Brown Perfection
Now it’s time for the air fryer to work its magic.
-
Preheat the Air Fryer: Preheat your air fryer to 380°F (193°C) for 5 minutes. Preheating ensures the chicken starts cooking the moment it goes in, which helps to crisp the skin immediately.
-
Arrange in the Basket: Place the seasoned chicken breasts in the air fryer basket, skin-side down. Do not overcrowd the basket; there should be space around each piece for air to circulate. If your chicken breasts are very large, you may need to cook them one at a time.
-
First Cook (Skin-Side Down): Air fry for 15 minutes at 380°F (193°C). Cooking skin-side down first allows some of the fat under the skin to begin rendering without the risk of the top burning.
-
Flip and Finish: After 15 minutes, use tongs to carefully flip the chicken breasts so they are now skin-side up. Continue to cook for another 8-12 minutes. The skin should be deep golden-brown, and the chicken should be cooked through.
-
Verify Doneness with a Thermometer: The chicken is done when an instant-read thermometer inserted into the thickest part of the breast (without touching the bone) registers 165°F (74°C). This is the most reliable way to ensure your chicken is both safe to eat and perfectly juicy.
-
Let it Rest: Remove the chicken from the air fryer and place it on a cutting board. Let it rest for 5-10 minutes before slicing. This crucial step allows the juices to redistribute throughout the meat, ensuring every bite is moist and tender.
Nutrition
- Serving Size: one normal portion
- Calories: 480-550


